11 min read
What Is The Blue Wire on a Ceiling Fan (Guide)
Let’s dive into the world of ceiling fans – a must-have in any cozy home. Every ceiling fan is a little universe of wires, each playing its vital role. And today, I want to focus on one specific wire – the blue wire.
So, here’s the deal with the blue wire: it’s the mastermind behind your ceiling fan’s lighting. It’s where all the power for your light kit is channeled through. If you want to light up your room with your fan’s light kit, you need this little blue buddy to be connected right.
I will walk you through everything you need to know about installing your ceiling fan, focusing particularly on that crucial blue wire. It’s all about getting that perfect balance of cool breeze and warm light in your home.
Where Does the Blue Wire Go on a Ceiling Fan?
Let’s discuss where to connect that blue wire to your ceiling fan. It’s all about whether you’re using one or two switches to control your fan, so let’s break it down.
Single Switch Wiring
If your setup involves a single switch, you’re in for a simpler task. In this case, the blue wire from your ceiling fan, which controls the lights, gets connected directly to the black wire from your ceiling. This black wire is your main power line and will handle the fan and the lights.
Single Switch Ceiling Fan Wiring: A DIY Guide
Wiring a ceiling fan with a single switch is easier than you might think, even if you’re new to this. Let’s walk through the steps together.
Step 1: Connect the Blue Wire
First, find that blue wire on your ceiling fan – this one’s for the lights. You will connect this to the black wire from the ceiling, which is your main power line.
Then, link it up with the black wire on the fan, too. It’s all about making the right connections here
Step 2: Grounding the Fan
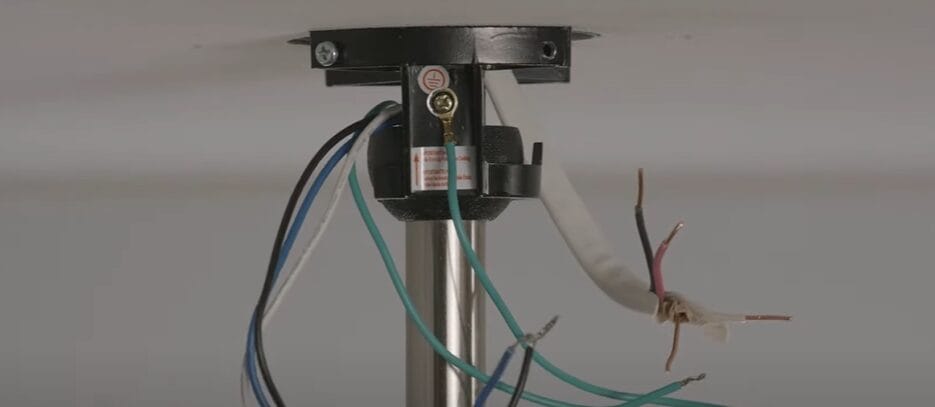
Now, let’s tackle the ground wires. These are typically green or yellow – easy to spot.
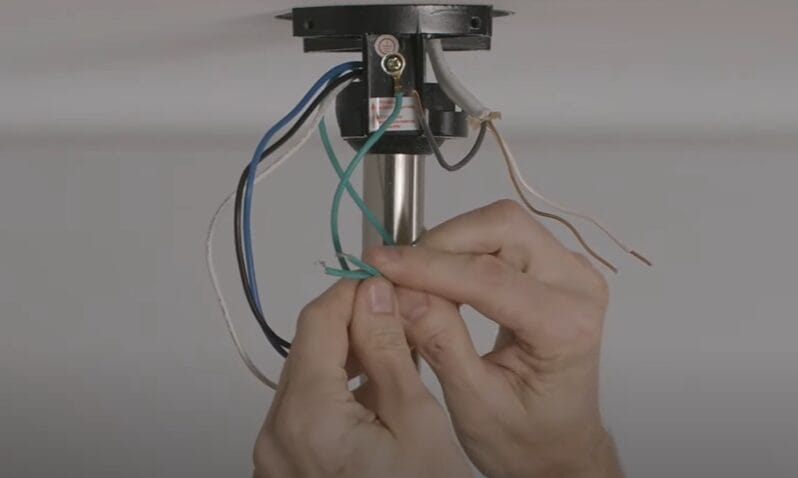
Connect the ground wire from the ceiling to the ground wire from the fan. Grounding the electrical current is crucial for your safety.
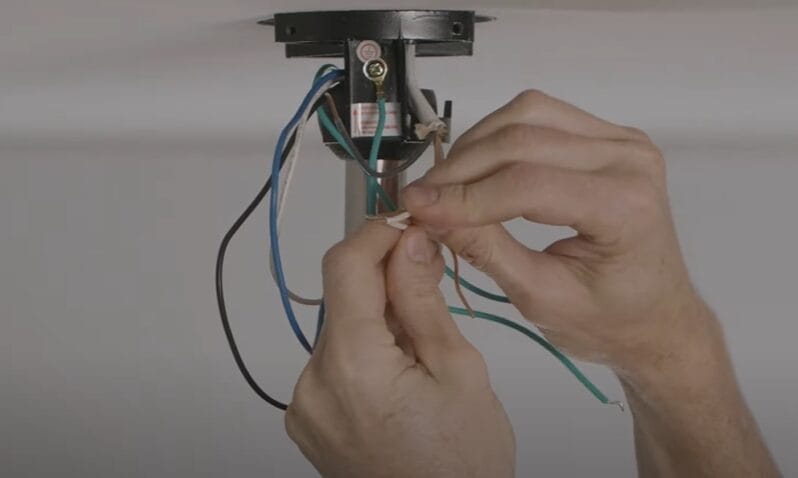
Step 3: White Wires Connection
Lastly, you’ve got the white wires. These are your neutral wires. Just twist the white wire from the ceiling with the white wire from the fan.
Dual Switch Wiring
Now, if you’ve got a dual-switch setup, things get more interesting. You’ll be using both the black and blue wires from your fan.
Dual Switch Ceiling Fan Wiring: Step-by-Step
Do a dual switch setup? Cool, you get to control the fan and lights separately. Let’s break it down.
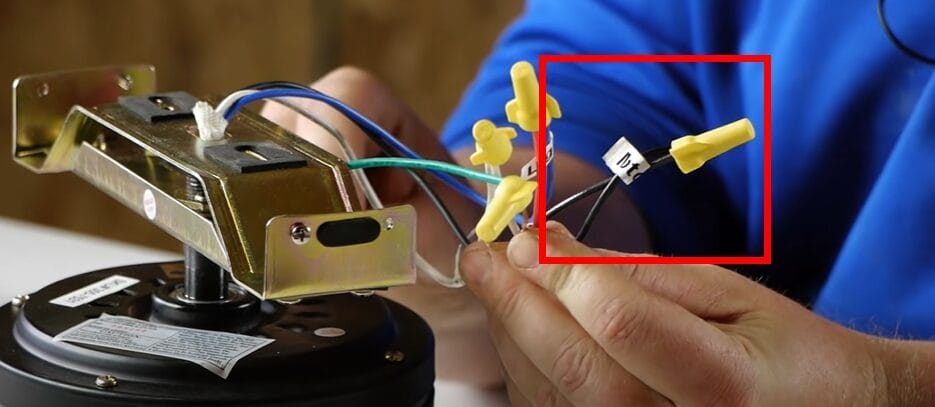
Step 1: Hook Up the Black Wire
Find the black wire from the ceiling – your ungrounded live wire. Attach this one to the black wire from your ceiling fan. This connection lets you control the fan’s power with one of the switches.
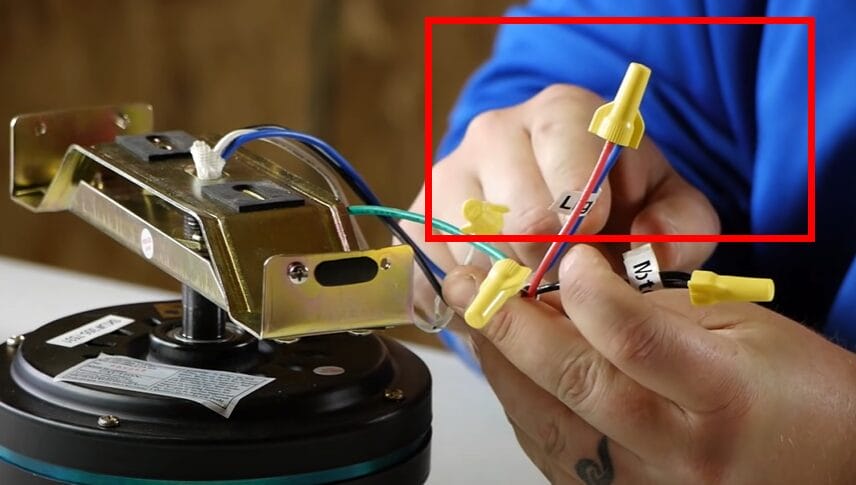
Step 2: Connect the Live Wire for Lights
Here’s where the blue wire comes into play. Link up the second live wire from your ceiling – often red or another black – to the blue wire from the fan. This is your light control, operated by the second switch.
Step 3: Find and Connect the White Ground Wire
Next, spot the white grounded wire coming from the ceiling. You’ll want to connect this to the fan’s white wire. It’s all about making sure everything is properly grounded.

Step 4: Double-Check Connections
Alright, it’s time for a quick review. Make sure all your fan and ceiling wires are securely connected. You should see three grounding wires in different colors, like copper, green, and yellow. A good double-check now can save headaches later.
Wiring up your ceiling fan, whether a single or dual-switch model, is doable. Follow these steps, and you’ll enjoy that cool breeze and light in no time. Remember, safety first – consult a professional if you’re ever unsure. Happy wiring!
User Tips and Common Mistakes in Ceiling Fan Installation
During a ceiling fan installation, let’s discuss some savvy tips and common slip-ups when dealing with that tricky blue wire. I’ve gathered these nuggets of wisdom from seasoned electricians and savvy DIYers, so you’re getting the real deal here:
Expert Tips for a Smooth Installation
- Double-Check Your Connections: Ensure the blue wire is snugly connected to the power source wire. A loose connection is like a half-tied shoelace – it’ll trip you up!
- Use the Right Tools: A wire stripper and a voltage tester can be your best buddies here. They make the job easier and safer.
- Label Your Wires: If your fan has multiple wires, label them before you start. It’s like putting names to faces at a big family gathering – it helps avoid confusion.
Common Mistakes to Dodge
- Mixing Up Wires: Don’t mix the blue wire with other non-compatible wires. It’s meant for your light kit, so keep it exclusive.
- Ignoring Wire Colors: Wire colors are not just for show; they have meanings. Stick to the color code in the manual to avoid wiring faux pas.
- Skipping the Manual: Every fan’s a little different. Skimming over the instruction manual is like ignoring a treasure map – you’ll miss out on valuable info.
- Forgetting Safety Measures: Always turn off the power at the circuit breaker before you start. An electric shock is no joke.
Pro Tips for a Flawless Finish
- Test Before Finalizing: Once connected, give it a test run before sealing everything up. It’s better to catch a mistake early than after everything’s put back together.
- Secure Connections: Use wire nuts or appropriate connectors to ensure secure and safe connections. Loose wires are a no-go.
- Mind the Load: If you have a fancy light kit, ensure your ceiling fan can handle the load. Overloading can lead to problems down the road.
Installing a ceiling fan is not just about making it spin; it’s about doing it right and safely. Keep these tips and tricks in your back pocket, and you’ll be ready for a successful install. Stay safe, take your time, and you’ll have that fan up and running soon!
Troubleshooting Common Issues with the Blue Wire in Ceiling Fan Installations
Let’s dive into some common snags you might hit when hooking up that blue wire in your ceiling fan. I’ve been there, and I know how frustrating it can be when things don’t go as planned. So, here are some tips to troubleshoot those pesky issues:
Light Fixture Not Working
- Double-Check Connections: First, ensure your blue wire is securely connected to the live power wire, usually the red or second black wire in your ceiling. Loose connections are often the culprit.
- Inspect the Wire Itself: If the connection’s tight but there’s still no joy, the wire itself could be damaged. Look for any signs of wear or breaks along the blue wire.
- Check Your Power Source: Sometimes, the issue isn’t with the fan but the power supply. Ensure your circuit breaker hasn’t tripped and that power is flowing as it should.
Flickering Lights
- Bulb Compatibility: Not all bulbs play nice with all fans. Ensure the bulbs you use are compatible with your fan model – especially if you use LEDs or energy-saving bulbs.
- Secure Bulb Connection: It might sound simple, but sometimes a bulb that’s not screwed in tightly can cause flickering. Give them a gentle tightening to see if that solves it.
- Examine the Socket: A faulty socket can cause flickering. Check for any signs of damage or corrosion in the socket contacts.
Buzzing Sound
- Loose Components: A buzzing sound can often be traced back to loose parts in the light kit or fan. Tighten any screws and ensure everything’s snug.
- Dimmer Switch Issues: If you’re using a dimmer switch, it might not be compatible with your fan’s light kit. Try switching to a standard switch or a dimmer compatible with your fan model.
Frequently Asked Questions
- Is It Safe to Install the Ceiling Fan Myself?
- Absolutely, but with a big emphasis on safety and following instructions. You can tackle this if you’re confident with basic wiring and follow the manual step-by-step. But hey, if you’re unsure, there is no harm in calling a pro.
- Can I Connect the Blue Wire to a Different Colored Wire?
- In a typical setup, the blue wire should connect to a red or black wire from your ceiling, depending on the switch configuration. Sticking to this is crucial, as mixing wires can cause electrical issues or hazards.
- What If My Ceiling Fan Doesn’t Have a Blue Wire?
- No blue wire? No problem! Some fans are designed differently. If yours doesn’t have a blue wire, the wiring for the lights might be integrated with the fan’s main wiring. Check the manual for specific instructions.
- What Should I Do If the Lights Flicker or Don’t Turn On?
- If your lights are playing tricks on you, first check your connections. Make sure the blue wire is securely connected to the power source wire. Flickering often means a loose connection or compatibility issue with the bulb.
- Do I Need Special Tools for Ceiling Fan Installation?
- You’ll need some basic tools like a screwdriver, wire strippers, and maybe a ladder to reach the ceiling. And remember, a multimeter can be your best friend when checking connections.
- Can I Connect the Blue Wire to a Dimmer Switch?
- Ensure the dimmer switch is compatible with your fan’s light kit. Not all dimmers play well with all types of bulbs, especially if you’re using LEDs.
References
Organizations:
- National Electrical Manufacturers Association (NEMA). https://www.nema.org/
- International Brotherhood of Electrical Workers (IBEW). http://www.ibew.org/
- Underwriters Laboratories (UL). https://www.ul.com/solutions
Books:
- “Wiring a House” by Rex Cauldwell. https://www.barnesandnoble.com/w/wiring-a-house-rex-cauldwell/1118175264
- “Black & Decker: The Complete Guide to Wiring” https://www.barnesandnoble.com/w/black-decker-the-complete-guide-to-wiring-updated-8th-edition-cool-springs-press/1141325337
- “Electrical Wiring Residential” by Ray C. Mullin and Phil Simmons. https://www.barnesandnoble.com/w/electrical-wiring-residential-ray-c-mullin/1116778103
Website Resources:
- Energy Star. https://www.energystar.gov/
- This Old House. https://www.thisoldhouse.com/
Video References:
The Home Depot
EMCDevs EMCDevs