16 min read
How to Fish Wire Through Ceiling Joists (7 Step – 2 Part Guide)
By the end of this article, you should know how to fish wire through ceiling joists.
The primary function of ceiling joists is holding the ceiling together which makes them ideal to also use to run electrical wires through. but there are many things you need to do right. As an electrician, I have learned a few techniques and tricks over the years that I’ll show you here.
In general, to fish a wire through ceiling joists for a new light fixture, follow these steps.
- Turn off the main power.
- Use a stud finder to avoid drilling studs.
- Mark the light fixture and light switch positions.
- Start cutting and drilling.
- Guide the fish tape through the ceiling hole.
- Fish the wire through using the fish tape.
- Complete your wiring process.
You’ll find more details in the guide below.
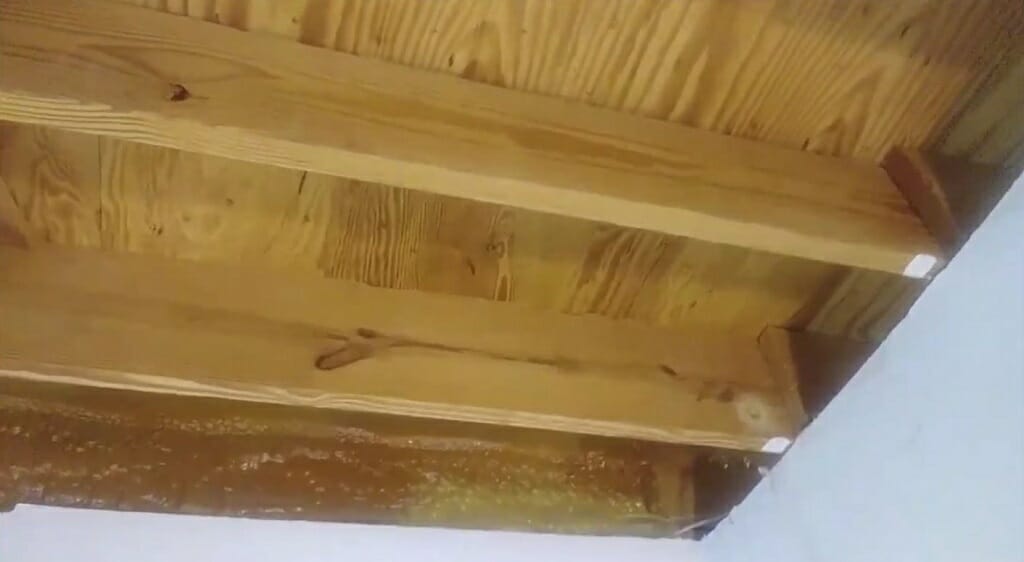
Defining Ceiling Joists
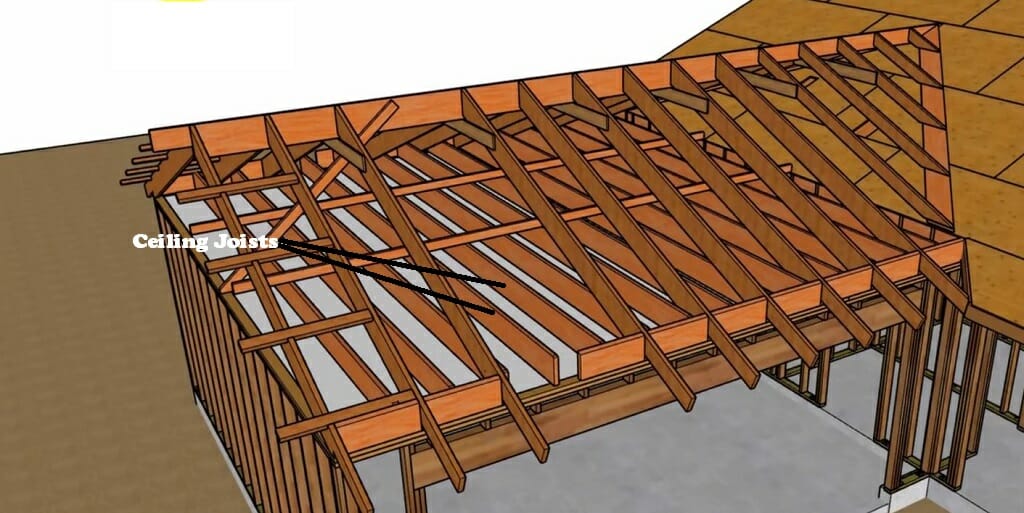
A roof consists of several items such as wall plates, rafters, purlins, and joists.
The ceiling joist is like the little brother to these. If your roof has a horizontal timber beam that is located close to the ceiling, those beams are the ceiling joists. The ceiling joists and the rafters are parallel to each other.
There are three main uses of these ceiling joists.
- They provide horizontal structural support for the roof.
- Ceiling sheets can be attached to these joists.
- Transfer roof load to the walls.
Manufacturers often use 2-by-4 or 2-by-6 timber to produce ceiling joists. However, the size of the joist might change depending on the span of the roof.
Note: The spacing of the joists can be 12 inches, 16 inches, 19.2 inches, or 24 inches.
Before We Start
Depending on the condition of your ceiling, we can categorize ceilings into a few different types.
- Ceilings with no attic access
- Ceilings with attic access
- Open or incomplete ceilings
If you plan to install a new light fixture, smoke detector, or a fan on a ceiling with no attic access, you’ll have to fish the wire through the ceiling. I’m going to talk about this matter in Part 1(including the ceiling with attic access).
However, if you are running wires on an open or incomplete ceiling, you can be more creative. Also, you’ll have more space to work around. We’ll talk about that in Part 2.
Keep in mind: You’ll learn how to fish wires for a new light fixture and switch from the below sections. However, if you plan to fish wires for a fan, smoke detector, or something else, you can follow the same process without hesitation.
Part 1 – 7 Step Guide On How to Fish Wire Through Ceiling Joists
Note: This part assumes you have no attic access.
Tools Needed
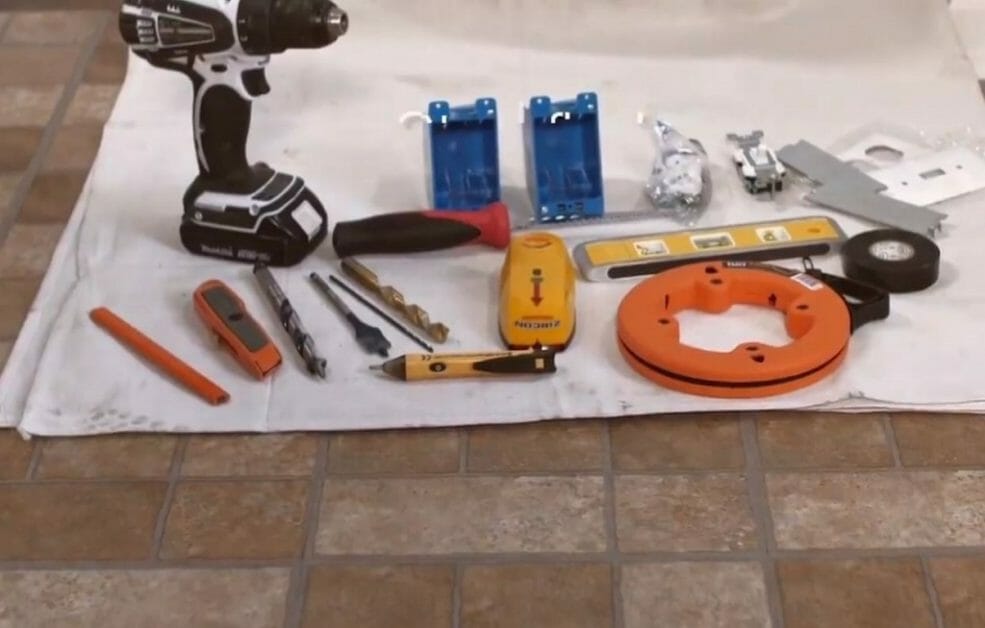
- Tape measure
- Drill
- Stud finder
- Fish tape
- Spirit level
- Drywall saw
- Chisel
- Pencil
- Ruler
- Voltage tester (optional)
Step 1 – Turn Off the Power

First and foremost, open your main panel box and cut off the power. This is a must-follow step for your safety. Do not skip this step.
Step 2 – Use the Stud Finder on The Wall and Ceiling
You can use the stud finder to locate ceiling joists and wall studs.
In this demonstration, we are going to do quite a bit of drilling and cutting. So, identifying the locations of the joists is crucial. Never damage a wall stud or ceiling joist. It could lead to complete structural failure. (1)
Check the surrounding locations where you plan to fish the wires through using the stud finder.
Step 3 – Mark the Locations
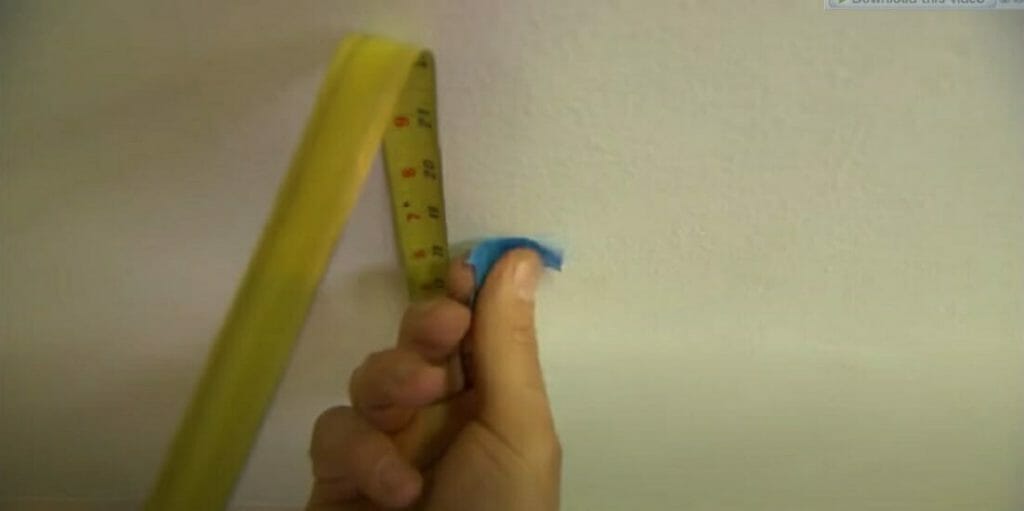
After finding suitable locations, mark those locations using a pencil and a ruler (or use any suitable technique). Use the tape measure to measure the following.
- Height of the light switch from the floor.
- Length of the light fixture from the wall edge.
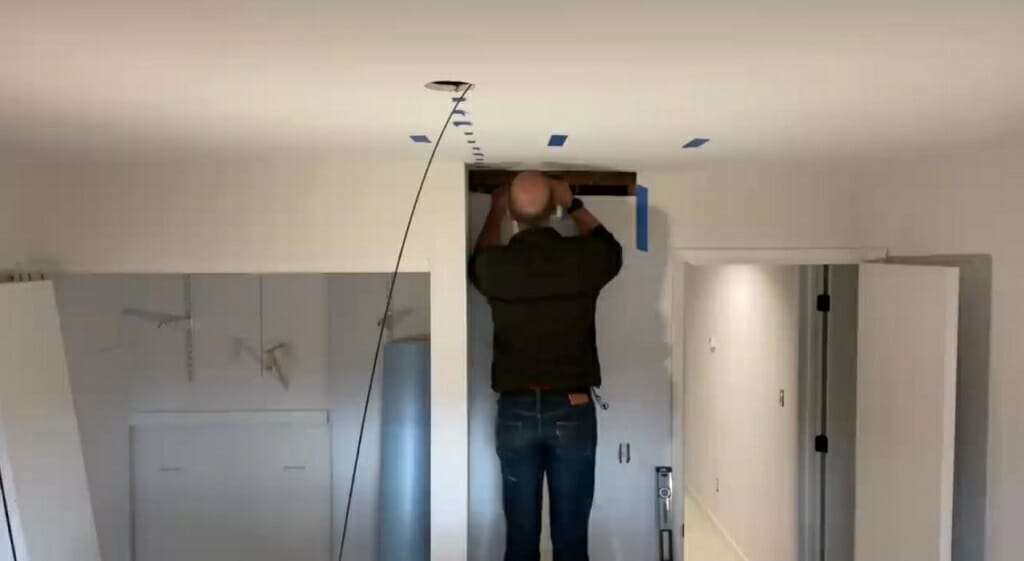
Step 4 – Start Cutting and Drilling
As I mentioned, there will be lots of cutting and drilling in this task. So, cut or drill according to the following guidelines.
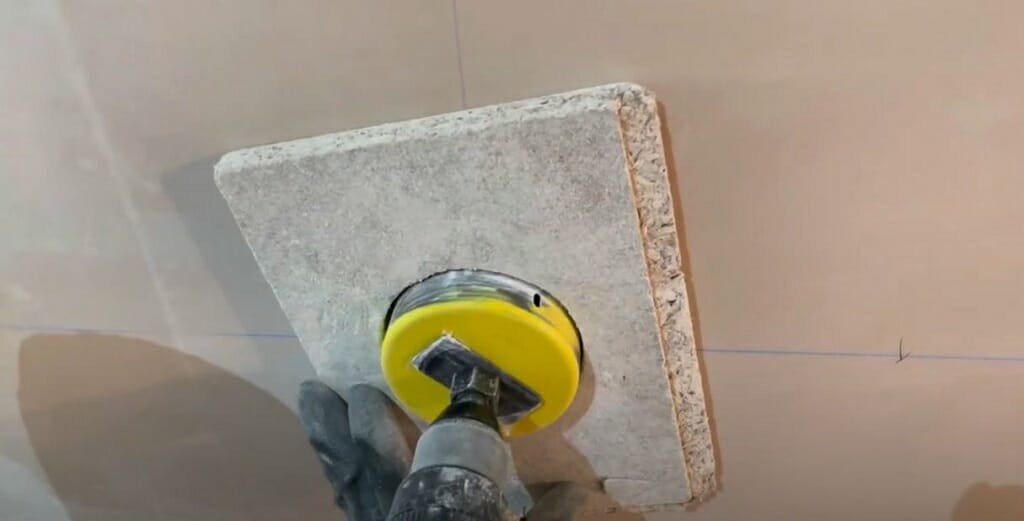
Cut a hole for the light fixture on the ceiling.
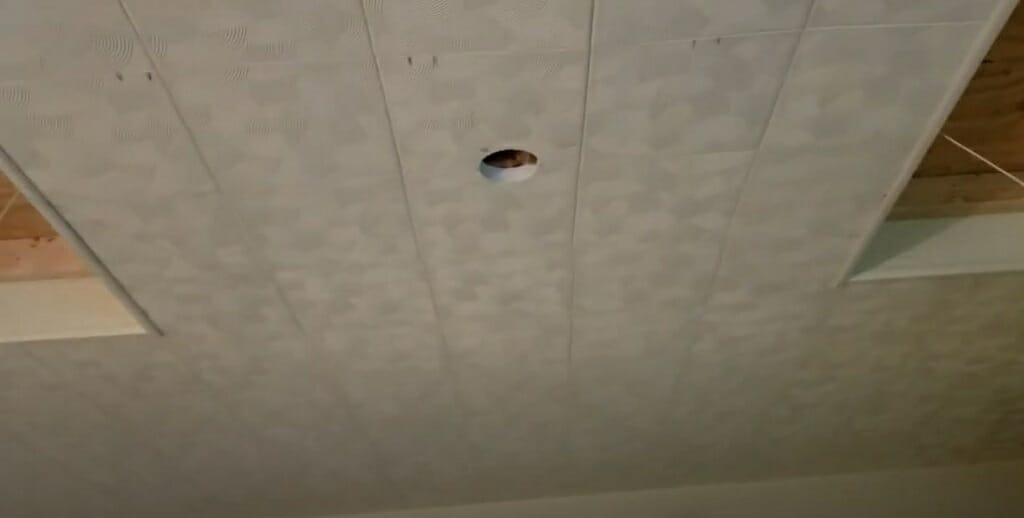
Most of the time, a 2-by-4-inch hole will be more than enough. Use a drywall saw for this. Next, go to the marked light switch located on the wall and cut a 2-by-4-inch hole.
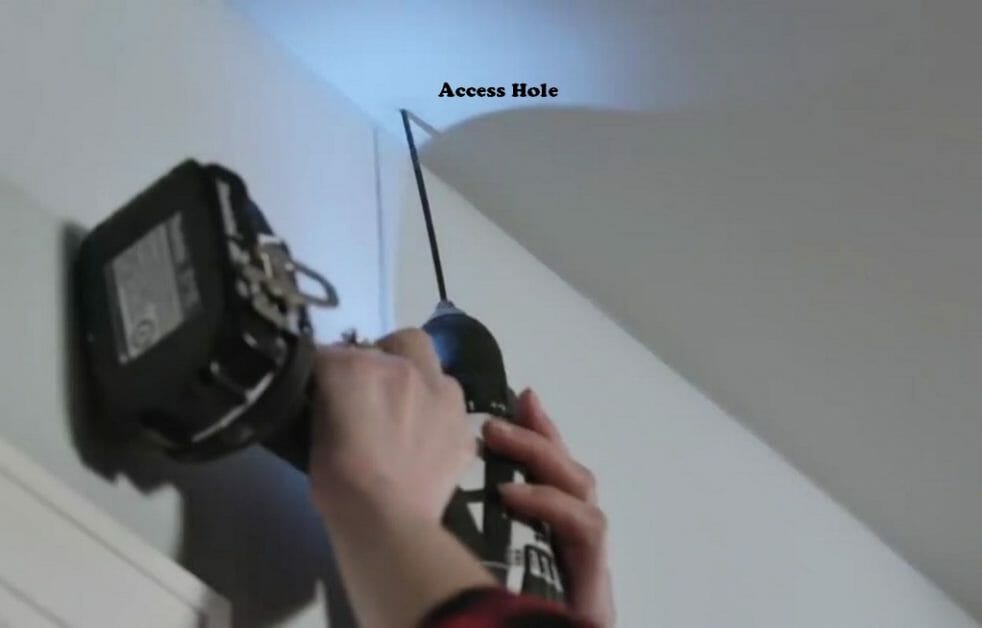
Then, take the drill and create an access hole on the edge of the ceiling using a suitable drill bit. The size of the access hole should be enough to run the fish tape and the wire.
Also, the access hole should be in line with the light fixture hole and light switch hole. This is the position where you are going to retrieve the wire from the ceiling.
If needed, cut the wire path on the wall or make a new access hole for the wire on the wall. This new access hole should be aligned with the light switch hole.
Tip: The access hole size might vary according to the gauge wires.
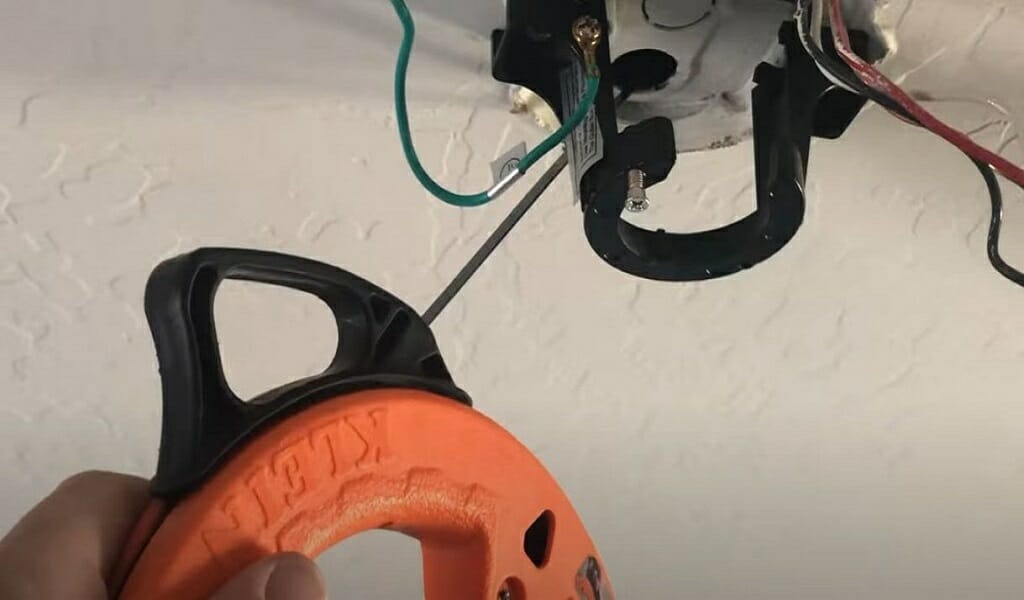
Step 5 – Insert the Fish Tape
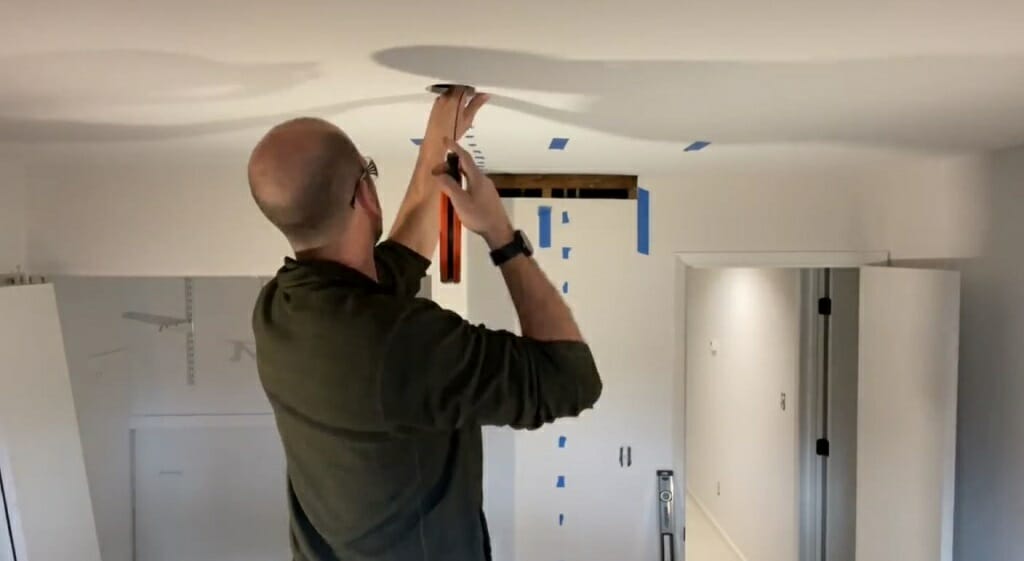
Now, insert the fish tape into the ceiling hole. Guide the fish tape through the ceiling and access holes until it reaches the light fixture switch.
Step 6 – Fish the Wire Through
Then, attach the wire to the fish tape.
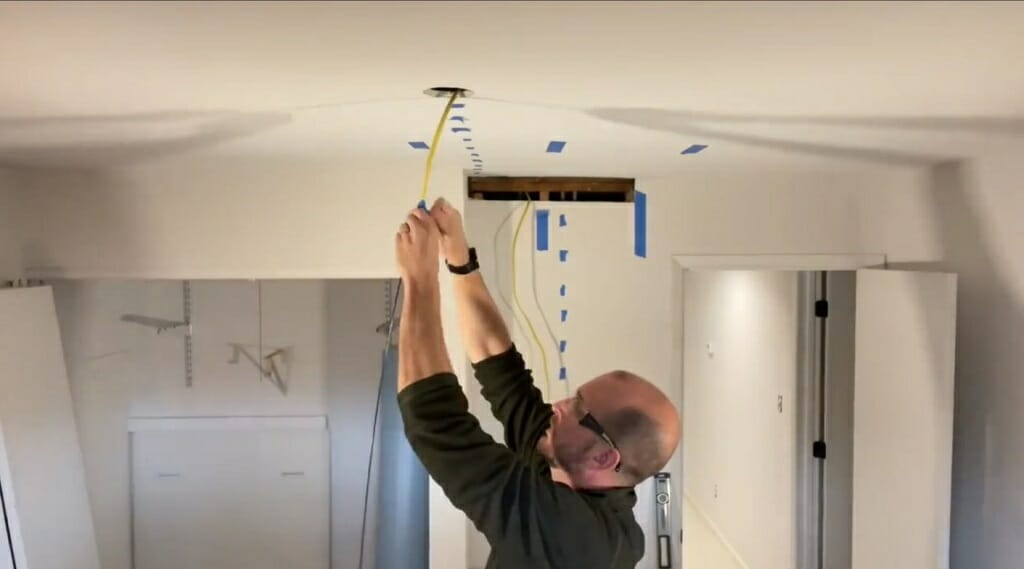
Go back to the starting point of the fish tape and pull out the tape and retrieve the wire from the ceiling hole.
Step 7 – Complete the Wiring Process
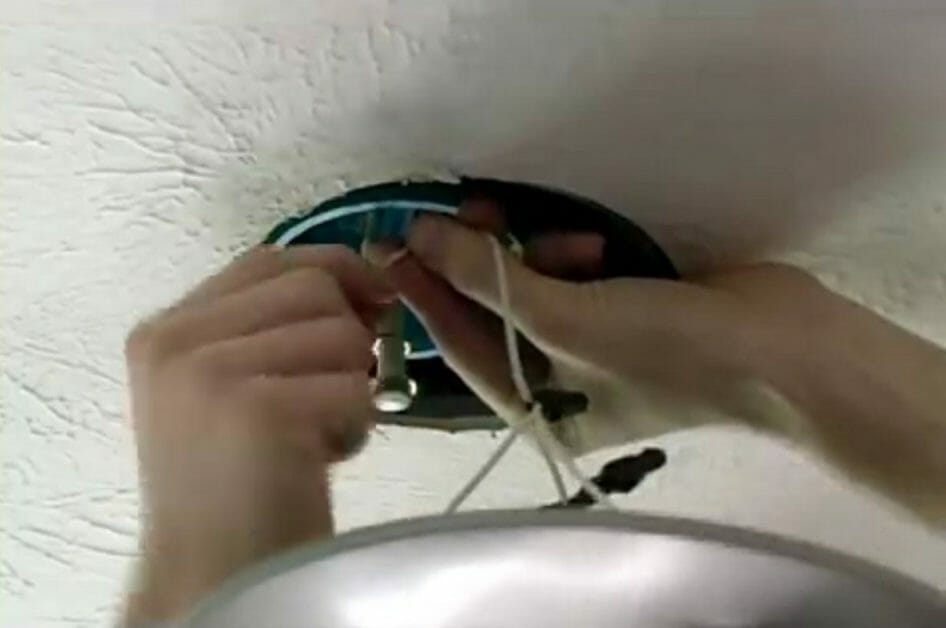
Now we’re going to assume you have been using this guide to get lighting like a light fixture wired and we’ll continue explaining how. If this is not your goal you can stop here, or read on and adapt this method to similar electronics.
Finally, complete the wiring for the light fixture and switch.
The above process is useful when you cannot access the attic. However, if you can access the attic, follow these steps.
- Drill a hole in the ceiling where you plan to install the light fixture.
- Then, determine where the wire should come out of the ceiling.
- Drill that location too.
- Insert the wire into the first hole.
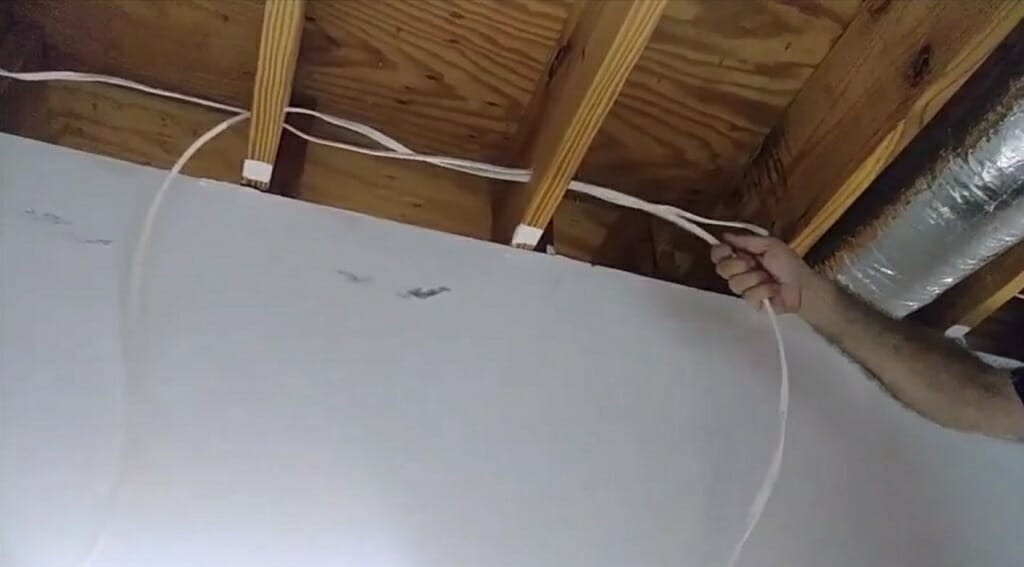
- Enter the attic and grab the wire.
- Run the wire through the joist.
- Finally, pull out the wire from the ceiling.
Keep in mind: If you can access the attic, you won’t need fish tape.
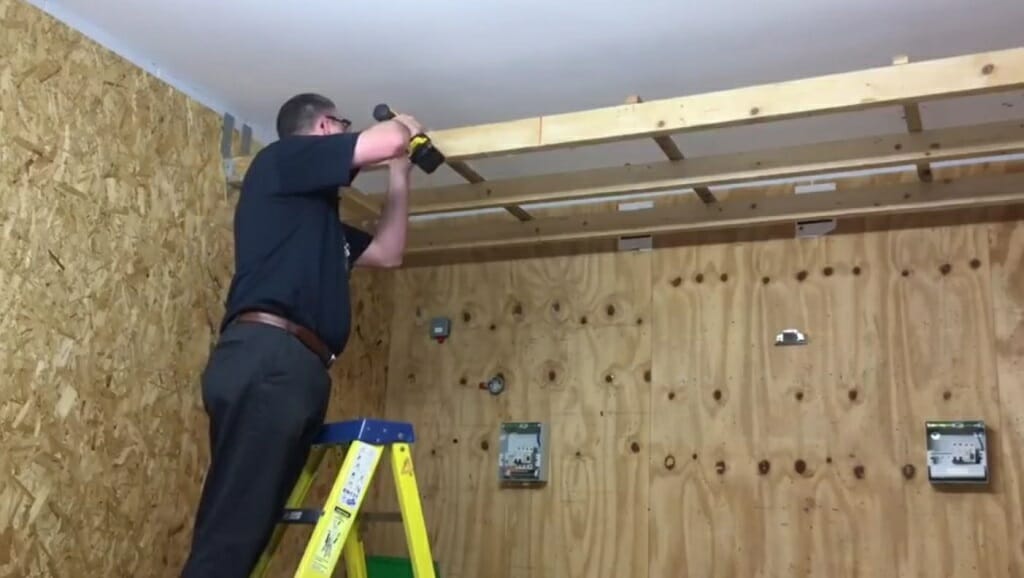
Part 2 – How to Run Wires Through an Open or Incomplete Ceiling
Running wire in an open or incomplete ceiling is a significantly different process compared to the above 7 steps guide. After all, you can apply the same techniques for a ceiling that has attic access.
The Ideal Time
If you are searching for an ideal time to run the wires on the ceiling joists, the initial roof construction phase is the best time. All the rafters, purlins, and joists will be open. You’ll be able to run electrical wires without much trouble. Positioning, pulling, and stapling the wires is much easier with an open roof. So, don’t wait until the ceiling sheets are installed.
What about the technique?
You can approach this matter in two ways. You can use running boards. Or drill holes in the ceiling joists to run wires.
Tip: You can use the below two methods for a ceiling that has attic access.
Method 1 – Using Running Boards
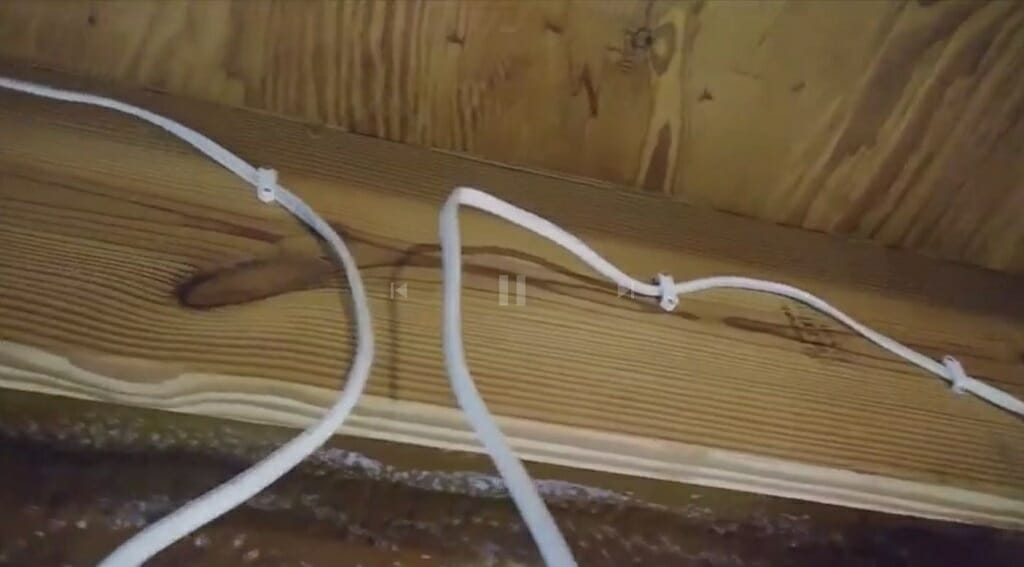
Using running boards is the best way to run wires through ceiling joists. It is a highly effective method.
A running board is a simple piece of timber. You can staple the electrical wires onto these boards. Then, place them on the ceiling joists. You can position them on top or side of the joists.
Benefits of Using Running Boards
Running boards are an excellent solution for issues you may face while trying to run wire through ceiling joists. Here are some of the benefits of using running boards.
- You only have to attach the running board to the joist in 2 or 3 positions.
- You can reposition the running boards quite easily.
- Removing the running board is easy.
- You’ll get a lot of extra space to run wires
- You don’t have to drill the ceiling joists.
Things to Consider While Stapling
If you plan to use running boards, you need a good technique while stapling the wires to the running board. There are specific guidelines for this kind of work.
- First, determine the number of staples and spacing. Otherwise, the wires will start to sag. Or sometime it might be too tight.
- Whenever stapling a wire to a joist, always avoid screws and nail positions.
- If you are using Romex wires staple them every 2 feet.
- Only place two or fewer wires for a single staple.
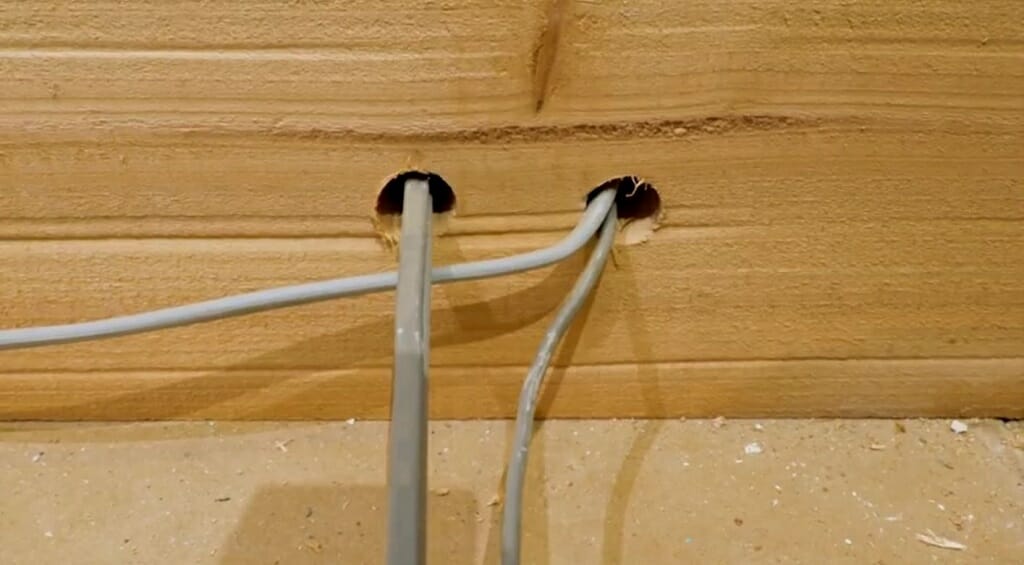
Method 2 – Drilling the Ceiling Joists
Even though running boards are the most suitable option for running wires through the ceiling, sometimes, you might not have enough space in the ceiling for running boards. If that is the case, you’ll have to drill the ceiling joists. However, here are a few things you should consider while drilling a joist.
Calculations
First, you need to calculate the location of the hole and its size. For that, you’ll need the following details.
- Length of the Joist
- Width of the Joist
For better understanding, follow this example.
Length – 300cm
Width – 10cm
Locations of the holes (according to the IET),
1st area = 300cm × 0.25 = 75 cm
2nd area = 300cm × 0.4 = 120 cm
Mark these two lengths on the joist. You should measure the length from one end of the joist. You can drill holes within these locations.
Then divide the width of the joist by 2. For this demonstration, the result will be 5cm. In other words, it is the horizontal center of the joist. So, you should drill a hole in this horizontal center only.
Now the location of the holes is calculated. You know the appropriate vertical and horizontal lengths for drilling holes. So, we can move on to the size of the hole.
To find the size of the hole:
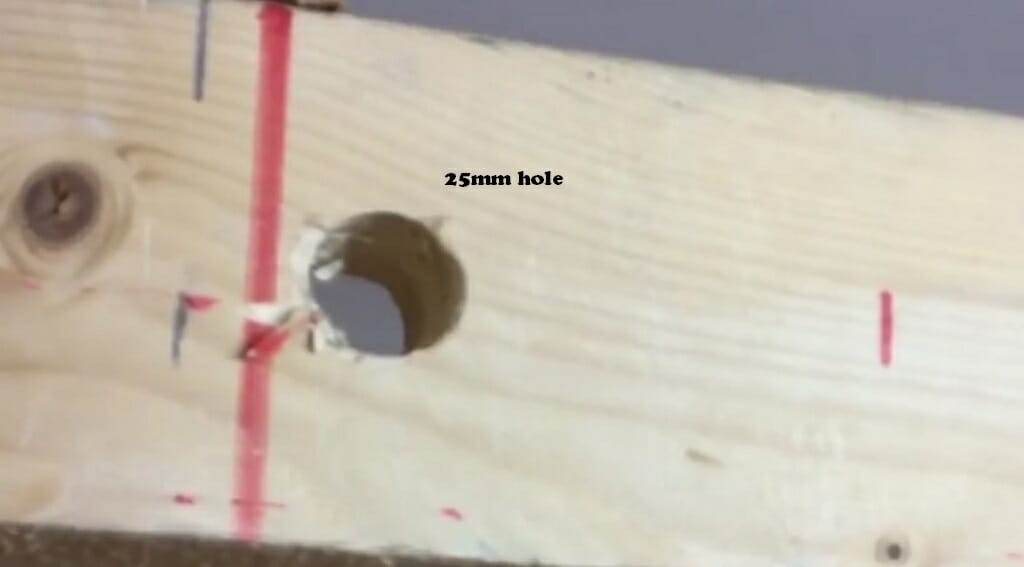
Take the width of the joist and multiply it by 0.25. Remember, you’ll have to convert the width to the millimeters.
Size of the hole = 100mm × 0.25 = 25 mm
Therefore, you can drill a 25mm hole on this joist. Don’t exceed this limit. It will reduce the strength of the joist considerably. Also, the spacing between two holes should be 75mm.
Keep in mind: We only considered one edge of the joist. If needed, apply the same process to the other end too.
Is it Safe to Drill Hole in the Ceiling Joist?
The wrong drilling process can reduce the strength of the joist. However, there won’t be an issue until you follow these rules.
- Avoid the area of 2 inches from the bottom and top of the joist edge. The horizontal center is the best position for holes.
- The maximum size of the hole should be one-fourth the width of the joist.
- Keep the spacing between the holes at least 75mm (for 25mm holes).
As long as you follow the above rules, you are safe. But drilling holes on the ceiling joist should be your last resort. So, try to complete the project with the running boards. It is a much more straightforward process that doesn’t risk the strength of the ceiling joists.
Wrapping Up
Whether you own an open ceiling or a ceiling with no attic, now you know how to fish wire through ceiling joists. Depending on your situation, you might have to change your tactics. So, remember to think this through before getting started. If you are not comfortable completing the task by yourself, don’t hesitate to hire a professional. (2)
Take a look at some of our related articles below.
- How to tell positive and negative wires on light fixture
- How to run electrical wire in unfinished basement
- A wire rope sling with a strength
References
(1) structural failure – https://www.businessinsider.com/biggest-structural-failures-disasters-history-2019-11
(2) tactics – https://www.britannica.com/topic/tactics
Video References
1SoN Review
gregvancom
The Home Depot
David Stanley
Quick Fix With H
Everyday Home Repairs
Fort Knox Co.
Joseph K
Skill Builder
GSH Electrical