8 min read
How to Wire a 120V Disconnect (7 Step Guide)
By the end of this article, you’ll know how to wire a 120V disconnect safely and quickly.
Wiring and installing a 120v disconnect comes with many complications. The wrong execution during the wiring process can eliminate the protection of the air conditioning unit or the circuit. On the other hand, wiring a 120V disconnect is slightly different from wiring a 240V disconnect. Working as an electrician over the years, I have learned a few tips and tricks that ill share with you below.
Quick Summary:
- Cut off the main power supply.
- Fix the disconnect box to the wall.
- Identify the Load, Line, and Ground terminals.
- Connect the ground wires to the disconnect box.
- Connect the black wires to the disconnect box.
- Connect the white wires.
- Put the outer cover on the disconnect box.
Follow the below article for a detailed explanation.
Before We Start
Before starting the 7-step how-to guide, here are a few points you need to know.
If you aren’t familiar with the disconnect box, this explanation might help you. A disconnect switch can disconnect the power supply at the first sign of trouble. For instance, if you install a disconnect box between your air conditioning system and the main power supply, the disconnect will instantly cut the power in case of an overload or short circuit.
In other words, a disconnect panel is an excellent protection for your electrical devices.
7 Step Guide on How to Wire a 120V Disconnect
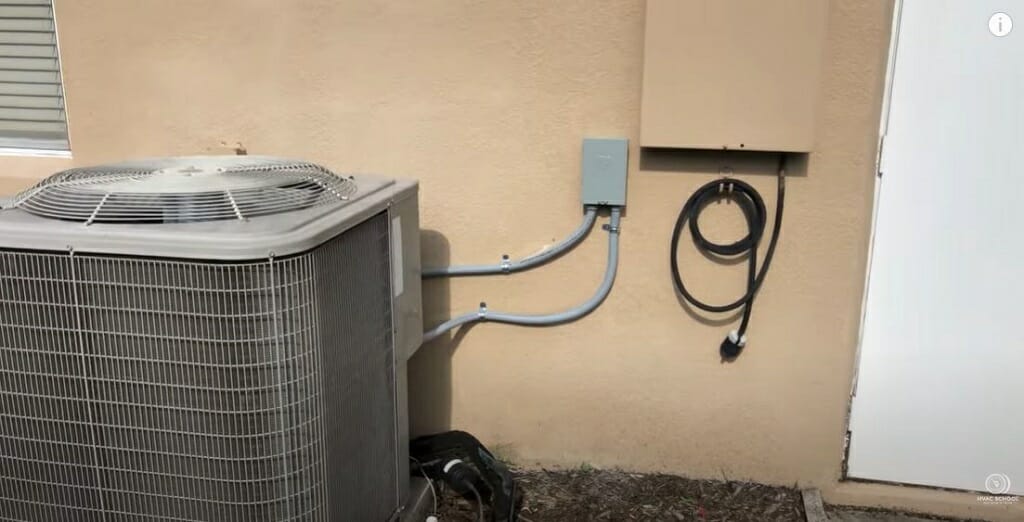
Below I’ll show you how to wire a 120V disconnect to an air conditioning unit for this guide.
Things You’ll Need
- 120V disconnect
- Wire Stripper
- Few wire nuts
- Philips screwdriver
- Flat screwdriver
- Power drill (optional)
Step 1 – Cut Off the Main Power Supply

First and foremost, locate the main power supply and cut off the power to the working area. You can turn off the main switch or corresponding breaker. Never start the process while the wires are active.
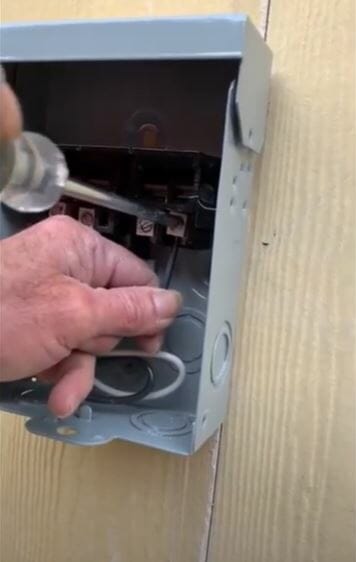
Step 2 – Fix the Disconnect Box to the Wall
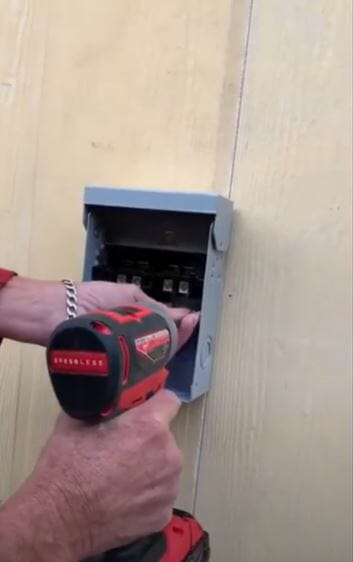
Then, choose a good location for the disconnect box. Place the box on the wall and tighten the screws using a Philips screwdriver or a drill.
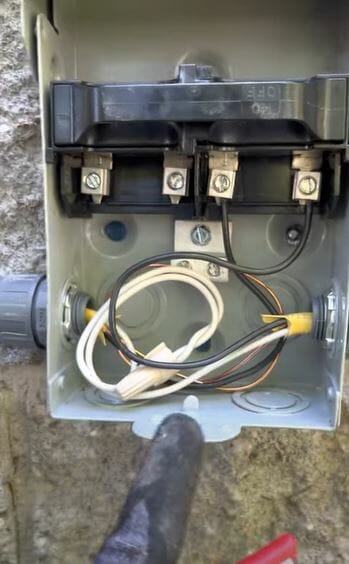
Step 3 – Identify the Load, Line and Ground Terminals
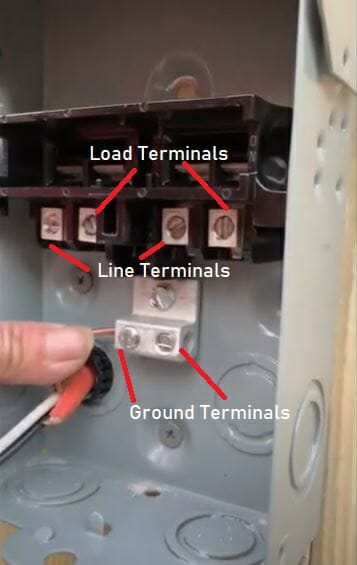
Next, examine the disconnect box and identify the terminals. There should be six terminals inside the box. Check out the above image for a better understanding.
Step 4 – Connect the Ground Wires
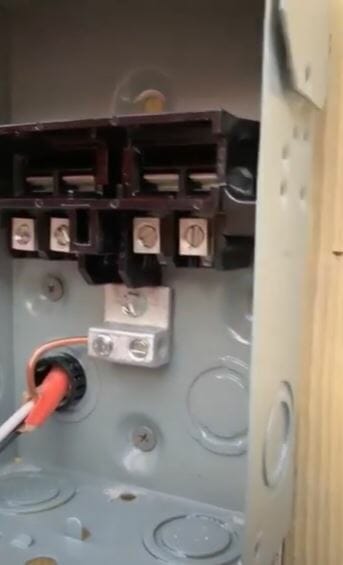
After correctly identifying the Load, Line, and Ground terminals, you can start connecting the wires. Strip the incoming and outgoing ground wires using a wire stripper.
Connect the incoming and outgoing ground wires to the two ground terminals. Use the screwdriver for this process.
Incoming Ground Wire: The wire that comes from the main panel.
Outgoing Ground Wire: The wire that goes to the AC unit.
Step 5 – Connect the Black Wires
Locate the two black wires (hot wires). The incoming black wire should connect with the right-side line terminal. And the outgoing black wires should connect to the right-side load terminal. Remember to strip the wires properly before connecting them.
Quick Tip: Identifying and connecting wires to the correct terminals is crucial. The success of the disconnect switch entirely depends on that.
Step 6 – Connect the White Wires
Next, grab the incoming and outgoing white (neutral) wires and strip them using the wire stripper. Then, connect the two wires. Use a wire nut to secure the connection.
Quick Tip: Here, you are wiring a 120V disconnect; the neutral wires should connect together. However, when wiring a 240V disconnect, all the live wires connect to the corresponding terminals.
Step 7 – Place the Outer Cover On
Finally, take the outer cover and connect it to the disconnect box. Tighten the screws using the screwdriver.
RELATED What Does a CDI Box Do? (Guide)
Safety Precautions You Should Follow During the 120V Disconnect Wiring
Whether wiring a 120V or 240V disconnect, safety should be your top priority. So, here are some safety tips that might be useful for you.
- Always switch off the main panel power before starting the wiring process. In this process, you’ll have to strip and connect many wires. Never do these things while the main panel is active.
- After cutting the main power, remember to test the incoming wires with a voltage tester.
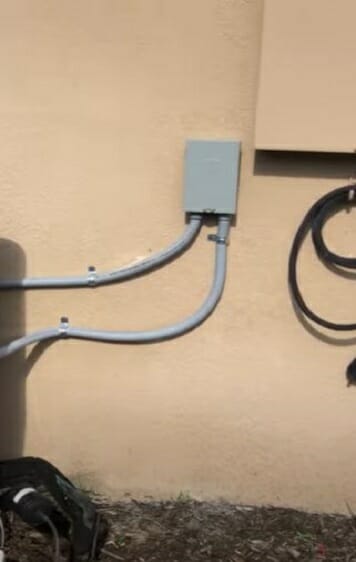
- Install the disconnect box within sight of the AC unit. Otherwise, someone might switch on disconnect without knowing the technician is working on the unit.
- If you are uncomfortable with the above process, always hire a professional to complete the task.
Why Should I Need a Disconnect?
For those who are in doubt about installing a disconnect, here are a few good reasons for having a disconnect.
For Safety
You’ll handle many electrical connections when running electrical wires for a commercial business. These connections put lots of pressure on your electrical system. So, the electrical system might malfunction from time to time.
On the other hand, a system overload can occur at any given time. Such an overload can damage your most valuable electrical equipment. Or it might lead to electrocution. You can avoid all of this by installing disconnects to vulnerable circuits. (1)
Legal Parameters
According to the NEC code, you must install a disconnect to nearly all locations. So, ignoring the code might lead to legal trouble. If you are uncomfortable deciding which locations need a disconnect, always reach out for professional help. Given the sensitivity of the process, it might be a good idea. (2)
FAQs
Do I Need an AC Disconnect?
Yes, you should install a disconnect for your AC unit, and it will keep your AC unit safe. At the same time, a properly working disconnect will protect you from any shock or electrocution. However, remember to install the disconnect within sight of the AC unit.
What are the Types of Disconnects?
There are four types of disconnect switches. Fusible, non-fusible, enclosed fusible and enclosed non-fusible. Fusible disconnects protect the circuit.
On the other hand, non-fusible disconnects don’t provide any circuit protection. They only provide easy means to close or open the circuit.
Take a look at some of our related articles below.
- How to test PC power supply with multimeter
- How to connect ground wires together
- What happens if you connect white wire to black wire
References
(1) valuable electrical equipment – https://www.thespruce.com/top-electrical-tools-1152575
(2) NEC code – https://www.techtarget.com/searchdatacenter/
definition/National-Electrical-Code-NEC
Video References
HVAC School
1st Electric Response Inc
Shemsta Remodeling and Handyman service