14 min read
How to Wire an Outlet with 4 Wires (Reg & GFCI)
This guide shows how to wire an outlet with 4 wires.
It covers 2 scenarios where you will see 4 wires: a 240V supply to a regular outlet and a GFCI/AFCI one protecting an additional outlet on the circuit.
Quick Summary: Let’s give you a quick overhead view of the steps we will cover.
Wiring a 240V Outlet:
- Connect ground wires to the ground terminal.
- Attach neutral wires to silver terminals.
- Splice hot wires.
- Connect spliced wires to one brass terminal.
- Attach the red wire to another brass terminal.
Wiring a GFCI Outlet:
- Connect the black wire to the line row’s brass terminal.
- Attach the white wire to line the row’s silver terminal.
- Connect the ground wire to the ground terminal.
- Repeat steps 1-3 for the second load cable on the load row.
- Combine all ground wires.
- Connect combined grounds to the ground terminal.
Continue reading below for more detailed instructions.
Wiring an Outlet with 4 Wires
There are two situations where you would need to wire an outlet with 4 wires:
- Wiring a regular outlet for a (3-phase) 240v connection. It’s usually done for powering heavy appliances requiring a higher voltage.
- Wiring a GFCI/AFCI outlet with an attached load, such as another downstream outlet. It’s usually done to provide it with the same GFCI/AFCI protection.
Requirements
You will need the following tools and other materials:
| Tools | Materials |
| Screwdriver Nose pliers Wire stripper | Cable Wire nuts Electrical tape |
Safety (Turn the Power Off)
Turning the power off at the panel before starting is vital for safety reasons.
Please turn off the circuit breaker so there’s no power in the circuit while working on it.
You can test the outlet to ensure no power using a voltmeter or tester before opening an outlet.
Wiring a Regular Outlet for a 240V Connection (9 Steps)
We will start by assuming that you already have an outlet box attached, or else you will remove an old, existing one to replace it.
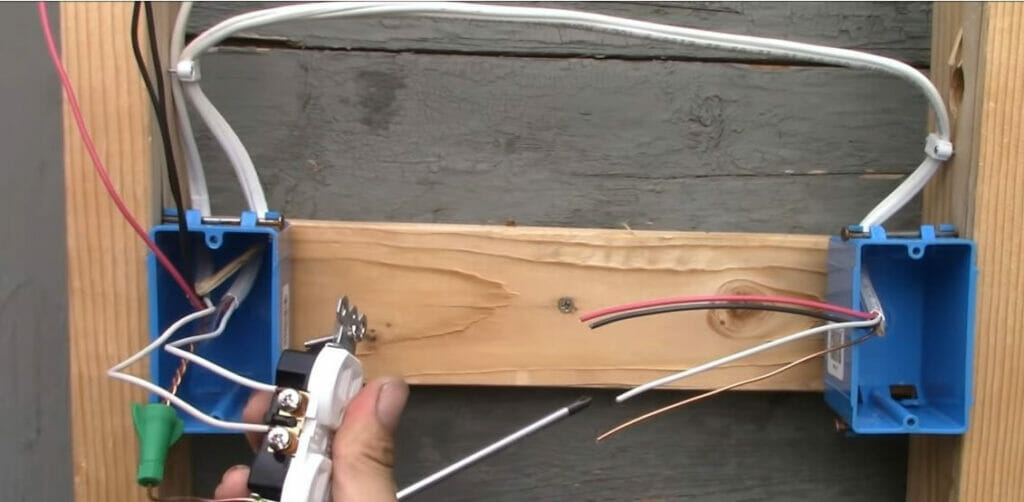
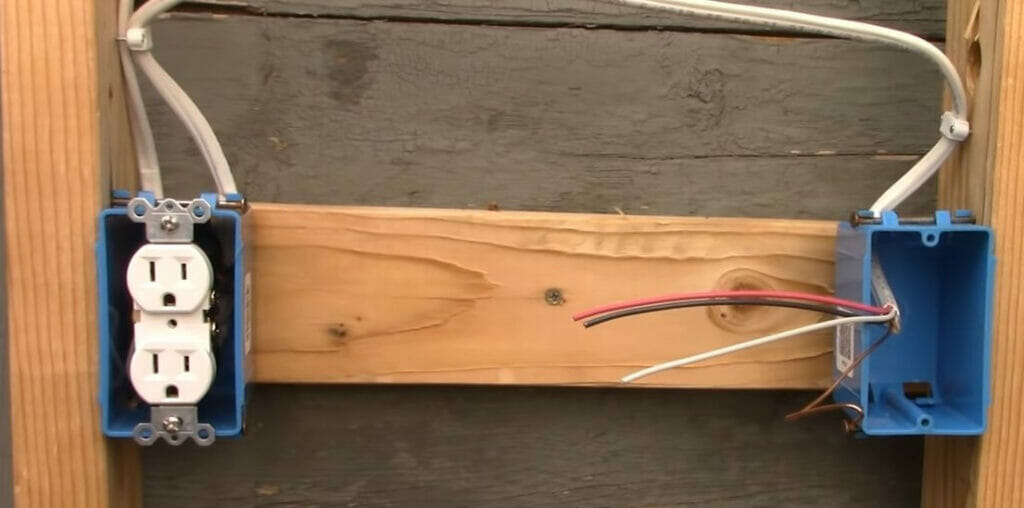
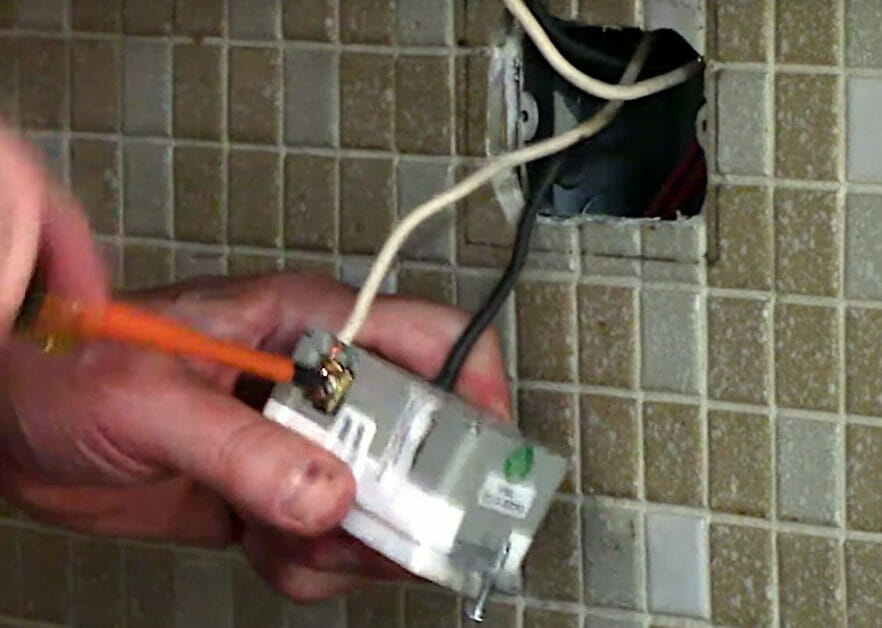
Consider the outlet box on the left in the picture below, which has 4 wires from the box on the right for a switch. It has 2 hot wires – one black and an extra red one to provide 240V.
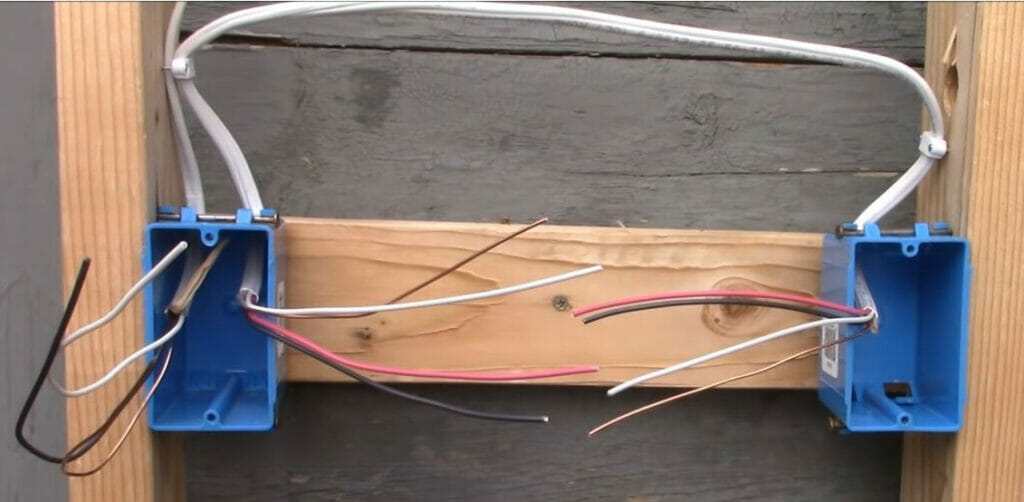
The other cable entering the outlet above is the power source cable, which is a regular 3-wire cable with one black (hot), one white (neutral), and one bare copper (ground) wire. We will wire that to make the outlet operational, but we will ignore the switch on the right as we focus on wiring the outlet.
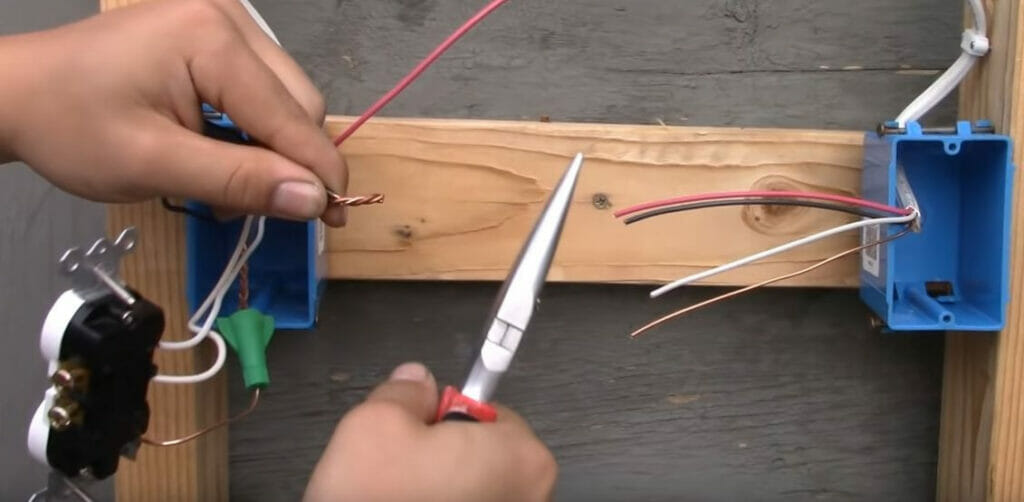
Step 1: Strip the Wires
Strip the ends of all the wires using a wire stripper, about half an inch.
Step 2: Combine the Ground Wires
Twist the two ground wires in the outlet’s box around each other and attach them to a wire connector or twist cap.
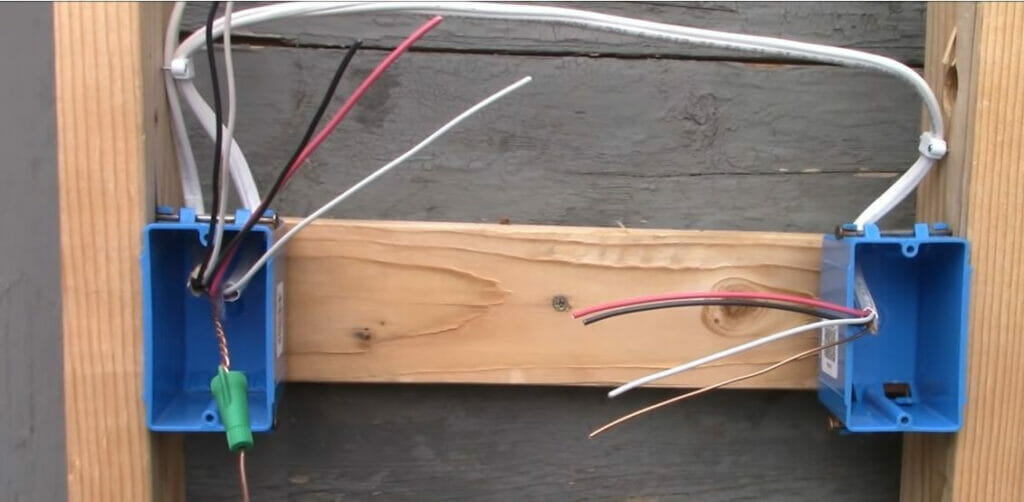
Step 3: Connect the Ground Wires
Connect the ground wires to the ground terminal on the outlet, which has a green screw.
Step 4: Connect the Neutral Wires
Connect the two neutral (white) wires to the outlet’s silver terminals.
Step 5: Combine the Hot Wires
Twist the ends of the two hot (black) wires, as you did to the ground ones, forming another pigtail.
This is to ensure they are always live or hot.
Step 6: Splice the Hot Wires
Splice the two hot wires by putting a wire cap over their ends.
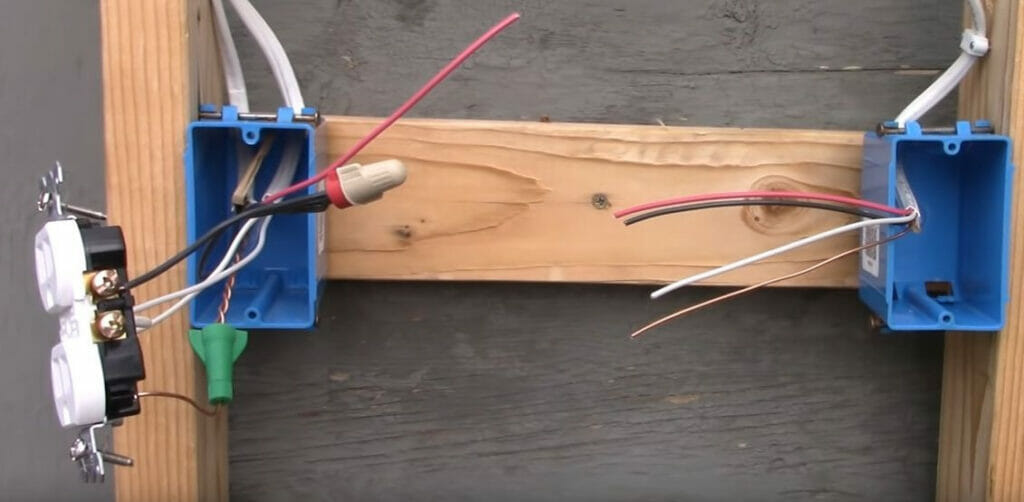
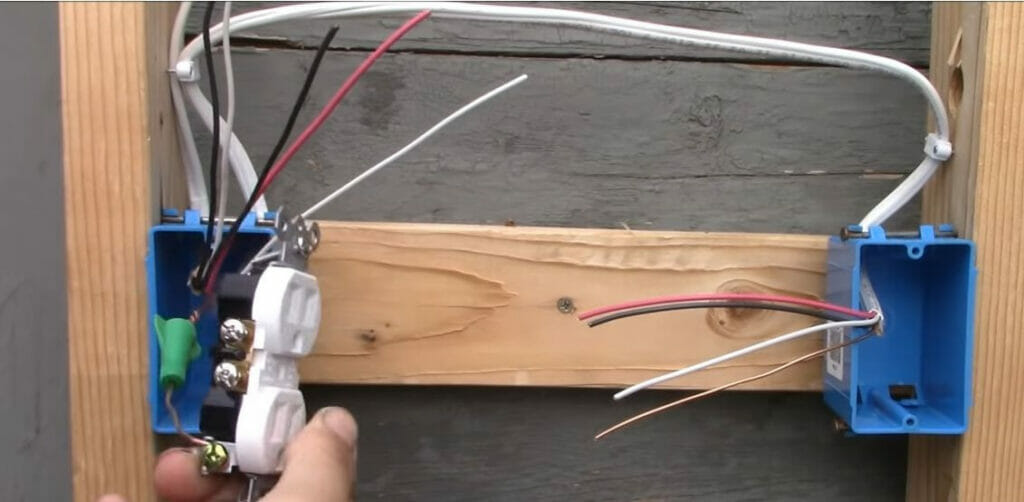
Step 7: Connect the Hot Wire
Connect the hot wire from the above wire cap to the outlet’s first bronze terminal, as shown in the above picture for the previous step.
You might also need to remove the tab that connects the two bronze terminals because we don’t need them connected.
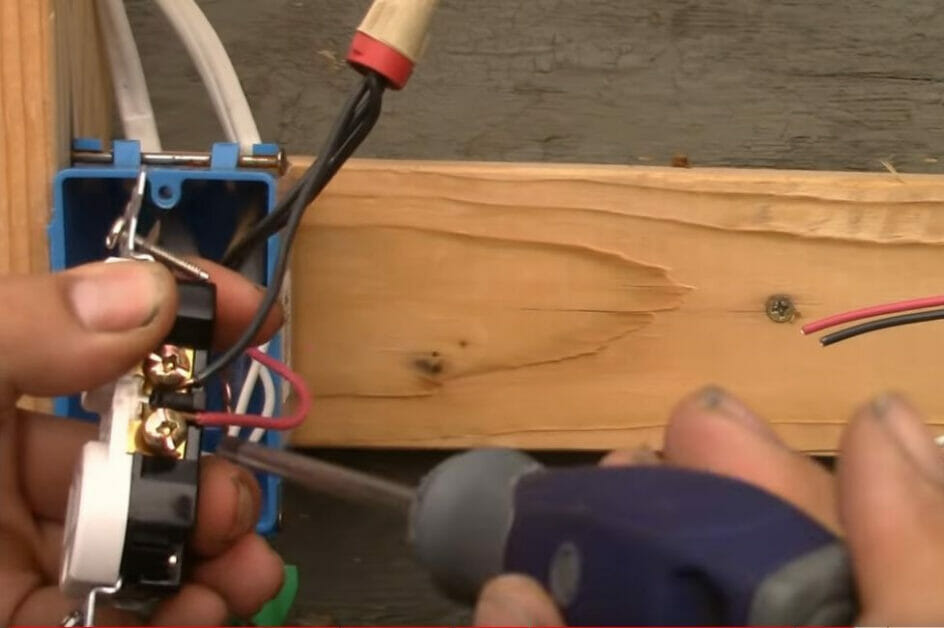
Step 8: Connect the Red Wire
We now come to the red wire as the second hot wire, hence the 4 wires. Connect it to the second brass terminal on the outlet.
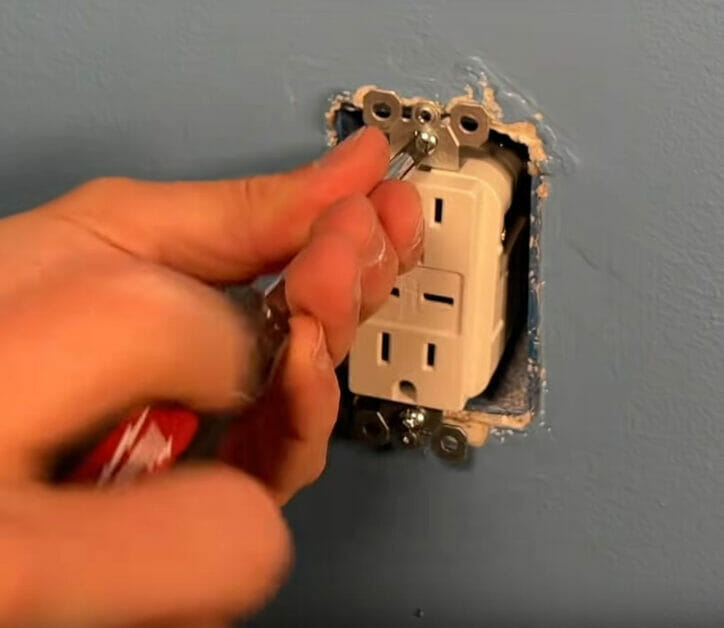
Step 9: Attach the Outlet and Power it On
The outlet is now wired and ready to be attached to the box.
Ensure all the wire connections on every terminal are tight. Then, attach the outlet to the box and secure it.
Wiring a GFCI/AFCI Outlet with an Additional Outlet (6 Steps)
Follow the steps below for wiring a GFCI outlet with 4 wires due to an additional outlet connected to the same circuit.
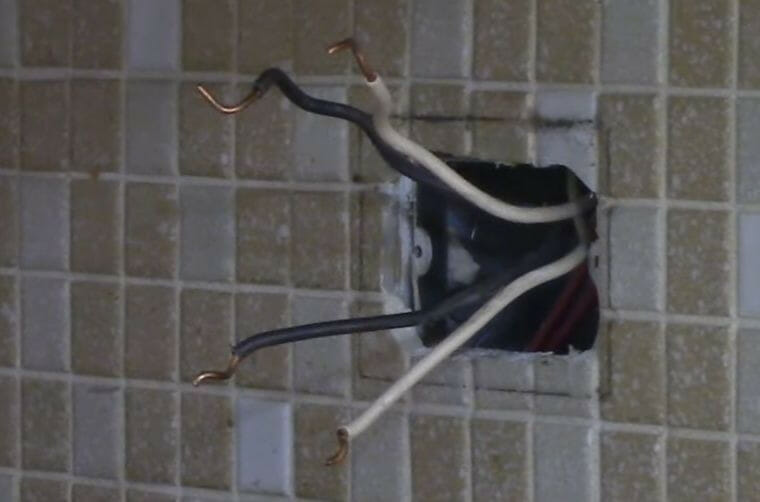
Step 1: Strip the Wires
Before installing a GFCI outlet, ensure the box is the right size and firmly set inside the wall.
Pass the first cable, then the second from the extra load or outlet. The wires should extend at least 4-6 inches from the box. Strip their ends about half an inch.
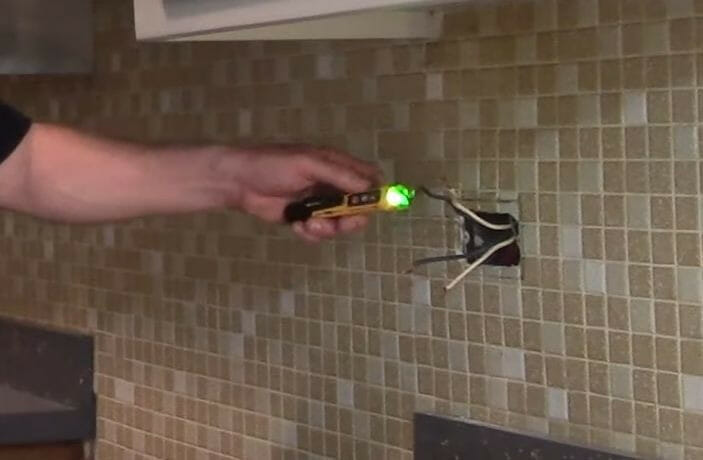
Step 2: Identify the Cables
Ensure you can distinguish the two cables. One cable provides power to the outlet, and the other provides power to another outlet on the circuit.
If you’re unsure, use a non-contact tester to find the one that is live when you turn the power on at the panel (temporarily). When the tester is close to the live black wire, and its light turns red, that’s the one from the power supply cable.
Once identified, label the cables LINE (power supply) and LOAD (power carrier to the other outlet).
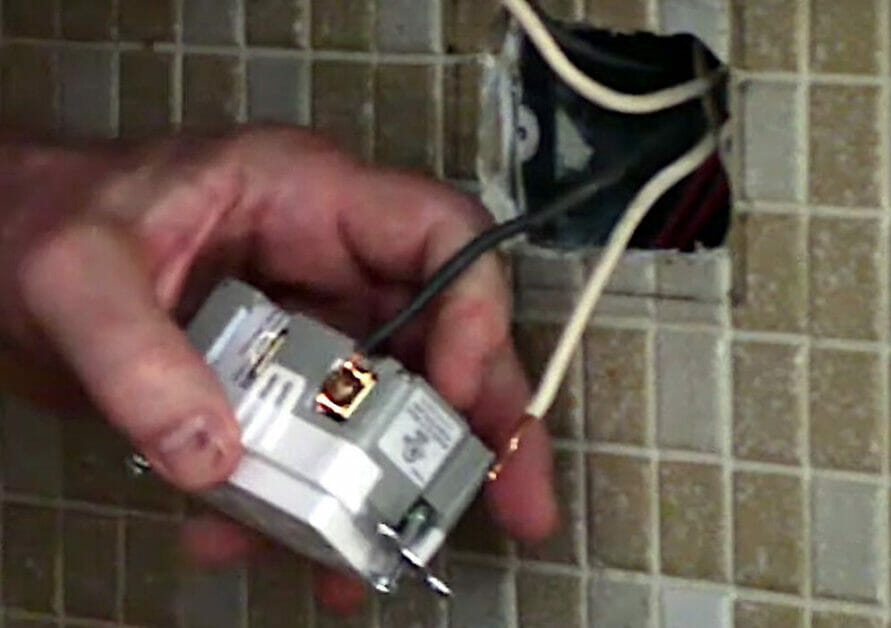
Step 3: Connect the Line Wires
Connect the wires from the LINE cable to the LINE row in this step.
Attach the LINE wires to the GFCI’s terminals (or connectors) as follows:
- Connect the black wire to the brass screw on the line terminal marked ‘Hot’ or ‘Black.’
- Connect the white wire to the silver screw on the line terminal marked ‘Neutral’ or ‘White.’
The power supply wires (black and white) must be connected to the LINE row, not to the LOAD row. The load terminals may be covered by tape if the outlet is new.
Use nose pliers to form a hook if you need to wrap a wire around its terminal. If the ground wire is bare copper, ensure it doesn’t touch other terminals.
Step 4: Connect the Load Wires
Connect the wires from the LOAD cable to the LOAD terminals on the outlet.
The other end of the LOAD cable will connect to the LINE terminals of the secondary outlet, as illustrated below. The primary one is shown on the left, which we are wiring.
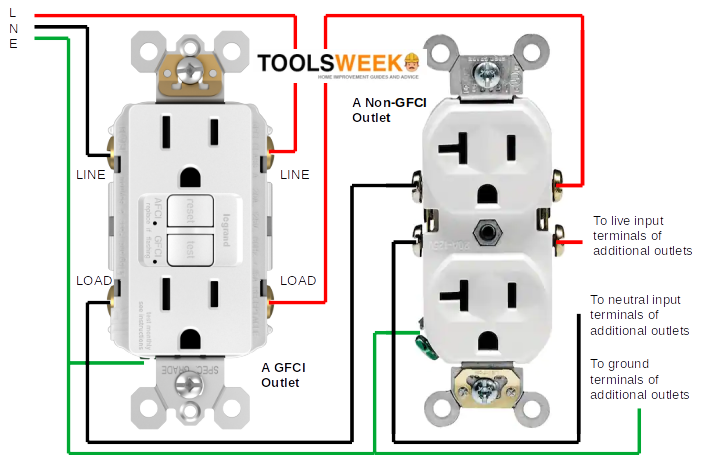
Connect the hot and neutral wires from the other outlet’s line terminals (or another load) to the primary GFCI outlet’s load terminals. To recap:
- All black (hot/live) wires connect to a brass terminal marked ‘Hot’ or ‘Black,’ but the one from the power cable should be on the LINE row and the one from the load to the LOAD row.
- All white (neutral) wires connect to a silver terminal marked ‘Neutral’ or ‘White,’ but the one from the power cable should be in the LINE row and the one from the load to the LOAD row.
Step 5: Connect the Ground Wires
Combine the ground wires using wire connectors, which are usually bare copper.
Then, connect them to the single ground terminal marked ‘GRD’ or ‘Ground’, which usually has a green screw.
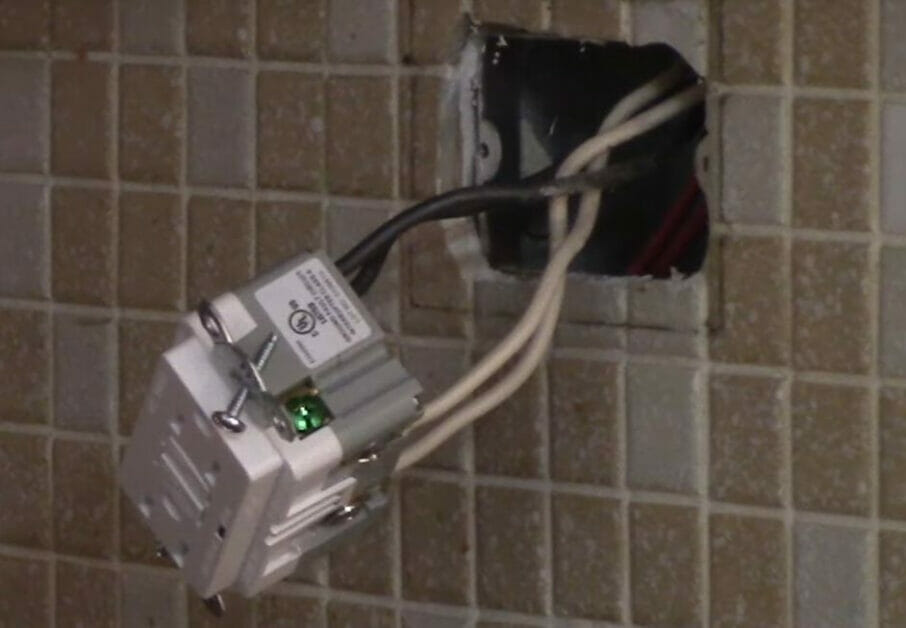
Step 6: Attach the Outlet and Power it On
After wiring the GFCI outlet, please attach it to the box and the cover plate. Ensure all the screws are tight.
When the GFCI outlet is wired, inserted, and attached, and the cover plate is on, it’s ready to use. You can now give power to the outlet by switching the breaker on again.
FAQs: Getting Down to the Nitty-Gritty of Outlet Wiring!
- Why is turning off the power at the circuit breaker essential before starting any wiring work?
- Safety first, my friends! Turning off the power ensures you don’t get a shocking surprise. Always double-check with a voltage tester to confirm the power is off before you dive in.
- What’s the deal with GFCI outlets? Why are they important?
- GFCI outlets are your guardians against electric shocks. They monitor the electricity flowing through the circuit and trip, halting the current if they detect any imbalance. They’re especially crucial in damp areas like bathrooms and kitchens.
- Can I handle wiring a 240V or GFCI outlet myself, or should I call a pro?
- While the steps are straightforward if you’re uncomfortable or experienced with electrical work, bringing in a professional electrician is always a wise call. Better safe than sorry!
- Is there a specific kind of wire I should use for these projects?
- Absolutely! For most residential wiring projects, you’ll use either 12-gauge or 14-gauge wire. The right one for you depends on the amperage of the circuit. When in doubt, check it out (with a pro)!
- How do I know if my outlet box is the right size for my GFCI outlet?
- Your outlet box should have enough room to accommodate the GFCI outlet and all the connected wires without cramming. If things feel too tight, you might need a larger box.
- What should I do if my newly wired outlet isn’t working?
- First, ensure your circuit breaker is turned back on. If the outlet still isn’t working, double-check your wiring connections. If everything looks good, but you’re still in the dark, it’s time to call a professional.
- Can I add more outlets to my GFCI outlet?
- You sure can! The GFCI outlet can protect additional outlets downstream on the same circuit. Just wire them to the LOAD terminals of the GFCI outlet, and they’ll enjoy the same GFCI protection.
- What’s the purpose of the red wire in a 240V outlet setup?
- The red wire is a second hot wire necessary for the 240V setup. Together with the black hot wire, they provide the juice needed for those heavy-duty appliances.
- Do I need to update the wiring to replace an old outlet?
- It depends on the condition and code compliance of the existing wiring. If the wiring is outdated or not up to code, it’s a good time to update it.
Alright, that wraps up our FAQ section. Stay safe, and remember, when in doubt, always reach out to a professional electrician to ensure a shock-free, top-notch job!
References
Website Resources:
- ArchAngel Electric. https://archangelelectricinc.com/services/
- GFCI outlet. https://www.walmart.com/ip/GE-15A-GFCI-Outlet-White-32073/52213771
- Switch-outlet combo. https://www.lowes.com/pd/Legrand-White-15-Amp-Duplex-Tamper-Resistant-Switch-Outlet-Residential-Switch-Outlet/3586610
Video References:
CircuitBread
Everyday Home Repairs
FIX IT Home Improvement Channel
MrFixItDIY
Skills and Trade
TheRenderQ