7 min read
How to Wire a 4-Ohm Sub (Steps & Guide)

This article shows how to wire a 4-ohm subwoofer.
To wire a 4-ohm subwoofer in parallel, join the same terminals on each pair together, using 18-, 16-, or 14-gauge wire as required. To wire it in series, join the opposite terminals together instead. Then, connect an additional pair of wires from any pair of terminals to the amplifier.
When testing, the total impedance should be around half (2 ohms) in a parallel setup or 8 ohms if wired in series.
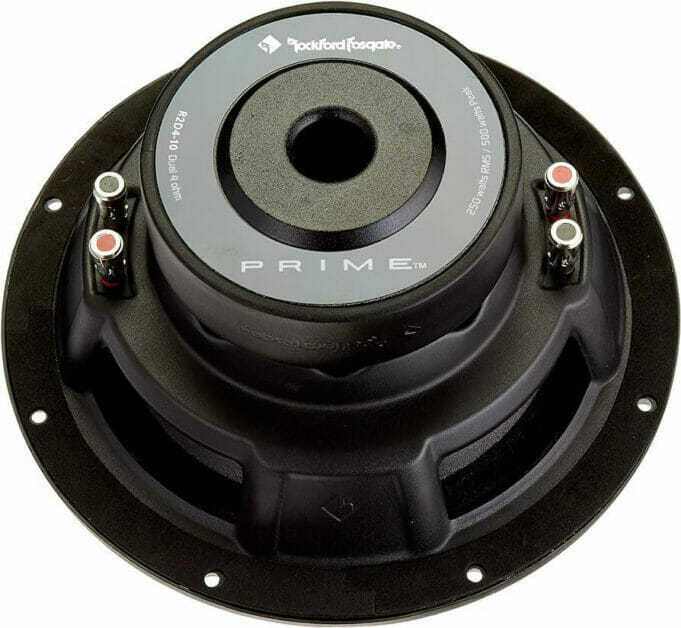
I will show the procedure using a DVC (dual voice control) 4-ohm subwoofer like the one below (notice the two pairs of dual terminals at each end).
Wiring a 4-Ohm Subwoofer
You have two options for wiring a 4-ohm subwoofer: parallel or series.
- Wiring in parallel reduces the load and improves the efficiency and output power of the amplifier. This setup is often recommended, especially if you only have a single subwoofer.
- Wiring in series raises the load and reduces the efficiency and output power of the amplifier. This setup is not recommended unless you have several subwoofers to connect and want to reduce the wiring.
Here are the steps:
Step 1: Choose the Configuration
Choose between a series or parallel configuration.
Step 2: Connect the Terminals
Connect the same terminals on the subwoofer together if wiring in parallel or the opposite terminals in series.
Step 3: Connect the Amplifier Wires
Connect the two wires from the amplifier by splicing with the existing wires inserted in any of the two pairs.
Step 4: Connect to the Amplifier
Finally, connect the other end of the amplifier wires to the amplifier.
More detailed instructions for the two configurations are given below, including how to test them.
Wiring a 4-Ohm Subwoofer in Parallel
To wire a 4-ohm subwoofer in parallel, connect the similar terminals together:
- Connect the two positive terminals on either side. They are red in the picture below.
- Connect the two negative terminals on either side. They are black in the picture below.
Note: Your wires don’t need to be as thick (12-gauge) as the above ones. Thinner 18-gauge wire is fine for about 50 watts at up to 25 feet. If you need to go higher than these values, use a 16-gauge wire instead (or 14-gauge if you consider the power insufficient).
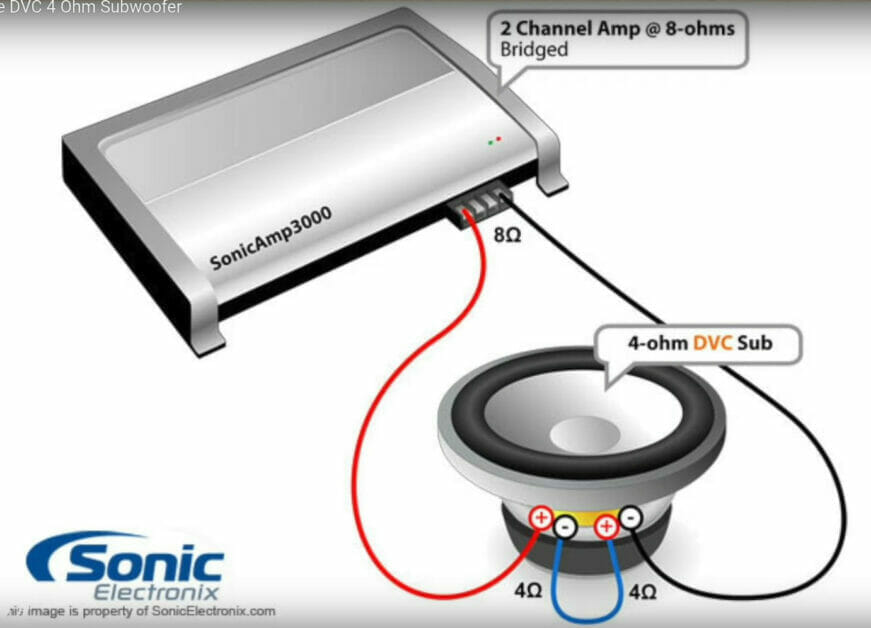
The next step is to connect the terminals to the amplifier. Follow the wiring diagram below. The two pairs of terminals are shown close together (rather than at opposite ends) so you can easily see the connections.
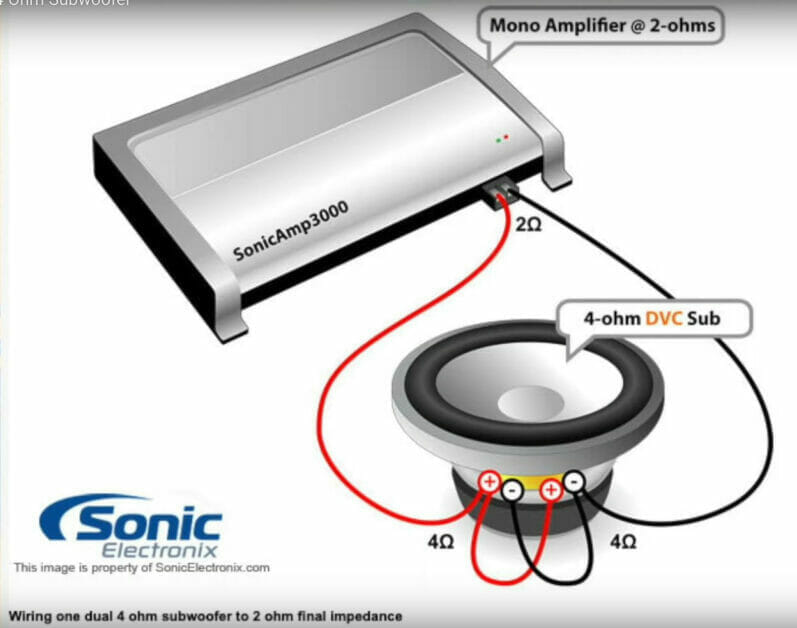
You can connect the amplifier to any pair of terminals (since both pairs are connected anyway). As shown below, splice the wires by twisting them together when inserting two wires into one terminal. The loose wires will connect to the amplifier.

Wiring a 4-Ohm Subwoofer in Series
To wire a 4-ohm subwoofer in series, connect the opposite terminals together:
- Connect the positive terminal to the negative one on the other side.
- Connect the negative terminal to the positive one on the other side.
The loose wires shown below will connect to the amplifier.
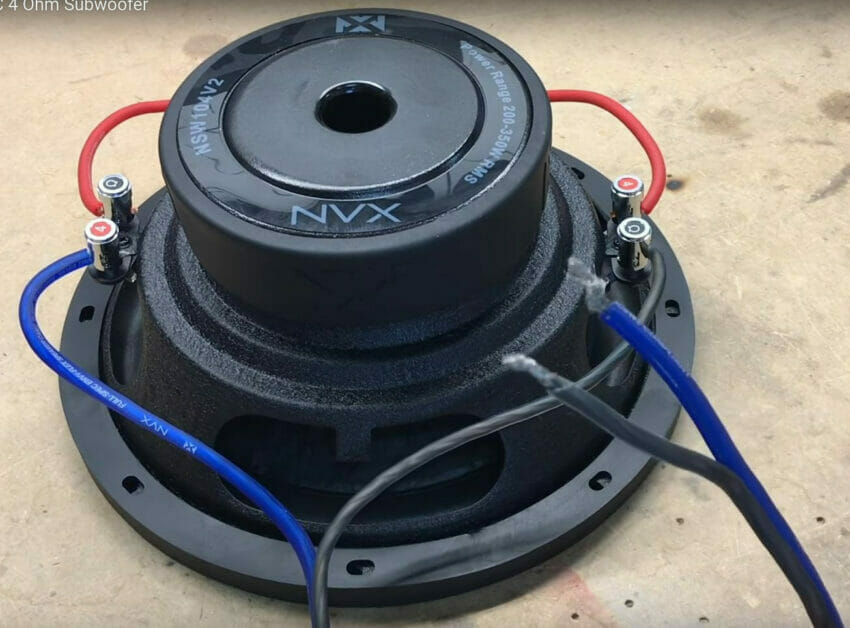
Connect the other end to the amplifier, as shown below.
Testing the Subwoofer
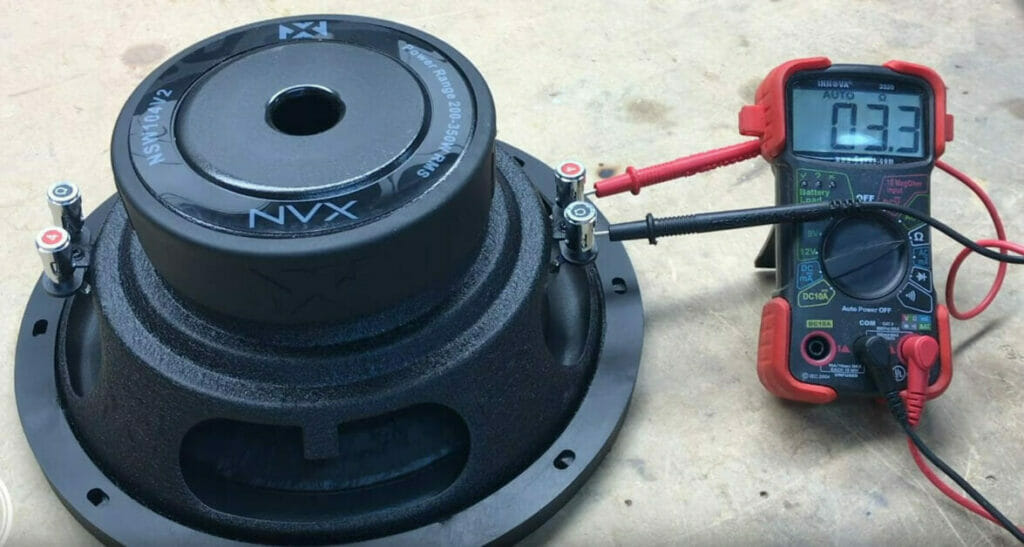
Conduct an impedance test by connecting the probes to each pair of a multimeter’s terminals on the subwoofer.
Set the multimeter to measure resistance. You should get a reading close to 4 ohms. It is 3.3 ohms in the example below, which is reasonable. Don’t expect it to be spot on 4 ohms.
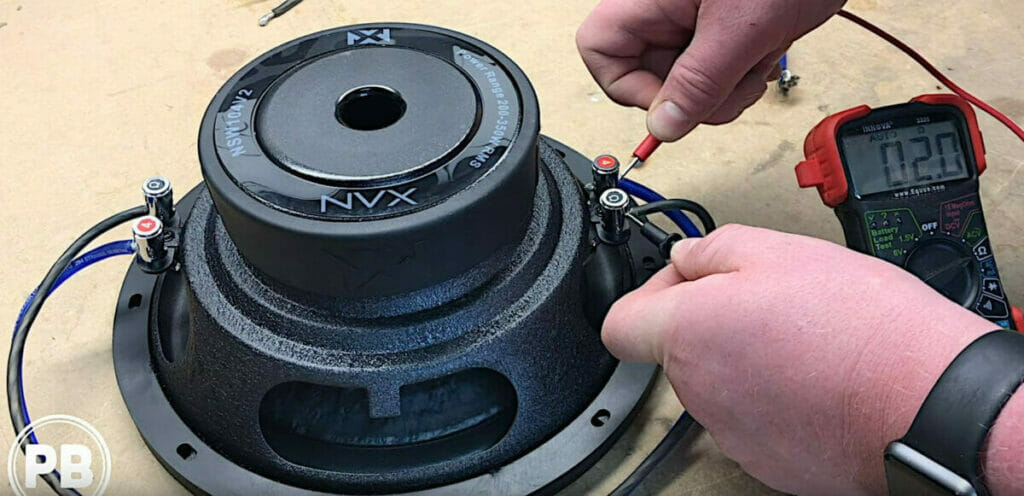
Repeat the above for the pair of terminals on the other side. A reading of 3.5 ohms was obtained in the above case, which is fine.
When connected in parallel, the reading should be close to 2 ohms. It’s exactly 2 ohms in this case. You can check at either end because the two pairs are connected.
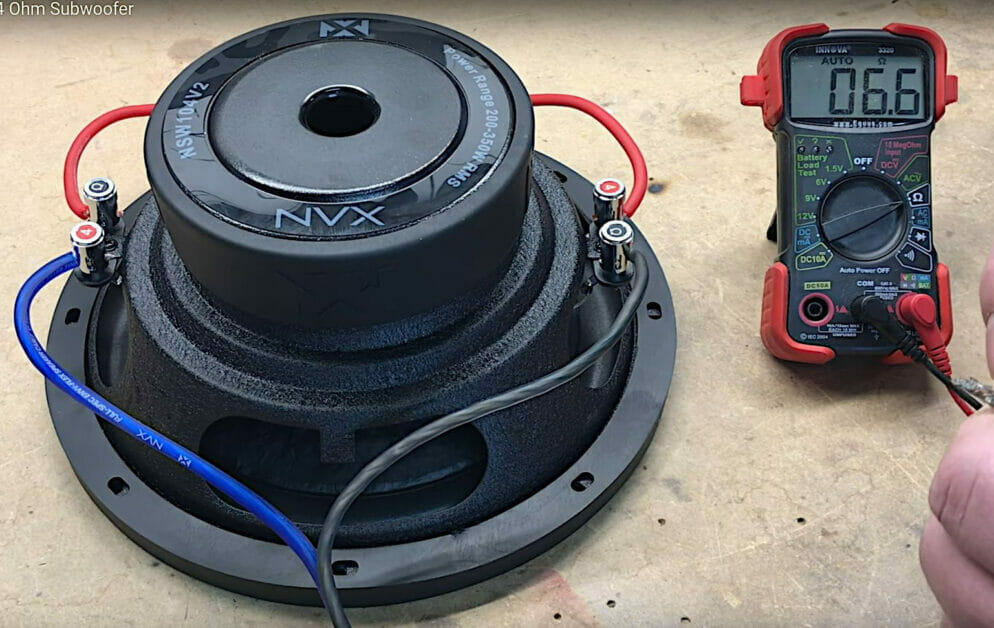
The reading should be close to 8 ohms when the wires are connected in series. It’s 6.6 ohms in this case, which is a bit less than expected. You can check at either end.
FAQs
- Why would I choose parallel wiring over series? Alright, here’s the deal: Wiring in parallel will reduce the load and bump up that amp’s efficiency and output power. It’s usually the way to go if you’ve got just one subwoofer. On the other hand, wiring in series raises the load and dials down the efficiency and output power. So, you might want to think twice unless you’ve got multiple subs to connect and you’re looking to cut back on the wiring.
- How do I know which terminals to connect? Please keep it simple! For parallel wiring, it’s like pairing up with your dance partner – you’re going to connect the same terminals. Positive with positive and negative with negative. For the series, it’s a little switcharoo. Positive connects to the opposite side’s negative, and vice versa.
- Which gauge wire should I use? It all depends on your setup. If you’re rocking up to 50 watts and staying within 25 feet, an 18-gauge will do just fine. Need more power or distance? Upgrade to 16-gauge or even 14-gauge. But remember, folks, bigger isn’t always better!
- What’s the difference between a DVC and a regular subwoofer? DVC stands for dual voice control, and it simply means that it has two sets of terminals. This gives you some flexibility in how you wire it to get the sound right!
- Why is my impedance reading, not exactly 4 ohms when testing? No need to sweat the small stuff! Sometimes, these readings can be slightly off due to manufacturing tolerances or the wiring’s resistance. You’re good to go as long as you’re in the ballpark!
- How do I connect to the amplifier? Check out those cool videos from Provo Beast Audio Installation! They lay it out step-by-step. You got this!
References
Website Resources:
- A DVC subwoofer. https://www.amazon.com.au/Rockford-Fosgate-R2D4-10-ROCKFORD-FOSGATE/dp/B004M5YI7A
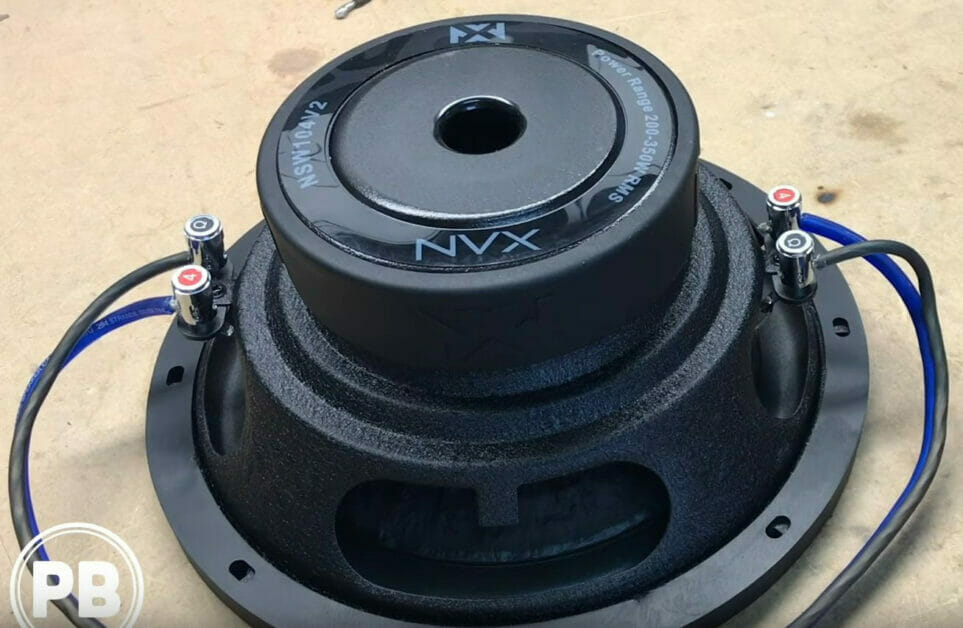
- 4-Ohm DVC subwoofer. https://www.hyperdrive.co.nz/product/118058/cerwin-vega-v104dv2-10-4-ohm-dvc-subwoofer-400w-rms
Video References:
Provo Beast Audio Installation