6 min read
How to Wire Subs to 1 Ohm (Steps – Parallel & Series)
Wiring a 1-ohm subwoofer to your audio system is possible if you have the right equipment and take the necessary precautions.
To wire a subwoofer to a 1-ohm amplifier:
If the impedance matches, wire in parallel by connecting the corresponding terminals on the subwoofer and amplifier.
If the impedance doesn’t match, you may need to wire in series by first bridging opposite polarity terminals or connecting another subwoofer and bridging.
Keep reading for more details about checking the amplifier’s impedance, determining the right speaker wire gauge to use, and how to apply one of the three possible configurations.

Wiring a 1-Ohm Subwoofer
The Amplifier’s Impedance Rating
Consider the whole audio system’s impedance by considering the amplifier’s impedance.
You can get this information from:
- The label at the back of the amplifier
- The amplifier’s owner’s manual
- The manufacturer’s website
Matching the amplifier’s impedance rating is important because it will ensure optimal system performance.
The critical thing is to ensure the subwoofer’s impedance rating is not too low compared to the amplifier’s rating. If it is, you may need to bridge and connect the subwoofer to the amplifier in parallel to match the impedance. It’s essential to avoid overheating and damaging the audio equipment.
For example, a 1-ohm subwoofer and 1-ohm amplifier are fine for connecting in parallel without bridging. Still, if the amplifier has a 2-ohm impedance, bridging will be necessary to make the total impedance 2-ohms, which would match the amplifier.
You can safely wire a matched setup in parallel, which is preferred. Otherwise, wire in series if the subwoofer’s impedance is lower than the amplifier’s, as it will raise it. But only wire in series if the amplifier can handle series wiring.
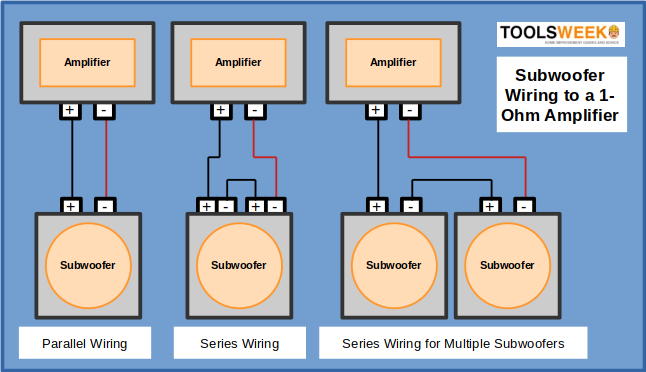
Wiring Diagram
Follow one of the wiring diagrams below once you understand which applies to your audio system setup.
Connecting to the Amplifier
Note that irrespective of the type of wiring, you only connect a positive terminal on the subwoofer to the positive terminal on the amplifier and likewise for the negative terminals.
Requirements and Precautions
You will need the following equipment to wire a 1-ohm subwoofer:
Speaker wires
Consider the subwoofer’s RMS power wattage when buying the speaker wire; otherwise, you risk the problem of signal loss and an overheating system.
Refer to the table below to determine the suitable gauge. If, for instance, you need a longer run than stated for a particular RMS power wattage, use the next thicker gauge speaker wire (lower rating).
| RMS Power Wattage of Subwoofer (in watt) | Length of Wire (in feet) | Speaker Wire Gauge |
| 500 | 4 | 12 |
| 1000 | 7 | 10 |
| 1500 | 10 | 8 |
| 2500 | 15 | 6 |
| 4000 | 20 | 4 |
Consult your subwoofer’s user manual (or the manufacturer’s website) if you know the RMS power wattage.
Ring Terminals
Although not essential, ring terminals will help to create a better connection between the subwoofer and wires.
It will help keep the wiring organized, prevent accidental contact with the wires, and help prevent signal loss. Buy the ring terminals according to the wire gauge.
Amp Wiring Kits
Alternatively, you can buy an Amp Wiring Kit.
It will have all the necessary components and save you time from buying them individually. It usually includes ring terminals and fuse holders beside the wires.
If you have most of the items or your audio system is already up and running, only buy what is necessary.
Safety Precautions
Take the following safety precautions:
- Ensure the subwoofer is compatible with the amplifier. Compare it with the amplifier’s impedance rating.
- Ensure you’ve got the right wire gauge for your requirement and match the amplifier’s specifications. Beware of the risk of overheating wires and the amplifier while the power is on.
- Turn the audio system off, including the amplifier and head unit, before rewiring it. Disable it completely by cutting it off from the power source. Wait a few minutes, even after turning the power off, because the amplifier might still be charged.
- Don’t let the wires touch one another or any metal surface while wiring.
Procedure for Wiring a 1-Ohm Subwoofer to a 1-Ohm Amplifier in Parallel
Follow this procedure for wiring in parallel if the subwoofer and amplifier have the same 1-ohm impedance. The wiring diagram on the left (for wiring in parallel) applies.
Step 1: Connect the Terminals
Connect the terminals as follows:
- Connect the subwoofer’s positive terminal to the amplifier’s positive terminal.
- Connect the subwoofer’s negative terminal to the amplifier’s negative terminal.
Step 2: Double-check and Power On
Double-check the wiring to ensure you did it correctly and it is secure.
Then, turn the amplifier’s volume down, turn the power on, and gradually increase the volume to ensure it works as expected.
Procedure for Wiring a Lower-Ohm Subwoofer to a 1-Ohm Amplifier in Series
We will wire in series if the subwoofer impedes less than the 1-ohm amplifier. The wiring diagram in the middle (for wiring in series) applies.
Step 1: Bridge the Terminals
Bridge a pair of opposite polarity terminals on the subwoofer.
Step 2: Connect the Terminals
Connect the terminals as follows:
- Connect the subwoofer’s remaining positive terminal to the amplifier’s positive terminal.
- Connect the subwoofer’s remaining negative terminal to the amplifier’s negative terminal.
Step 3: Double-check and Power On
Double-check the wiring to ensure you did it correctly and it is secure.
Then, turn the amplifier’s volume down, turn the power on, and gradually increase the volume to ensure it works as expected.
Procedure for Wiring Multiple Subwoofers to a 1-Ohm Amplifier in Series
We will wire in series if you have multiple subwoofers with a lower impedance than the 1-ohm amplifier. The wiring diagram on the right (for wiring multiple subs in series) applies.
Step 1: Bridge the Terminals
Bridge a pair of opposite polarity terminals on each subwoofer.
Step 2: Connect the Terminals
Connect the terminals as follows:
- Connect the subwoofer’s remaining positive terminal to the amplifier’s positive terminal.
- Connect another subwoofer’s remaining negative terminal to the amplifier’s negative terminal.
Step 3: Double-check and Power On
Double-check the wiring to ensure you did it correctly and it is secure.
Then, turn the amplifier’s volume down, turn the power on, and gradually increase the volume to ensure it works as expected.
References
Website Resources:
- A 1-ohm amplifier. https://www.walmart.com/ip/BOSS-Audio-Systems-PD5000-Phantom-Series-Car-Amplifier-3000-High-Output-Class-D-Monoblock-1-Ohm-High-Low-Level-Inputs-Pass-Crossover-Full-Range-Hook-/45006992
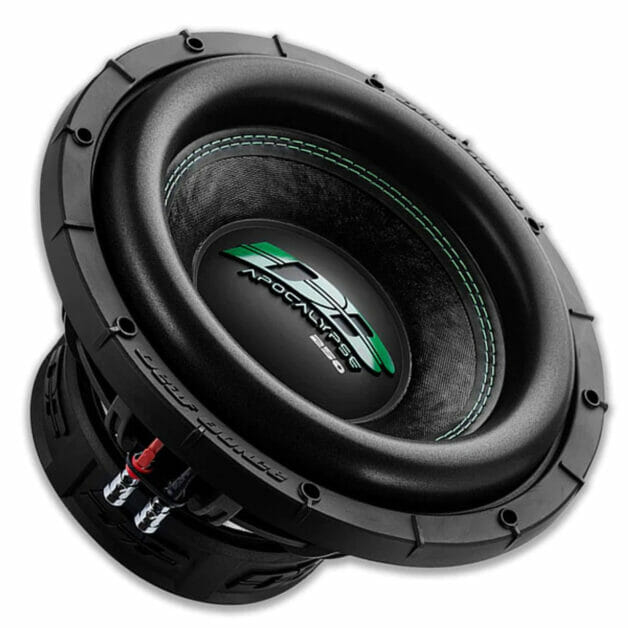
- A 1-ohm subwoofer. https://wccaraudio.com/deaf-bonce-apocalypse-db-sa252-d1-12-2000-watt-dual-1-ohm-subwoofer/