17 min read
How to Wire 3-Way Switches for Multiple Lights (6 Step DIY Guide)
Wiring three-way switches for multiple lights can seem intimidating, but I assure you it’s more straightforward than you think.
Three-way switches allow you to control a light source from two separate points. It’s a common requirement in staircases and large rooms with multiple entryways. This setup is particularly handy when you want the flexibility to switch on your lights from various locations.
Key Takeaways: These are the important steps to wire 3-way switches for multiple lights:
- Turn off the power at the circuit breaker
- Trace the electrical path from the power source
- Securely attach the ground wire
- Connect the black wire to the common screw of the 3-way switch
- Use a 14-3 cable to connect the second switch
- Extend the wiring to the lights
By the end of this guide, you’ll be confidently wiring up your three-way switches for multiple lights without breaking a sweat.
Understanding 3-Way Switch Mechanics
Do you ever wonder how two different switches can control the lights in your hallway?
In a nutshell, 3-way switches work by alternating the electrical flow path between two separate circuits.
Here’s a simple breakdown:
- Current enters first 3-way switch
- One traveler wire is selected based on the switch position.
- Voltage travels down the selected wire.
- Lights are powered based on the second 3-way switch’s position.
What happens when you flip either one of your three-way switches? You’re diverting power from one traveler wire to another, controlling multiple lights independently!
So there you have it – an easy-to-understand explanation of how these handy little devices work.
Safety First: The Golden Rule of Electrical Work
Regarding any electrical project, there’s one mantra I swear by – safety first.
Remember, you’re dealing with a power source that doesn’t discriminate between a novice and an expert electrician. A single mistake could be fatal or cause serious injury.
When wiring 3-way switches for multiple lights, it’s crucial to:
- Disconnect the power supply at your circuit breaker or fuse box before you start.
- Use insulated tools and wear non-conductive shoes.
- Never touch bare wires or terminals unless you are certain there is no current flowing.
It’s also worth mentioning that every locality has building codes regarding electrical work at home. So do yourself a favor and check these out before getting started.
Remember that enthusiasm is great for DIY projects like wiring 3-way switches for multiple lights, but nothing trumps taking precautions and ensuring your safety.
Let’s move on to our next section, which will guide us through wiring these switches.
Choosing the Right Tools for the Job
When wiring 3-way switches for multiple lights, having the right tools can make all the difference.
I’ve seen my fair share of DIY projects go haywire due to improper tool use. You don’t want to be halfway through your project only to realize you’re missing a crucial piece of equipment.
So, here’s the rundown:
Screwdriver Set: Think of this as your DIY bread and butter. Sounds basic, right? But picture this: installing a switch without it is like showing up to a beach party without sunscreen – a surefire way to get burned! Ensure you’ve got both the flat-head and Phillips-head in your kit. Trust me, both come in handy more than you’d think!

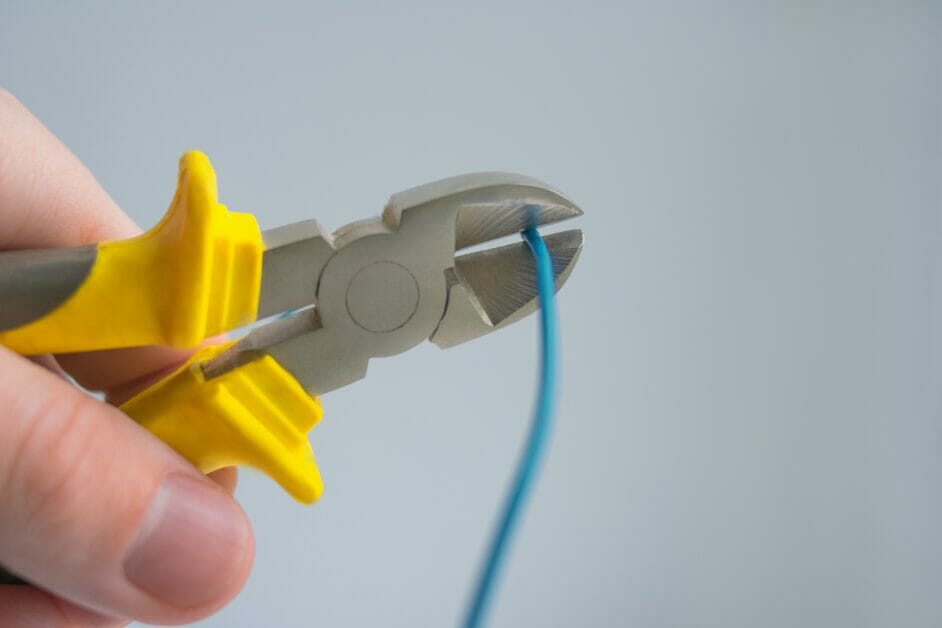
Wire Strippers: No, not for a cool magic trick. We’re talking about stripping insulation from electric wires. Connecting insulated wires is like trying to text with mittens on — it just doesn’t work!
Voltage Tester: The unsung hero of electrical DIY! Before you get too touchy-feely with those wires, this tool will let you know if any current zips through. Think of it as your protective guardian, always there to keep shocks at bay.

Safety Gear: Hey, heroes wear capes, but DIYers? We wear rubber gloves and protective eyewear! This isn’t a fashion statement, folks. We’re dealing with electricity, so it’s better to be safe than you get the picture.

Choosing the right tools will make your job easier and ensure it’s done safely and correctly. Make sure you’re geared up and ready to go! And remember, the real magic happens when preparation meets action.
Classic Way: A Step-by-Step Guide
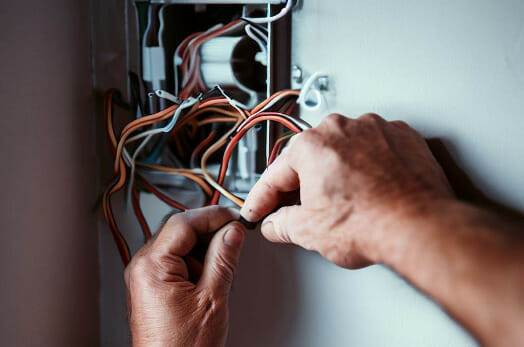
Diving right into it, you’ll find the classic way of wiring 3-way switches for multiple lights is not as daunting as it may seem.
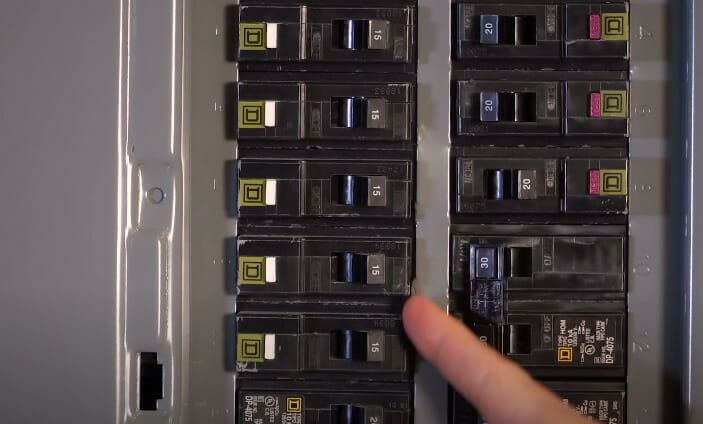
First off, safety should always be your utmost priority. Always switch off the circuit breaker’s main power before starting any electrical work. A voltage tester is also recommended to ensure no current flows through the wires you are about to handle.
Here’s a familiar scene: a long corridor in your home where you wish to control lights from either end. Handy, right? It’s a common setup, and it’s simpler than it sounds.
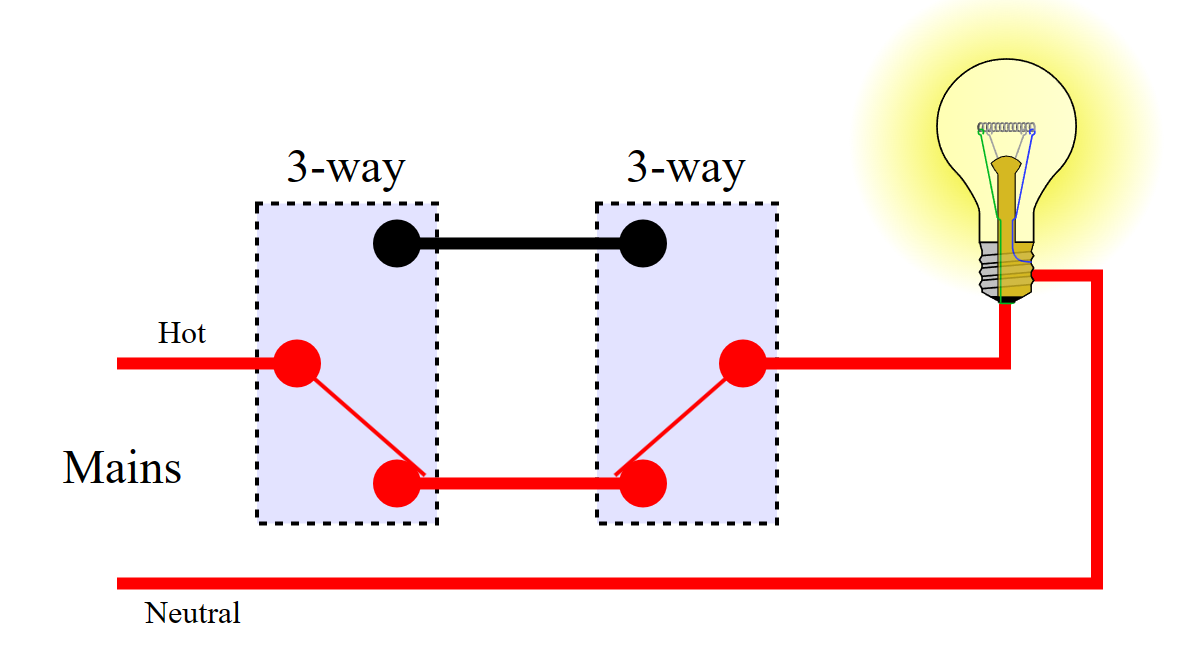
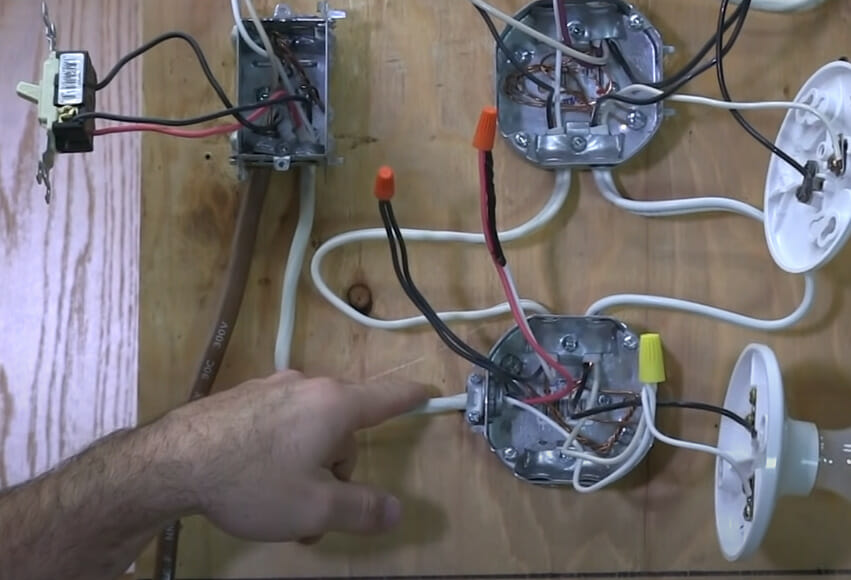
Step 1: Decoding the Electrical Pathway
Before manipulating wires and switches, find the route the electrical power takes. Starting from the power source, this energy flows seamlessly into the switches, and from there, its final destination is the lights awaiting its spark.
Typically, your primary companion in this endeavor will be a 14-2 wire. Comprising three distinct components – a grounding wire, a neutral white wire, and a fervently active black wire – it’s the backbone of your setup.
Step 2: The Importance of Grounding
Grounding isn’t just a term; it’s an essential safety mechanism. Begin by affixing the ground wire securely onto a screw located at the rear of your preliminary switch box.
A piece of advice for enthusiasts in the US: grounding is often imperative for your switches, too. Never overlook this step!
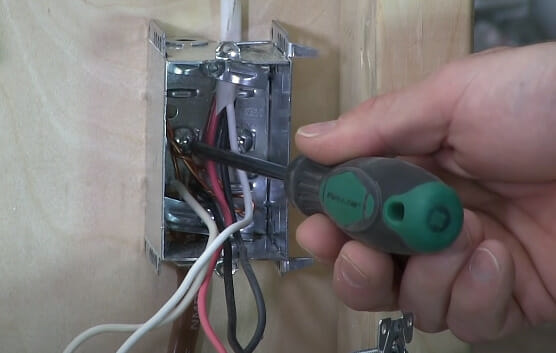
Step 3: Destination of the Black Wire
The black, or hot wire as it’s often termed, has its specific niche. Its rightful abode is the common screw of the 3-way switch. Identifying this screw is straightforward; its distinct black hue is a giveaway.
Think of it as the primary junction, the nexus where power distribution is orchestrated.
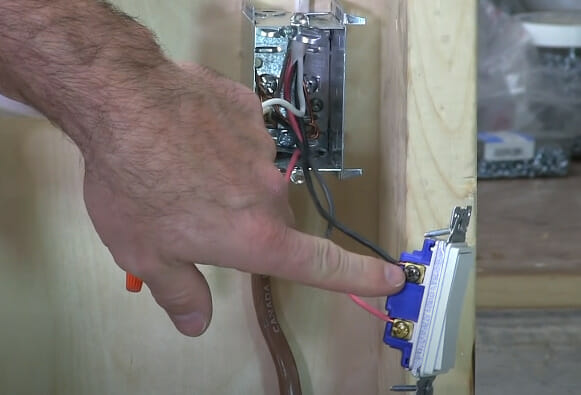
Step 4: Welcoming the Second Switch

As we progress, the role of the 14-3 cable emerges. This is where the symphony of colors comes into play.
This cable’s red and black wires are to be snugly attached to the lustrous brass screws on your secondary switch.
As for the neutral wire? It finds its counterpart in the neutral wire from the first switch, forming a harmonious connection.
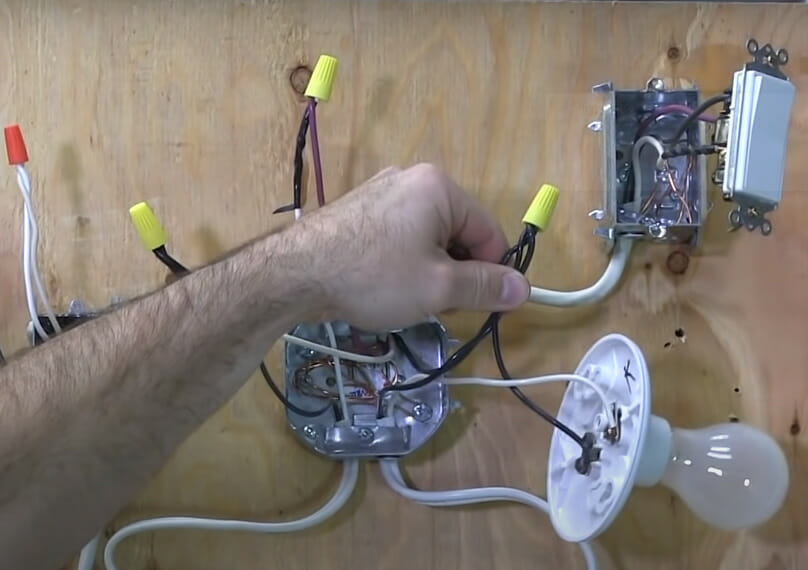
Step 5: Illuminating the Scene
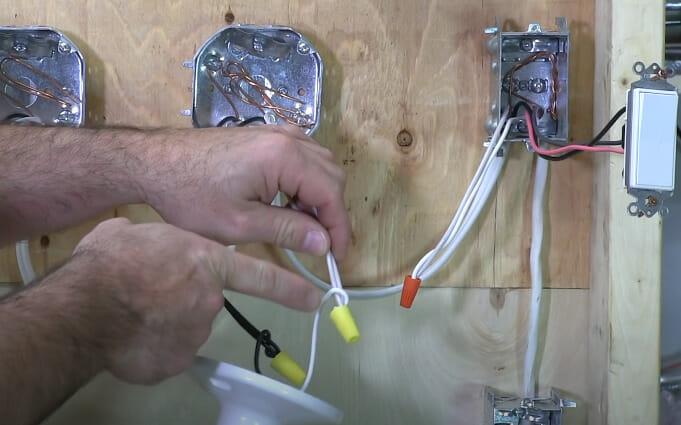
The journey doesn’t halt here. Introduce another 14-2 wires, originating from the second switch and culminating at your lights.
A guiding principle here is alignment. The black wire from this cable should be congruent with the common screw on your switch.
Step 6: Amplifying the Brilliance
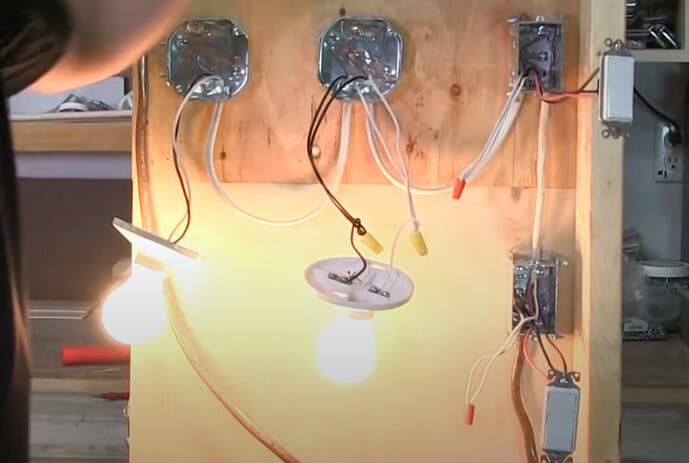
Integrating additional lights is seldom a challenge for homes that resonate with luminosity. The process is akin to an elegant dance – the black and white wires gracefully intertwine, ensuring they’re congruent with their corresponding partners on the lights.
It’s essential to remember that mastery in any domain, including electrical work, isn’t an overnight achievement. It’s the culmination of practice, repetition, and learning from occasional mistakes.
If you stumble in your initial attempts, view these as learning opportunities rather than setbacks.
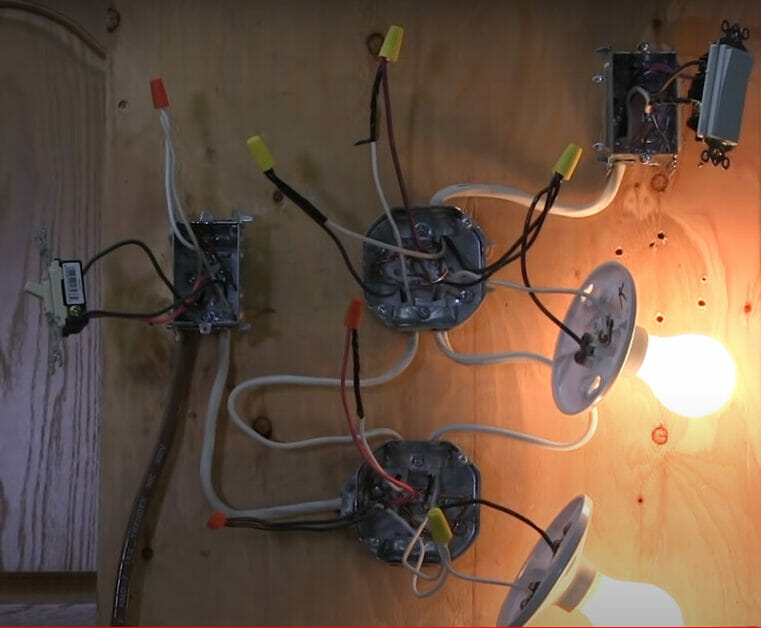
Power-Through-Lights: An Alternative Approach
Let’s dive into the world of power through lights.
This approach directs the power through the lights before hitting the second switch. Here are the steps:
Step 1: Kick-starting the Process at the Switch

Every journey begins with a first step, and in our electrical work, this involves the crucial first switch. As the electrical power makes its grand entrance into this switch, your task is to ally the black wire of your power source and the all-important common screw.
Step 2: Charting the Path of Illumination
Having set the stage with the initial switch, it’s time to beckon the light into your setup. Reach out for a 14-3 wire; consider it the bridge between your switch and your system’s first beacon of light.
A nuance to remember: the black wire extending its arm from the switch entwines with its counterpart – another black wire headed to your following light. And the role of the red wire? It finds its mate in a white wire, transforming into a hot connection for this setup.
Step 3: Finishing Touches with the Second Switch
Focus on the last light. From this luminary point, a 14-3 wire paves its way to the much-awaited second switch. Watch as the black wire settles confidently onto the common terminal.
Meanwhile, like welcoming hosts, the gleaming brass screws embrace the white-hot wire alongside its red ally.
Wrapping Up the Radiance
And voila! We’ve just walked through two tried-and-true methods for wiring 3-way switches for an ensemble of lights. There’s a certain elegance to the traditional approach in Scenario 1. But home improvement is all about personalization. So, pick your favorite!
Sometimes, witnessing the process can offer more clarity than mere words. Check out some insightful videos or DIY forums for expert advice.
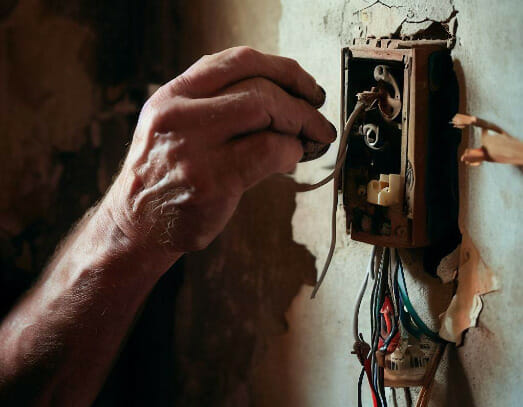
Pitfalls and Challenges in 3-Way Wiring
Let’s tackle the subject of the drawbacks and difficulties that you might encounter when wiring 3-way switches for multiple lights.
- Wire Whirlwind: Wire wires can be like that pesky puzzle piece you can’t place – especially if they’re mislabeled. You’ve got your hot, ground, neutral, and those traveler wires. Lose track? You might have a wonky light system or a real safety concern. So label them right and keep them straight!
- Lighting Limbo: Now imagine getting your groove on with some mood lighting, and suddenly, one bulb’s acting like a disco strobe, outshining the rest! If your fixtures aren’t playing nice in a parallel circuit setup, some could shine a tad brighter than their pals.

- Grounding Games: I can’t stress this enough – don’t skip out on grounding. It’s like leaving out the foundation when building a house. You’re setting yourself up without proper grounding for shocking surprises or a fire fiesta.
- Old House Hijinks: If you’re in one of those charming, older homes with wiring that’s more vintage than vogue, brace yourself. They may have circuits just chilling in the two-way switching era. Bringing them up to date? Let’s call it a hands-on history lesson.
So, while these 3-way switches can jazz up your lighting game, be prepared to waltz through a few challenges. But remember, every challenge is a chance to shine brighter.
Keep that tool belt tight, and let’s light it up!
Economic Implications: DIY Vs. Professional Installation
When wiring 3-way switches for multiple lights, one of the first things you might wonder about is cost.
I’ve researched and crunched the numbers to understand better what you’re looking at regarding economic implications.
Here’s what we get:
| Installation Type | Material Costs | Time (hrs) | Total Cost |
|---|---|---|---|
| DIY | $30 – $100 | 2 – 5 | $30 – $100 |
| Professional | Included | 1 | $150 – $250 |
But remember, folks, while saving money is always appealing – especially when budgets are tight – safety should never be compromised. Working with electricity isn’t something to take lightly; it can lead to serious injury or even death if not handled correctly.
If you’re confident in your abilities and understand all safety precautions, tackling this as a DIY project could save you some cash. However, if you have any doubt or lack of experience, it’s best to leave this job up to the professionals. That way, peace of mind and an expertly wired system are guaranteed.
Remember that certain electrical works require permits and inspections by law – another point for considering professional installation!
Weigh your options carefully before deciding which route to take for wiring 3-way switches for multiple lights.
Frequently Asked Questions (FAQs) about 3-Way Switch Wiring.
1. What exactly is a 3-way switch setup?
Hey there, lighting enthusiast! Think of a 3-way switch as your home’s secret sauce. It lets you control a single light source from two different spots. Super handy for those big rooms or long staircases, right? Imagine entering your living room from the front and back and being able to control the chandelier from both ends. That’s the magic of the 3-way!
2. How do 3-way switches work?
Some insider info: These switches alternate the electrical flow between two circuits. It’s like a railroad track switch – you decide which direction the train, or in this case, electricity, goes. Flip a switch here; the light goes on; flip another switch there, and the light goes off. Pure magic!
3. Is it safe to wire these switches myself?
Safety first, always! If you’ve got some DIY spirit, it’s doable. But remember, turn off that power at the circuit breaker every time. For Pete’s sake, Get some insulated tools and wear non-conductive shoes. If you’re ever unsure, call up a professional. No DIY project is worth a shock or worse.
4. What tools do I need to get started?
Gear up, DIY warrior! You’ll need a trusty screwdriver set, wire strippers (no, not for a magic trick), a voltage tester (your guardian against shocks), and don’t forget your safety gear: rubber gloves and protective eyewear. Protect those peepers!
5. Do you have any tips for old houses with vintage wiring?
Ah, the charm of an old house. And the… not so charming vintage wiring. If you’re in one of those timeless gems, tread with caution. The wiring might be old-school, so getting it up to today’s standards might feel like a trip back in time. When in doubt, bring in a pro to take a peek.
6. How about permits? Do I need one?
That’s a golden question! Depending on where you live, certain electrical tasks need those official thumbs-up in the form of permits and inspections. Before you dive in, check your local building codes and see what’s up.
7. How do professionals ensure safety when working with 3-way switches?
Professionals typically follow a standard safety protocol, including turning off the main power supply, using insulated tools, and wearing safety gear like gloves and safety glasses.
8. How can I determine if I should attempt DIY or hire a pro?
If you feel unsure or think the task might be time-consuming, hiring a pro is a good sign. Remember, safety and peace of mind are paramount.
9. What are the typical scenarios for using a 3-way switch system?
3-way switches are usually found in spaces where users might need access to light controls from different points, like hallways where switches can be placed at both ends or rooms with multiple entrances.
References
Studies:
- “Electrical Safety in the Home” by the National Fire Protection Association (NFPA). https://www.nfpa.org/Public-Education/Fire-causes-and-risks/Top-fire-causes/Electrical
- “U.S. Home Electrical System Trends” by the Electrical Safety Foundation International (ESFI). https://www.esfi.org/
Organizations:
- National Electrical Contractors Association (NECA). https://www.necanet.org/about-neca
- Electrical Safety Foundation International (ESFI). https://www.esfi.org/
Books:
- “Wiring a House” by Rex Cauldwell. https://www.amazon.com/Wiring-House-Completely-Revised-Updated/dp/162710674X
- “The Complete Guide to Wiring” by Black & Decker. https://www.amazon.com/Black-Decker-Complete-Photo-Wiring/dp/0760371512
- “Electrical Wiring Residential” by Ray C. Mullin and Phil Simmons. https://www.amazon.com/Electrical-Wiring-Residential-Ray-Mullin/dp/1285170954
Website Resources:
- HomeAdvisor’s Electrical Safety Guide. https://www.homeadvisor.com/r/electrical-wiring-safety-at-home/
- Mike Holt Enterprises. https://www.mikeholt.com/product-category-list.php?id=1
Video References:
HouseImprovements
Rundown Reborn
Family Handyman