11 min read
How to Test a Relay with Multimeter (Step-by-Step Guide)

Relays, those essential components in cars and home systems, need regular check-ups to avoid surprises.
Quick Summary:
🔍 Step 1: Locate the Relay
🧽 Step 2: Check and Clean the Connectors
📏 Step 3: Grab Your Multimeter
🔋 Step 4: Energize the Electromagnet Coil
💡 Step 5: Connect a Test Light
⚡ Step 6: Test the Relay’s Voltage
This article will delve into the nitty-gritty of testing a relay using a multimeter.
What You’ll Need for Relay Testing
Checking your vehicle’s relay is a straightforward procedure that does not require a complete kit. To start relay testing, you’ll need the following items:
Tools and Materials:
- A trusty digital multimeter (DMM)
- High-impedance test light
- Maybe a spare relay
- Jumper wires (they always come in handy)
Steps to Relay Test
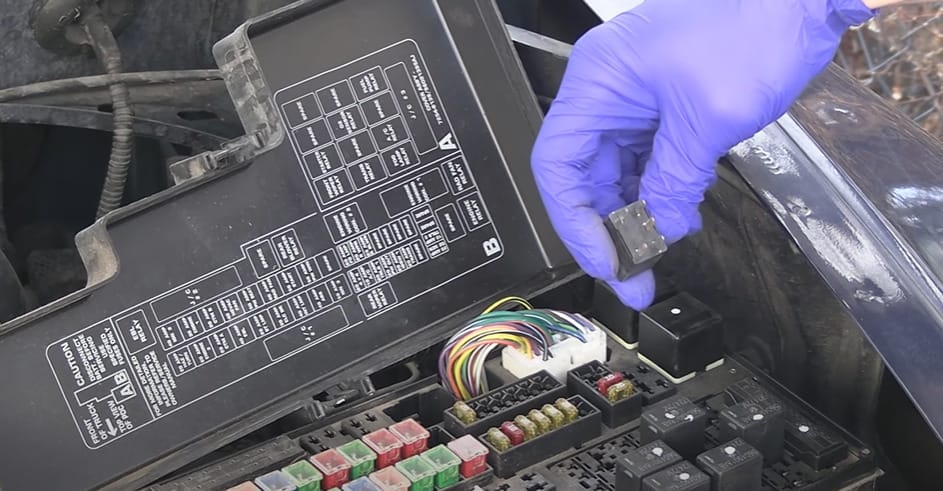
Step 1: Locate the Relay
I remember wrestling with an old truck one time. The relay was hidden, like a treasure hunt under the hood.
Always start with your service manual; it’s your map to the treasure.
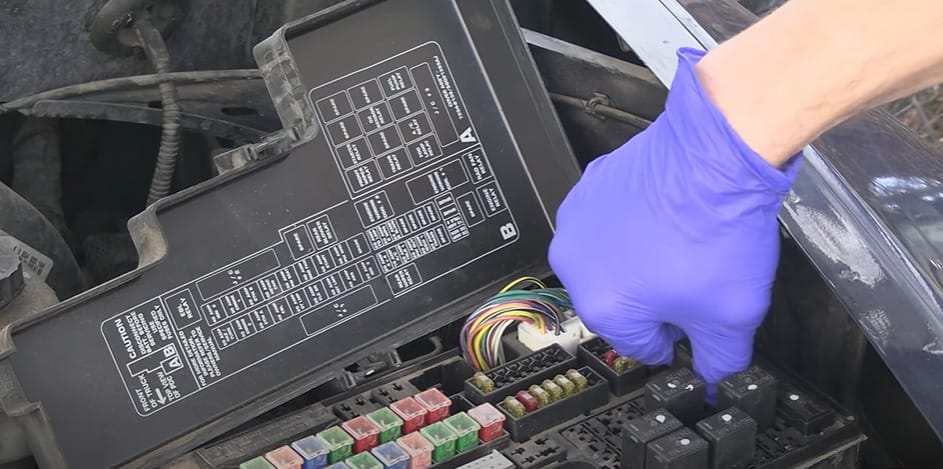
Step 2: Check and Clean the Connectors
Dirty connectors can be deceiving. Once, a quick cleanup saved me from buying a new relay for my vintage radio. It was just a bit of grime-playing tricks!
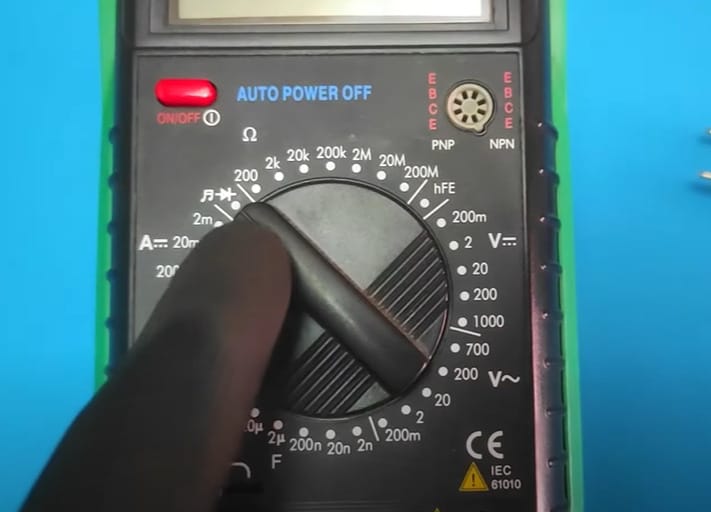
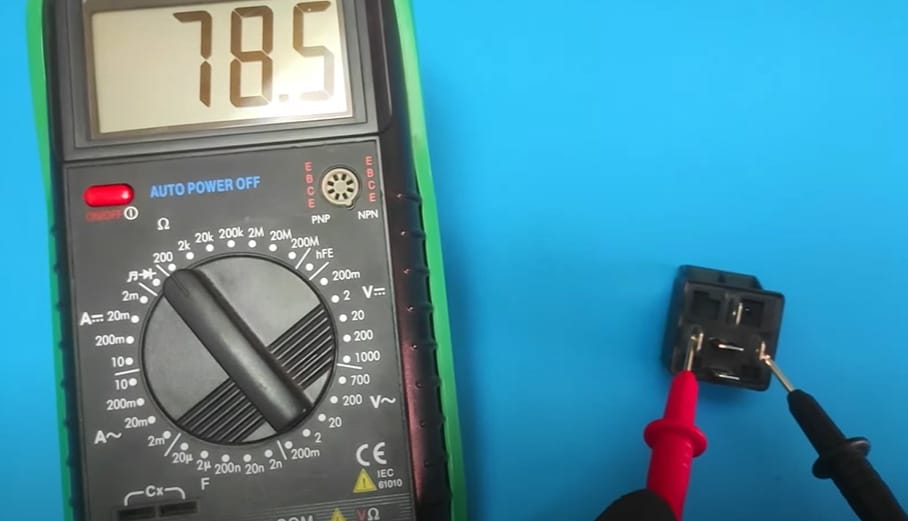
Step 3: Grab your Multimeter
Let’s talk about setting your multimeter right – it’s a game-changer. I remember working on my old camper van, fussing over a relay I thought was toast.
- Step 1: I switched my trusty multimeter to continuity mode.
- Step 2: Connected the leads between the COM and NC terminals while the relay was relaxed, and bam! It turned out to be just a loose connection.
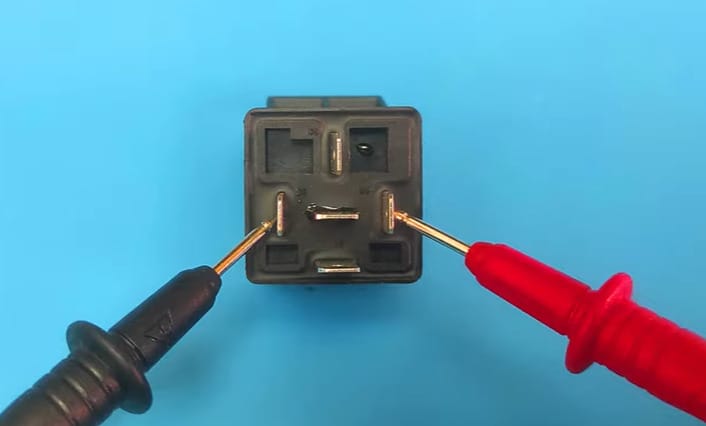
It has saved me from replacing a perfectly good relay. It just goes to show that the simple checks make all the difference.
Step 4: Energize the Electromagnet Coil
That ‘click’ when the coil energizes is music to my ears. It’s like the relay’s saying, “I’m still kicking!
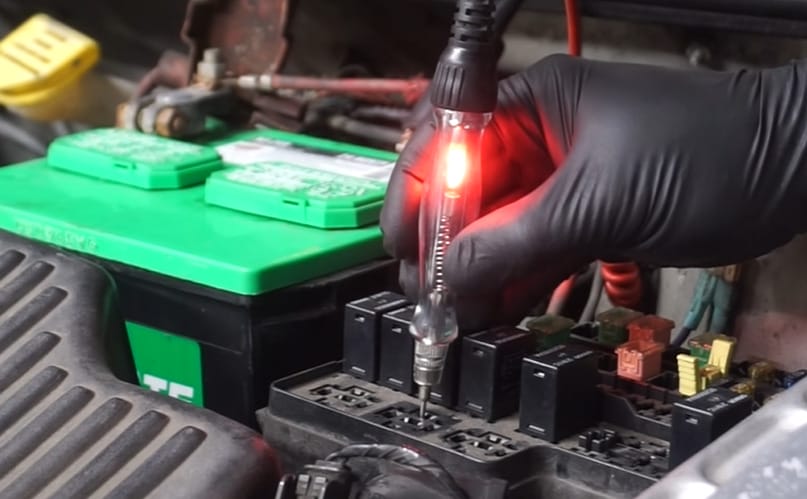
Step 5: Connect a Test Light
Always double-check your setup. I once forgot, and let’s say the fuse wasn’t happy.
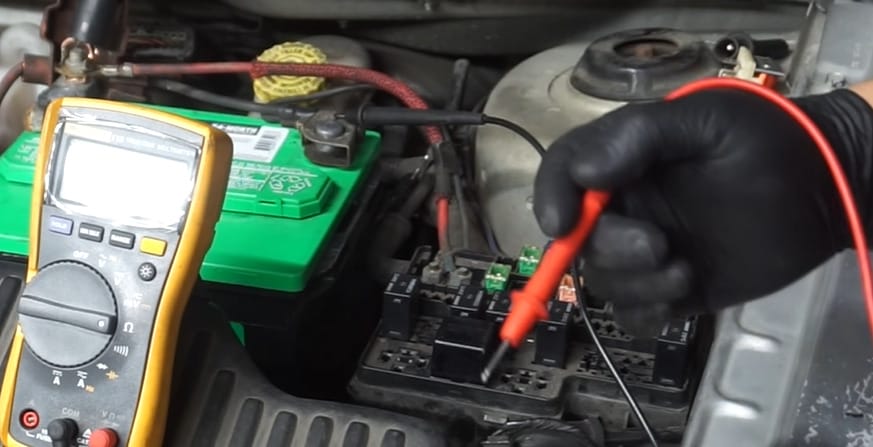
Step 6: Voltage’s Relay Test
Mismatched voltages can tell tales. In my buddy’s boat, it hinted at a sneaky wiring issue. Always trust but verify with your multimeter.
Maintenance Tips: Keeping Your Relays and Multimeters in Top Shape
Alright, DIYers and tech buffs! Keeping your relays and multimeters in great condition isn’t just about performance, safety, and reliability.
Here are some straightforward, no-nonsense tips to ensure these crucial tools stay in tip-top shape.
Relay Maintenance Tips:
- Regular Cleaning: Dust and debris are the enemies of relays. Gently clean the relay surface with a soft brush or cloth to prevent buildup that can cause overheating or connection issues.
- Check for Corrosion: Routinely inspect relay contacts for signs of corrosion. If you spot any, a bit of contact cleaner can work wonders.
- Tighten Connections: Loose connections affect performance and can be a safety hazard. Periodically tighten any screw terminals.
- Avoid Moisture: Keep your relays in a dry environment. Excess moisture can lead to rust and electrical faults.
- Monitor Performance: Pay attention to any signs of wear or irregular function. If a relay seems to be acting up, replacing it sooner rather than later is better.
Multimeter Maintenance Tips:
- Battery Care: Regularly check and replace the batteries in your multimeter to prevent leakage and ensure accurate readings.
- Storage is Key: Store your multimeter in a protective case to shield it from dust, moisture, and accidental drops.
- Probe Care: Keep the probes and leads of your multimeter in good condition. Frayed or damaged leads can lead to inaccurate readings and are a safety risk.
- Clean Contacts: Wipe the probe tips with a dry cloth after use to keep them clean and free from oxidation.
- Firmware Updates: If you’re using a digital multimeter, keep its firmware updated to ensure you get the most accurate and reliable readings.
- Calibration Checks: Have your multimeter calibrated periodically, especially if used frequently or in critical measurements. This ensures its readings remain accurate over time.
Taking care of your relays and multimeters doesn’t take much time, but it greatly affects their performance and lifespan.
Common Mistakes to Avoid When Testing Relays
Hey there, electrical enthusiasts! Testing relays is critical, but it’s easy to trip up if you’re not careful.
Let’s go through some common mistakes people make while testing relays and how to steer clear of them, ensuring your testing goes smoothly every time.
| Mistake | Description | How to Avoid |
|---|---|---|
| Incorrect Multimeter Setting | Using the wrong settings can result in inaccurate readings or damage to the multimeter. | Double-check your multimeter is set to the correct measurement mode before starting. |
| Overlooking Visual Inspection | Skipping a visual check can miss physical damage or corrosion on the relay. | Always conduct a thorough visual inspection before using your multimeter. |
| Ignoring Safety Precautions | Testing without proper safety measures can lead to accidents or injuries. | Disconnect all power sources and wear appropriate safety gear before testing. |
| Testing Under Load | Testing a relay under load can give misleading results and be dangerous. | Remove the relay from its environment or ensure it’s not under any load before testing. |
| Forgetting to Check Relay Polarity | Incorrect polarity, especially in diode relays, leads to improper testing. | Verify the relay’s polarity, if applicable, before conducting any tests. |
| Using Damaged Test Equipment | Faulty or damaged equipment can yield incorrect results. | Regularly inspect and replace your multimeter and test leads if they show signs of wear or damage. |
| Misinterpreting the Results | Misreading test results can lead to incorrect conclusions about the relay’s condition. | Familiarize yourself with the meaning of test results and consult the relay’s datasheet or a professional if unsure. |
| Neglecting Environmental Factors | Environmental factors like temperature and humidity can affect the relay’s performance but are often overlooked. | Consider the environment where the relay operates and try replicating these conditions during testing. |
This table highlights key mistakes to avoid for accurate and safe relay testing. Understanding your tools and your testing components is crucial for effective diagnostics.
Safety Precautions: Ensuring Safe Relay Testing
Safety first, always! I remember working on a car’s relay and thanking my stars. I had my insulated gloves on when I accidentally touched a live wire.
Let’s break down the key safety measures you should take to avoid common risks during relay testing.
- Power Down Before You Start:
- Risk: Testing relays while systems are live can lead to electric shock.
- Mitigation: Always ensure that the power supply to the relay is completely turned off. Double-check this before beginning any testing.
- Wear Appropriate Protective Gear:
- Risk: Exposing yourself to potential electric shock or short circuits.
- Mitigation: Wear safety glasses to protect your eyes and insulated gloves to prevent electric shock.
- Use Reliable Testing Equipment:
- Risk: Faulty equipment can give incorrect readings and pose safety hazards.
- Mitigation: Ensure your multimeter and other testing tools are working well. Regular checks and calibration are key.
- Be Mindful of Your Surroundings:
- Risk: Working in a cluttered or damp environment can cause accidents.
- Mitigation: Keep your workspace clean and dry. Avoid testing in areas where there’s a risk of water contact.
- Avoid Working Alone:
- Risk: In case of an emergency, working alone can be risky.
- Mitigation: Work with a partner, especially in complex or potentially hazardous situations.
- Educate Yourself on Relay Types:
- Risk: Different relays might require different handling and safety protocols.
- Mitigation: Understand the specifics of the relay you are testing. Knowledge of its functionality and structure can prevent mishandling.
- Check for Damaged Components:
- Risk: Testing with damaged relays or components can be dangerous.
- Mitigation: Inspect relays for any visible damage or wear before testing. If a relay appears damaged, it’s safer to replace it.
- Proper Disposal of Faulty Relays:
- Risk: Improper disposal can lead to safety hazards or environmental harm.
- Mitigation: Dispose of any faulty or worn-out relays following local guidelines for electronic waste.
Keeping these safety measures in mind will protect you and ensure the reliability of your testing process. Remember, in the world of electrical testing, safety always comes first. Stay safe, and keep those relays functioning smoothly!
Frequently Asked Questions
- Can I Test Any Relay With This Method?
- Absolutely! This method is versatile and works for most types of relays. However, always double-check the requirements for the relay you’re testing, as some might have unique characteristics or configurations.
- How Often Should I Test My Vehicle’s Relays?
- I’d recommend checking them annually or whenever you’re performing routine maintenance on your vehicle. It’s also a good idea to test them if you’re experiencing electrical issues that might be relay-related.
- Is It Safe To Test Relays On My Own?
- Yes, it’s safe if you follow the proper steps and precautions. Always disconnect power before testing, wear protective gear, and use reliable equipment. It’s wise to consult a professional if you’re unsure or uncomfortable.
- What Are The Signs Of A Faulty Relay?
- Common signs include unusual noises (like clicking sounds), the device controlled by the relay not functioning correctly, or visible damage to the relay. Sometimes, a multimeter test can reveal issues not immediately apparent.
- Do I Need Special Tools To Test A Relay?
- The essentials are a digital multimeter and a high-impedance test light. Jumper wires can also be helpful. You don’t need an extensive toolkit for basic testing.
- What Should I Do If My Relay Fails The Test?
- If the relay fails during testing, it’s best to replace it. Ensure you get the correct type of relay for your specific application. Remember, a malfunctioning relay can lead to more significant electrical problems.
- Can Bad Weather Affect My Relay’s Performance?
- Yes, extreme weather can impact a relay’s performance. Cold can make a metal contract and change contact points, while heat can cause expansion and affect electrical resistance. It’s always good to consider the environment where the relay operates.
References
Organizations:
- InterNational Electrical Testing Association (NETA). https://www.netaworld.org/
- IEEE (Institute of Electrical and Electronics Engineers). https://www.ieee.org/
Books:
- “The Art of Electronics” by Paul Horowitz and Winfield Hill. https://artofelectronics.net/
- “Electrical Engineering 101” by Darren Ashby. https://www.barnesandnoble.com/w/electrical-engineering-101-darren-ashby/1100694184
Website Resources:
- Fluke Corporation Website. https://www.fluke.com/
- Klein Tools Website. https://www.kleintools.com/
- Tektronix Website. https://www.tek.com/en
Video References:
⚙️Homie Hektor⚙️
Electro University
Make It Easy Mechanic