14 min read
How to Cover Wire Shelves (2 Quick Methods)
Wire shelves, while practical, can sometimes let items wobble or fall through.
Improve stability, longevity, and aesthetic appeal using adhesive shelf liners or custom-fit wood panels. Benefits include smoother surfaces, protection from wear, aesthetic upgrades, customization, cleanliness, and noise reduction.
Stick around as we delve into this project together. We’ll discuss covering options like adhesive shelf liners and custom-fit wood panels. Plus, I’ll share tips on caring for these covers.
So, let’s roll up our sleeves and get down to business!
Safety Precautions: “Better Safe Than Sorry!”
Safety’s gotta be our number one priority. So, let’s get started the right way.
- Goggles On!: Whenever cutting, sawing, or sanding, keep those beautiful eyes safe with some sturdy goggles. Splinters, sawdust, or rogue adhesive bits won’t stand a chance!
- Hand Protection: Slipping on gloves might sound overkill, but trust me, you’ll thank me when handling rough wood or that super sticky adhesive.
- Ventilation is Key: Working with adhesive materials? Make sure you’ve got good airflow. Open some windows and get a fan going. Let’s keep those fumes at bay!
- Tidy Workspace: Keeping your workspace clutter-free isn’t just about looking good; it’s about safety. The last thing we want is tripping over tools or materials!
- Stay Sharp… But be Careful: Ensure those cutting tools – scissors or utility knives – are sharp for clean cuts. But always store them safely out of reach when not in use.
- No Rushing: DIY is fun, and I get it. You’re excited! But let’s take our time. Hasty moves lead to mistakes, and we want our project to be a masterpiece!
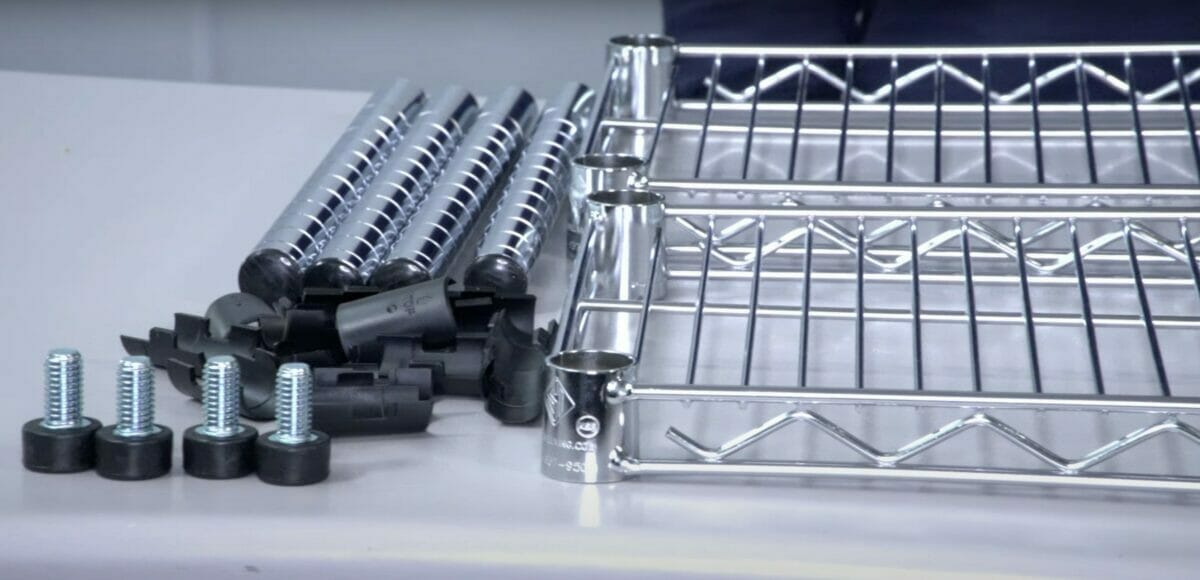
Materials You’ll Need
Before we dive into the process, let’s get our toolkit ready. I can’t stress enough how important it is to have everything you need on hand before starting a project like this. It saves time and helps keep the workflow smooth.
So, what are we going to need? Well, here’s my list:
- Wire Shelf Liners: These come in various materials, such as plastic or acrylic, for maximum durability and aesthetics.
- Measuring Tape: A good old measuring tape will be your best friend during this process. Accuracy is key when it comes to covering wire shelves.
- Scissors or Utility Knife: Depending on your preference and comfort level, either of these tools will do the job.
- Adhesive (optional): This isn’t always necessary but can provide extra stability if dealing with items that tend to slide around.
Methods for Covering Wire Shelves
Covering wire shelves can seem intimidating, but trust me, it’s easier than you think. You’ll have those shelves covered quickly with the right tools and a little time.
Method 1: The Adhesive Laminate Transformation
Perks: Easy to wipe down, sturdy as a rock, and oodles of patterns.
Your Action Plan:
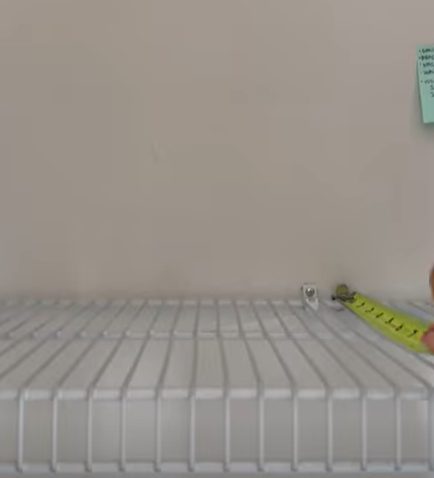
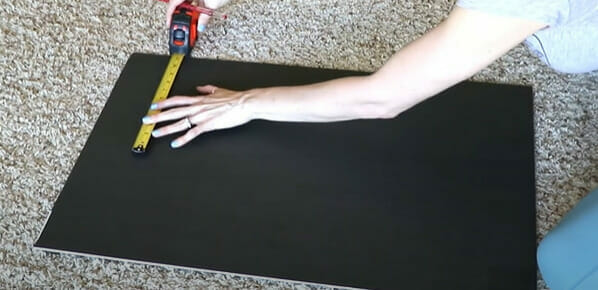
Step 1: Measure Up
- Before any project, always know your battlefield. Whip out that measuring tape and get your shelf’s length, width, and depth.
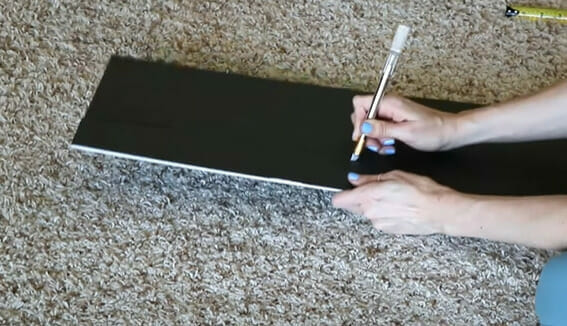
Step 2: Roll With It
- Use a pencil or tailor’s chalk (if you feel fancy) and trace those measurements on your form board.
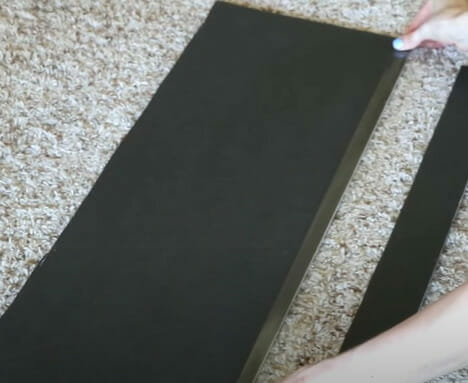
Step 3: Snip, Snip
- Grab a pair of scissors or a utility knife and follow your traced lines. Remember, slow and steady wins the race!
Step 4: Stick to It
- Get some packaging tape to attach the piece to the front panel. Lay it down and flip it over.
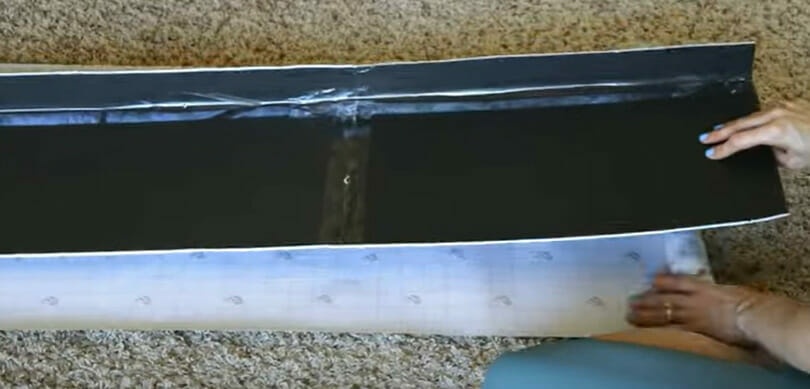
- Lay down that laminate design facing the floor.
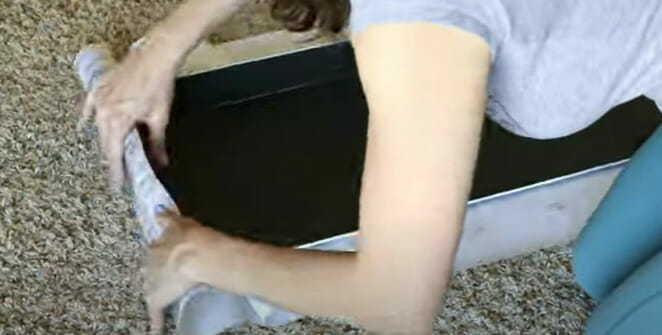
- Starting at one end, firmly press down your laminate.
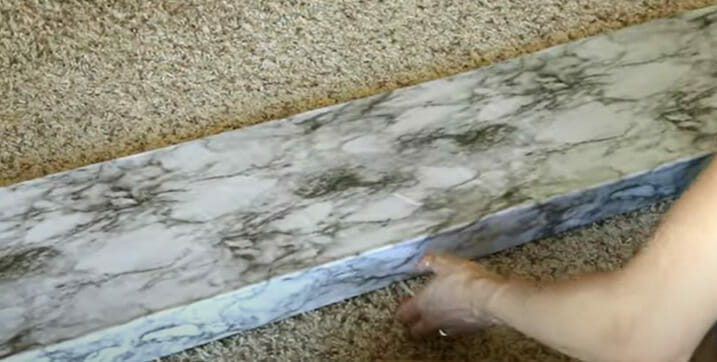
- Watch for pesky bubbles as you make your way to the other side. We want smooth sailing here!
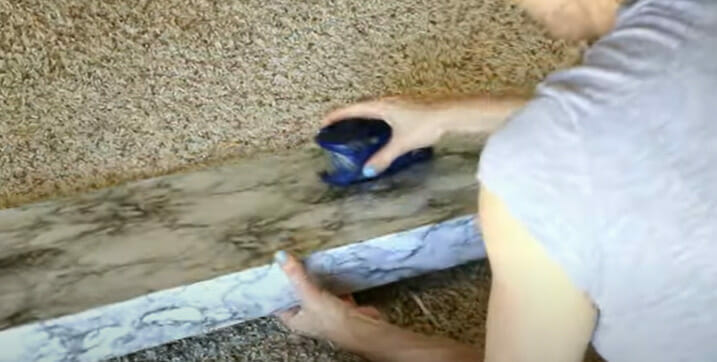
Step 5: Finishing Moves
- If any bubbles made it through, use a flat-edged tool and smooth them out for that pristine finish.
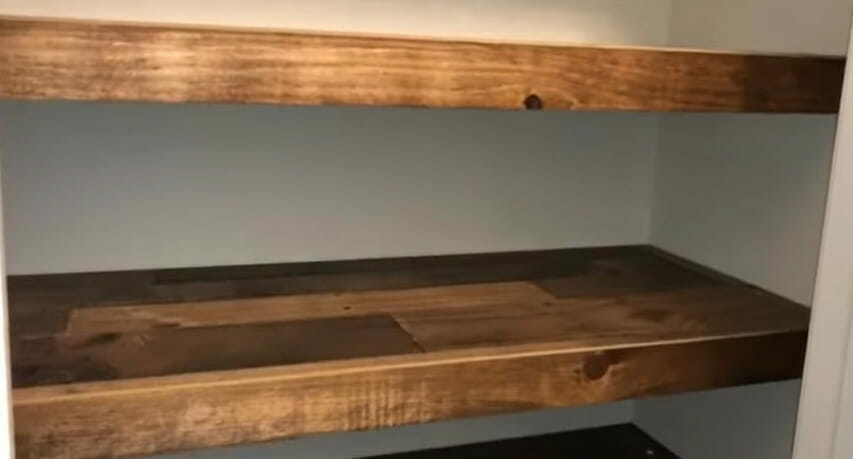
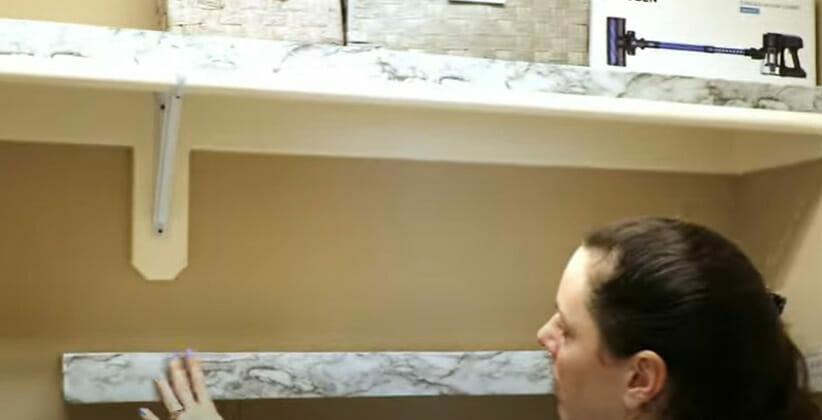
Method 2: The Rustic Wooden Overhaul
Perks: Sturdy, chic, and perfect if you’re going for that farmhouse or industrial vibe.
Your Action Plan:
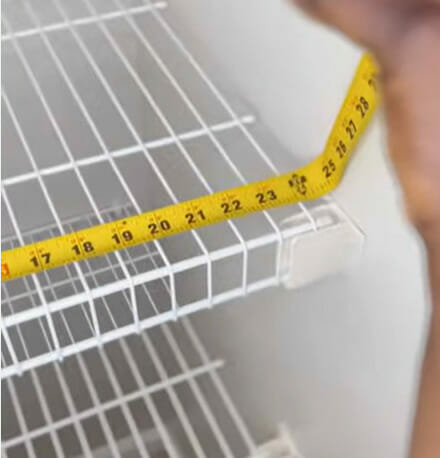
Step 1: Measure Up!
- I bet you saw this coming. Grab those shelf dimensions!
Step 2: Wood You Do It
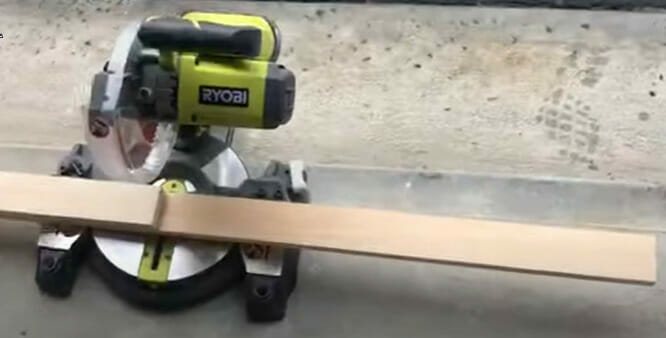
- Depending on your DIY prowess, use a saw or pop by your local hardware store to get those planks pre-cut.
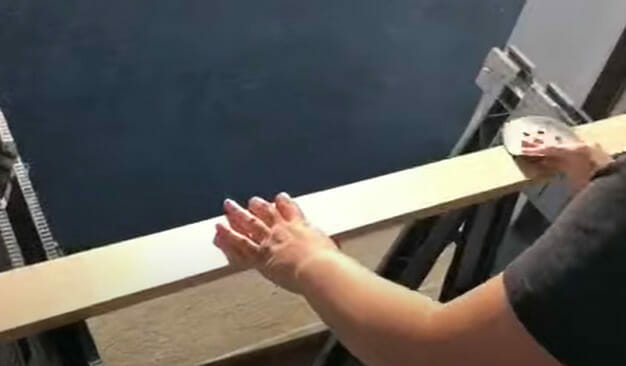
- Do you have some rough edges? Sand them down.
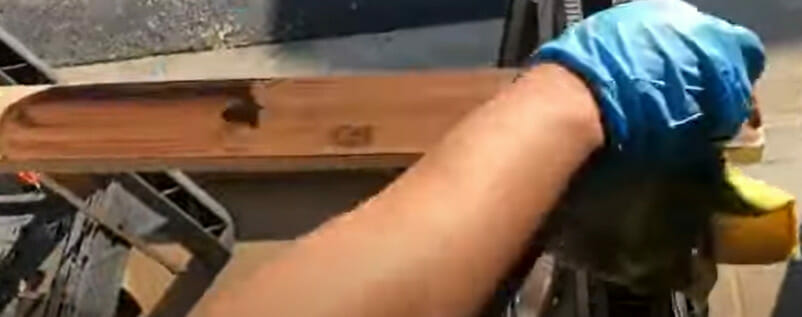
- Coat this with varnish or paint; it can change the game.
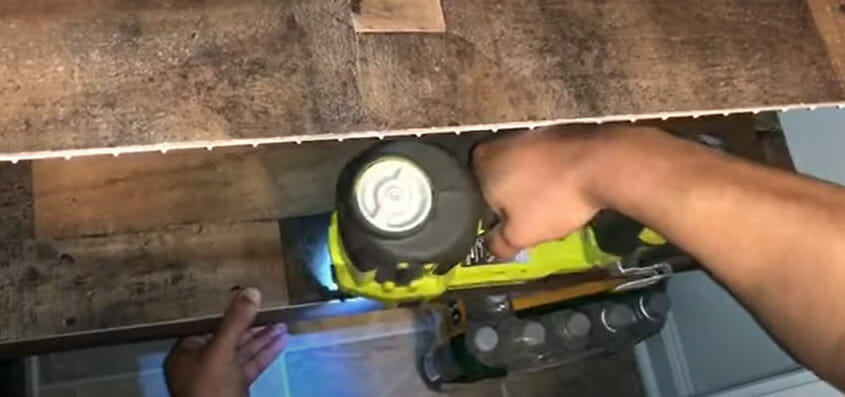
Step 3: Lay It Down
- Place those wooden planks right on top. Want to avoid any slips? Some small rubber or foam pads can work wonders.
Cost Estimates: “Quality Without Breaking the Bank!”
We all love a fantastic makeover that doesn’t break the bank, right? So, let’s talk numbers. Whether you have a tight budget or are ready to splurge a bit for that extra flair, I’ve got the rundown on what you might spend.
Let’s dive in and make every penny count!
Method 1: The Adhesive Laminate Transformation
| Item/Activity | Estimated Cost |
|---|---|
| Measuring tape | $5 – $15 |
| Pencil/tailor’s chalk | $1 – $5 |
| Scissors or Utility knife | $5 – $20 |
| Packaging tape | $2 – $7 |
| Adhesive laminate (per sq. ft) | $5 – $20 |
| Flat-edged tool (like a credit card) | $1 – $5 (or free if you use an actual credit card) |
| Total Estimated Cost | $19 – $72 |
Method 2: The Rustic Wooden Overhaul
| Item/Activity | Estimated Cost |
|---|---|
| Measuring tape | $5 – $15 |
| Saw (if you don’t have one) | $20 – $200 |
| Wooden planks (per sq. ft) | $3 – $15 |
| Sandpaper | $5 – $10 |
| Varnish or paint (per can) | $10 – $50 |
| Small rubber or foam pads (per pack) | $5 – $15 |
| Total Estimated Cost | $48 – $305 |
These estimates assume you don’t already have some of the basic tools.
The totals are provided in ranges because of the variability in costs. If you’re budgeting for a project, always check prices from local sources and adjust accordingly!
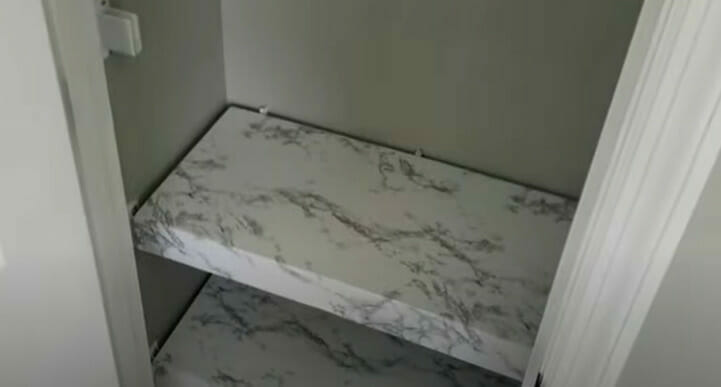
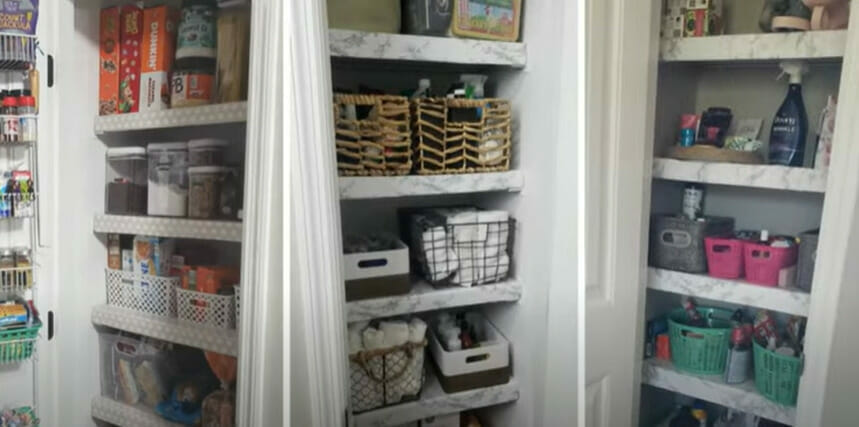
Benefits of Covering Wire Shelves
Let’s dive into the benefits of covering wire shelves, shall we? One of the main advantages is that it gives a smoother surface for your items.
| Benefits | Description |
|---|---|
| Smoother Surface | We’ve all been there: you’re trying to balance a small item on a wire shelf, and it just keeps slipping through or tilting awkwardly. When you cover those shelves, everything gets more stable – from your delicate china to your favorite novels. |
| Longevity | Wire shelves are great because they’re sturdy and durable, but they can start showing signs of wear and tear over time. By adding a cover, you’re sprucing up its look and adding an extra layer of protection against elements like moisture and dust. |
| Aesthetic Appeal | Wire shelves serve their purpose well but aren’t known for their beauty! By covering them up with fabric or vinyl covers (for instance), you could match them with your room decor or make them stand out as unique pieces. It’s like giving your shelving unit a makeover! |
| Customization | With covered wire shelves, you can choose what material color or pattern goes on top. From funky polka dots to elegant solid colors – the sky’s the limit! |
| Cleanliness | Wire shelves can be dust magnets! The open structure makes it easy for dirt and debris to accumulate over time – not something you’d want in places where you store food or clothes. |
| Noise Reduction | If metal objects clanging against your wire shelves every time you pick something up or put it back, it can quickly become an ear sore. |
Maintenance and Care Tips
Taking care of your wire shelves doesn’t have to be a chore. You’ll be surprised how simple it is to keep them looking brand new.
| Tip Category | Description | Frequency |
|---|---|---|
| Routine Cleaning | Hey, life gets messy, right? So grab a damp cloth and gently wipe off those pesky dust bunnies or oddball stains from your laminate. And for fabric liners? A little shake-off outside or a quick machine wash should do the trick! | Weekly |
| Spot Cleaning | Oops! Did you spill something? For laminates, a gentle dance with mild soap and water will help. | As needed |
| Avoiding Damage | Treat them right, and they will love you back! Store those prickly items in containers and spread out heavy items evenly. It’s all about balance! | Always |
| Refreshing the Look | Feeling a change in the air? Swap out those fabric covers for a fresh vibe, or slap on a new laminate sheet to jazz things up. It’s like giving your shelves a mini-vacay! | Seasonally or yearly |
| Addressing Wrinkles | No one likes the creased look! For fabric liners, iron them out on a low setting. And for those laminates? A hairdryer on low and a smooth slide should iron out those bubbles. | As needed |
| Longevity | Sun’s great, but too much of it? Not so much. Keep those shelves away from Mr. Sunshine, and check them out now and then for signs of wear. They deserve that TLC! | Monthly |
Frequently Asked Questions
- What’s the easiest material to work with for first-timers?
- Well, folks, if you’re dipping your toes into the world of DIY for the first time, I’d steer you towards adhesive laminate. It’s like putting a sticker on your shelf, but way cooler. Plus, it’s a breeze to clean. Just roll, cut, stick, and voila!
- How often should I replace my shelf liners?
- Good question! Depending on how much love (or chaos) your shelves see, laminates can last a few years. Fabric liners? Could you give them a check every year? If they’re looking a little tired, it might be time for a shelfie makeover!
- My laminate’s getting a little bubbly. What’s up with that?
- Ah, the dreaded bubble! Happens to the best of us. Sometimes, the air gets trapped. No worries! Use a pin to poke a tiny hole and smooth it out. Or, take a hairdryer on a low setting and gently warm the area, then press down. Bubbles, be gone!
- Can I switch between fabric liners and laminates?
- Absolutely! Variety’s the spice of life. Whether you feel a soft fabric vibe or a slick laminate look, your shelves are your canvas. Go wild and mix it up!
- Are there any eco-friendly options out there?
- Absolutely! If Mother Earth’s your main concern, plenty of eco-friendly liners are made from recycled materials or organic fabrics. It’s all about looking good while doing good.
- I’ve got kids. What’s the most ‘oops’ proof option?
- Ah, the joys of little artists spilling and crafting! I’d recommend going for a heavy-duty adhesive laminate. Easy to wipe clean, durable, and ready for all those “oops” moments. Plus, they come in fun patterns that your kiddos will love.
References
Website Resources:
- The Spruce. https://www.thespruce.com/
- Houzz. https://www.houzz.com/
Video Resources:
Shelving, Inc.
Meagan Nichole DIY & Lifestyle
iamwanellewillie
Marissa Explains It All
HomeWithNia