11 min read
How to Hang Wire Shelves (5 Steps, Tips)
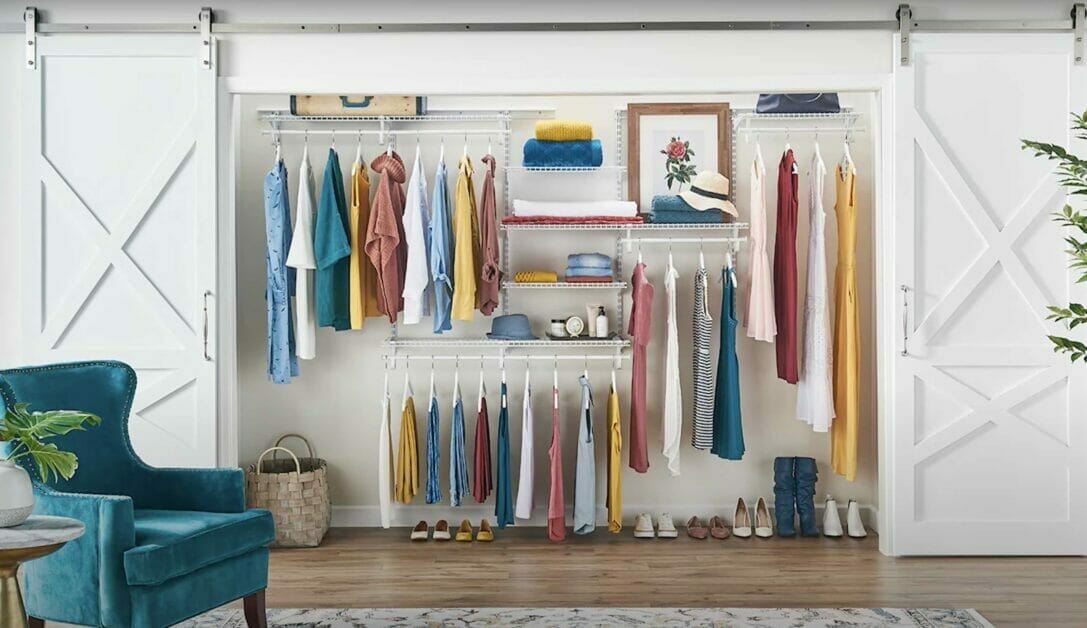
Wire shelving can be a real game changer for those battling cluttered spaces. They’re versatile and durable, and most importantly, they save you tons of space. I’m here to guide you through hanging these lifesavers on your own.
Now, let’s be honest. The idea of drilling holes in your walls might seem intimidating at first. But trust me, it’s not rocket science! With a little patience and the right tools, you’ll master this skill in no time.
Key takeaways: To Hang a Wire Shelf:
- Step 1: Identify the Shelf’s Location.
- Step 2: Align your shelf bracket with a stud and mark the screw holes.
- Step 3: Drill into the marked points.
- Step 4: Install the bracket holes.
- Step 5: Mount the Shelf.
In this article, we’ll dive into every step to hang wire shelves successfully. From choosing the right location to securing the brackets and finally hanging your shelves – I’ve got you covered!
Importance of Proper Installation
I can’t stress this enough: installing wire shelves correctly is crucial. Why, you ask? Well, first and foremost, a properly installed shelf ensures stability. It’s not just about keeping those books or kitchenware in place. No, it’s much more than that.
- Stability
- A sturdy shelf protects your cherished items from potential damage caused by unexpected falls.
- Capacity
- Each wire shelf has a specific weight limit.
- Overloading can lead to disastrous results. You don’t want the whole thing crashing down in the middle of the night because you decided to pile on one too many cookbooks.
- Safety
- Ensures the shelf is not shaky, minimizing risks.
- A shaky shelf might pose risks for anyone passing by—especially little ones who are naturally curious and tend to explore around.
- Aesthetics
- When you install wire shelving correctly, it looks balanced and neat – just picture-perfect!
- A poorly installed unit sticks out like a sore thumb!
Materials and Tools Needed
Before diving into the nitty-gritty of hanging wire shelves, we must review the essential materials and tools you need. Trust me, there’s nothing worse than starting a project only to realize halfway through that you’re missing a key item.
| Category | Items | Description |
|---|---|---|
| Shelves | Wire Shelves | You’ll find a variety at your local home improvement store or online. They come in various sizes and styles, so choose one that best fits your needs and space. |
| Hardware | – Brackets – Anchors – Shelf clips/locks | Necessary for mounting. This is depending on the type of shelving system you’ve chosen. |
| Tools | – Level – Tape Measure – Drill – Stud Finder (optional) | – For ensuring your shelves aren’t leaning towards Pisa. – Precision is key here, folks! – To secure your hardware to the wall. – If you plan on mounting on drywall, this tool will be invaluable in locating secure points. |
| Safety Gear | – Safety Glasses – Gloves | – Protective equipment to ensure safety during installation. |
Step-by-Step Installation
Let’s start with the first step. You’ve got your wire shelves and are ready to hang them up. But wait, before you grab that hammer, there are a few things you’ll need to keep in mind.
Step 1: Identify where you want your shelves
- Get out that stud finder (or knock on the wall if you’re old school) and locate those studs. They will support your shelves, so ensure they’re in a spot that works for you.
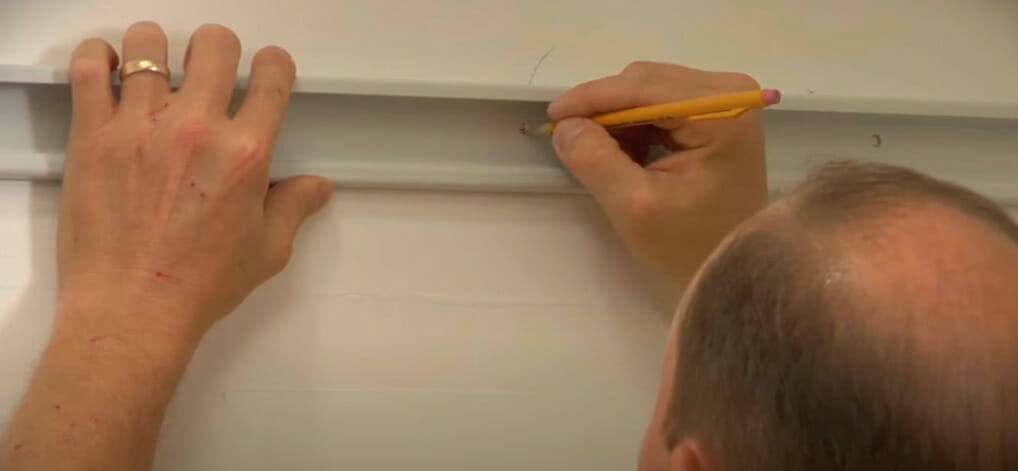
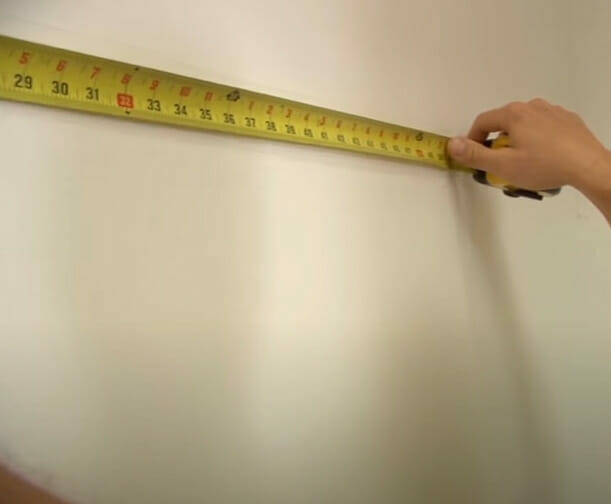
Step 2: Marking your drill points
- Hold up your shelf bracket against the wall where one of those studs is located, and mark where the screw holes line up with a pencil or marker. You’ll want to do this for each bracket, of course.
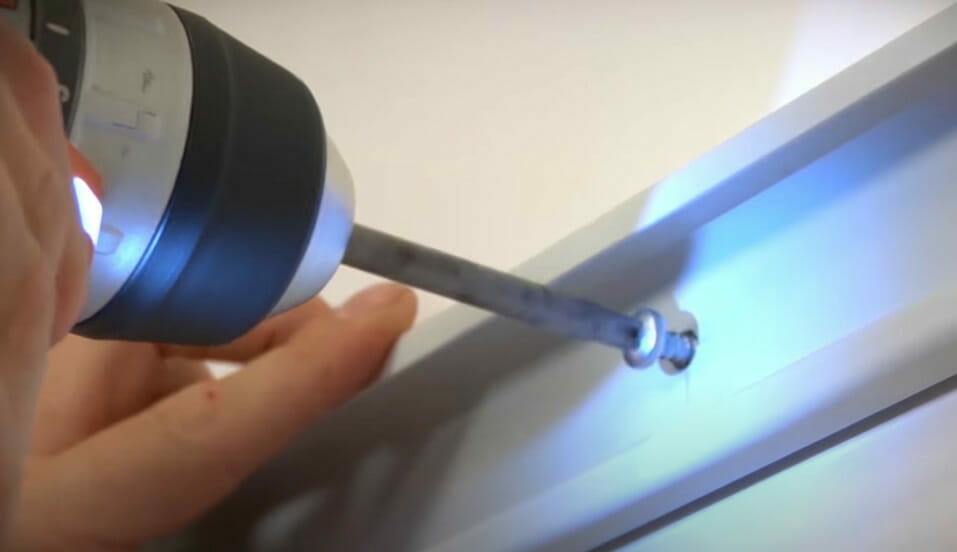
Step 3: Start your drilling!
- Drill into each marked point just deep enough to fit your screw anchors securely.
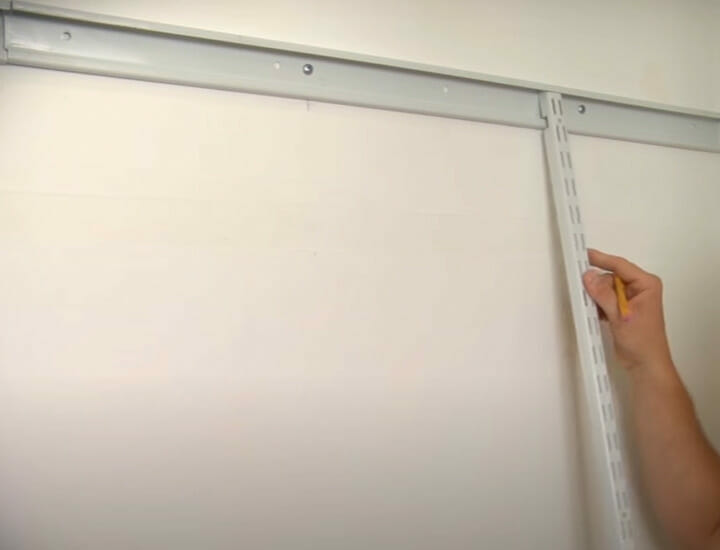
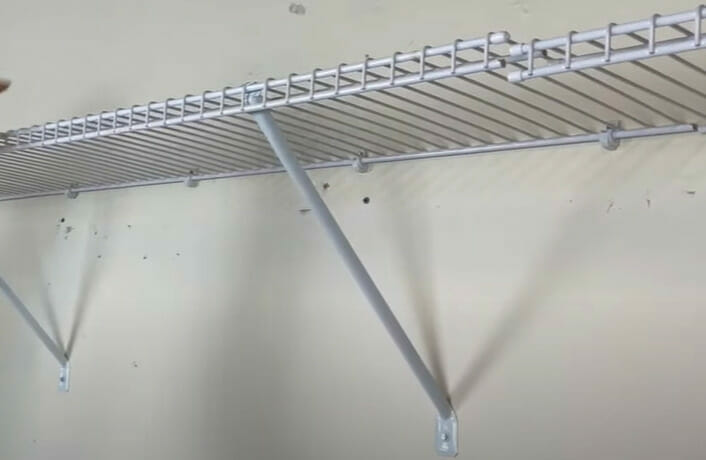
Step 4: Installing those brackets
- Start by inserting a screw through one hole in your bracket, then into its matching anchor on the wall, and tighten it with a manual or electric screwdriver until snug but not overly tight (we don’t want to crack anything!).
- Repeat this for all brackets, ensuring they’re level – remember, balance is key!
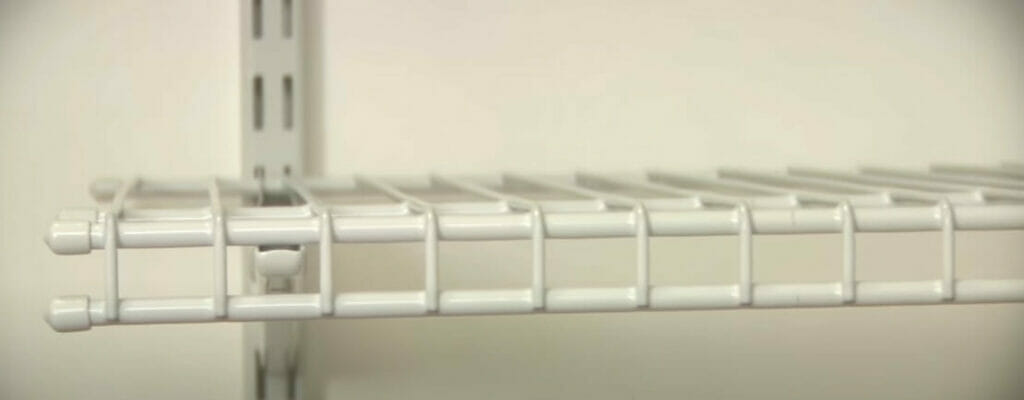
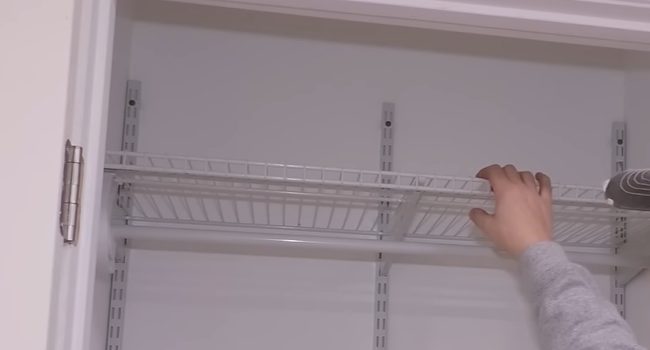
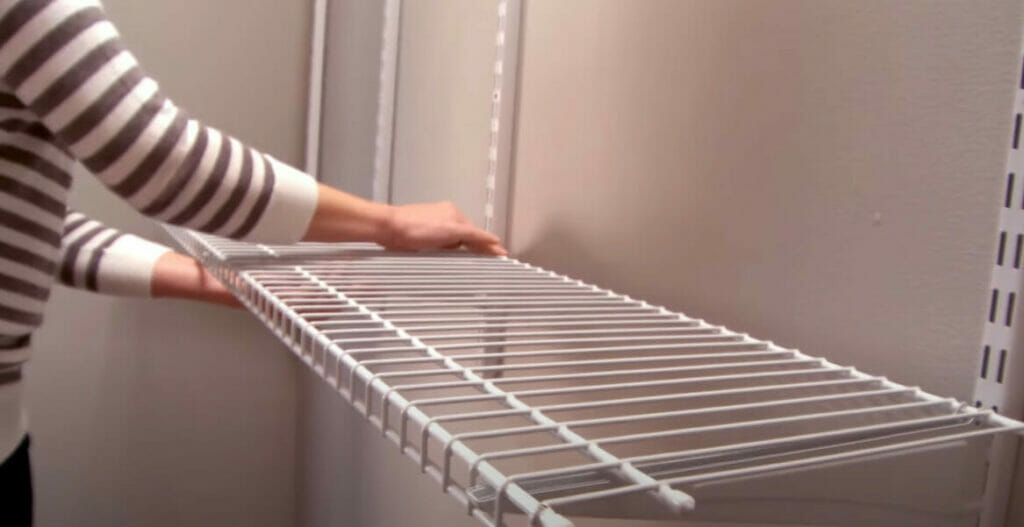
Step 5: Placing our wire shelf onto our brackets!
- This should be pretty straightforward – align each end of your shelf over its matching set of brackets to ensure it fits securely.
Safety Precautions
Before we jump into the hows of hanging wire shelves, let’s pause for a moment to consider safety. It isn’t just about making your space look tidy and organized – it’s also about doing it safely.
- Protective Gear
- We’re talking gloves to protect your hands from sharp edges.
- Safety glasses to shield your eyes from stray bits of wire or dust that might come loose during installation.
- Mindful Drilling
- Remember that behind those walls could be electrical wires or plumbing pipes waiting to give you a nasty surprise if you drill in the wrong spot.
- I can’t stress enough how important it is to use a stud finder to locate studs before drilling holes for the brackets.
- Shelf Load
- Don’t overload your shelves.
- While they may look sturdy enough, each type of wire shelving has its weight limit, and exceeding that can lead to a disaster.
- Proper Tools
- Avoid improvising with tools during installation.
- Using incorrect or low-quality tools makes the job tougher and increases the chances of mishaps.
Maintenance and Cleaning
After successfully hanged your wire shelves, the job’s not quite done. There’s still the essential task of maintenance and cleaning to consider.
| Task/Aspect | Details | Frequency/Recommendation |
|---|---|---|
| Cleaning | Dust regularly | At least every one or two weeks |
| Use a mix of warm water and mild dish soap | As needed | |
| Dry thoroughly to prevent water spots. | After each cleaning session | |
| Maintenance | Inspect for signs of rust or corrosion | Especially if exposed to frequent moisture |
| If rust appears, use sandpaper or a wire brush to remove | As soon as rust is observed | |
| Avoid overloading shelves | To prevent bending or sagging over time | |
| Protection | Apply a thin layer of rust-inhibitor spray if required | Annually or after cleaning off rust |
| Use shelf liners to protect shelf surfaces and for easy cleaning | Replace or clean liners as needed | |
| Inspection | Check connectors and hardware for tightness | Every 6 months to ensure stability |
| Replace any damaged or bent components. | As soon as damage is noticed | |
| Environmental Control | Maintain good room ventilation to minimize humidity | Continuous; especially important in moisture-prone areas |
| Avoid placing the shelf near heat sources, like radiators or heaters | This can weaken the structural integrity over time |
Frequently Asked Questions
Q1: Can wire shelving be used outdoors?
A1: While wire shelving is durable, using it outdoors depends on its material and finish. Epoxy-coated shelves are resistant to rust and can be used in humid or damp environments, but prolonged exposure to rain and other elements might reduce their lifespan. It’s best to use wire shelving designed specifically for outdoor use or ensure it’s adequately protected from the elements.
Q2: How do I adjust the height of my shelves once installed?
A2: Most wire shelving units come with adjustable brackets or clips. You’ll typically need to loosen the brackets/clips, move the shelf to the desired height, and re-tighten to adjust the height. Always make sure to empty the shelf before adjusting to avoid accidents.
Q3: What’s the maximum weight capacity for wire shelves?
A3: The weight limit varies depending on the shelving unit’s design and materials. Always refer to the manufacturer’s guidelines. However, a common range is between 50-500 pounds per shelf, with heavier-duty units supporting more.
Q4: How can I customize the look of my wire shelves?
A4: You can use shelf liners to add color or patterns. Additionally, hanging elements such as fairy lights, plants, or decorative clips can enhance their appearance. Another option is to paint them using a suitable metal paint, though this might affect their rust resistance.
Q5: Can I add additional shelves to my existing wire shelving unit?
A5: Yes, in many cases, you can add extra shelves. Ensure they are of the same brand and design to ensure a proper fit. You’ll also need to ensure the overall unit isn’t overloaded past its weight capacity.
Q6: Are wire shelves safe for storing food items directly?
A6: While wire shelves are commonly used in pantries, using liners or containers when storing food directly on them is a good idea. This helps easy cleaning and ensures smaller items don’t fall through the gaps.
Q7: How do I prevent my wire shelves from scratching my floors?
A7: If your shelving unit isn’t wall-mounted and stands on the floor, consider attaching rubber or felt pads to the bottom of its legs. This will protect your floors from potential scratches and scuffs.
Q8: My wire shelf has started to sag in the middle. What should I do?
A8: Sagging usually indicates an overload. First, reduce the weight on the shelf. If it continues to sag even after lightening the load, you might need to add a center support bracket or consider replacing the shelf if it’s been compromised.
References
Website Resources:
- The Container Store’s Blog – https://www.containerstore.com/blog/
- Houzz – https://www.houzz.com/
- Wirecrafter – https://www.wirecrafters.com/
Video Resources:
Lowe’s Home Improvement
Caesar Critiques
The Fixer
The Home Depot