9 min read
How to Cut Wire Shelving (Easy DIY Guide for Beginners)
Today’s mission? Learning how to cut wire shelving! I can hear you asking, “How tough could it be?” Trust me, with the right know-how, it’s as easy as pie.
Quick Review
| Step | Description |
|---|---|
| 1 | Selecting the Right Spot: Mark with chalk or tape; ensure stability. |
| 2 | Precise Measurements: Double-check using a tape measure; always consider obstacles. |
| 3 | Methods of Cutting: Choose between a hacksaw (for precision) or bolt cutters (for thicker wires). |
| 4 | Finishing Edges: Smooth with a file; check for burrs, and consider sealing. |
So sit tight, grab your safety gloves, and let’s get cracking!
Materials and Tools Required
Before diving into the nitty-gritty of cutting wire shelving, let’s discuss the essential items needed to complete the job. Having all your materials and tools ready makes the process smoother and faster.
First off, safety gear is non-negotiable. You don’t want accidents while handling sharp edges or tiny metal pieces flying around! Here’s what I recommend:
- Safety glasses
- Work gloves
Next up are the tools. We’re talking about things like:
- A hack saw (with a blade suitable for metal)
- File (for smoothing out rough edges after cutting)
- Measuring tape
- Marker
Lastly, you’ll need some materials, specifically:
- The wire shelving unit you plan to cut
- Plastic shelf caps (to cover up those cut ends)
I’ve prepared a simple table below summarizing all these necessities:
| Safety Gear | Tools | Materials |
|---|---|---|
| Safety glasses | Hack saw | Wire shelf |
| Work gloves | File | Plastic shelf caps |
| Measuring tape | ||
| Marker |
Remember, it’s always better to be overprepared than underprepared! Don’t skimp on safety gear or quality tools; they can make all the difference in your DIY project.
Step 1. Selecting the Right Spot for Cutting
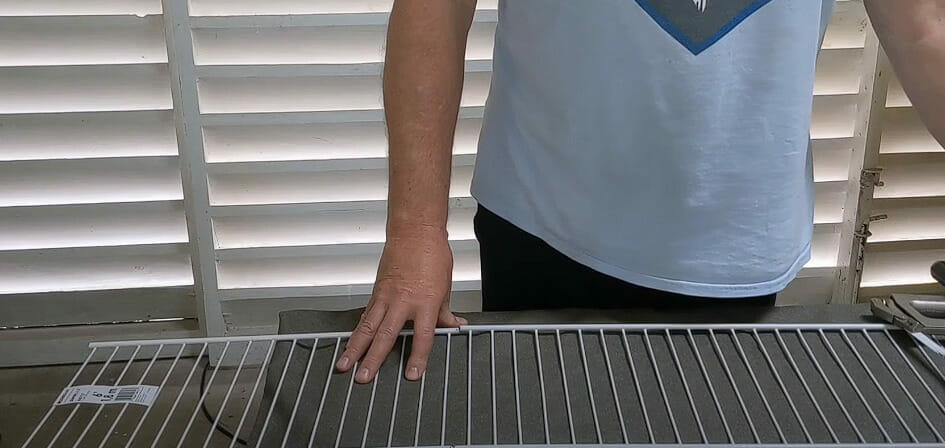
First off, location is key when it comes to cutting wire shelving. You don’t want to just randomly start hacking away at your shelves. Instead, take a moment and think about where that cut needs to be made.
Consider the overall look of your space and the functionality of your shelf. Measure twice (or three times!) before making any cuts.
Next up is ensuring the stability of your shelf before cutting. Be sure your shelf isn’t wobbly or unstable, which could lead to accidents or uneven cuts.
- Tip 1: If possible, try securing it against a wall.
- Tip 2: Use clamps if available.
There we have it – selecting the right spot for cutting can make all the difference in achieving that professional finish we’re after!
So take your time deciding where exactly that cut should be – remember, patience pays off!
Step 2. Measurements for Custom Fit
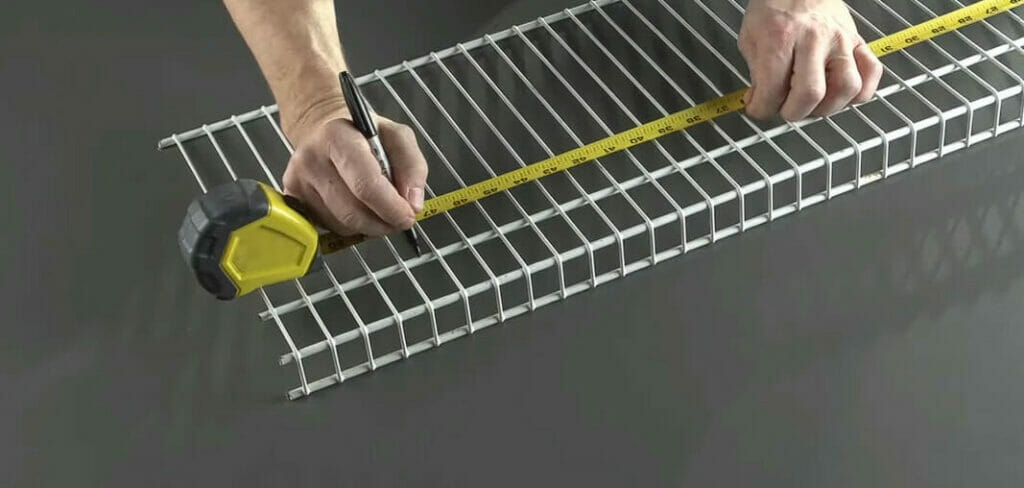
Let’s jump right into it, folks! Getting your measurements right is crucial when custom-fitting your wire shelving.
Nothing’s more frustrating than spending all that time cutting, only to realize the shelf doesn’t fit in its designated spot!
Now, I won’t get overly technical here, but there are a few simple steps you need to follow.
First up, grab a tape measure. Make sure you’re using one that’s easy to read and reliable. You want something that can give accurate readings of at least 1/16th of an inch.
Next – remember this golden rule: Measure twice, cut once. It’s not just about saving time; it also saves materials and keeps your work area clean.
Here are some key points on how you should take those measurements:
| Step | Description |
|---|---|
| 1 | Measure the length of the space where you plan to install the shelf. |
| 2 | Place one end of the tape measure at one side of the space. |
| 3 | Stretch the tape measure across to the other side of the space. |
| 4 | Record the measurements accurately. |
If we were dealing with a perfect world here, every corner would be square and every wall perfectly straight. But as we all know too well – that isn’t often the case!
So, always double-check those corners with a carpenter’s square.
And lastly, account for any obstacles like pipes or outlets. Take note of them on your sketch so they don’t come as nasty surprises later on!
So there you have it! Ensure precise measurements for a perfect custom-fit wire shelving unit in no time! Now roll up those sleeves, and let’s get cutting!
Step 3. Methods of Cutting
Let’s jump into the nitty-gritty of wire shelving hacks and how you can master them. We’re all about self-empowerment, so let’s talk tools—specifically, a hacksaw and a bolt cutter.
I’ve used both in my years of tinkering around the garage (and more than once on TV!). Each has its own strengths that make it ideal for certain jobs.
First up is our good friend, the hacksaw.
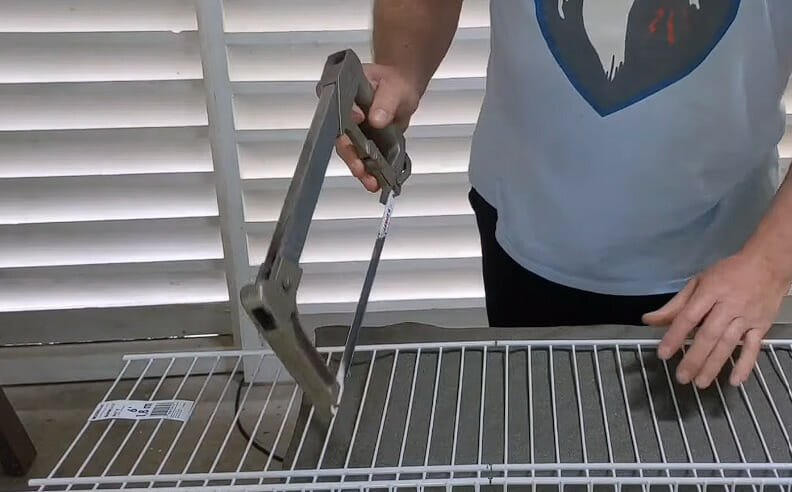
This thing is versatile. It can cut through wood, metal…you name it. The trick to using it, right? Make sure you have a fresh blade installed.
Nothing is worse than trying to see through your shelving with a dull blade!
Moving on bolt cutters now.
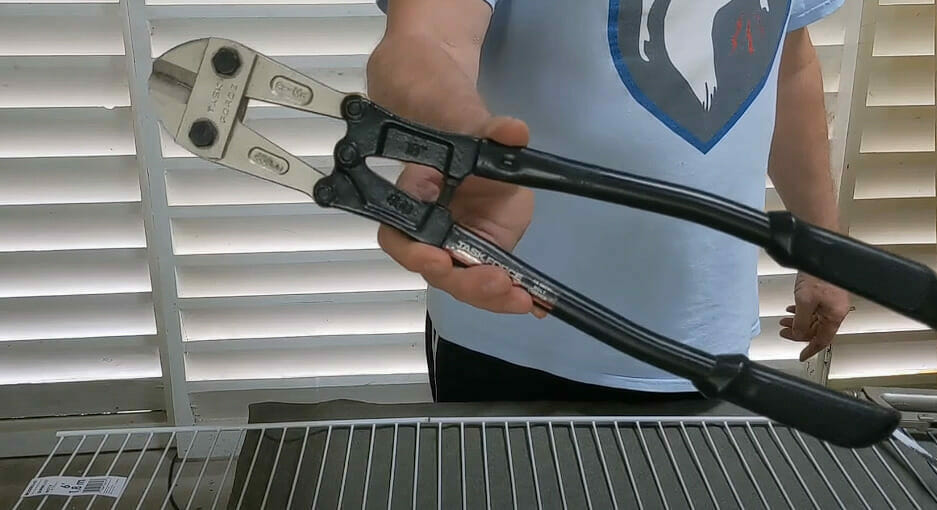
These bad boys are like the strongmen of the tool world – they CUT through stuff like nobody’s business and are great for thicker wires or chains.
But hold on – they’re not as precise as their slimmer cousin, the hacksaw.
So, which one should you use when tackling your wire shelving project? Well, it depends…
If precision is key and you’re comfortable putting in extra effort (think arm workout!), grab that hacksaw off your tool wall.
But if brute strength is what you need because you’re dealing with some seriously hefty wires or chains, reach out for those bolt cutters.
Whichever route you choose, remember to take your time, measure twice (or thrice), and always put safety first!
Step 4. Finishing Edges
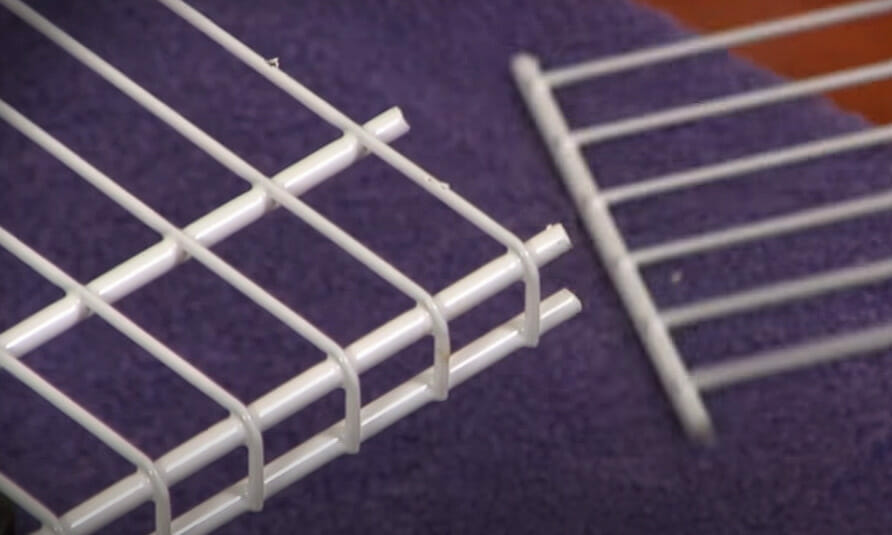
Now that you’ve cut your wire shelving, let’s look at the final step – finishing those edges. It’s a crucial part of the process because we want to ensure smooth edges and avoid potential hazards.
First up, grab your file. Yep, it’s time to put some elbow grease into this! Start by running the file along the cut edge of your wire shelving.
This isn’t just about aesthetics – it’s about safety, too. We don’t want any sharp bits catching on clothes or, worse still, cutting hands!
When I’m filing, I like to make sure I’m working in a good light to see what I’m doing clearly. And remember, always file in one direction – back-and-forth action can damage your file.
Next up is checking for burrs (those annoying little rough spots). If you spot any while smoothing those edges, remove them with sandpaper or an emery cloth. Just give them a good rub until they’re gone.
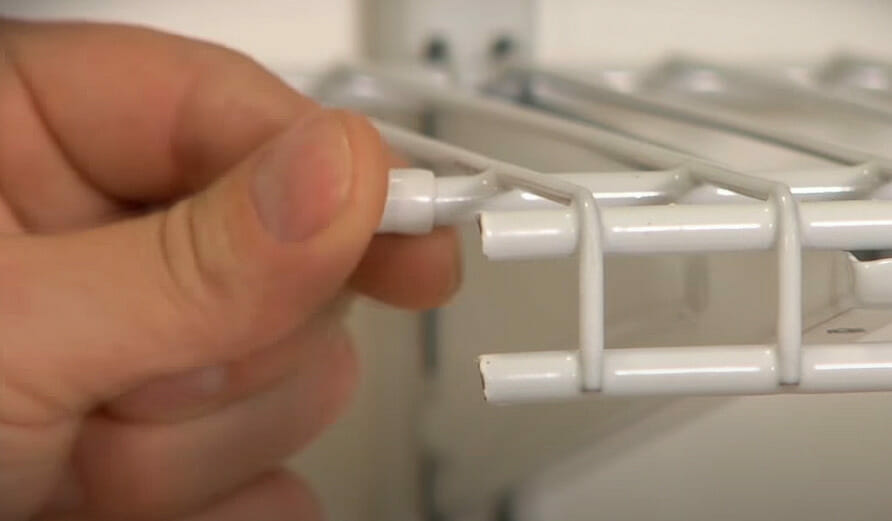
But wait! Don’t forget those sharp edges left behind by cutting wire shelving!
My advice? Grab some plastic caps from your local hardware store – they easily slip onto those sharp ends, keeping everyone safe from potential scratches.
Lastly, paint the edge, if needed. This might not be necessary for every project, but it could be worth considering if you’re worried about rust.
Simply apply a thin layer of rust-proof paint or sealant and let it dry completely before using your new shelf.
And there you have it! With these simple steps, you’ll have smooth and safe wire shelves ready for use!
References
Websites:
- Family Handyman. https://www.familyhandyman.com/
- This Old House. https://www.thisoldhouse.com/
- Instructables. https://www.instructables.com/
Image References:
- ClosetMaid Wire Shelf Kit. https://www.amazon.com/ClosetMaid-Hardware-Laundry-Utility-Storage/dp/B0000DH4LH/
Video References:
neuromangler
Dremel
The Home Depot