10 min read
High-Voltage Glove Testing (How to Test & Regulations)

What are the different and proper ways to test gloves designed for handling high voltages?
Knowing which insulating gloves are best for specific situations and how to inspect, clean, and test them is important. Manufacturers test their high-voltage gloves before selling them and stamp them with a test date, but you must keep testing them regularly. This ensures they can still provide the same level of safety they were designed for.
You can visually inspect high-voltage insulating gloves for physical signs of abrasions, cuts, and punctures, but more thorough checks are necessary periodically, every 6 and 12 months. They include dielectric and inflation testing. You can do some of them yourself. But laboratories do these tests under controlled conditions, in a controlled environment, and according to ASTM standards.
Besides explaining in detail how high-voltage insulating gloves are tested, I’ve also given a few extra tips to help you take good care of them.
High-Voltage Gloves

Insulated gloves are rubber gloves specially designed to provide protection against high-voltage electricity.
They are critical when working with all high-voltage electrical equipment and areas. They help protect the electrician from shocks and arc flashes. They are a part of the personal protective equipment (PPE) required by OSHA when working with high-voltage applications and on or near energized circuits and power lines.
You should use gloves and other PPE, even if not directly touching electrical circuits because arc flashes and blasts can cause injury.
Wearing High-Voltage Gloves
The OSHA standards require all workers to wear insulating gloves whenever working with electricity above 50 volts.
Different classes of gloves are available for specific use cases, according to the voltage levels. See the table further below for classes and voltage levels. Leather protectors over the gloves are required if using Class 1-4 gloves or Class 00-0 gloves if the voltage exceeds 250 volts AC or 375 volts DC. However, there are exceptions when high finger dexterity is required, which the leather would hinder.
Safety Regulations
The relevant safety regulations that deal with the use of high-voltage gloves are covered in OSHA 29 Code of Federal Regulations (CFR) 1910.137.

High-voltage electricity is highly dangerous. Only trained technicians should work in these situations and only if wearing PPE, including high-voltage insulating gloves.
Testing High-Voltage Gloves
Regularly testing your high-voltage gloves is critical for your safety.
Testing them will ensure they are still safe to wear because they can provide the same level of protection they are designed for. Natural wear and tear will inevitably reduce the quality of the gloves over time. Still, regular testing could make them last longer by helping prevent early surface integrity deterioration.
The higher the class, i.e., the higher the voltage they are designed to be used for, the greater the importance of testing them properly.
Inspecting High-Voltage Gloves
General Visual Inspection
Inspect your high-voltage insulating gloves frequently for specific defects – every time before using them and after every repair.
High-voltage insulating gloves are also vulnerable to abrasions, cuts, and punctures like ordinary rubber gloves. All such defects can put the wearer’s life at risk. Even a small puncture in one glove can allow an electrical current to pass through the hand.
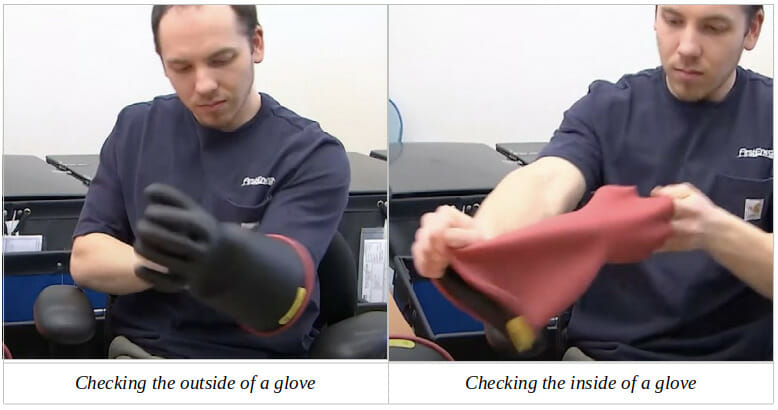
OSHA regulations also require inspecting for signs of bulging or swelling. ASTM standards recommend doing the following for a general visual inspection:
- Roll the rubber at the base with your hands. Check the outside and inside of the glove for any signs of damage or defect.
- If you notice something odd while rolling, inspect the gloves closer by pinching and rolling between your fingers.
- Inspect the base and fingertips. Slightly pull each finger to look for any sign of damage or defect.
Periodic Inspection
In addition to the regular general inspections, you must inspect the gloves periodically.
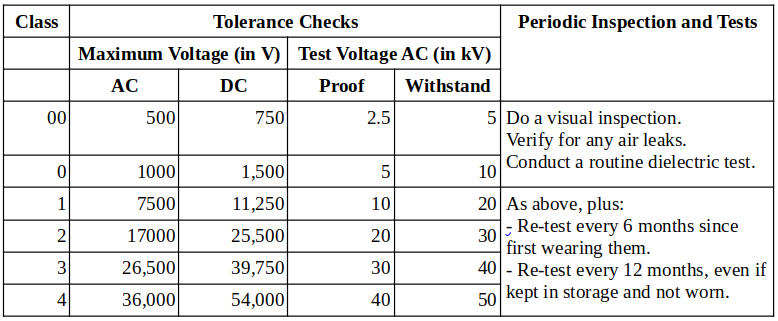
Some types require specific tests every 6 or 12 months. The table below mentions the tolerance of each type of glove based on its class and the type of periodic inspections and tests to conduct.
Inflation Testing

Do an inflation test on the gloves to check for any air leaks.
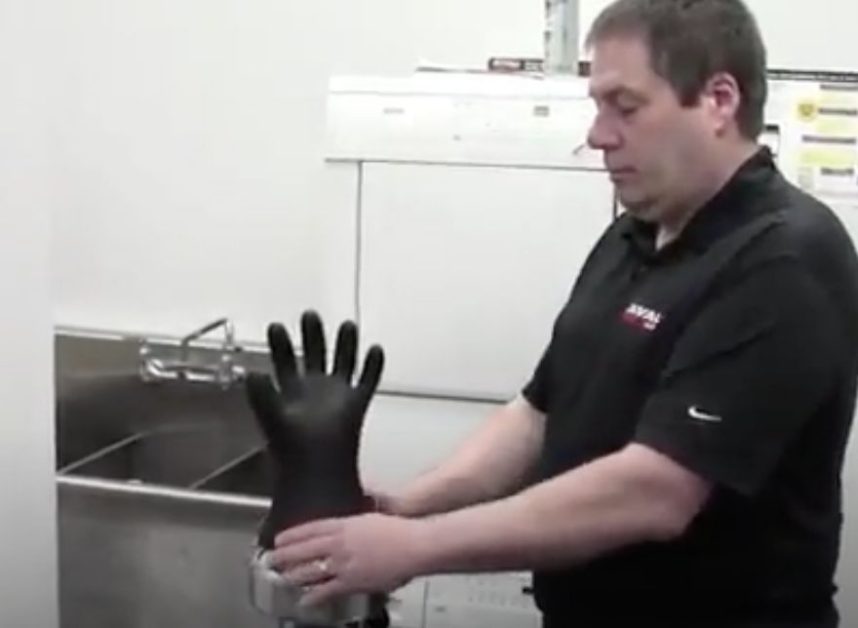
You can either do this manually or by using a pneumatic glove inflator. The manual method can only test the finger and palm areas, whereas a glove inflator allows inspecting the whole glove.
If doing it manually, roll each glove’s bottom about 1½” to ensure air is present in its fingers and palm. Hold the glove to your ear and gently squeeze it. This will help to listen and feel for any air leaks.
If using a glove inflator, slide the glove’s base over the inflator and the rubber ring over the glove. Inflate the glove but don’t overinflate it. Don’t inflate non-ozone-resistant Type I gloves more than twice their normal size and Type II gloves more than 1¼” times the size. Then repeat, as for manual inflation testing, by holding the inflated glove to your ear and listening and feeling for any air leaks.
A high-voltage glove with an air leak should be disposed of. Don’t reuse it.
Laboratory Testing
The 6- or 12-month period tests are best done under laboratory conditions.
This term applies from the date of the initial manufacturer test, not when you purchased the gloves. Accredited test laboratories can conduct these tests for you if your company doesn’t have its testing laboratory.
Laboratories usually test high-voltage gloves in the following way:
Phase 1: Cleaning
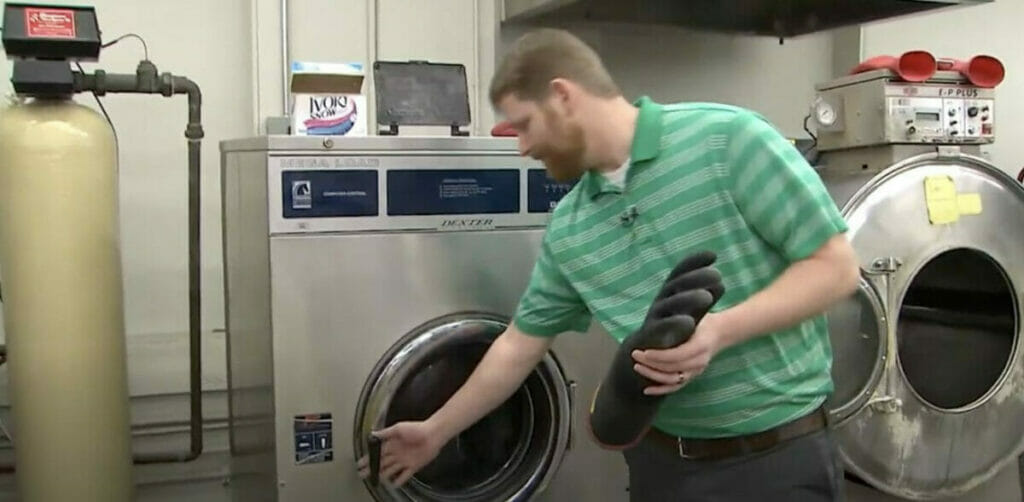
The gloves undergo a cleaning process after documenting their arrival and testing.
The detergents are specially designed to disinfect and remove contaminants from insulative rubber equipment. The gloves are then dried before testing.
Phase 2: AC Current Testing
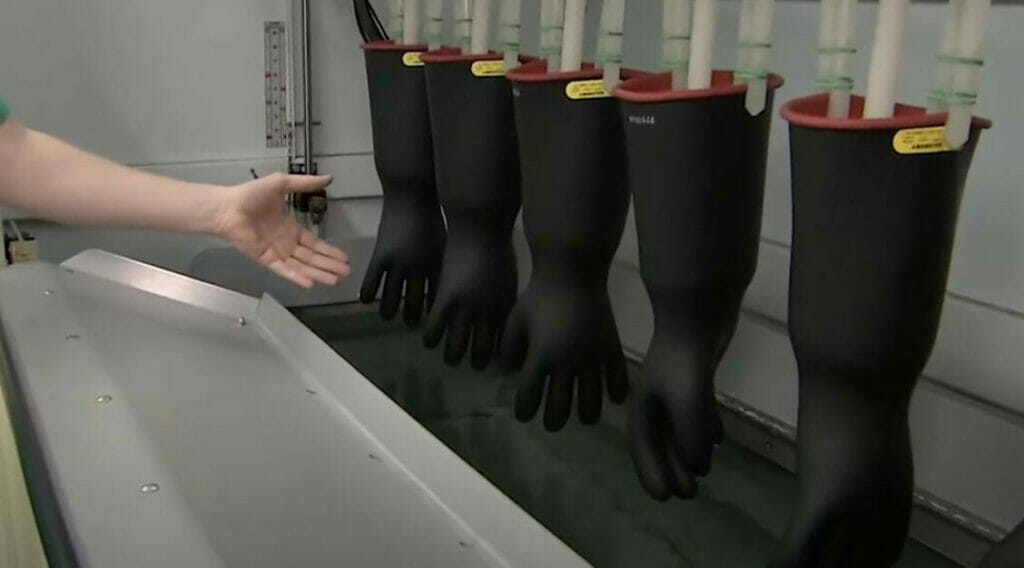
The laboratory tests the gloves using AC in a dielectric glove testing machine, according to ASTM standards recognized by OSHA.
All the gloves are hung by plastic pins from a rack. The grounding rods are a reference point in case of electricity punctures through a glove. The gloves are filled with water and energized to a specific test voltage for three minutes for new gloves and one minute for retested ones. The current is monitored to see if the leakage is not in excess.
The gloves that pass Phase 2 are then dried again before the next test.
Phase 3: Inflation and Visual Inspection
This test uses compressed air and a visual inspection in an extra brightly-lit environment.
The amount of compressed air is regulated to ensure the gloves are not overinflated. Technicians inspect each glove’s surface outside and inside. The extra bright lighting helps to ensure no physical defects are missed. This is important because even a minor defect can compromise its integrity.
This is the final test, the last chance to identify defects.
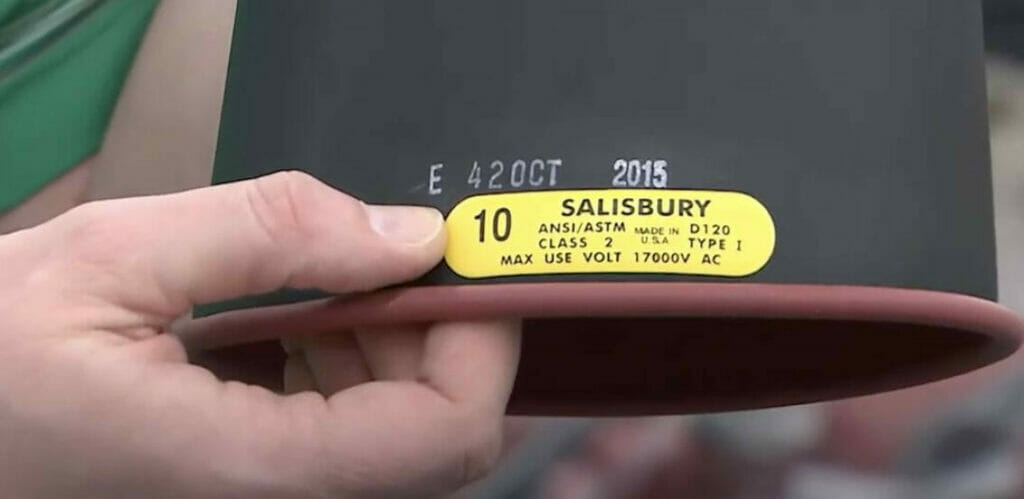
Phase 4: Final Stamping
All gloves that pass the tests are stamped with details of when and how they were tested.
The information usually includes the date they were tested, the voltage applied during the dielectric test, the maximum field use voltage, and any unique identifying detail requested by the company.
The inspection does not stop here. A technician conducts a final inspection to ensure the accuracy of the stamped details and logs them before preparing to return the gloves.
Taking Care of Your High-Voltage Gloves
Here are a few extra tips to help you take good care of your high-voltage gloves.
When Using the Gloves
Although the high-voltage insulating gloves protect you when using them, it’s still best to avoid touching high-voltage cables and other areas if it’s not necessary to touch them.
Also, do your best not to damage high-voltage cables because they are dangerous, difficult, and expensive to replace.
Applying Powder
You might be tempted to apply talcum powder to the inside of the gloves, but I don’t recommend you do that.
Talcum powder can damage the gloves. Use special electrical glove dust instead, available from most high-voltage glove suppliers.
Storing the Gloves
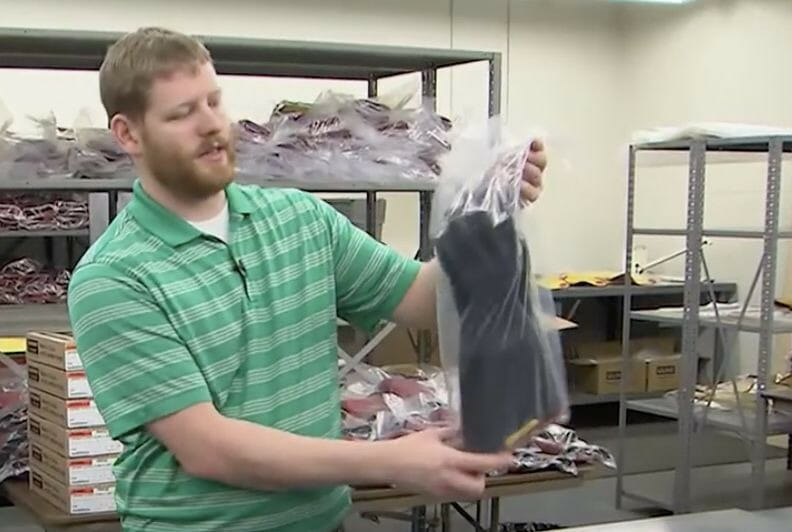
Always store your high-voltage gloves in their UV-resistance polythene bag when not using them.
This will protect them from light, heat, and ozone. Also, keep the bag inside the polypropylene storage box for both storage and transportation.
Chemical Exposure
Gloves that come into contact with any kind of accidental contamination should be disposed of after completing the electrical work if they can still be used for it. Replace the gloves afterward. Bulging or swelling is a common sign of contamination. The glove will be weak at that point.
Expiration
Insulating rubber gloves don’t have an expiration date as such. They can still be used only as long as they are kept clean and pass your inspection and tests.
References
2 pieces insulating gloves for high voltage. https://www.amazon.com/Insulating-Electrical-Protective-Equipment-Protection/dp/B01IVKJEYS/
Linemen used insulting gloves. https://nara.getarchive.net/media/tech-sgt-kevin-pearson-electrical-systems-craftsman-a39bb5
Tim Gilles, Automotive Service. Inspection, Maintenance, Repair. Cengage Learning. 2019.
Video References
Bryan Rupert
FirstEnergy