11 min read
How to Use an Electric Planer on a Tabletop
An electric planer is great for helping you create smooth and even surfaces; using one on a tabletop to smoothen a wooden surface is relatively easy. But some good practices could help you get through it more effectively and safely.
My below steps outline:
- Securing the wood,
- Marking it,
- Setting the knob for the right depth,
- Holding the planer with your dominant hand,
- Pushing the trigger before contact with the wood,
- Starting slowly,
- Applying slight pressure,
- And making multiple passes.
I’ve also given information to introduce the planer and mention its types, common features, and tips.
Electric Planers
We use an electric planer to clean or shave wood and strip and shape it.
It’s a tool that beginner woodworkers can also learn to use quickly. They are ideal for ensuring straightness, smoothness, and precision in woodworking projects.
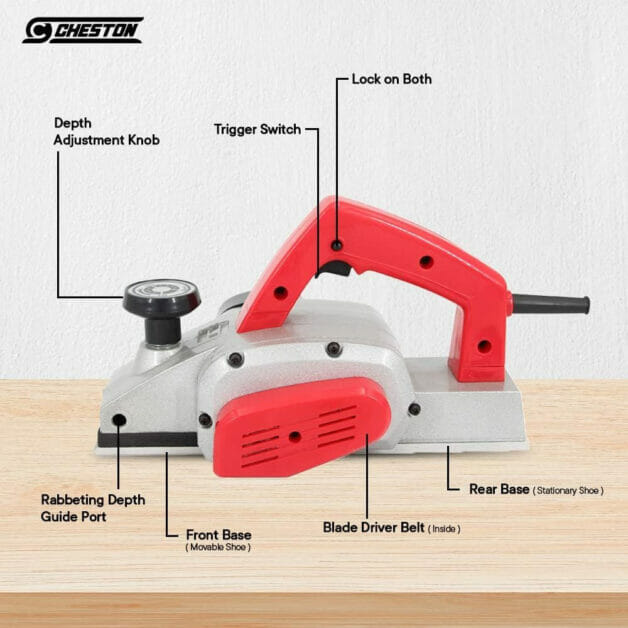
Before I tell you about using one, let’s get familiar with its main parts. See the picture below. This way, you’ll know what part I’m referring to.
| Electric Planer Type | Power Source | Description |
|---|---|---|
| Hand Planer | Electric | Compact and easy to use |
| Corded Planer | Wall Outlet | Continuous power without charging |
| Battery-Powered Planer | Rechargeable Battery | Portable and cord-free |
| Common Planer Features | Function |
|---|---|
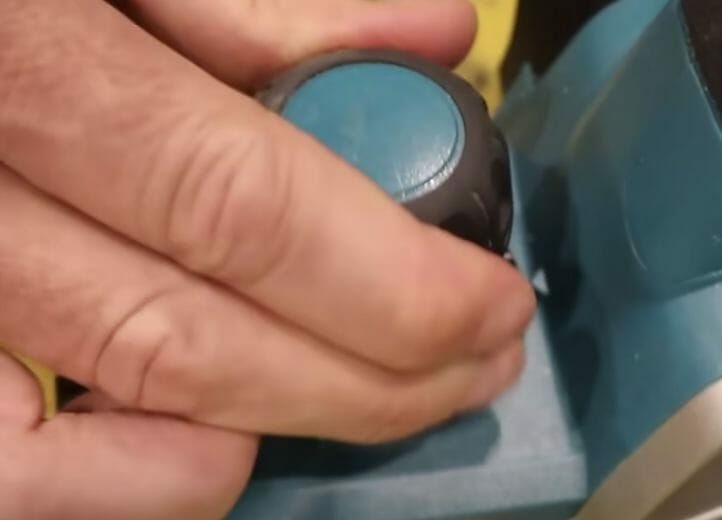
| Depth Adjustment Knob | Adjusts the depth of the cut by rotating either clockwise or counterclockwise. |
| Aluminum Plate | Smoothens the planer’s movements and ensures precision while cutting. |
I’ve given more information about electric planers at the end of the article.
RELATED Can You Drill into Wood Filler?
Good Practices and Essential Preparations
Here are some good practices and suggestions for preparation when using an electric planer on a tabletop.
Wood
The wood should be as dry as possible. Otherwise, the planer might not work as expected.
If it’s not dry, allow it to dry well before working on it by keeping it dry, even if it takes a few days.
No other material or bits should be attached to the wood, such as splinters, fasteners, or nails, as they could break the blade and cause an incident.
Also, the wood must be positioned correctly and securely so that it’s easy to work with. It should not be larger than the table. A bigger piece will be difficult to work with and keep fixed in one place. It shouldn’t be too small either.
Stability is very important. You don’t want the wood to keep moving from its position while working on it. Use clamps or clips if it helps, and use enough to ensure the wood is secure and will not move about.
For best results, I recommend only stripping a small amount of wood at a time while operating the planer.
Workspace
A good tabletop can make it much easy to work, and a bad-quality one can hinder your ability to work effectively.
Its size should be large enough to put the wood on.
You probably already have a good setup if you’re working in a workshop, garage, or shed. If this is not a regular thing you do, make sure the chosen workspace is ideal for the task. An ideal one is sized appropriately and sturdy.
The tabletop should also be free of dust and debris. Wipe it clean before working, anyway.
Planer
Check the planer to ensure it’s in good working order.
If it’s a corded planer, check the cable for any signs of damage. If it’s cordless, ensure the battery is adequately charged.
Ensure the blades are in good working order. The sharper the blades, the easier the planer will work. A dull or bent blade will not strip well and could damage the design. Sharpen it if it’s dull.
Attach the dust bag to the planer before starting. Some planers can set which side you want the debris to come from. Choose the side opposite from where you will be standing.
When setting the cut depth, know that a smaller depth is easier to work with but may require more passes, whereas a deeper setting will require more time and effort but fewer passes. Multiple low-depth cuts are preferable if you have a good supporting tabletop over attempting a single deep cut. It also reduces the margin for error.
Posture and Personal Safety
The correct posture can make a big difference, and personal safety is paramount.
You’ll work more comfortably and finish more effectively with the right posture. Keep your back close to being straight without being stiff and minimize the need to bend.
For personal safety, you should use earplugs or headphones to protect yourself from noise, goggles for dust protection, and a mask to protect against airborne sawdust.
Although electric planers are usually small, their motors are fast, and their blades are sharp. You don’t want to use an electric planer if you’re unaware and in control of your actions. Only use one if you can remain fully concentrated without any disturbance while it’s operational.


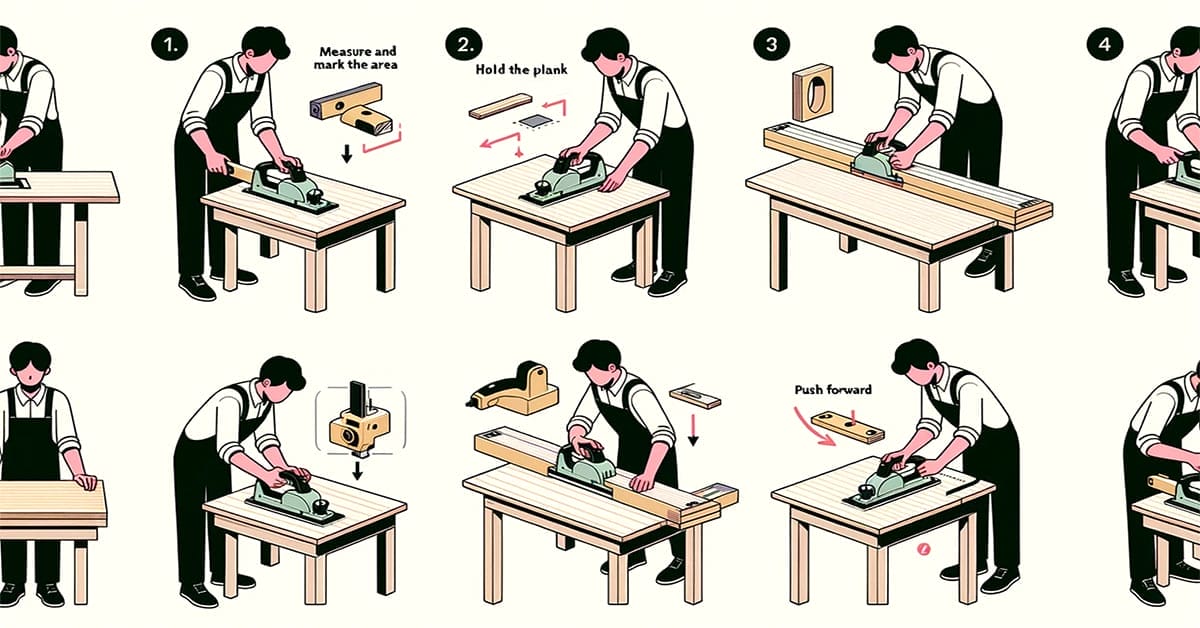
Using the Electric Planer
Once you’ve ensured all the above, turn the planer on and start scraping the wood off as outlined below.
The following five steps are detailed:
- Securing and marking the wood.
- Setting the planer.
- Using the planer.
- Multiple passes.
- Finishing off.
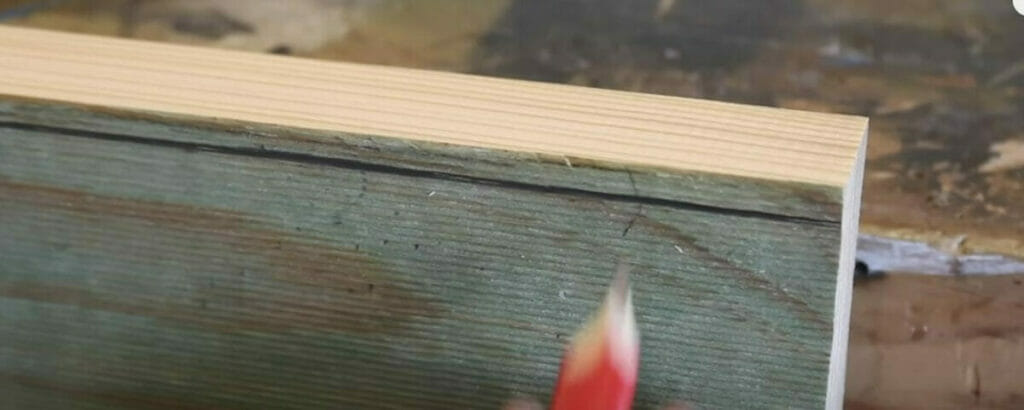
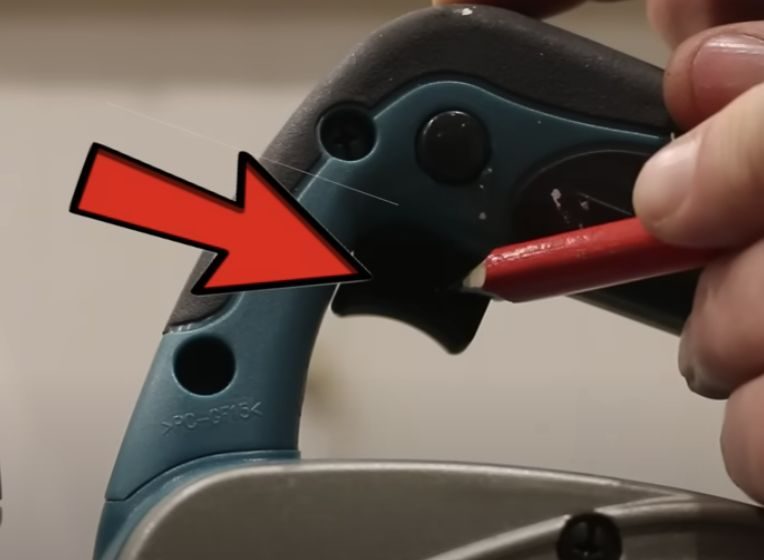
Step 1: Secure and Mark the Wood
Secure the wood, using clamps if necessary, and mark how deep you want to shape or cut it using a pencil.
Step 2: Set the Planer
Set the knob to how deep you want to cut and attach a dust bag to the planer to collect the sawdust or chips.
Step 3: Using the Planer
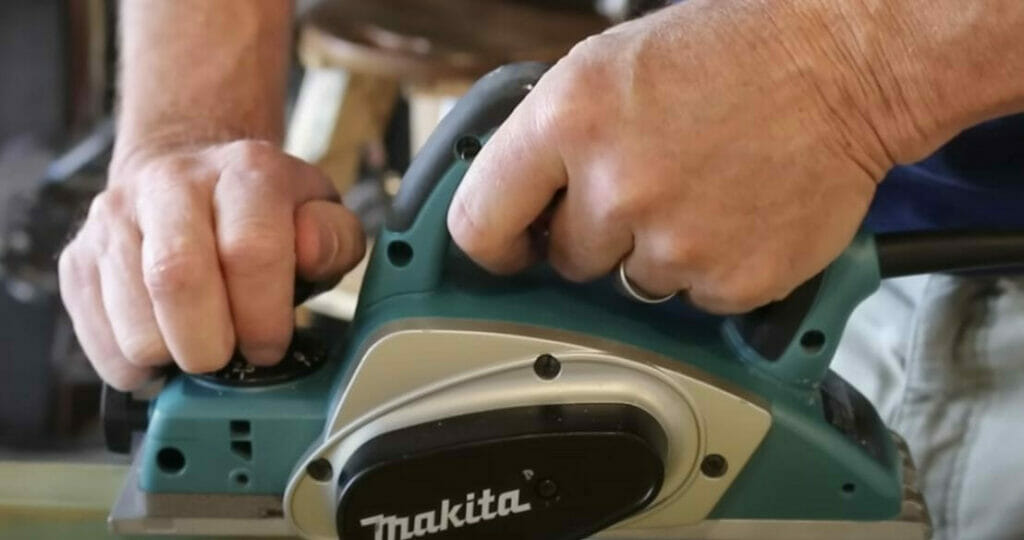
While using the planer, apply the good practices we recommended for posture and safety.
If you’re right-handed, I suggest you put your right hand on the handle and your left (non-dominant) hand on the knob. If you’re left-handed, it will be the other way around. This way, the dominant hand will also remain near the trigger.
Before pushing the trigger, keep the planer in the air to let it start spinning before directly contacting the wood. You’re ready to go once you’ve pulled the trigger.
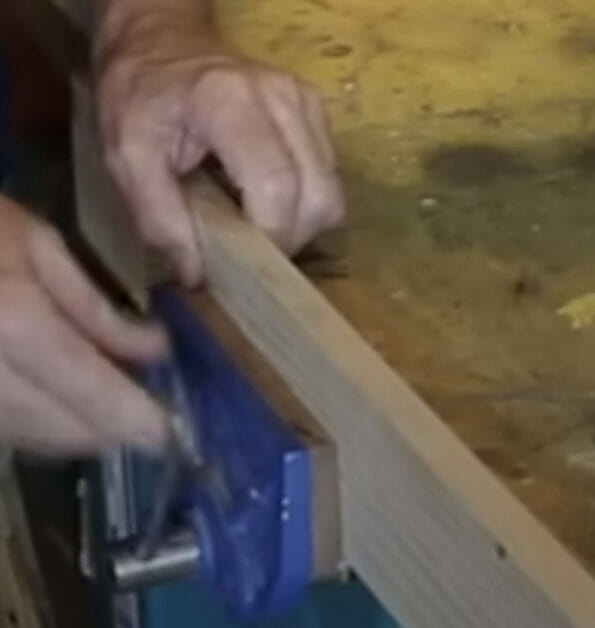
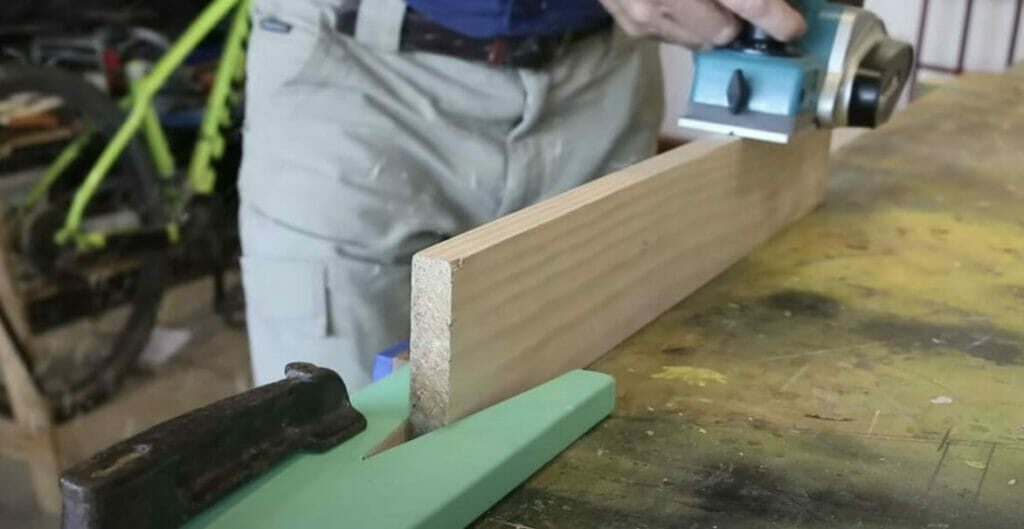
Initially, it would be best to position the planer on the table’s edge to start from there.
Start slowly and apply constant downward pressure while moving the planer forward. Then increase the speed a little and keep it steady.
While slowly moving along, most pressure will naturally be on the planer’s front end. But also apply a little pressure on the back at the end of each stroke. This ensures the planer remains in line and does not flip forwards over the board.
Keep going over straight until the blade no longer touches wood. Then release the trigger and wait for the blade to stop spinning.
Step 4: Multiple Passes
Repeat the process and strokes until you’ve shaped or cut the wood as desired and reached the marked thickness. You may need to make several passes over the wood before you achieve the final result you are comfortable with.
If you need to look at the surface while using the planer, release the trigger and wait until the blade stops spinning.
The multiple passes are necessary to ensure you’ve removed all imperfections and defects and ended up with a smooth surface.
Step 5: Finishing Off
You can finish off your project by applying varnish or paint.
It will protect the wood while also making the outer sides look nice. Varnish or lacquer will retain the wood’s appearance while giving it a protective layer. Paint can give it a completely different look, and you can choose from many colors and textures.
Additional Tips
| Personal Safety | Use earplugs or headphones for noise protection, goggles for dust protection, and a mask for airborne sawdust protection. |
| Workspace Organization | Ensure all tools and equipment are easily accessible and organized to maintain an efficient workflow. |
| Planer Maintenance | Regularly check the planer for any signs of damage or wear, and keep the blades sharp for optimal performance. |
| Wood Preparation | Explore different finishing techniques, such as sanding, staining, and sealing, to achieve your woodworking project’s desired look and protection. |
| Technique Improvement | Practice using the electric planer on scrap wood to refine your technique and gain confidence before working on your project. |
| Material Selection | Choose the appropriate type of wood for your project, considering factors such as hardness, grain pattern, and color. |
| Finishing Techniques | Explore different finishing techniques, such as sanding, staining, and sealing, to achieve the desired look and protection for your woodworking project. |
About Electric Planers
Types of Electric Planers
Three main types of electric planers are available in the market: hand, corded, and battery-powered planers.
They are all easy to operate and share some features, as they’re all designed for the same purpose.
Common Features
A couple of special features you may find in an electric planer include:
- A depth adjustment knob enables adjusting the depth of the cut. It rotates either clockwise or counterclockwise.
- An aluminum plate helps to smoothen the planer’s movements and ensure precision while cutting.
Advantages
Compared to manual planers, electric planers offer some advantages. Here are a few examples:
- They usually give a smoother result and a more even surface.
- You can craft wood with more precision and to the desired thickness.
- They allow you to reclaim old wood more easily and quickly.
- You can use it on a wide variety of wood.
RELATED Can You Drill into Wood Filler?
References
Electric Planer. https://www.amazon.in/dp/B0BSNB9868.
Video References
DIYForKnuckleheads
Freebird Woodworkin