6 min read
How to Connect a Speaker Wire to a Wall Plate (7 Steps)
If you’re bothered by the sight of long speaker wires along your floor and people tripping over them, you can conceal the wiring in your walls and use wall plates.
It’s not difficult to do this. It’s similar to how television and phone cables are wired to wall plates. This is more convenient and safer.
Connecting a speaker wire to a wall plate involves simply wiring it to the terminals of each audio jack behind the plate, attaching the plate to the wall, and adapting the other end for the audio source.
I will show you how you can do this.
Speaker Wires and Wall Plates
Speaker Wires
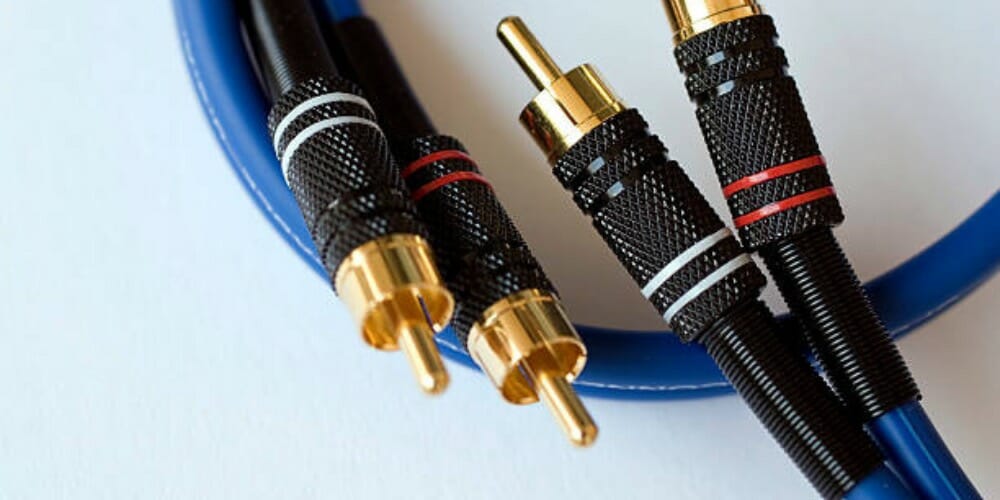
A speaker wire is a common type of audio cable.
It usually comes in pairs because the two are meant to work together in a stereo system. One is typically in red (positive wire), and the other in black or white (negative wire). The connector is either bare or in the form of a banana connector, which is more secure and protective of the wire, making it less likely to fray or lose integrity.
The banana connector is designed to fit into a banana port, which is common on almost every speaker.
Wall Plates
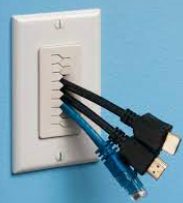
Wall plates provide greater convenience than laying your wiring out in the open.
Like power outlets in a home’s electrical system, you can also install wall plates with audio jacks for your entertainment system. This way, the audio wires can be kept hidden instead. It is also a safer method because no one will trip over them.
Steps to Connect a Speaker Wire to a Wall Plate
The steps to connect a speaker wire to a wall plate are below.
Remember to take the following precaution: Make sure no strands on the positive and negative terminals touch one another.
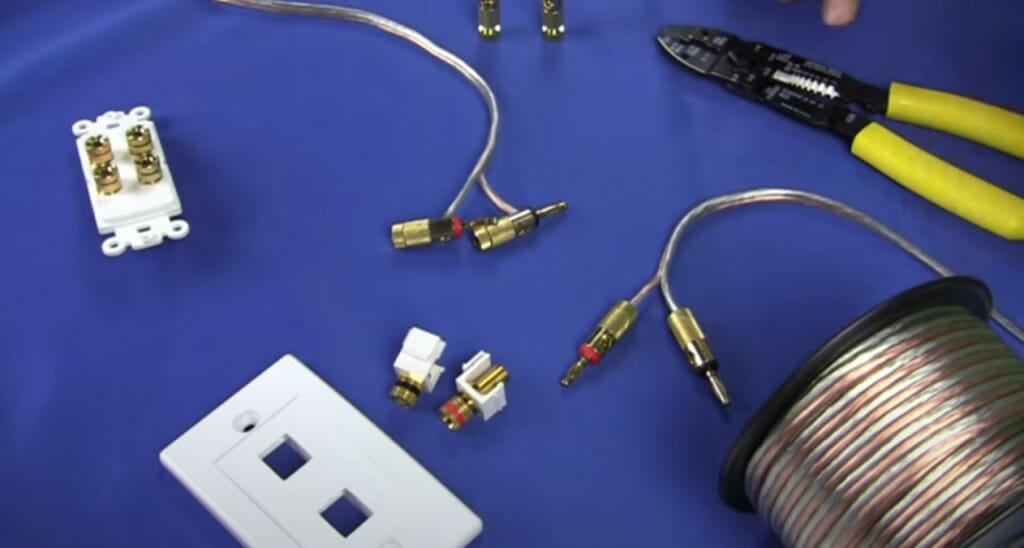
Also, we recommend you use gold-plated banana plugs for greater durability.
The only tools you need are a screwdriver and a wire cutter.
Step 1: Route the Speaker Wires
Route the speaker wires through the opening in the inner box.
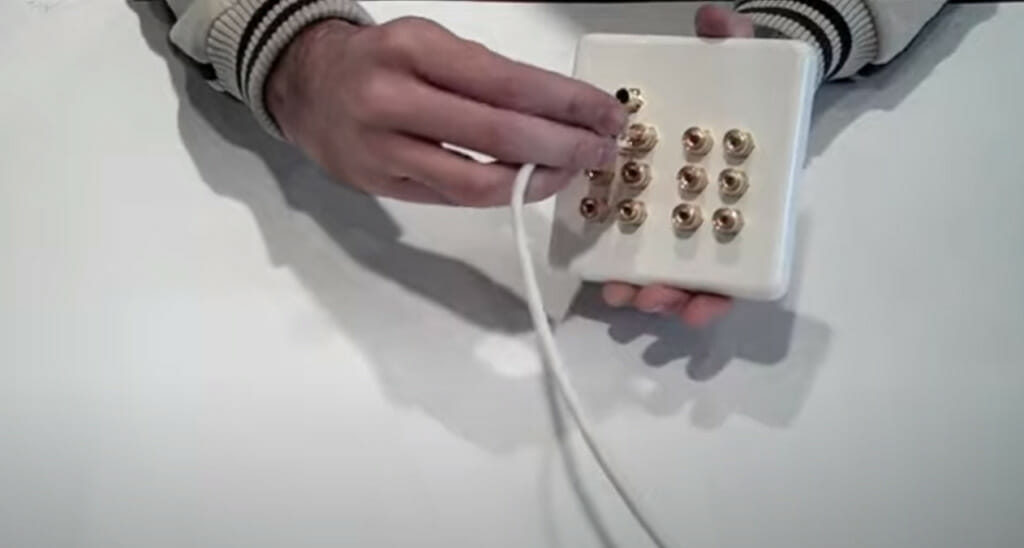
Step 2: Turn the Screw Terminal Sleeves
Turn the screw terminal sleeves (counter-clockwise) on the rear of the wall plate so that the terminal holes are exposed.
Step 3: Insert the Speaker Wire
Insert the speaker wires (positive and negative) into each terminal hole of the screw terminal, then turn the sleeve (clockwise) to secure it.
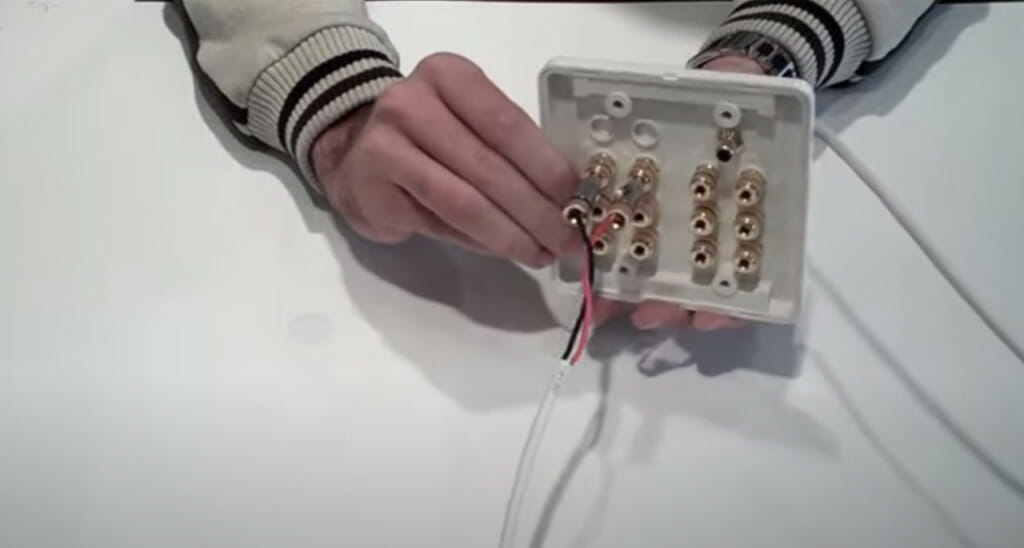
Step 4: Repeat for All Other Terminals
Repeat the above step for all the other terminals.
Step 5: Remove the Faceplate
Once the wiring in the rear is done, remove the faceplate from the wall plate. You should see at least a couple of screws concealed underneath.
Step 6: Position the Wall Plate
Place the wall plate against the electrical box opening.
Step 7: Thread the Screws
Once the wall plate is positioned in the wall, secure it by threading the screws through the screw holes and tightening them.
You can now connect your speakers to the wall plate and enjoy listening to your audio system.
A Sample Audio Wall Plate Setup
Below is the wiring diagram for a home theatre or entertainment system.
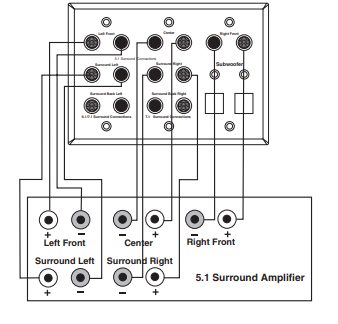
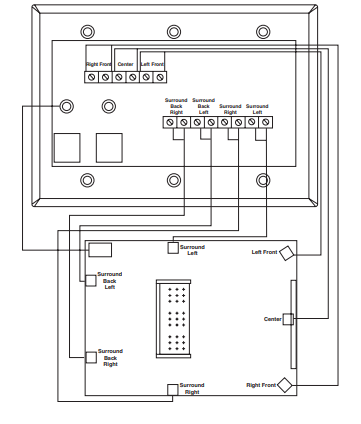
This particular setup requires a 3-gang low-voltage ring near the amplifier, a single-gang low-voltage ring near each speaker, and an RG6 quad-shielded coax cable extending from the wall plate to the speakers. The speaker wire should be at least 16/2 Class 3, at least 18-gauge for up to a 50-feet distance (thicker for longer distances).
This should give you an idea of what to expect if you intend to wire for a home theatre system. You will have to consult the manual that came with yours for the exact specifications and steps.
How Wall Plate Setups Work
Before I tell you how to connect a speaker wire to a wall plate, it would help to know how a speaker wall plate setup is organized.
The speaker or audio wall plate is installed on a wall, like those for electrical plugs, cable television, and phone jacks. The speaker cables run from it along the wall’s interior, usually to another wall plate where the audio source is connected.
This arrangement connects the audio source and speakers concealed behind walls. Some speaker wall plates use banana sockets, but some can also accept bare speaker wires.
The back of a speaker wall plate is like an ordinary one used for electrical fittings.
Take a look at some of our related articles below.
Reference
(1) Leviton. Wall plate – front and rear view. Home theatre interface plate. Retrieved from https://rexel-cdn.com/Products/B78D614E-3F38-42E7-B49B-96EC010BB9BA/B78D614E-3F38-42E7-B49B-96EC010BB9BA.pdf
Video References
CableWholesale.com
Sewell Direct