10 min read
How Do You Know If You Drilled into a Wire? (4 Warning Signals)
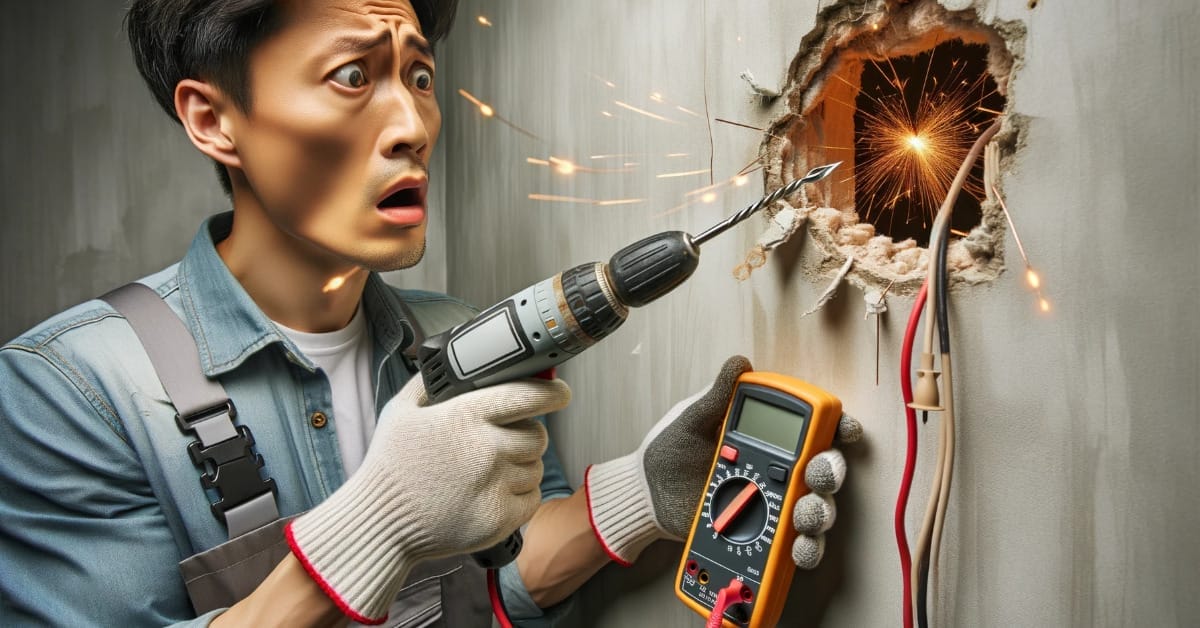
How do I know if I hit a wire? It’s a valid fear for any homeowner or renter taking on their own repairs or upgrades.
To answer that question immediately – you’ll typically know you’ve drilled into a wire when there’s a sudden loss of power, sparks flying, or even an electrical shock from your drill. In this article, we’ll delve into the telltale signs that you might have struck an electrical wire during your drilling adventure.
In general, here are key signs to know if you drilled into a wire:
- Sparks or smoke
- Unexpected power outage
- Popping sound
- Tripped circuit breaker
I want to stress that safety should always be paramount in these situations. If you suspect there’s been contact with live wiring, it’s important to disconnect the power immediately at the circuit breaker before proceeding further.
Stay tuned as I guide you through what to do next and how to avoid these issues in future projects.
Signs You May Have Drilled into a Wire

It’s not always easy to tell. Some clear signs can indicate if you’ve indeed drilled into a wire. Let’s dive right in.
- Sparks and Smoke: If you drill into an electrical wire, there might be noticeable sparks or smoke from the hole.
- Unexpected Power Outage: Electrical wires run throughout your house, supplying power to different rooms and appliances. So, if one moment everything’s working fine and the next moment the room is plunged into darkness, chances are high that you’ve struck a nerve or a wire!
- Popping Sound: Now, let’s talk about sound cues. If there was any popping sound when drilling the hole, it may mean you accidentally pierced an electrical line. This isn’t necessarily life-threatening but requires immediate attention.
- Circuit Breaker Trip: It’s also worth mentioning circuit breakers here because they’re designed with safety in mind – ‘tripping’ or shutting off when too much current flows through them or they sense any abnormality like a drill bit puncturing a live wire.
Here’s hoping these insights will help keep those DIY projects safe and ‘shock-free.’ After all, we’re aiming for home improvements, not home disasters.
Using Wire Detection Tools
Here’s a little secret from my toolbox – wire detection tools.
These handy devices are your safety net for avoiding wires during drilling. They’re designed to identify the presence of hidden cables and pipes behind walls, ceilings, or floors before you start a project.
1. Stud Finder with Wire Sensing Capabilities: While it’s primarily used for locating wooden studs behind drywall, many models come with built-in wire sensing capabilities. I’m talking about compact devices that use electronic sensors to detect changes in density – allowing them to spot not just studs but also live electrical wires within walls.

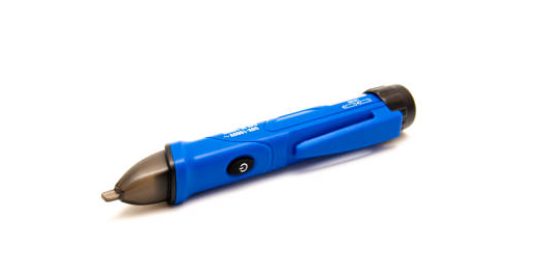
2. Voltage Detector (Non-Contact Voltage Tester): This pen-like device can sense electricity without direct contact with a wire. It’s straightforward to use; you’ll see its tip glow or hear a buzzer sound when close proximity to an energized line is detected.
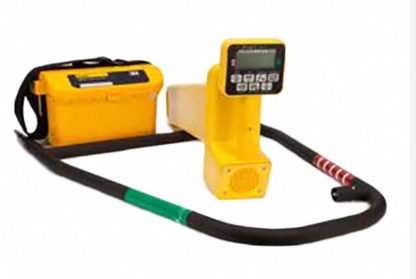
3. Advanced Pipe and Cable Locators: These are specifically made for detecting hidden utilities, including electric cables, metal pipes, plastic pipes (with tracers), and even telecom and fiber optic cables!
These tools bring peace of mind when drilling into unknown territory. But remember – they aren’t foolproof:
- Calibration matters: Your tool might give false negatives or positives if incorrectly calibrated.
- Depth limitations: Some detectors struggle with depth. They may fail if the wire is too far behind thick walls.
- Interference: Other metallic objects can interfere with readings, leading to inaccurate results.
Using wire detection tools effectively requires understanding their limits and proper usage techniques. And always double-check before bringing out that drill!
Conducting Electrical Checks
Let’s walk through some steps to help you determine if that’s what happened.
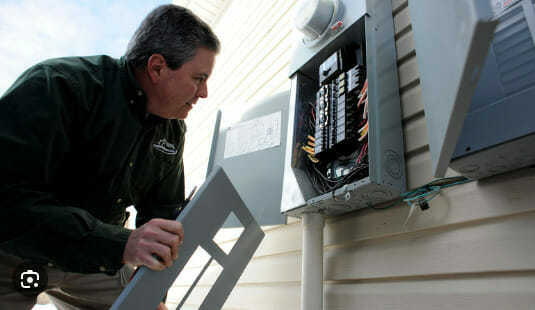
One of the first things I’d recommend is checking your circuit breaker or fuse box. If you’ve drilled into a wire, chances are high that it would trip the circuit breaker or blow a fuse.
This happens because the drill bit could create a short circuit when it comes in contact with an electrical wire. So, take a look at your breaker panel. Is any switch flipped off? Or, for those using fuses, is any fuse blown?
Next up, inspect the hole you drilled carefully. Are there any visible signs of wiring? It might be difficult to see if the wire was small or deep within the wall, but check anyway.
Still unsure? The best way forward may be to use voltage testers (also known as voltage detectors). These handy little devices are designed to detect electrical current without direct contact with wires, making them perfect for this situation! Remember to test them on an outlet before using them on your wall.
Lastly, if all else fails or you’re still uncertain, call in a professional electrician — they have tools like endoscopes and infrared cameras that can peek inside walls and confirm whether or not damage has been done.
Safety Tips for Drilling Near Wiring

Safety should be your top priority for home improvement.
This is especially true when we’re talking about drilling near wiring. So, let’s jump into some practical tips that’ll help keep you safe and sound.
First, before drilling holes in your walls, ensure you know what’s behind them. Invest in a stud finder with wire detection capabilities. It’s a simple tool that can save you from a shock or an expensive repair bill.
Here are a few additional points to remember:
- Power down: Always turn off the electricity at the breaker box before starting work.
- Know your layout: Understanding where wires typically run in homes can give clues about where they might be hiding.
- Tread lightly: Don’t apply too much pressure while drilling. If there’s resistance, stop!
Now I get it – sometimes accidents happen, and that’s okay! But knowing how to handle them is key. If you do accidentally drill into a wire, don’t panic! Turn off the power immediately and contact a professional electrician for assistance.
Drilling near wiring isn’t something to take lightly – even pros like me never underestimate its potential dangers.
By following these safety tips and always erring in caution, we can ensure our DIY projects remain fun and incident-free.
What to Do if You Drill into a Wire
Drilling into a wire is no fun. So, what do you do when you hit that wire?
Let me walk you through it.
- Stop Drilling Immediately: If you continue, there’s a chance you could cause more damage or even spark an electrical fire.
- Turn Off the Power: This isn’t just about preventing further damage; it’s also about keeping yourself safe from potential electrocution.
- Assess the Damage: Look at where you drilled, see how big the hole is, and if any wires are visible or damaged. If they’re not visible, but your power went out, or tools stopped working during your project, there might be some hidden trouble.
- Decision Time: Patch or Professional Help: Here are some pointers:
- Patching up: If only the insulation around your wire got nicked and no actual wires were hit—you might be able to fix this with electrical tape.
- Call for help: However, if copper wiring gets damaged—it’s time for professional intervention. Damaged copper can lead to serious electrical issues like arcing, which can start fires.
This whole thing might have been nerve-wracking, but everyone makes mistakes! The important thing is learning from it, so we’ll remember to use a stud finder before drilling blindly into walls or ceilings again!
Common Locations for Wiring

We’re diving into the world of home improvement, and trust me, it’s an adventure worth taking. Picture this: you’ve got your toolkit ready your project plan in hand, and you’re all set to drill into those walls and create magic. Before you charge ahead, let’s discuss a crucial aspect – avoiding concealed electrical wires.
Hitting a wire mid-project is a surprise you’d rather avoid. So, let’s lay down some ground rules to keep you on the safe and successful path:
1. Wall Outlets and Switches: Wires love to hang out around these areas. So, steer clear of drilling immediately above or below these fixtures, and you’ll be golden.
2. Ceiling and Floor: Wires can run along the floors and ceilings, usually right where the walls meet these surfaces. Keep this in mind as you plan your project.
3. Studs: Wires often ride through holes drilled in those vertical studs that make up your walls. Avoid drilling smack dab in the center when you locate a stud with your trusty stud finder. Wires tend to hang out around there.
4. Appliances and Fixtures: If it’s hardwired into your home, you bet electrical wires are making their way to it. Think ceiling fans, lights, or any such home fixture. Wires are like the roads that connect these dots.
5. Near the Circuit Breaker or Fuse Box: The hub of all things electrical in your home – the circuit breaker or fuse box. It’s like a maze of wires in there! So, be extra cautious when working on walls near this box. Those wires can take unexpected turns.
6. Baseboards: Sometimes, wires stroll right above the baseboards, especially in older homes. Keep an eye out for these sneaky paths.
7. Visual Clues: Wall-mounted light fixtures, electrical outlets, switches, phone jacks, and cable jacks could mean wires are nearby! Wires can play hide and seek, running horizontally away from these points. So, be aware of their tricks.
So, keep these guidelines in your toolkit, and you’ll be well-prepared to tackle your home improvement projects without any shocking surprises.
References
Studies:
- National Fire Protection Association (NFPA). https://www.nfpa.org/Research
Organizations:
- Occupational Safety and Health Administration (OSHA). https://www.osha.gov/electrical
- National Electrical Contractors Association (NECA). https://www.necanet.org/
Books:
- “NFPA 70®: National Electrical Code (NEC) Handbook” by NFPA. https://www.nfpa.org/NEC/About-the-NEC
- “Electrical Safety Handbook” by John Cadick, Mary Capelli-Schellpfeffer, Dennis Neitzel. https://www.amazon.com/Electrical-Safety-Handbook-John-Cadick/dp/0071766856
Website Resources:
- Electrical Safety Authority (ESA). https://www.esasafe.com/consumers/homeowners
Video References:
Peterson Electric