14 min read
Revolutionize Your Water Heater: One Simple Repair to Prolong Its Life (Guide)
As a homeowner, one of the most important things you can do to extend the life of your water heater is to replace the anode rod.
An anode rod is a long metal rod inserted into the water heater tank, and its purpose is to attract minerals that would otherwise rust the inside of the tank.
What I’ll cover: Replacing an Anode Rod in 6 steps:
🔒 Step 1: Safety First – Shut off the water and fuel supply.
💧 Step 2: Ready the Tank – Drain it to access the anode rod.
🔎 Step 3: Find the Anode – Locate the rod, often under a cap.
🔧 Step 4: Out with the Old – Remove the old anode rod.
✨ Step 5: In with the New – Install the new anode rod.
🔌 Step 6: Power Up – Turn the water and fuel supply back on.
In this article, we’re diving into the nitty-gritty of anode rod installation. I will carefully guide you through each step, ensuring you have the know-how to tackle this confidently.
Project Overview
I’m excited to share this DIY project to save you money on repairs and maintenance.
- Working Time: 60 minutes
- Total Time: 60 minutes
- Skill Level: Moderate
- Estimated Cost: $30 to $90
Don’t let a corroded anode rod ruin your day. This simple replacement allows you to troubleshoot and maintain your water heater easily. So roll up your sleeves, and let’s get started!
Tools & Materials
Before replacing an anode rod, gathering the right set of tools and materials is crucial. Having these items at your disposal will streamline the process, ensuring efficiency and safety.
Let’s lay out the essentials you’ll need:
- Pipe wrench
- Ratchet (optional)
- Sockets (optional)
- Garden hose
- Plumber’s tape
- Anode rod
Before Starting

When it comes to replacing your water heater’s anode rod, you should consider a few things before getting started.
- Anode Rod Selection: Decide on the right type of anode rod for your water heater.
- Water Hardness: Consider the hardness of your water to determine whether magnesium or aluminum is the best option for your electric or gas water heater anode rod replacement.
- Zinc Addition: Note that some aluminum anode rods have a small amount of zinc added to their construction to reduce any sulfur smells in the water.
Step-by-Step Guide to Anode Replacement
I will walk through the necessary steps to inspect and replace your anode rod, ensuring that your water heater remains in peak condition.
Step 1: Shut Off the Water Heater’s Water and Fuel Supply
Before replacing the anode rod in my water heater, I need to shut off the water and fuel supply to the tank. This important safety step will prevent any water or gas from leaking out while I’m working on the unit.
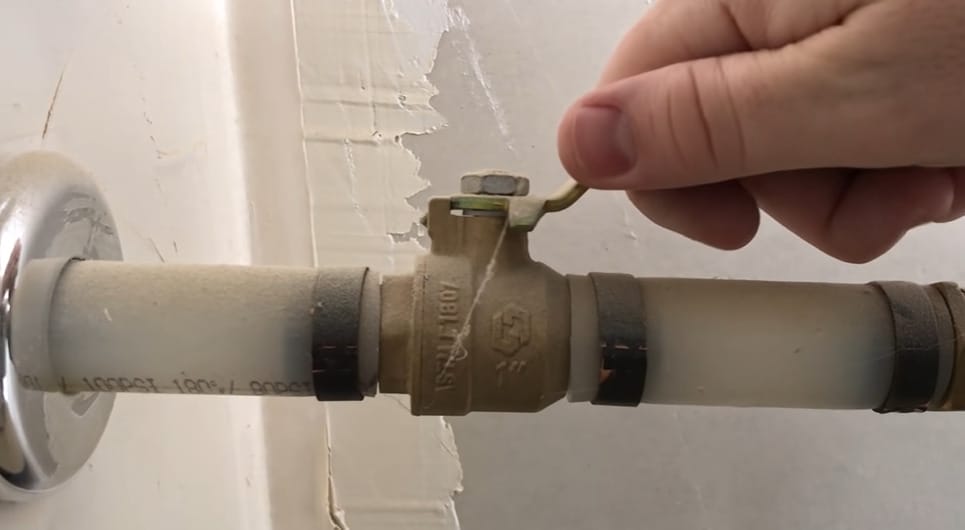
To shut off the water supply, follow these steps:
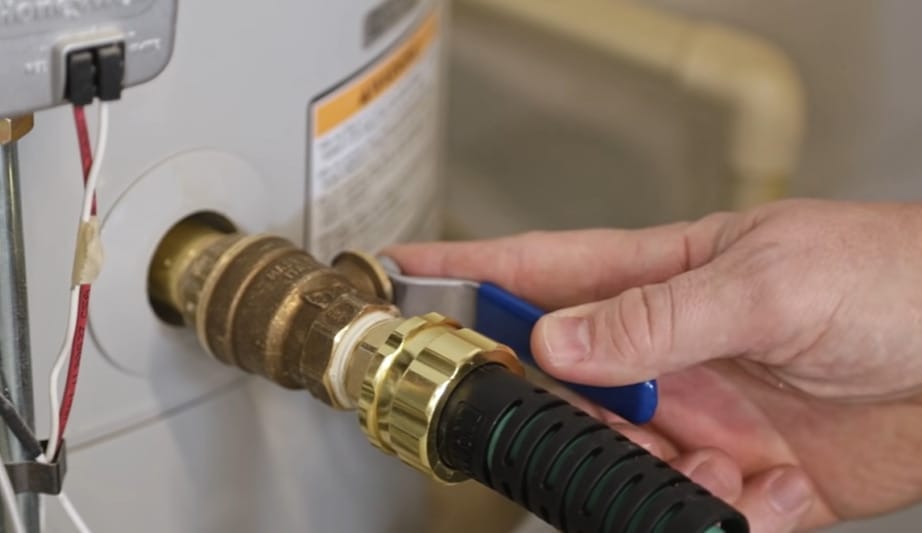
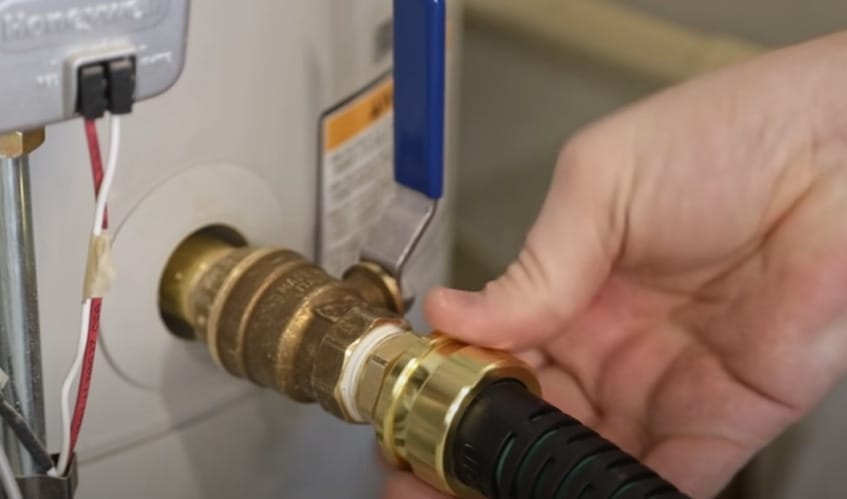
- Step 1: Locate the shut-off valve on the water line leading to the water heater. This valve is usually located near the top of the tank and can be turned off by rotating it clockwise until it stops.
- Step 2: Once the valve is turned off, open a hot water faucet in the house to relieve any pressure in the tank.
- Step 3: Shut off the fuel supply to the water heater. If you have a gas water heater, locate the gas control knob and rotate it to the OFF position to stop fuel delivery to the water heater.

Following these simple steps, you can safely shut off the water and fuel supply water heater and begin replacing the anode rod.
Step 2: Drain the Water Heater
Now that I’ve shut off the water and fuel supply to my water heater, it’s time to drain it.
This step is essential because it removes any sediment buildup that may have accumulated at the bottom of the tank, which can cause damage to the anode rod and the water heater itself.
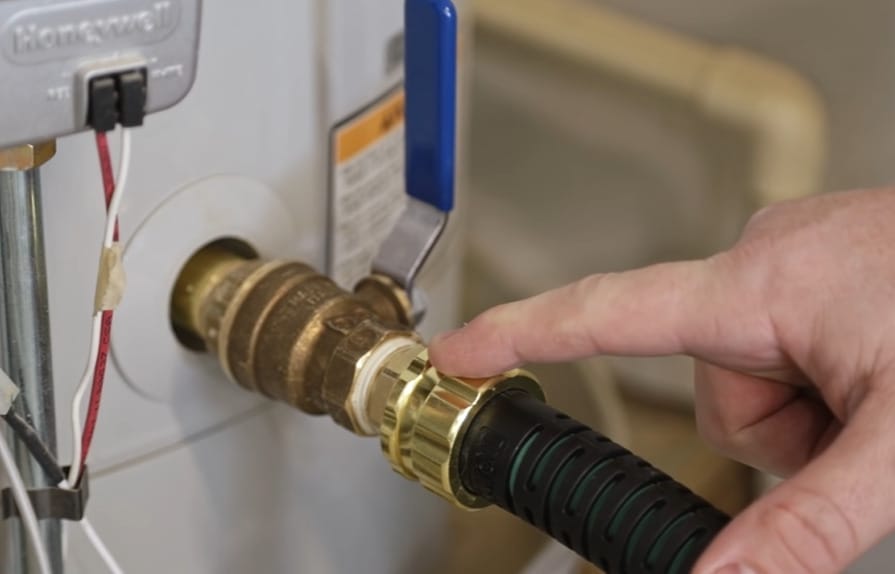
- Step 1: Locate the drain valve on the water heater. It’s usually located near the bottom of the tank and looks like a spigot.

- Step 2: Once found, attach a garden hose to the valve and run it to a drain or outside.
- Step 3: Open the drain valve and let the water drain out. It may take a while for all the water to drain, so be patient. While the water is draining, take the opportunity to inspect the tank for any signs of damage or corrosion.
- Step 4: Once the water has drained out completely, close the drain valve and remove the garden hose. It’s important to ensure the valve is tightly closed to prevent leaks.
With the water heater drained, I’m ready to move on to the next step: replacing the anode rod.
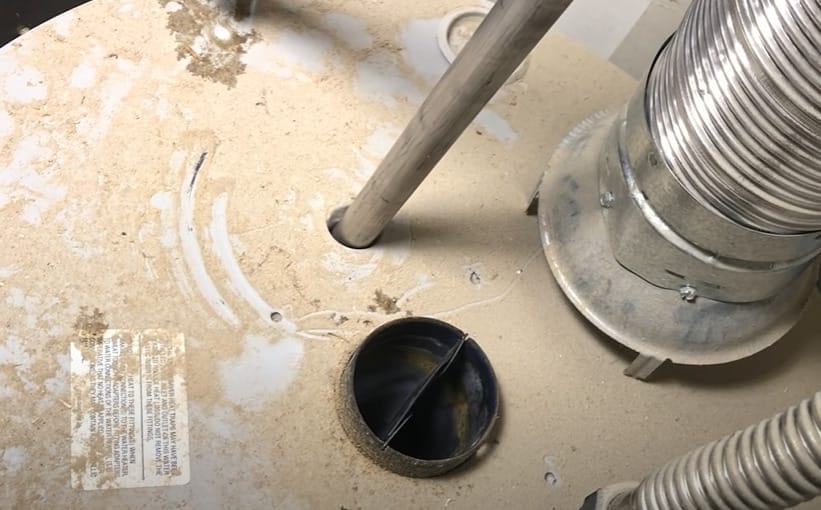
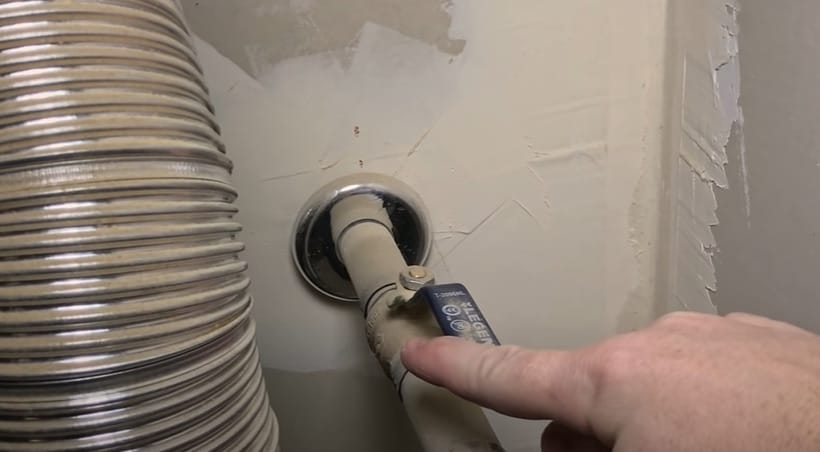
Step 3: Locate the Anode Rod
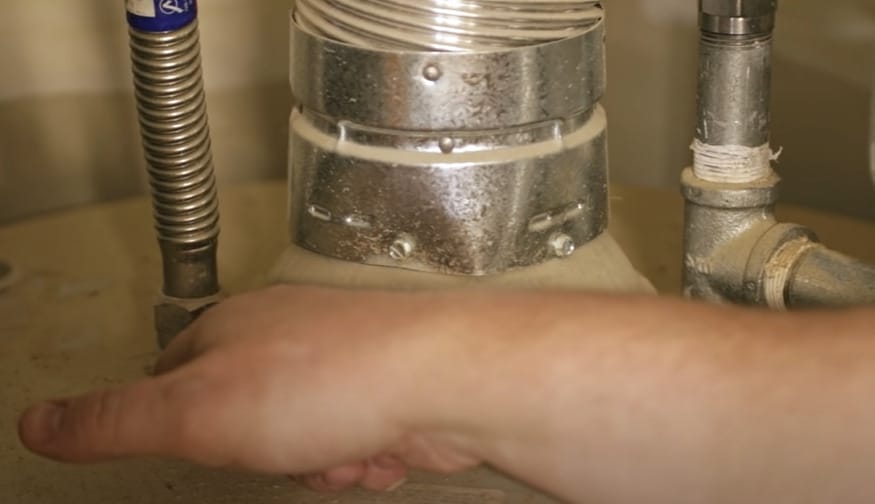
Now that you have turned off the water and power supply and drained the tank, it’s time to locate the anode rod. This is an essential step in replacing the anode rod of your water heater.
You can usually find the anode rod near the top of the water heater tank, close to the hot water outlet. Employ a socket wrench, breaker bar, or impact wrench to loosen and extract the anode rod.
It is important to note that it is best to consult a professional if you encounter difficulty locating or removing the anode rod. A qualified plumber will be able to guide you through the process and ensure that the anode rod is replaced safely and correctly.
Remember, the anode rod is a critical component of your water heater; replacing it regularly is essential to extend its life.
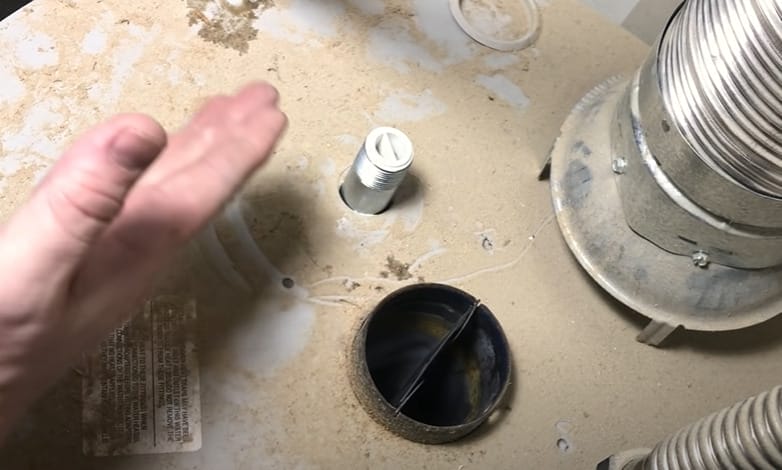
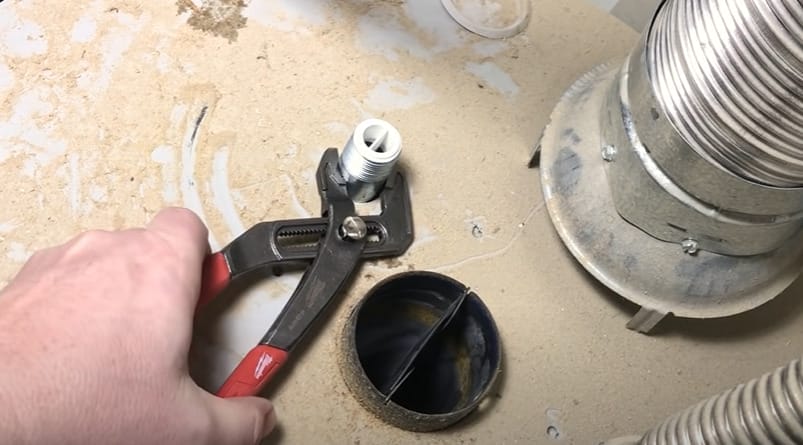
Step 4: Remove the Old Anode Rod
Now that the water heater’s water and fuel supply are turned off, it’s time to remove the old anode rod. This is a critical step in replacing the anode rod and extending the life of your water heater.
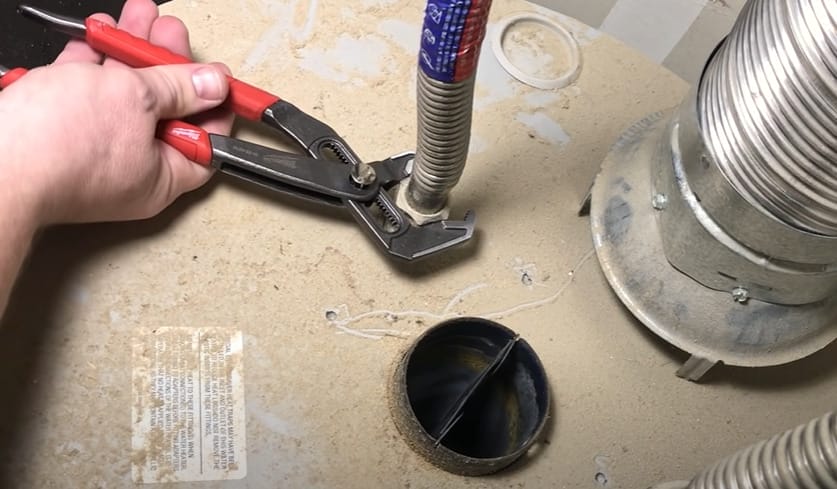
To remove the old anode rod, follow these steps:
- Step 1: Use a socket wrench or breaker bar to loosen the hex head of the anode rod. If the anode rod is difficult to remove, use an impact wrench or spray lubricant to loosen it. Remember to turn the anode rod counterclockwise to remove it.
- Step 2: Once the old anode rod is removed, inspect it for signs of wear and tear. If the anode rod is heavily corroded, it’s a sign that it has been protecting the water heater’s tank from corrosion.
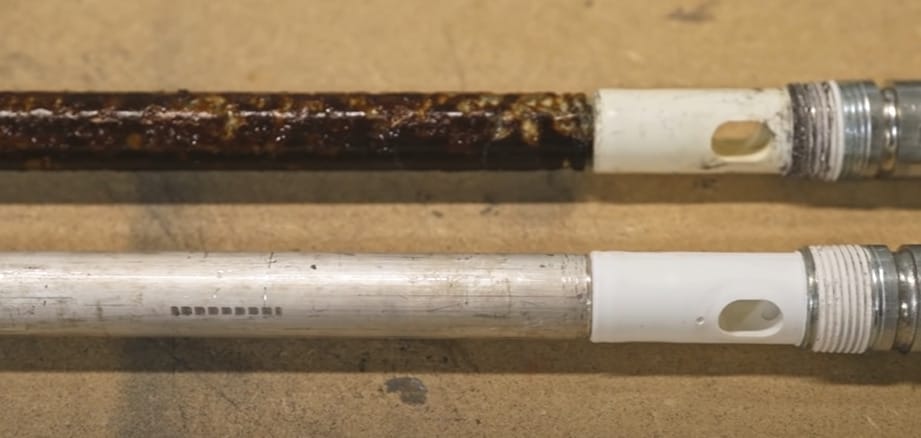
By following these steps, you can easily remove the old anode rod and install a new one, extending the life of your water heater and saving you money in the long run.
Step 5: Install the New Anode Rod
Now that the old anode rod has been removed, it’s time to install the new one. First, check the packaging to ensure you have the correct type of anode rod for your water heater. Remember, magnesium anode rods are the best option for protecting the tank.
Here are the steps to install the new anode rod:
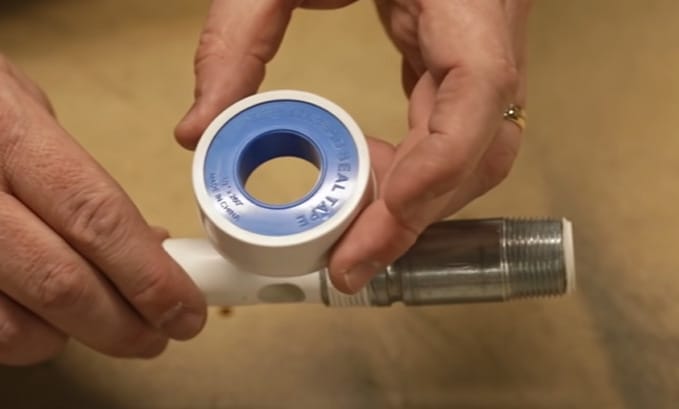
- Step 1: Wrap the threads of the new anode rod with Teflon tape. This will help to create a watertight seal and prevent leaks.
- Step 2: Insert the new anode rod into the water heater tank. Use a wrench to tighten it in place. Be careful not to overtighten, as this can damage the threads.
- Step 3: If you’re using an aluminum or aluminum/zinc alloy anode rod, leave enough space between the top of the anode rod and the top of the water heater tank. This will allow for the expansion and contraction of the rod as it corrodes.
- Step 4: Once the new anode rod is in place, turn the water supply back on and refill the tank. Check for leaks around the anode rod and tighten it further if necessary.
Remember, the anode rod is a sacrificial element that needs to be replaced periodically to protect your water heater tank from corrosion. Following these steps ensures that your water heater remains in good working condition for years.
Step 6: Turn On the Water and Fuel Supply to the Tank
Now that we have successfully replaced the anode rod in our water heater, it’s time to turn the water and fuel supply back on.
Ensure the tank is completely filled with water by turning on a hot water faucet in your home. This will allow air pockets to escape and ensure the tank is completely filled with water.
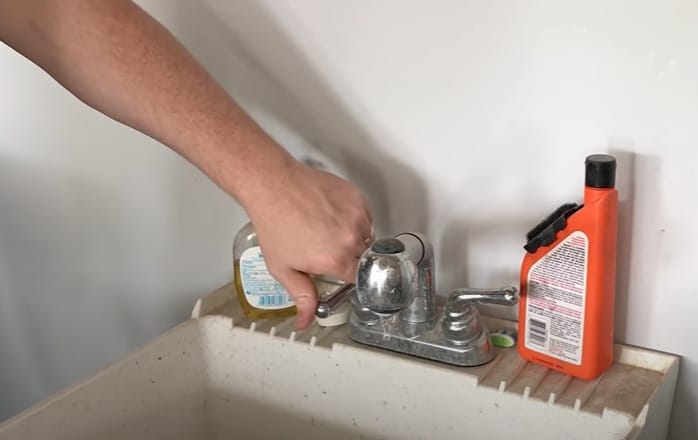
Tip: It’s also good to check your faucet aerators for any debris that may have accumulated while the water was shut off. Unscrew the aerator and rinse it out before screwing it back on.
Congratulations, you have successfully replaced your water heater’s anode rod and ensured that your tank will last for years!
Troubleshooting Tips
From stuck rods to unexpected leaks, we have the insights to help you troubleshoot confidently. Let’s solve those problems so you can bask in the glory of a job well done!
Facing A Stuck Anode Rod?
- Loosen Up: Sometimes, these rods can be stubborn. Give it a good turn with a breaker bar for extra leverage.
- Impact to the Rescue: If it’s still not budging, an impact wrench can be your best pal here. It delivers high torque with less effort on your part.
- Penetrating Oil: Apply some penetrating oil around the connection. Let it sit for a while to break down the corrosion.
Dealing With Leaks Post-Replacement?
- Check the Tightness: If you’ve got drips, first things first, ensure that the rod is tightened properly. It’s not too tight, though — you don’t want to strip the threads.
- Inspect the Seals: It’s all about the seal. Double-check if you’ve used enough Teflon tape to prevent water from sneaking through the threads.
- Valve Verification: Don’t forget to look at the pressure relief and drain valves. If they’re not closed, you might get some unwanted leakage.
Remember, folks, staying cool and collected is key. If these tips don’t fix the issues, don’t hesitate to call in a professional. Water heater woes can be tricky, and there’s no shame in getting a little help to ensure everything is shipshape.
Maintenance Advice: Keeping Your Water Heater in Tip-Top Shape
It’s not just about fixing things when they go awry; it’s about giving your water heater the regular TLC it deserves. So, let’s talk shop about keeping your system in prime condition.
- Semi-Annual Inspections: Give your water heater a thorough check-up twice a year. Look for any signs of wear or leaks, and flush out the tank to remove sediment affecting efficiency.
- Anode Rod Check-Up: Annually inspect the anode rod, your tank’s first line of defense against corrosion. You might need to check it more frequently if you have hard water or high heat settings. Replace it if it looks significantly corroded.
- Temperature and Pressure Relief Valve: Test this safety valve once a year to ensure it’s working correctly. It’s essential for preventing potential over-pressure damage or overheating.
By keeping up with these simple maintenance steps, you’ll prolong the life of your water heater, save on energy costs, and maintain a safe and comfortable home.
Frequently Asked Questions
- How Often Should I Replace My Anode Rod?
- It varies depending on your water quality and usage, but an anode rod should generally be checked every 3-5 years and replaced if significantly corroded.
- What Are The Signs That My Anode Rod Needs Replacement?
- Watch for rusty water, a rotten egg smell, or decreased water temperature. These can all be indicators that your anode rod is no longer doing its job effectively.
- Will Replacing My Anode Rod Affect My Water Heater Warranty?
- Replacing your anode rod is part of regular water heater maintenance and should not affect your warranty. It’s often a requirement to keep it valid.
- Can I Use A Flexible Anode Rod If My Space Is Limited?
- Yes, flexible anode rods are designed for tight spaces and can be bent to fit. Just make sure it’s the correct type for your water heater.
- Can I Install A Powered Anode Rod?
- Yes, powered anode rods are an option for those with consistent water odor or tank corrosion issues. They are more expensive but can last much longer.
- How Do I Know What Size Anode Rod To Buy?
- Check your water heater’s manual for specifications, or remove the existing rod and measure its length and diameter. When in doubt, consult with a professional.
References
Studies and Technical Information:
- U.S. Department of Energy. http://energy.gov/
- Water Quality Association. https://wqa.org/
Organizations:
- Plumbing-Heating-Cooling Contractors Association (PHCC). https://www.phccweb.org/
- American Society of Plumbing Engineers (ASPE). https://www.aspe.org/
Books:
- “Residential Construction Academy: Plumbing” by Michael A. Joyce. https://www.abebooks.com/9781401848910/Residential-Construction-Academy-Plumbing-Joyce-1401848915/plp
- “The Complete Guide to Plumbing: Current with 2015-2018 Plumbing Codes” by Black & Decker. https://www.pdfdrive.com/black-decker-the-complete-guide-to-plumbing-expanded-4th-edition-modern-materials-and-current-codes-all-new-guide-to-working-with-gas-pipe-e170584184.html
Website Resources:
- This Old House. http://thisoldhouse.com/
- Home Depot DIY Projects and Ideas. https://www.homedepot.com/c/diy_projects_and_ideas
Video References:
AmplifyDIY