12 min read
How To Wire Trailer Lights to Truck (7-Step Guide)

Wiring trailer lights can be frustrating, but I’m here to help.
Quick Summary:
🔌 Step 1: Find that perfect connector.
📦 Step 2: Unbox your light kit.
🔍 Step 3: Tail light detective work.
🔗 Step 4: Time to make those connections.
⚓ Step 5: Grounding – the unsung hero of electrical work.
🛠️ Step 6: Secure and protect.
🔄 Step 7: Repeat on the other side
🔎 Step 8: Final testing.
In this article, I’ll guide you through the process, ensuring you stay legal and safe on the road. We’ll also cover how to troubleshoot common issues. Let’s dive into the nitty-gritty of wiring trailer lights to your truck.
Essential Tools and Materials
When you’re gearing up to wire your trailer lights, start by assembling your power team of tools and materials. This isn’t some NASCAR pitstop where you roll up, and everything is ready; you’ve got to come prepared.
On your roster, you’ll need:
- Trailer Wiring Harness: This is specific to your truck’s make and model.
- Wire Stripper and Crimper: For preparing and connecting wires.
- Electrical Tape: To insulate connected wires.
- Screwdriver and Pliers: For securing connections and mounts.
- Trailer Light Kit: This should include tail lights, brake lights, and turn signals.
- Connector (4-pin or 7-pin): Depending on your truck and trailer type.
Also, give a pat on the back to the liner clips! They’re your best friend in this situation. They’ll be popping off like excited spectators all around the lining.
For the lighting gig, it’s best to stick with a 16 gauge or larger. Do you have power-hungering entities like brakes? We’re talking a thicker beast – think 14 gauge or maybe even a 12 gauge.
Steps to Wire Trailer Lights to a Truck
Step 1: Identifying the Right Connector
- So, I started by figuring out what connector my truck needed.
- I ended up with a 4-pin connector, the go-to choice for my kind of trailer. It’s like choosing the right tool for a job – you’ve got to know what works best for your situation.
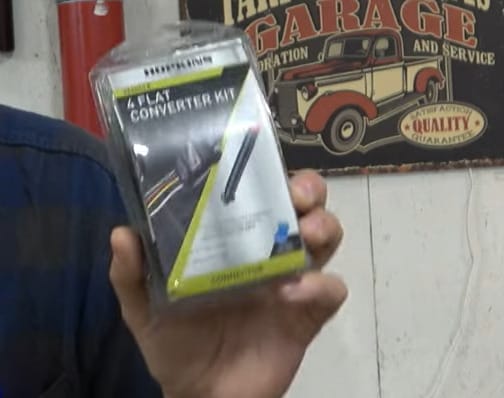
Step 2: Trailer Light Kit Unboxing
- I laid out all the pieces – the converter, extension wire, those nifty scotch locks, zip ties, corrosion cap, and the test light.
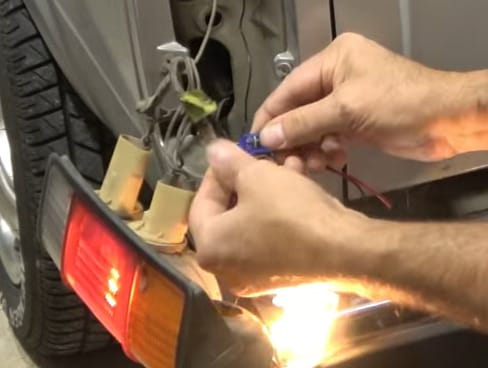
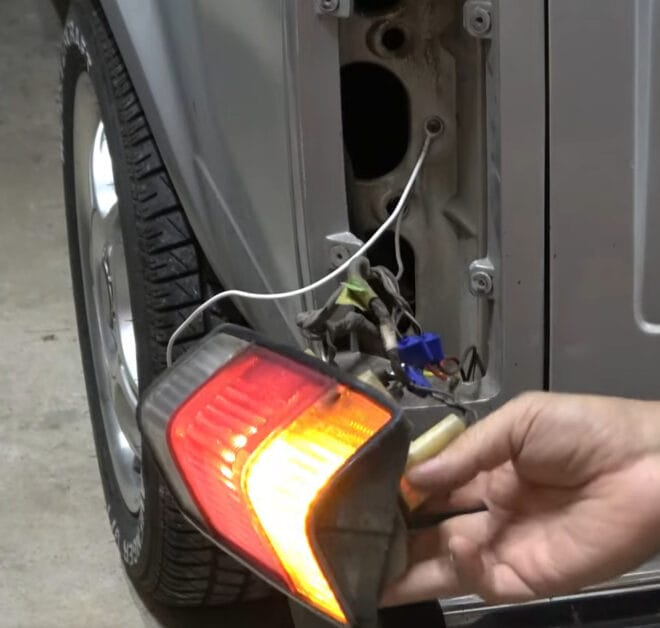
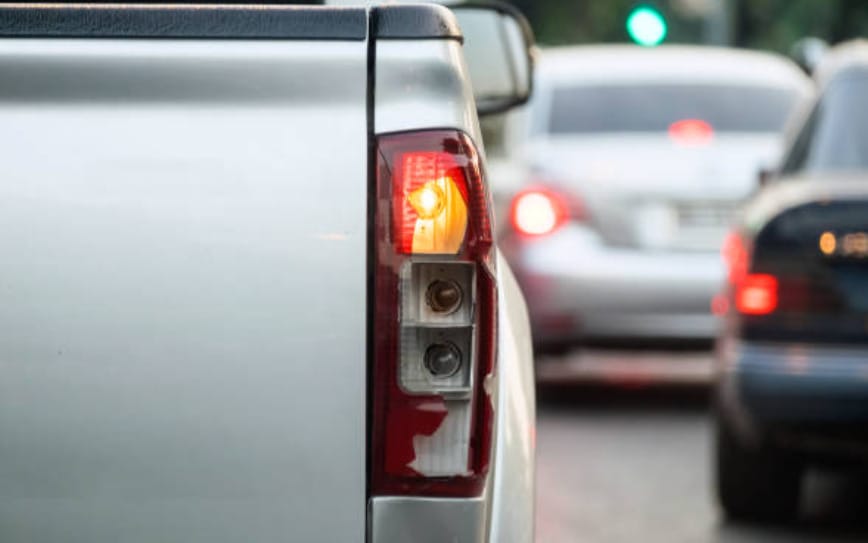
Step 3: Tail Light Recon
- With the test light in hand, I pinpointed which wire was responsible for each function – turn signals, brake lights, park lights. It’s a crucial step, almost like laying the groundwork before building a house.
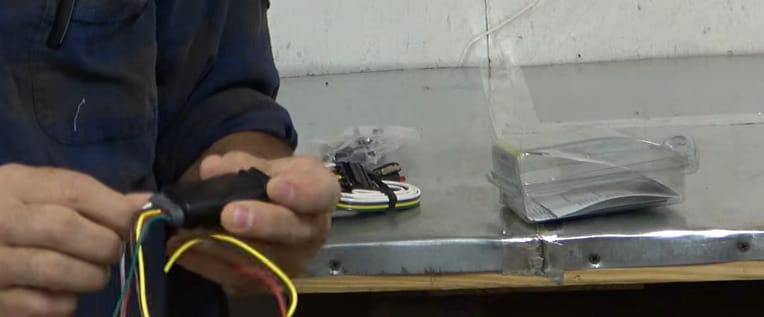
Step 4: Wiring Connections
- This part was where things got interesting. I used scotch locks to join the kit’s wires to my truck’s.
- Each connection clicked into place, and with a solid crimp using pliers, it was as satisfying as hammering down that last nail on a deck.
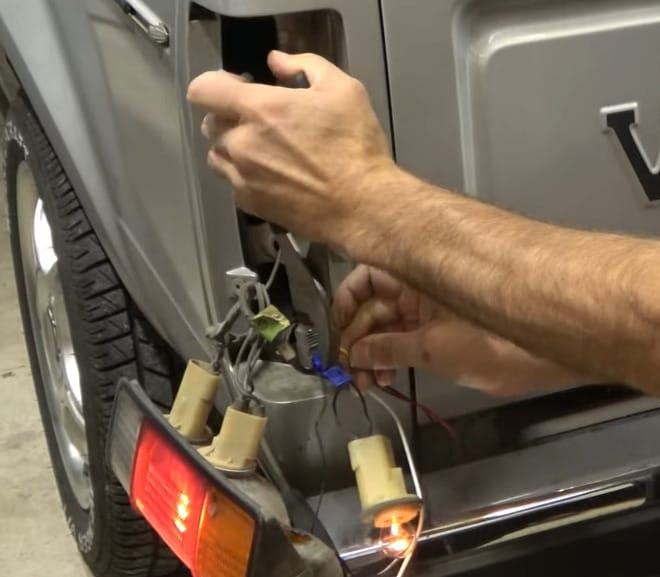
- Remember: Color coding is your best friend here. Brown for tail lights, yellow for the left turn signal and brake light, green for the right, and white for the ground.
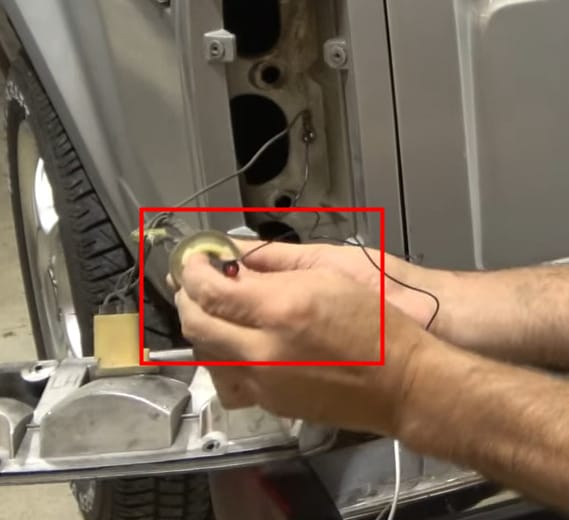
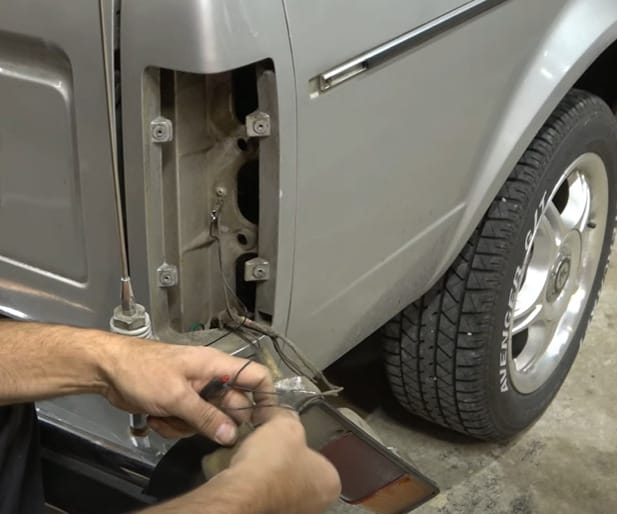
Step 5: Grounding the Setup
- Grounding the circuit was key. I had to find the ideal spot for the white wire. Sometimes, you’ve got to get creative and use a self-tapping screw if there are no ground screws available.

- I remember thinking, “This is where the rubber meets the road,” as I secured the ground.
Step 6: Secure and Protect the Wiring
- I’m big on organizing things, so I arranged and secured the wires neatly. It’s about caring for the details, ensuring nothing’s out of place.
- After all, clean and organized work is safe work.
Step 7: Mirror the Process: Wiring the Opposite Side
- Now, it’s time to replicate the process on the other side of my truck.
Step 8: Final Testing
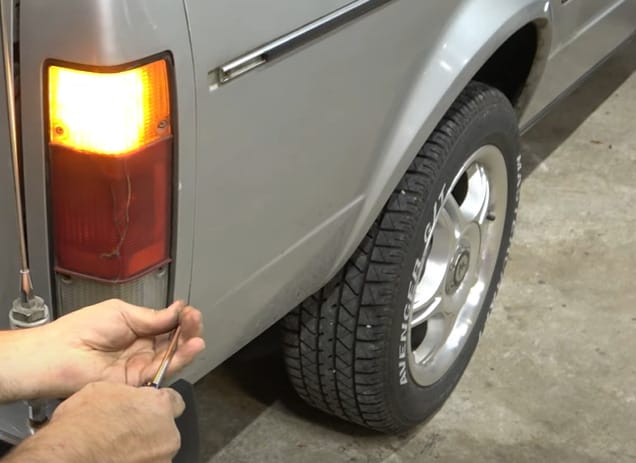
- The final test was like the grand finale of a show. Seeing all the lights working correctly was a triumphant moment.
Wiring Trailer Lights to Your Truck: A Safety-First Approach
Wiring trailer lights to your truck isn’t just about making connections; it’s about ensuring safety every step of the way. Let me walk you through my approach, honed from years of hands-on experience.
- Professional Consultation: If there’s even a sliver of doubt about wiring up those lights, don’t hesitate to call in a pro. I’ve been there, and let me tell you, a professional’s insight is invaluable. They have the tools and know-how to nip any potential problems in the bud.
- Connection Check: Before hitting the road, thoroughly check your connections. It’s like doing a pre-flight check on a plane. I once missed a loose wire, leading to an unexpected pit stop. Ensure every wire and electrical connection is secure and ready for the journey.
- Wiring Harness Draping: How you lay out your wiring harness is crucial. It needs to be secure yet with enough slack for turns. I learned this the hard way when mine almost got torn to shreds.
- Replacing Worn Components: Any signs of wear and tear on your wiring or connectors? Replace them pronto. This proactive step can save you from a world of trouble.
- Connector Care: When not in use, keep those connectors covered. It’s a simple but effective way to protect them from the elements, similar to putting a cap on a tube of toothpaste. Unprotected connections can degrade over time, leading to potential hazards.
- Final Testing: Before embarking on any significant journey, thoroughly test all lights. This includes brake lights, turn signals, and running lights on the truck and trailer. Follow it up with a short test drive, then recheck.
Incorporating these safety measures when wiring trailer lights to your truck isn’t just about compliance but peace of mind.
Troubleshooting Common Wiring Issues
Do you ever find yourself scratching your head, trying to figure out why your trailer lights are acting up after you’ve wired them to your truck?
You’re not alone. Wiring can be tricky, but I’m here to help guide you through the maze of trailer wiring woes.
| Challenge | Diagnostic Approach | Solution |
|---|---|---|
| Unreliable Lighting | Check power and ground connections for corrosion or looseness. | Secure and clean ground connections between the trailer and vehicle. |
| Confusion Over Wire Functions | Uncertainty about wire color coding for power and grounding. | Refer to wiring diagrams for accurate color identification. |
| Non-Functional Lights | Potential issues with the vehicle socket. | Test the vehicle socket with an electrical tester to ensure functionality. |
| Inconsistent or Non-Functional Lights | Damaged, corroded, or worn wiring along the trailer. | Thoroughly inspect wiring from the trailer tongue to rear lamps, looking for damage or wear. |
| Some Lights Not Illuminating | Possible faulty lightbulbs. | Replace any burnt-out or damaged bulbs. |
| Persistent Lighting Issues | Broken wire within the wiring system. | Trace the wire using alligator clips and a continuity tester to find and repair breaks. |
Successful troubleshooting is all about taking a systematic approach and maintaining a keen eye for the minute details.
Insider Tips: Keeping Your Trailer Lights Bright and Functional
Let’s dive into how I keep my trailer lights in top-notch shape. Trust me, a bit of regular maintenance can make a huge difference in safety and longevity, and I’ve learned this through my own experiences on the road.
- Regular Inspections: Every time before I hit the road, I give those trailer lights a good once-over. I’ve learned that catching issues like cracked lenses or loose connections early can save you from a world of hassle later on.
- Clean and Clear: I always keep the lenses of my trailer lights clean. It’s amazing how much dirt and grime can accumulate and affect visibility. A quick wipe with a soft cloth and soapy water usually does the trick. Plus, keeping the lights free from obstructions is key. I’ve seen everything from mud to leaves block those lights!
- Check the Connections: I regularly check the electrical connections. Disconnecting and reconnecting them ensures they fit snugly. In my experience, corrosion or rust can mess things up, so I use a bit of dielectric grease to keep those connections in good shape.
- Test Regularly: I do a quick light test before I set off on any trip. I can’t stress enough how this simple step can prevent many problems. Checking brakes, turn signals, and running lights has become my ritual.
- Grounding is Key: I’ve found that a poor ground connection is often behind many lighting issues. I ensure the ground wire is securely attached to the trailer’s clean, rust-free surface. It’s a small detail that makes a big difference.
- Bulb Check: If you’re still using traditional bulbs like I did for a while, keep an eye on them. I always carry spares and replace any that are burnt out. My maintenance was reduced when I switched to LED lights, but I still check them regularly.
- Wiring Wisdom: I’ve learned to monitor the wiring closely over the years. Frayed wires or worn insulation are a big no-no. I’ve had to do my share of repairs, and I can tell you catching damage early is much better.
- Be Proactive: I’ve learned not to procrastinate regarding trailer maintenance. Dealing with small issues promptly can save you from major headaches.
Maintaining your trailer lights isn’t just about ticking a box; it’s about ensuring you’re safely and confidently ready for the journey ahead. Stay on top of these tips, and you’ll be set for smooth sailing – or, should I say, hauling!
Frequently Asked Questions
- Why Do My Trailer Lights Keep Failing?
- Ah, the age-old question! In my experience, it’s usually down to a few culprits: bad ground connections, corroded wires, or even a simple blown bulb. Always start with the basics – check your bulbs, wires, and ground connections.
- Can I Use LED Lights Instead of Traditional Bulbs?
- Absolutely, and I highly recommend it! LED lights are more durable and energy-efficient, and they last way longer. I made the switch a while back, and it’s been smooth sailing ever since.
- How Often Should I Check My Trailer Lights?
- I say make it a habit to check before every trip. It’s like giving your trailer a quick health check-up. This practice can save you from surprises on the road.
- Is It Hard to Wire Trailer Lights by Myself?
- It’s doable! With the right tools and a bit of patience, you can get it done. Just follow the steps I laid out earlier, take your time, and remember: safety first.
- What Should I Do If My Trailer Lights Aren’t Working Even After Wiring Them Correctly?
- This can be tricky, but don’t fret. Double-check your connections first. If everything looks good there, your truck might have a fuse issue. Sometimes, the solution is as simple as replacing a blown fuse.
- How Important Is the Wire Gauge in the Wiring Process?
- It’s super important! Using the right gauge ensures that your lights get the correct amount of power without overloading the system. I usually use 16 gauge for lights, but you might need to step it up if you add brakes or other power-heavy features.
- Can Bad Weather Affect My Trailer Lights?
- Oh, you bet! Water and moisture can be troublemakers, leading to corrosion or short circuits. I always stress ensuring all connections are tight and properly sealed.
References
Organizations:
- American Trucking Associations (ATA). https://www.trucking.org/
- Truckload Carriers Association (TCA). https://truckload.org/
Books:
- The Complete Trailer Handbook. https://books.google.com.ph/books?id=2QKV7ddNPCMC
Website Resources:
- etrailer.com – Trailer Wiring Diagrams. https://www.etrailer.com/
- CURT – Trailer Wiring Diagram and Installation Help. https://www.curtmfg.com/towing-electrical-wiring
Video References:
Farpoint Farms Restorations and Repairs