12 min read
How to Test Trailer Brakes with a Multimeter (3–Step Guide)
Hey there! I’m about to dive into something that might save your next road trip—Have you ever wondered how to keep your trailer brakes in check? Well, I’ve got the perfect DIY guide for you.
We’re talking about testing trailer brakes with a multimeter. It’s simpler than you might think, and I’m here to walk you through it step by step.
- Step 1: First, ensure your trailer is parked safely and is not connected to your vehicle. Safety is always our number one priority.
- Step 2: We will open up the trailer’s electrical panel next. We’re looking for the brake wire here.
- Step 3: Now, grab your multimeter and set it to the ohms setting.
- Step 4: Connect one probe of your multimeter to the brake wire and the other to a good ground point on the trailer.
- Step 5: Grab a buddy. Have them press the brake pedal in the tow vehicle, or if you’re working solo, find a way to apply the brake. Watch for any change in resistance on your multimeter.
- Step 6: Lastly, we’re going to test each brake individually. It takes a little more time, but trust me, it’s worth it to know exactly where any problems might be.
So, grab your multimeter, and let’s get started. Trust me, you will be a pro in no time.
Introduction to Trailer Brake Systems
So, you’re probably wondering what the deal is with trailer brake systems, right? Trailer brakes are like the unsung road heroes, ensuring you can stop safely and smoothly when you’re hauling your boat, camper, or any big load.
There are two main types of trailer brakes: electric and hydraulic.
Electric brakes are like your typical gadget, needing electricity to work. They’re hooked up to your vehicle’s brake system, and get this: they activate when you hit the brakes in your car. Pretty neat, huh?
On the other hand, hydraulic brakes, or as some like to call them, surge brakes, work a bit differently. They use the motion of the trailer moving forward to activate the brakes. It’s like they have a mind of their own, reacting to what’s happening with your ride.
Understanding the nuances of your trailer’s brake system might seem daunting initially, but it’s crucial for ensuring a safe journey. So, let’s make sure we give our trailer brakes the love and attention they deserve, alright?
Step-by-Step Guide to Testing Trailer Brakes
Let’s dive into the nitty-gritty of testing those trailer brakes with a multimeter. You’ve probably got your multimeter handy. They’re indispensable when discussing ensuring our trailer’s safety and functionality.
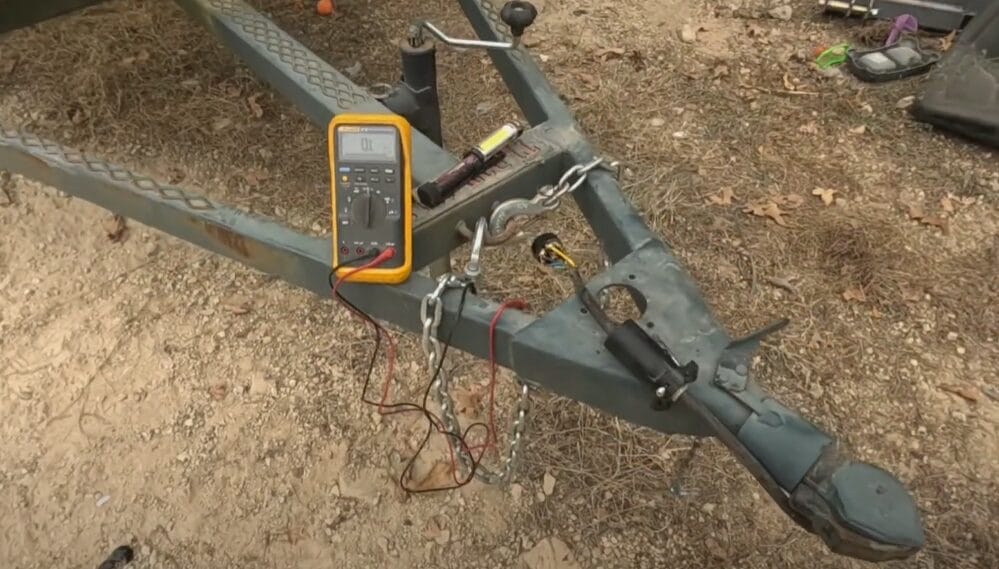
Step 1: Prepare Your Testing Environment
Ensure your trailer is securely parked and disconnected from the towing vehicle. Safety comes first, always. You don’t want that trailer going on a journey without you.
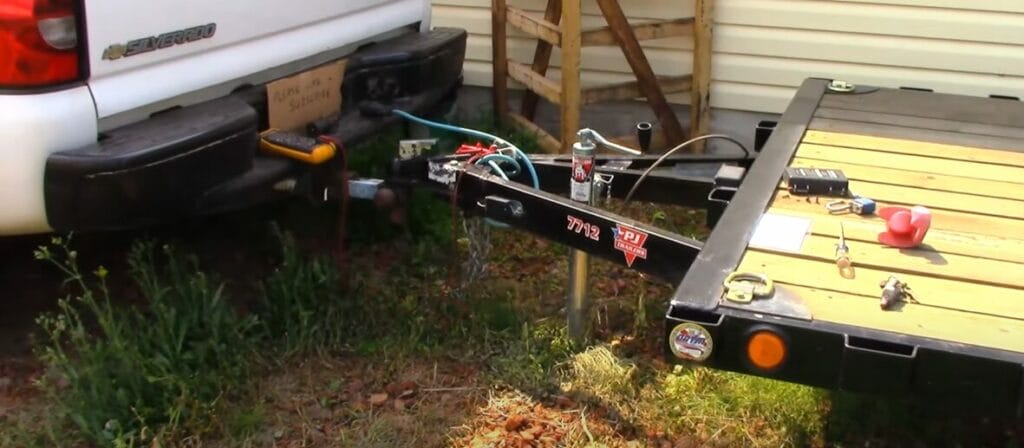
Step 2: Access the Electrical Panel
Open your trailer’s electrical panel to locate the brake wire (commonly blue, but verify with your trailer’s manual).

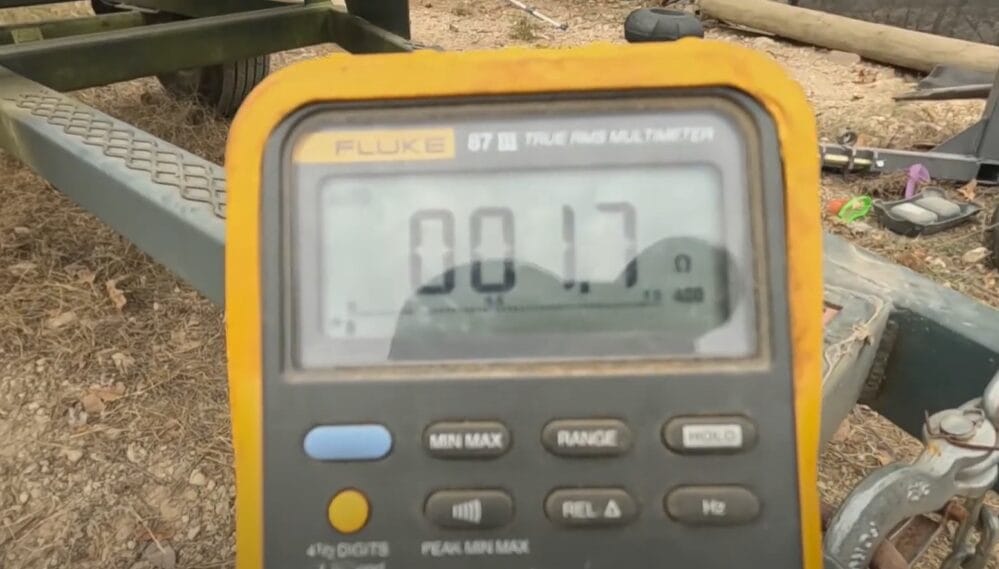
Step 3: Set Your Multimeter
Set it to the ohms setting, which measures resistance. We’re looking for a reading, not just a fancy number on the screen. No resistance means something’s off in your brake circuit, and it’s time for a deeper dive.
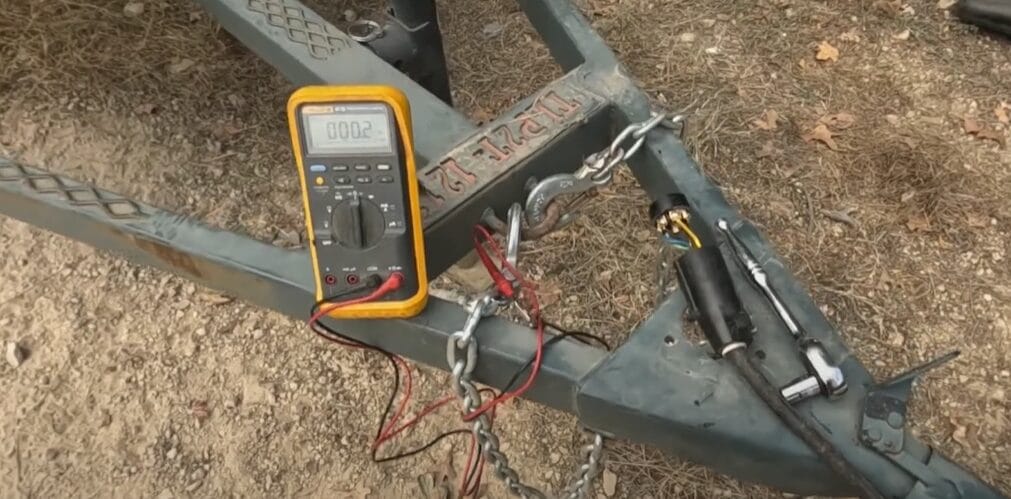
Step 4: Connect the Multimeter
Connect one multimeter probe to the brake wire and the other to a solid ground point on the trailer.
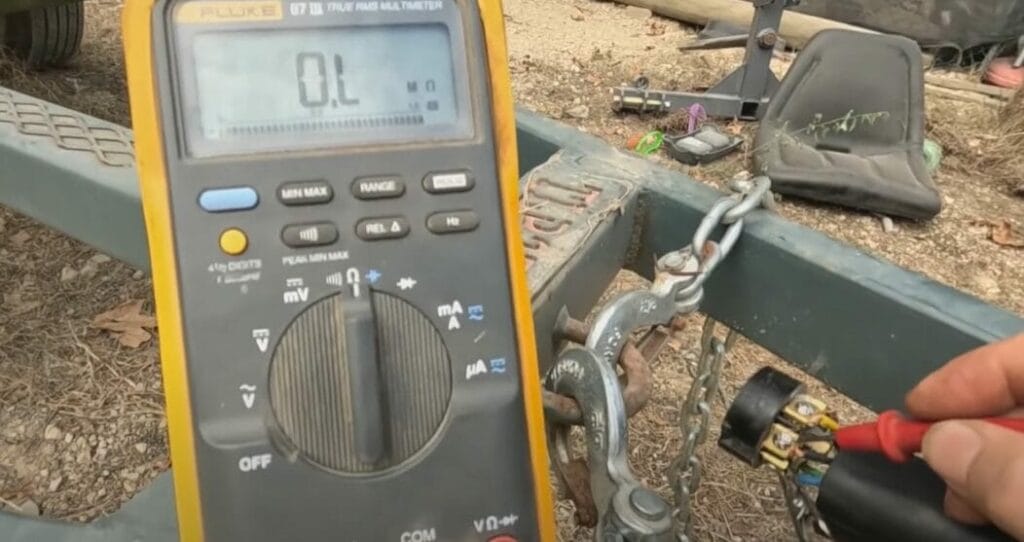
A good ground is crucial here; a bad connection can give you false readings faster than you can say “brake failure!”
Step 5: Test for Resistance Change
With everything hooked up, have a buddy press the brake pedal in the towing vehicle, or if you’re flying solo, a trusty brick can do the trick. You’re looking for a change in resistance on the multimeter.
Step 6: Individual Brake Testing
Test each brake individually. It might take a bit more time, but it’ll pinpoint exactly where issues lie. Plus, it gives you peace of mind, and who doesn’t love a bit of that?
Whether it’s a weekend adventure or a cross-country haul, knowing your brakes are reliable is priceless. So, take the time, do the tests, and keep those wheels rolling safely.
Identifying Common Trailer Brake Issues
Let’s dive into the nitty-gritty of what can go wrong with trailer brakes. You’ve got your multimeter in hand, but before we start prodding and poking, knowing what issues to look for can save you a ton of time.
First up, uneven braking. It’s like when one side of your trailer wants to stop at a burger joint, and the other’s rushing to the beach. This imbalance often points to worn brake pads or issues with the brake assembly on one side. Testing resistance with your multimeter can help identify which brake isn’t keeping up.
Then there’s the infamous no-braking scenario. It feels like you’re hitting the brake, and your trailer’s just laughing at you, right? This nightmare can stem from a complete circuit failure or a break in the wiring.
Oh, and don’t forget about intermittent braking. This one’s tricky. It’s like your trailer’s brakes are playing hide and seek – sometimes they work, and sometimes they don’t. This issue might be due to loose connections or corrosion in the wiring.
And lastly, we have weak braking. It’s when your trailer does slow down, but it’s more like it’s gently laying on a feather pillow rather than slamming the brakes. Weak braking often indicates a problem with the brake magnet or insufficient voltage reaching the brakes.
Identifying these issues is crucial. Once you know what’s wrong, you can take the right steps to fix it and ensure your trailer’s safety and reliability. And who doesn’t want that?
Troubleshooting Common Problems When Testing Trailer Brakes with a Multimeter
You will run into a hiccup or two when diving into the trailer brakes and multimeters world. I’ve had my fair share of head-scratching moments while testing trailer brakes.
Let me walk you through some troubleshooting tips that I’ve picked up along the way. It’s like peeling back the layers of an onion; sometimes, you have to dig a bit to get to the root of the issue.
| Troubleshooting Tip | Problem | Solution |
|---|---|---|
| Inconsistent Readings | You’re getting different values every time you test. | First, ensure your multimeter is calibrated and set to the correct setting. Check your connections to ensure they’re clean, secure, and not corroded. A loose connection can cause fluctuating readings. If the issue persists, test another component with your multimeter to ensure the device works correctly. |
| No Reading at All | The multimeter shows no response when testing the brake magnets. | Start by checking the multimeter’s battery and ensure it’s in good condition. Next, verify that you’re using the correct measurement setting. If you’re sure the setup is correct, inspect the wires for breaks or disconnections and the brake magnets for signs of damage or wear. A complete lack of reading could indicate a break in the circuit or a failed brake magnet. |
| Brakes Pull to One Side | When applied, the brakes cause the trailer to veer to one side. | This could be a sign of uneven wear or an issue with the brake adjustment on one side. Inspect the brake shoes for uneven wear and ensure they are adjusted properly. Also, check for any obstructions or damage to the brake mechanism that could prevent even application of the brakes. |
| Surging Brakes | The brakes engage and disengage rapidly, causing a surging feeling. | This is often due to a poor electrical connection or a shortage in the wiring. Check all electrical connections for corrosion, looseness, or damage. Ensure the brake controller is properly configured and functioning correctly. A surging issue can also stem from an inconsistent power supply, so inspect the battery and charging system for issues. |
| Weak Brakes | The brakes do not engage strongly enough, or the stopping power is diminished. | First, check for proper electrical current to the brakes using your multimeter. If the current is within the expected range, inspect the brake pads, drums, or rotors for wear and tear. Adjustments may be needed if components are out of alignment or if there’s significant wear. Also, ensure the brake fluid (for hydraulic systems) is at the correct level and not contaminated. |
A little bit of DIY spirit goes a long way, but recognizing when to call in the cavalry is a mark of true wisdom. Happy troubleshooting!
Best Practices for Trailer Maintenance
Let’s get down to the brass tacks of keeping your trailer in tip-top shape. Now, if there’s one thing I’ve learned over the years, it’s that Regular Maintenance isn’t just a suggestion. It’s essential.
First off, let’s talk Tire Health. I cannot stress this enough: checking your tires regularly for wear and tear is like brushing your teeth – it has to be done. Make sure there’s enough tread, and keep an eye out for any cuts or bulges. You wouldn’t wear shoes with holes in them on a hike. The same goes for your trailer.
Next up is Lubrication. Everything that moves needs a good grease job now and then. Those brake mechanisms and wheel bearings? They’re screaming for it. This not only makes everything run smoother but also prevents rust and wear. And who doesn’t like things that slide and glide effortlessly?
Onto Electrical Connections. This is like the nervous system of your trailer. You want to ensure all lights, brakes, and signals are in working condition. A simple check before hitting the road can save you a world of hassle. Imagine cruising down the highway, and your brake lights decide to take a nap. Not cool, right?
Brake Component Inspection is next on our list. Every so often, take a peek at those brake pads, drums, and linings. If you see anything that looks worn down or out of place, it might be time for a replacement. Think of this as preventive care that keeps the bigger, scarier repairs at bay.
So, grab that grease gun, check those connections, and make sure your trailer is as ready for adventure as you are.
Frequently Asked Questions
- What Tools Do I Need To Test My Trailer Brakes?
- To test your trailer brakes, you’ll need a reliable multimeter that can measure volts and ohms, a solid ground connection, and possibly a friend to help or a weight to press the brake pedal in your vehicle.
- How Often Should I Test My Trailer Brakes?
- It’s a good idea to test your trailer brakes before each significant trip and perform a comprehensive check at least once a year. Regular checks can catch issues early and save you from unexpected surprises on the road.
- Can I Test Trailer Brakes Without A Multimeter?
- While a multimeter provides the most accurate reading of your brake system’s health, you can visually inspect for wear and listen for unusual sounds. However, for electrical diagnostics, a multimeter is essential.
- What If My Trailer Brakes Are Not Working After Testing?
- If your trailer brakes aren’t working even after testing, check for common issues like worn brake pads, damaged wiring, or a faulty brake controller. If you’re unsure, it might be time to consult a professional.
- Are Electric Brakes Better Than Hydraulic Brakes?
- Each type has its advantages. Electric brakes offer easy adjustability and are great for varying load weights, while hydraulic brakes are known for their reliability and simplicity. Your choice depends on your specific towing needs and preferences.
References
Organizations:
- National Association of Trailer Manufacturers (NATM). https://www.natm.com/
- Recreational Vehicle Industry Association (RVIA). https://www.rvia.org/
- Society of Automotive Engineers (SAE). https://www.sae.org/
Books:
- “Trailer Life’s RV Repair and Maintenance Manual” by Bob Livingston. https://www.thriftbooks.com/w/rv-repair-and-maintenance-manual-4-ed_bob-livingston/250526/
- “The Complete Trailer Handbook” by Richard Newton. https://www.abebooks.com/first-edition/Complete-Trailer-Handbook-Newton-Richard-Publishing/30732761590/bd
Website Resources:
- etrailer.com. http://etrailer.com/
- RV.net. http://rv.net/
- iRV2.com. http://irv2.com/
Video References:
FARMBOY FIXES
Arrow JM Farms