10 min read
How to Wire Multiple Lights to One Cord (6 Steps)
You can wire multiple lights to one cord by daisy-chaining them sequentially or wiring them in a more complex parallel way, as in a Fork or Hub & Spoke arrangement. You can also create home runs for all the lights separately. In either case, connect like wires and never let unlike ones come into direct contact. The hot wires will connect, and the neutral ones, according to your chosen design.
There are several ways to approach this, from the simple and popular daisy chain arrangement to more complex parallel ones. Some require less or more wiring, affect other lights differently if one fails, and are either easier or more difficult to maintain.
All parallel arrangements follow the same principle (I don’t recommend a series arrangement). It takes 6 steps. I’ll show you how to connect the wires with illustrations and photos.
Why Wire Multiple Lights Together?
Wiring multiple lights together to a single cord offers convenience.
You can control all of them together. For instance, you can switch multiple lights on or off with a single flip. It’s like a smaller version of a lighting circuit with several lights connected to a circuit breaker in the main panel.
It is ideal for a line of recessed lights, halls, hallways, gardens, external lighting, and any place where you would like to control all the lights simultaneously.
Wiring Arrangements
Wiring in Series
I don’t recommend wiring AC lights in series, as it has many disadvantages.
But, in a series circuit, you would connect the lights by wiring from one light to the next before connecting them back to the power source. It’s more common in DC circuits, where a positive pin of one light is connected to the negative pin of the next light, and so on.
This article focuses on wiring multiple lights to one cord in parallel.
Wiring in Parallel
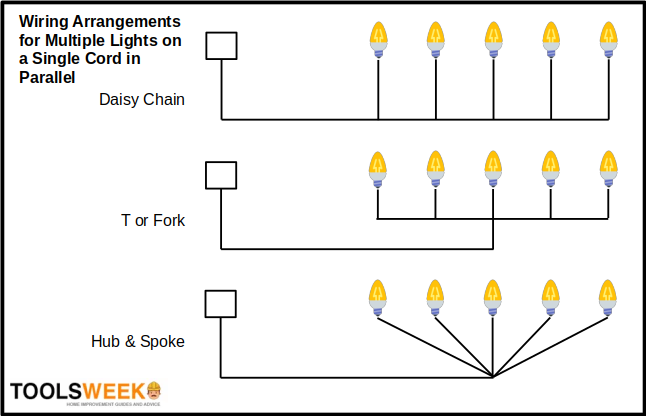
At least three different arrangements are possible for wiring multiple lights on a single cord in parallel.
They are Daisy-Chain, T, and Hub & Spoke. See the circuit diagrams below. The box on the left may be the circuit breaker, junction box, switch, or transformer. But only one cable extends from it to the lights. So, you can, for instance, control all the lights with a single switch under either arrangement.
The daisy-chain arrangement forms a sequential circuit, where each light is connected to the one before and after it. It is also described as “looping through” from one load to the next but should not be confused with a series circuit. It differs from connecting the lights in parallel arrangements, such as T and Hub & Spoke.
All types have certain advantages and disadvantages, which I’ll explain further on.
Requirements and Precautions
You will need the following items:
- Lights: As many light bulbs as you want to connect (including their fixtures)
- Other electrical items: Wire, electrical tape, light fixtures, and wire nuts or connectors
- Tools: Wire cutter, wire stripper, screwdriver

(1) Turn the main circuit breaker off for the circuit you will be working on. Don’t risk working with mains wiring without turning the power off first. Use a tester or voltmeter to confirm that the power is off.
(2) Only connect like wires together. Don’t directly connect unlike wires, i.e., the hot and neutral ones should be entirely separate throughout.
Wiring Multiple Lights to One Cord in a Daisy Chain
This method connects the multiple lights in a simple parallel arrangement in a daisy chain.

Step 1: Arrange the Lights
Arrange the lights sequentially after first turning the power off.
Step 2: Cut the Wires
Cut the wires to the required length with a wire cutter.
Step 3: Strip the Wire Ends
Strip the ends of each wire with a wire stripper.
Step 4: Connect the Wires
Connect the like wire of each light to the like wire of the subsequent one.
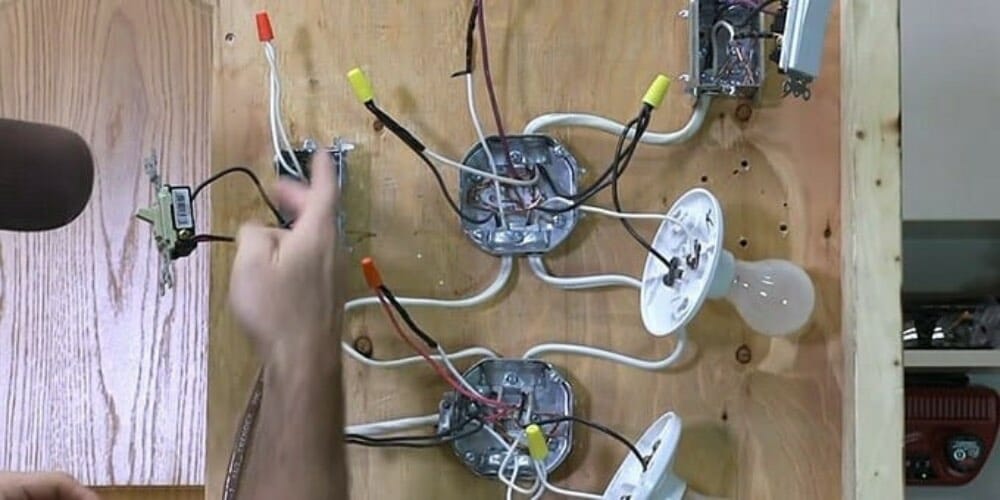
So, the hot wire of the first light will connect to the hot wire of the second, the neutral to the next neutral, the ground to the next ground, and so on by looping through to the last light.
Then, connect the main cable from the power source or switch to the first light:
- Connect its hot wire to the hot terminal of the first light; and
- Connect its neutral wire to the neutral terminal of the first light.
If connecting to an existing ceiling fixture, the rule is the same: Connect like wires together. So, connect the white wire to the other white wires and the black wire to the other black wires.
If they are recessed lights, the like wires are still connected and will look somewhat like in the picture below.
Step 5: Secure the Connections
Make sure all the connections are secure. Tighten the caps or screws and use electrical tape where necessary.
Step 6: Turn the Power On
Finally, after re-checking to ensure you did all the wiring correctly and all the connections are secure, turn the power on to test the circuit.
Wiring Multiple Lights to One Cord in Complex Parallel Arrangements
One fork-type non-daisy chain possibility is illustrated below.
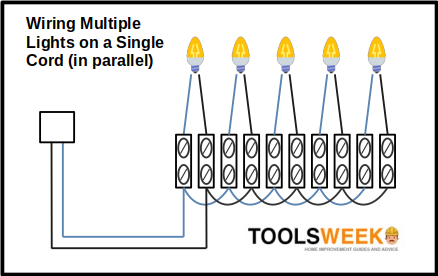
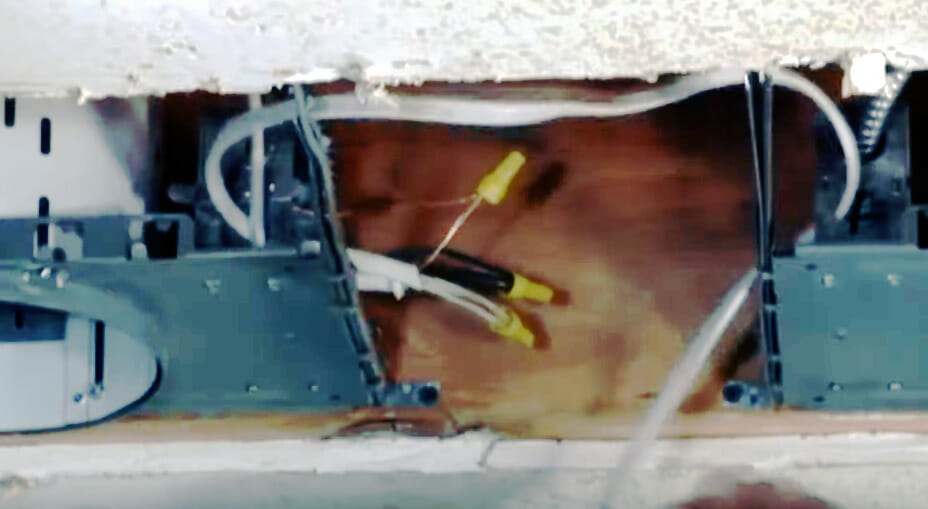
Note that you will need twice as many insulated screw joints as the number of lights. But you can use twist-on wire nuts or connectors instead if you prefer.
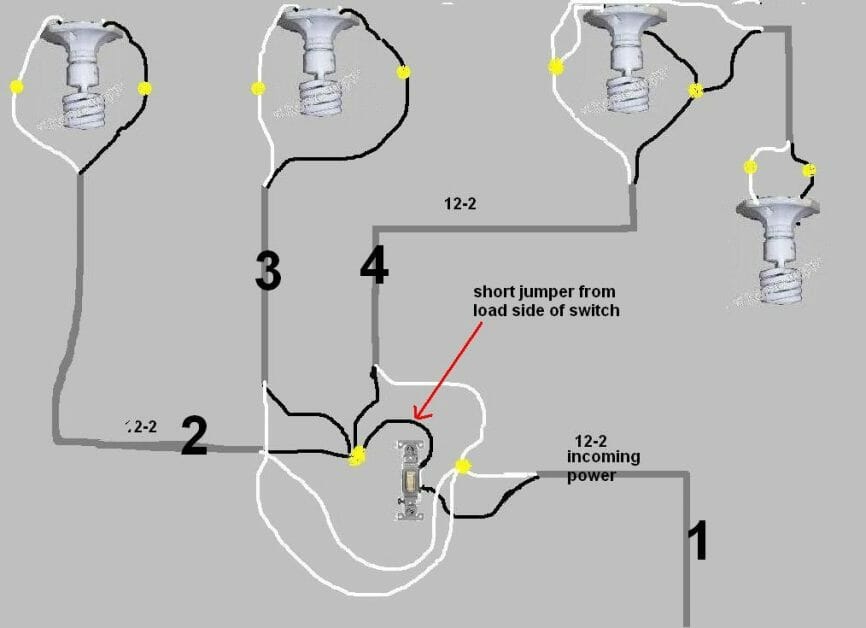
Here’s another illustration showing a different complex parallel arrangement. Overall, it’s a hub-and-spoke design, except that one extra light (top right) is also directly connected with the one before it, as in a daisy chain.
Steps 1-3: Preparation
Steps 1 to 3 are the same as in the daisy chain method, except the lights will be arranged in a more complex parallel arrangement using more wire.
When you get to Step 4 to connect the wires, proceed as follows:
Step 4: Connect the Wires
Connect all the hot (black) wires of each light, and connect all the neutral (white) wires of each light.
Then, connect the main cable from the power source or switch likewise:
- Connect its hot (black) wire to the hub or terminal of hot wires of all the lights; and
- Connect its neutral (white) wire to the hub or terminal of neutral wires of all the lights.
You will make these connections as per your chosen complex parallel arrangement.
Step 5: Secure the Connections
Steps 5 and 6 are also the same as before.
Make sure all the connections are secure. Tighten the caps or screws and use electrical tape where necessary.
Step 6: Turn the Power On
Finally, after re-checking to ensure you did all the wiring correctly and all the connections are secure, turn the power on to test the circuit.
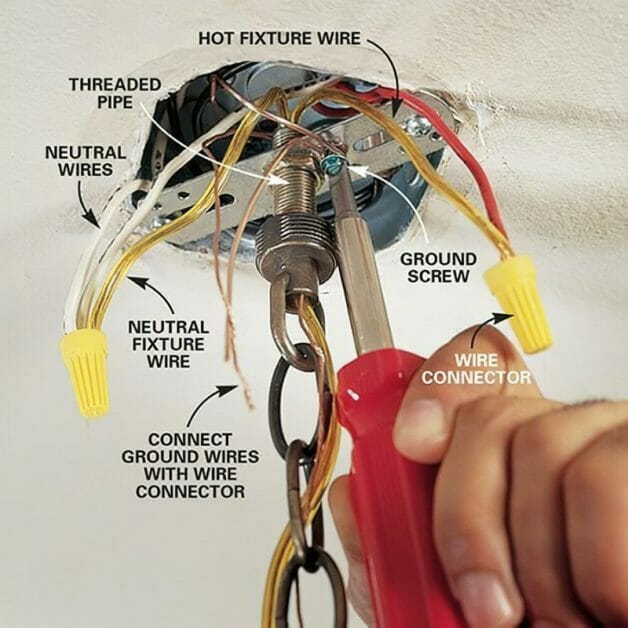
All Home Runs (Star Topology)
The single cord to the shared switch or junction box is called the “home run,” i.e., the branch from the panel to the first joint. It is defined as:
“A home run is the branch-circuit wiring from the panel to the first outlet or junction box in that circuit.” (Mullin & Simmons, 2017, p.184)
Home runs are permitted by the NEC code 210.18.
A complete home run wiring has a star topology, where each light is connected directly to the main junction or distribution box. If you choose to have a home run for each individual light separately, you will require a lot more wire than any of the methods described above.
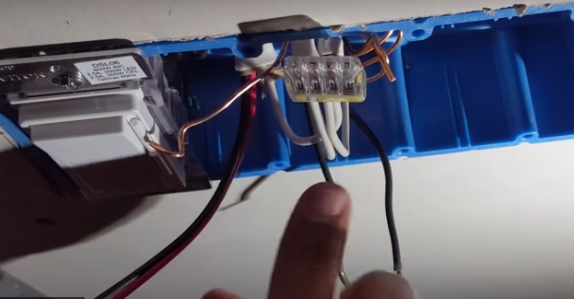
But the principle of connecting like wires together is the same, as shown in the picture below, where the neutral wires are all connected inside a single connector.
How Many Lights Can You Connect Together?
Knowing that you can connect multiple lights together, you might ask how many?
This depends on the wattage of each bulb and how much current the circuit and switch can handle.
For example, a regular 15-amp circuit on a 110-volt supply will allow up to 1,320 watts of power. If each bulb consumes 20 watts, you can theoretically have up to 66 of them (15 x 0.8 x 110 / 20). But if each one is 60 watts, the limit would be 22.
You will also need to consider the switch wattage. Never overload a light switch. Get a new switch if you need to connect more lights than it can handle.
Also, the NEC 15-100 imposes a limit of 8 lighting points per 15-amp circuit breaker.
Should You Daisy-Chain or Not?
By connecting the lights in a daisy chain, all the individual lights get the same power (due to equal voltage).
Their brightness should, therefore, also be the same if their wattage is the same. But, all lights downstream would be impacted if any one light fails, and you would have to check each one to find the source of the problem. Otherwise, a daisy chain is an easy circuit to arrange quickly.
Under any one of the alternative parallel arrangements, the other lights will remain on even if one of them fails. But you will have noticed that it requires more wiring. Unless you have only one or two additional lights, you can easily overload a single fixture.
That’s why I recommended a separate junction box from the individual lights, as shown in my circuit diagram, for a parallel arrangement. It won’t overload any fixture and will remain easier to troubleshoot and repair than a daisy-chain circuit.
References
Ray C. Mullin & Phil Simmons. Electrical wiring residential, 19th edition. Cengage Learning. 2017
Video References
Eddie Rinier
Zeothan Technician