7 min read
How to Wire a Switch to an Outlet (Step-by-Step Tutorial)

Wiring a switch to your electrical outlet will allow you to control it better without needing to remove a plug to disconnect it from the power source.
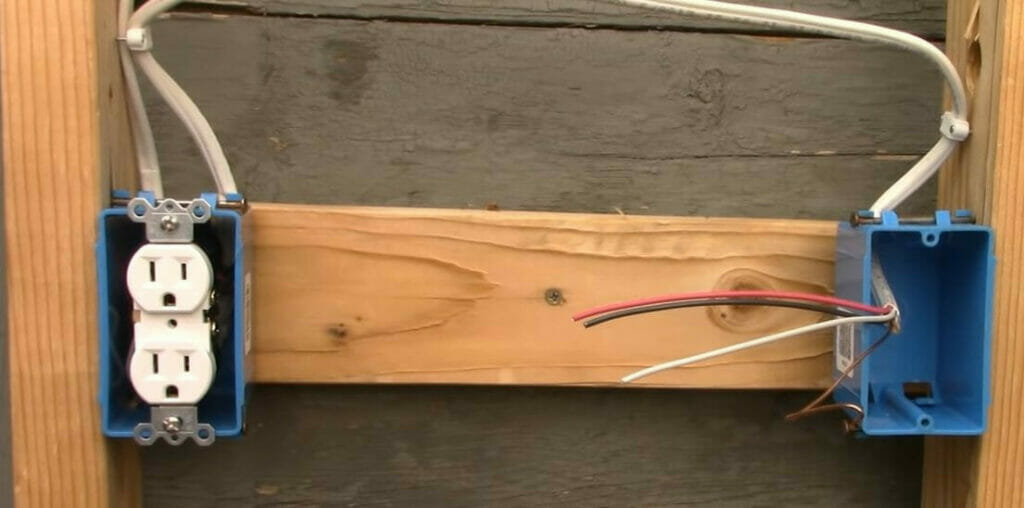
To wire an independent switch to an existing outlet, you will need an extra wire extending from the outlet’s box to the switch.
At the outlet box: Connect the two ground wires to the outlet’s ground terminal, connect the two neutral wires to the silver terminals, splice the two hot wires before connecting them to one of the brass terminals, and connect the red wire to the second brass terminal.
At the switch box: Connect the ground wire to the switch’s ground terminal, isolate the neutral wire by capping it, and connect the two hot (black and red) wires to its brass terminals.
I’ll show you how it’s done step-by-step in detail (in 17 steps).
Equipment
I assume you already have an outlet attached, and you want to attach a switch to it.
You will need the following tools and other materials:
| Tools | Materials |
| Switch with its box Screwdriver Nose pliers Wire stripper | Single-pole switch Cable Wire nuts Electrical tape |
Wiring
The wiring for this project should look something like this:
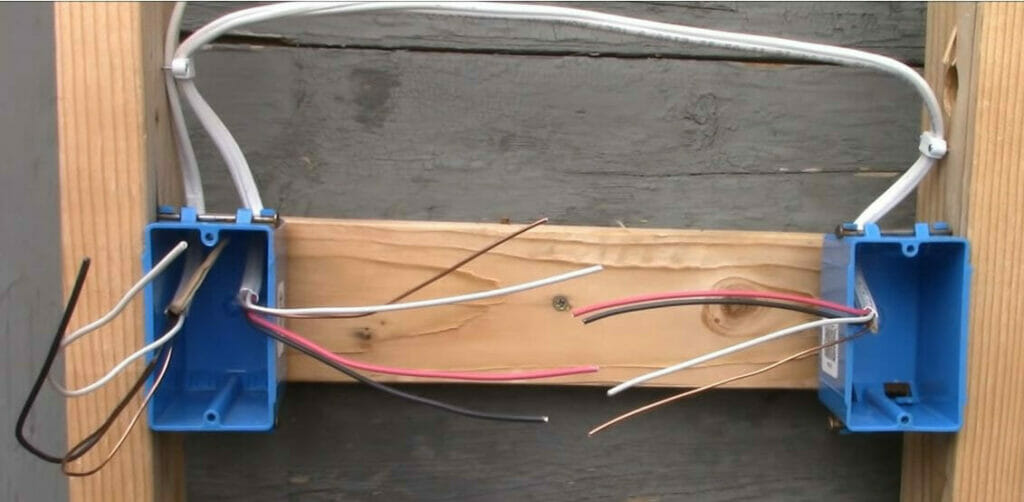
The power source cable to the outlet is a regular 3-wire cable with one black (hot), one white (neutral), and one bare copper (ground) wire.
The second cable from the outlet to the switch has 4 wires. It has an extra red wire, which is a secondary hot wire.
Strip the ends of all the wires using a wire stripper, about half an inch.
Method
Step 1: Turn Off the Circuit Breaker
This is a vital step for safety reasons. Turn off the circuit breaker so that there’s no power in the circuit while you are working on it.
You can test the outlet to ensure there is no power (using a voltmeter or tester) before opening it.
Step 2: Wire the Setup
See the wiring diagram above. The two types of cables are also explained.
Step 3: Combine the Ground Wires
Twist the two ground wires in the outlet’s box around each other and attach them to a connector.

Step 4: Connect the Ground Wires
Connect the ground wires to the ground terminal on the outlet.
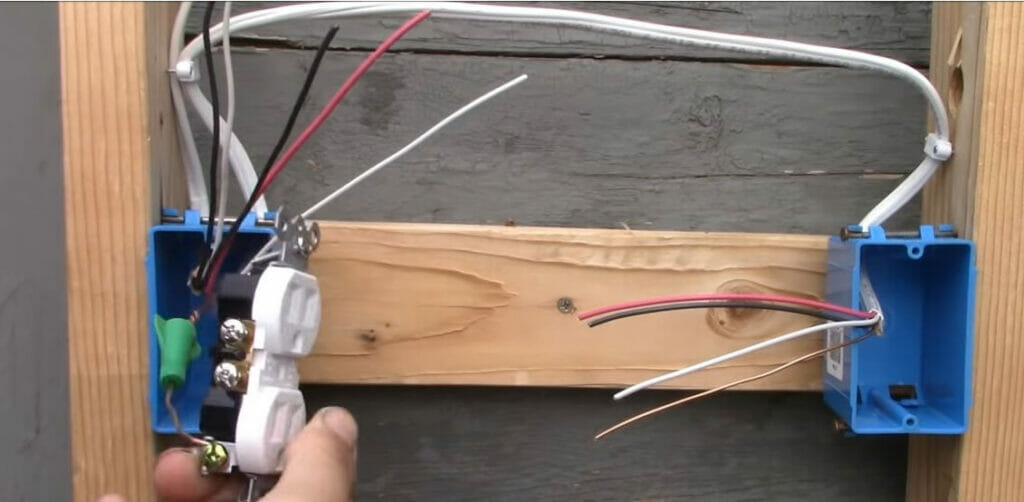
Step 5: Connect the Neutral Wires
Connect the two neutral (white) wires to the outlet’s two silver terminals.

Step 6: Combine the Hot Wires
Twist the ends of the two hot (black) wires, as you did to the ground ones, forming another pigtail.
This is to ensure they are always live with the current.
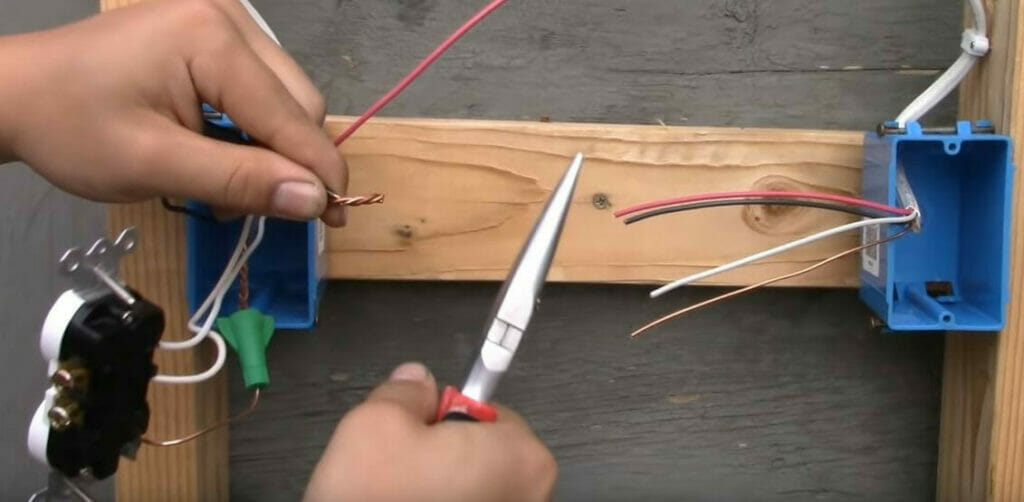
Step 7: Splice the Hot Wires
Splice the two hot wires by putting a wire cap over their ends.
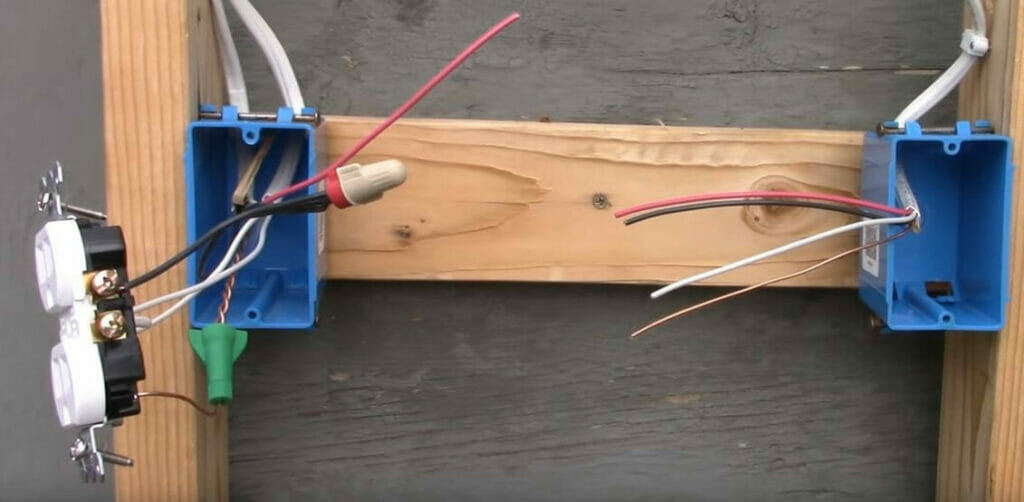
Step 8: Connect the Hot Wire
Connect the hot wire from the above wire cap to the outlet’s first bronze terminal, as shown in the above picture for the previous step.
You might also need to remove the tab that connects the two bronze terminals because we don’t need them connected.
Step 9: Connect the Red Wire
Connect the red wire to the second brass terminal.

Step 10: Attach the Outlet
The outlet is now wired, so it’s ready to be attached to the box.
Ensure all the wire connections on every terminal is tight. Then, attach the outlet to the box and secure it, too.
Step 11: Attach the Ground Wire to the Switch
Now, at the switch end, connect the ground wire to the ground terminal on the switch.

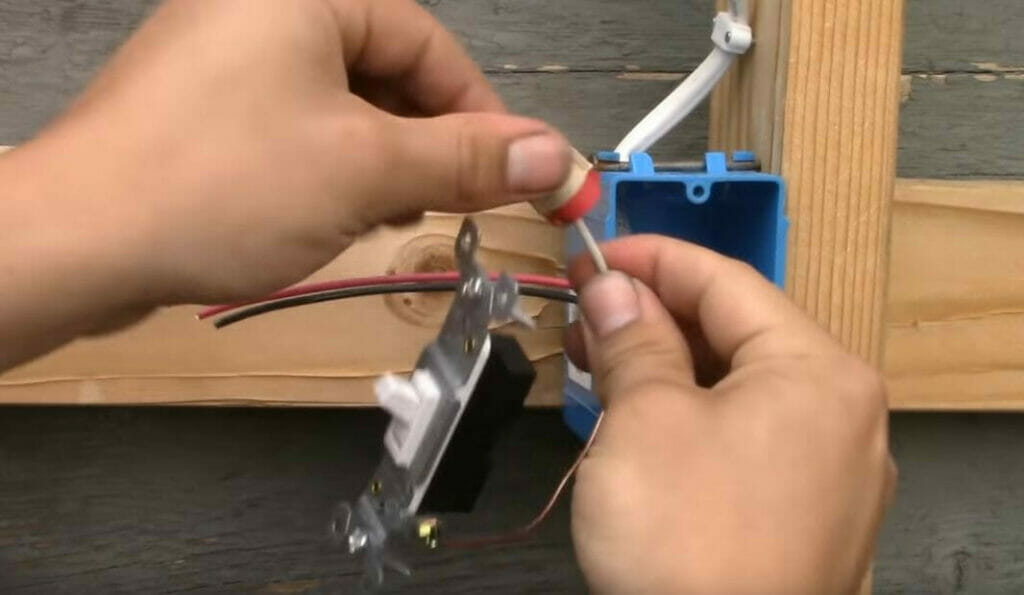
Step 12: Isolate the Neutral Wire
Since we’re not going to use the neutral wire (because it’s never connected to a switch), isolate it by attaching a wire cap on its end.
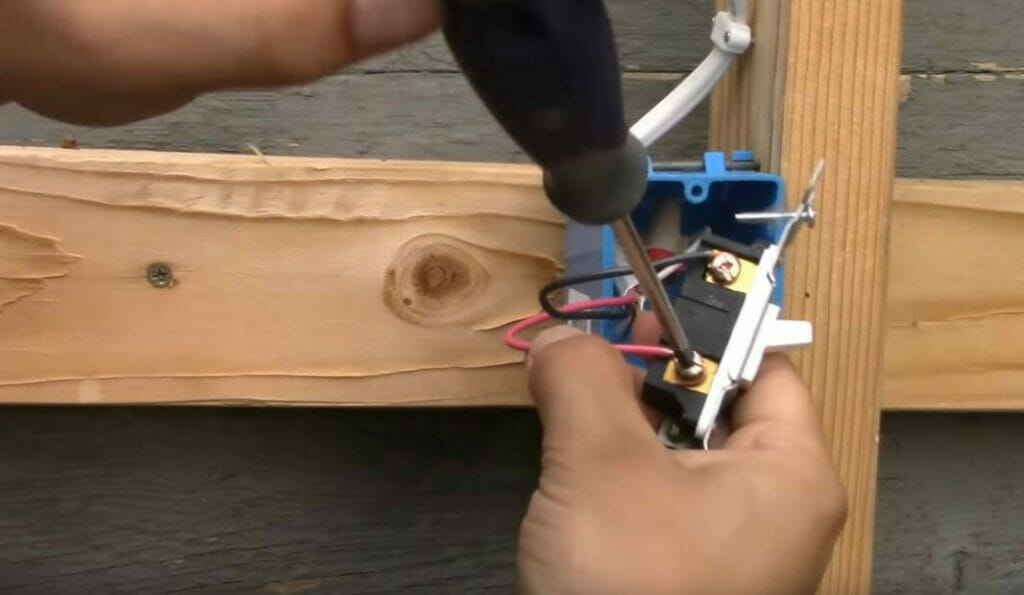
Step 13: Connect the Hot Wires
Connect the two hot wires (black and red) to the two brass terminals on the switch.
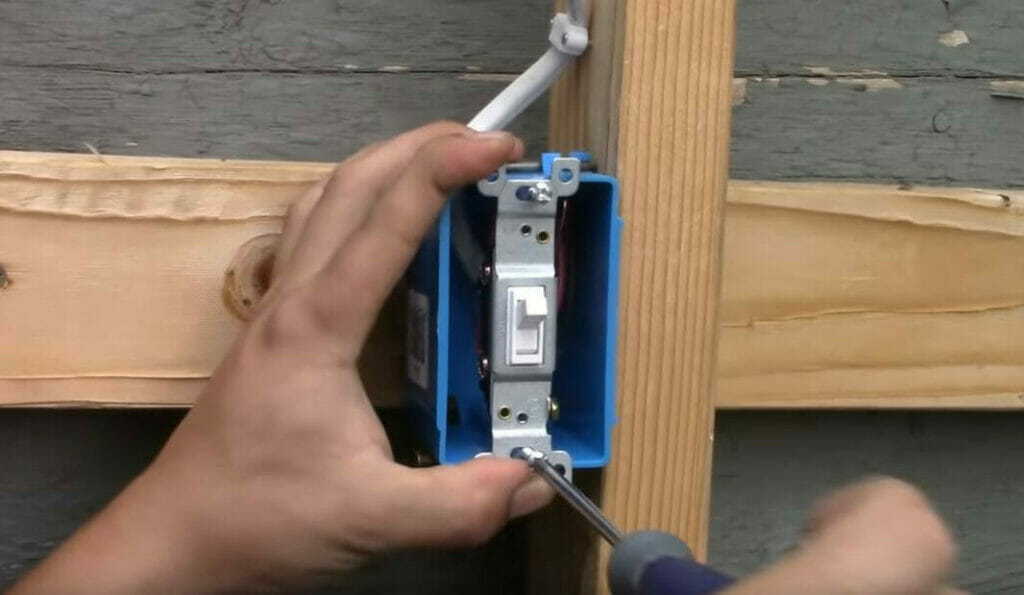
Step 14: Attach the Switch
The switch is also now wired. Ensure all the wires are connected to the right terminals securely. Then, attach the switch to the box securely, as well.
Step 15: Attach the Covers
Attach the covers over the outlet and switch.
Step 16: Turn the Power On
With all the wiring done and the outlet and switch securely attached, along with their covers, you can safely turn the power back on.
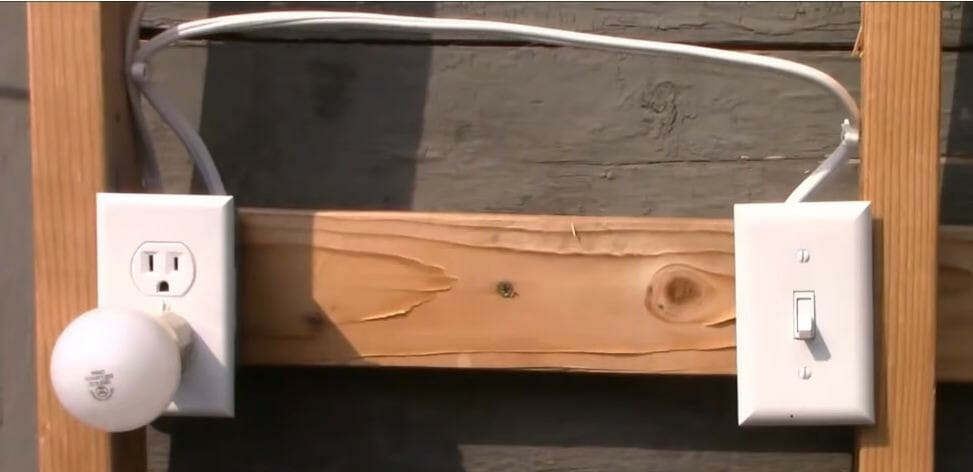
Step 17: Test the Switch
The switch should work if you follow our guide carefully, but it’s a good idea to check.
When the switch is in one position, the test bulb shown above should be off, and in the other, it should light up.
An Alternative Solution
This article was about adding a separate switch to an existing outlet. But if you prefer, you can replace the outlet with a switch/outlet combo instead. It will take up less space, too.

References
Switch-outlet Combo. https://www.lowes.com/pd/Legrand-White-15-Amp-Duplex-Tamper-Resistant-Switch-Outlet-Residential-Switch-Outlet/3586610
Video Reference
Skills and Trade