7 min read
How to Wire a Light Switch to an Outlet (Tools and Steps)

Have you ever found yourself in a situation where you wished that your light switch also controlled an outlet? I’m here to tell you it’s possible; I will walk you through it!
Quick Overview
| Step | Description |
|---|---|
| 1 | Turn off the power supply. |
| 2 | Remove the faceplates on the switch and outlet. |
| 3 | Access the wires. |
| 4 | Turn off the power supply. |
| 5 | Connect wires based on color. |
| 6 | Secure with wire nuts and tape. |
| 7 | Place wires back and attach faceplates. |
This article will explore how to wire a light switch to an outlet. Don’t worry if electrical work isn’t your strong point—I promise I’ll break it down so even beginners can follow along.
Tools and Materials Needed for the Job
Before diving into this DIY task of wiring a light switch to an outlet, let’s prepare our tools and materials.
Trust me, nothing is more frustrating than starting a project only to realize halfway through that you’re missing something crucial. So here’s what you’ll need:
| Tool | Description |
|---|---|
| Wire Strippers | Specially designed for stripping electrical wires. |
| Screwdrivers | Phillips head screwdriver for most of the screws involved. |
| Voltage Tester | Ensures safety by checking if electricity is turned off before starting. |
| Electrical Tape | Used to secure wire connections. |
As far as materials go, it’s equally straightforward:
| Item | Description |
|---|---|
| Electrical Wires | Opt for 14-gauge wires, striking a balance between thickness and flexibility. |
| Electrical Box | Provides housing for the new light switch. |
| Light Switch | The essential component is to control the light. |
| Wire Connectors or Nuts | Necessary for secure wire connections. |
That’s pretty much it!
Next up? We’ll move on to steps to wire a light switch to an outlet
Steps to Wire a Light Switch to an Outlet
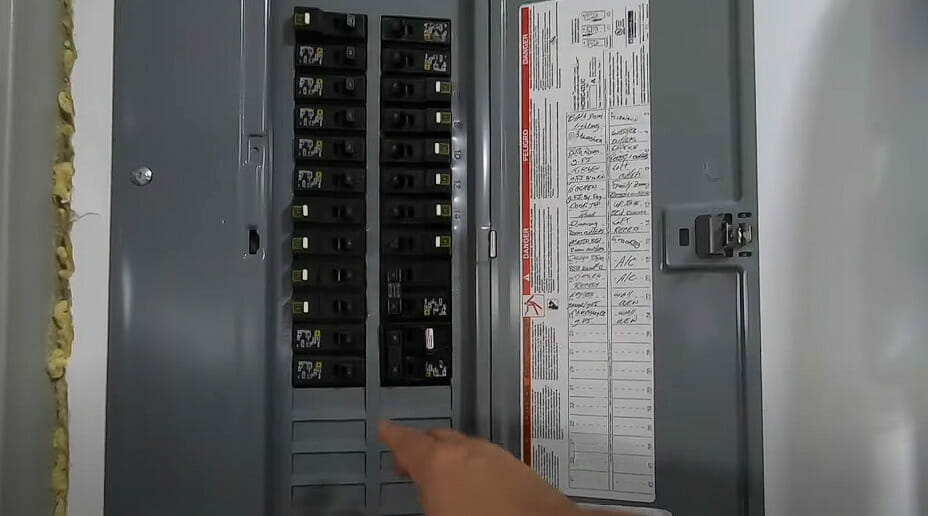
Step 1. Disconnect the power supply. Head to your breaker box and flip off the circuit, powering your room. This is crucial to avoid any nasty shocks! A simple tester tool will tell you if there’s any power running.
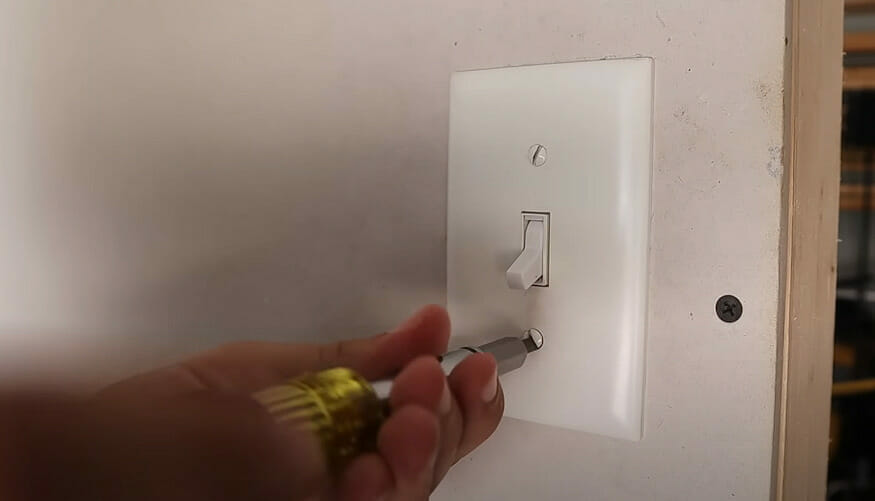
Step 2: Remove the faceplate on the light switch and outlet using your screwdriver.
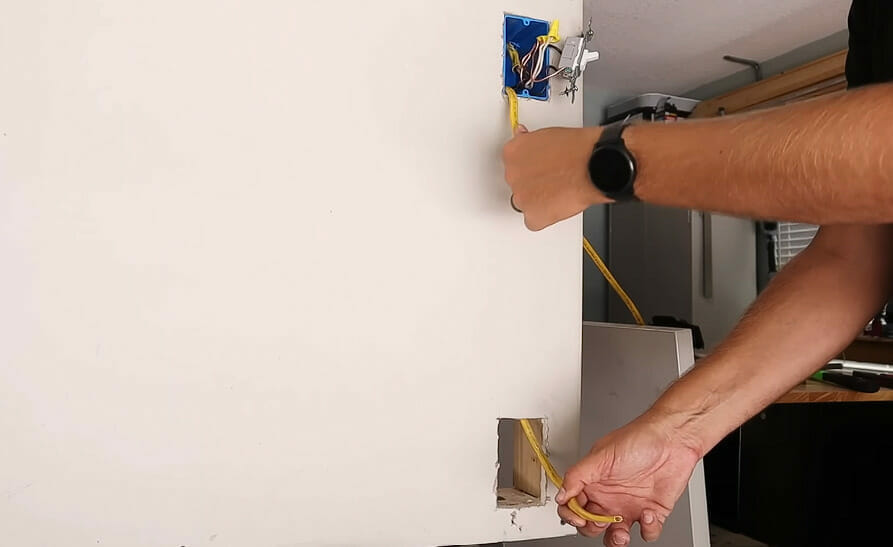
Step 3: Carefully pull out both units from their boxes so you get access to those wires behind them.
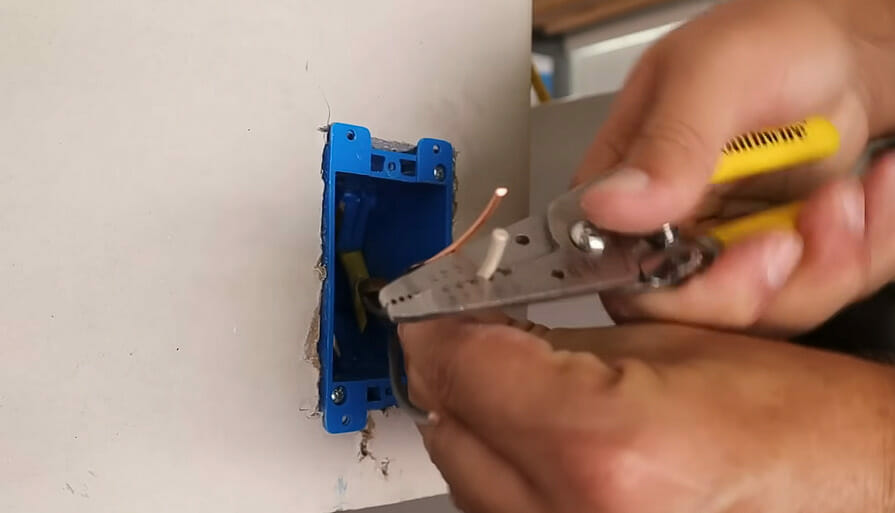
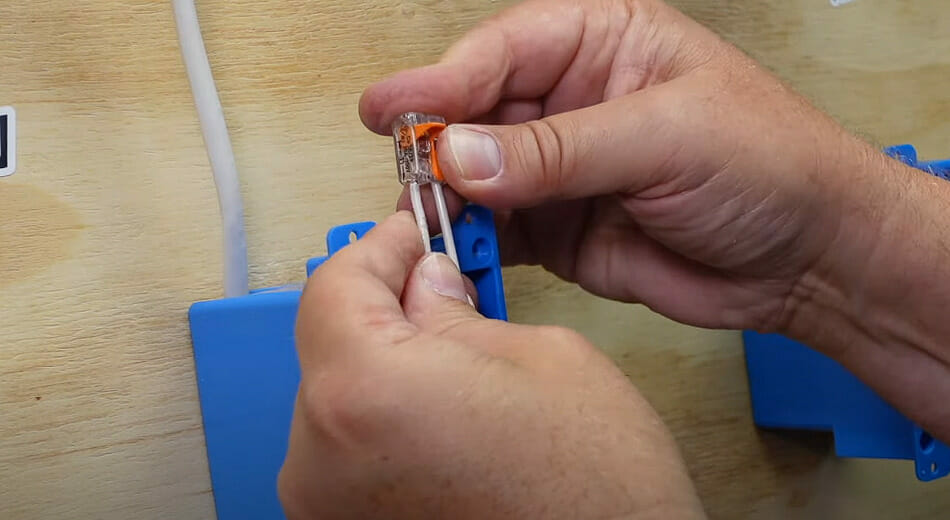
Step 4: Now it’s time for some wire-stripping action! With your wire strippers in hand, strip about half an inch of insulation from each of these wires: black (hot), white (neutral), and green or bare copper (ground).
Step 5: Alrighty then! You’ve got to connect these stripped wires from both units based on color matching: black-to-black, white-to-white, and ground-to-ground. Twist each set of matched colors tightly with wire nuts or lever nuts – they’ll be best buddies from now on!
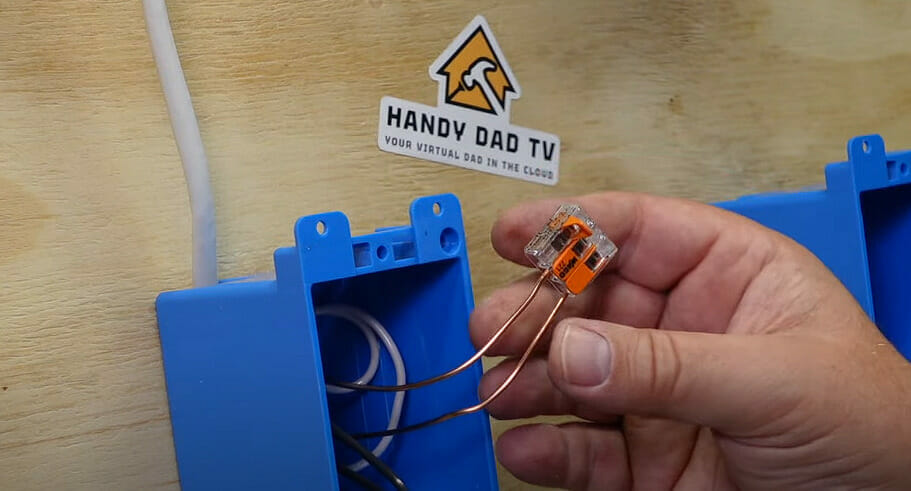
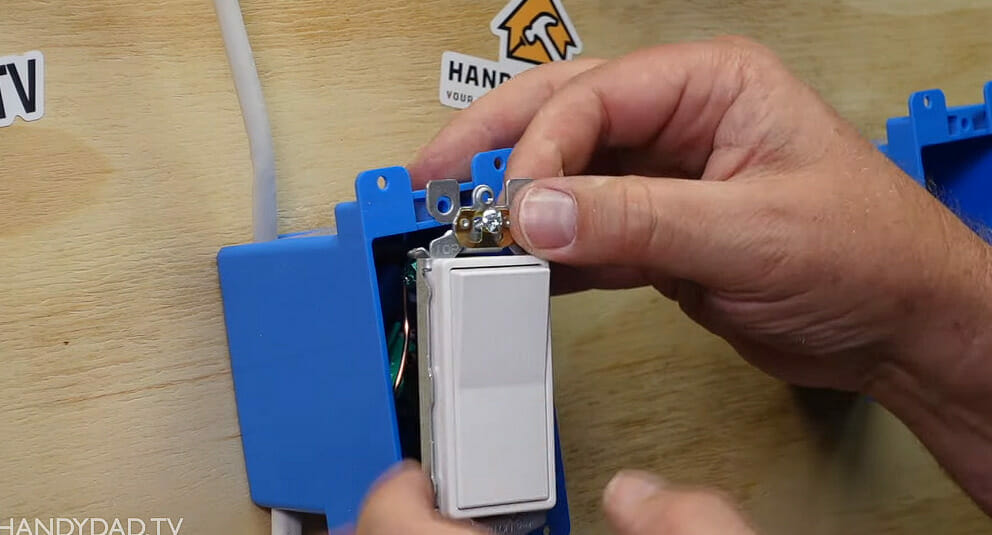
Step 6: Finally, gently push all connected wires back into their respective boxes (that’d be one less mess!) Attach back those faceplates using your screwdriver once again.
Ta-da! There you have it—you just wired a light switch to an outlet like a pro!
Don’t rush through these steps; take your time and ensure everything is done safely. Your patience will pay off when you flick that switch ON and see that bulb glow without any hitches!
Testing Your Newly Wired Connection
Alright, we’re coming down the home stretch now. It’s time to test out your new connection. Remember, safety comes first! Make sure your power is still off before proceeding.
First up, double-check everything. Confirm that your wiring matches what we’ve discussed earlier in this article.
If something looks off or doesn’t align with our diagrams and instructions, return and make any necessary adjustments.
Next on the agenda? Testing for voltage at the outlet and light switch boxes using a voltage tester. Here’s how to do it:
- Put one probe into each slot of your outlet.
- The meter should read 0 if there’s no current.
OK, did you get a zero reading? Great job!
But wait a minute! We’re not done yet! Get ready to move over to your light switch box.
- Place one probe on each terminal screw of the switched-off light switch.
- Again, if wired correctly, it should show zero current.
If you’ve got zeros across the board – congratulations are in order! You’ve successfully wired a light switch to an outlet!
Now flip that circuit breaker back on (finally!), turn on your lights, and take a well-deserved victory lap around your living room!
Remember – if at any point during testing things don’t seem quite right or safe – don’t hesitate to call professional help. It’s always better to be safe than sorry about electricity!
Troubleshooting Common Wiring Issues
Now you’ve got your light switch wired to an outlet. But what if something’s not going right? Are the lights flickering? Or is the outlet not working properly?
Let’s dive into some common issues and how we can fix them!
- No Power: The first thing I’d do is double-check all my connections. Did I connect everything as per instructions? Is there any wire left dangling around without a secure connection? Sometimes, it helps to take everything apart and start from scratch again!
- Flickering Lights: It’s super annoying when your room starts looking like a disco because of flickering lights. This could be due to loose wiring connections or a faulty switch! Check for any loose wires and ensure every connection is tight and secure.
- Outlet Doesn’t Work: The light switch works, but the outlet doesn’t. Don’t panic yet! Try plugging different devices into the socket – sometimes it might just be that one particular device acting up.
There you have it! A quick guide on troubleshooting common wiring issues when installing a light switch to an outlet.
Remember – electrical work isn’t something to mess around with carelessly; always prioritize safety over curiosity!
References
Organizations:
- National Electrical Contractors Association (NECA). https://www.necanet.org/
- Electrical Safety Foundation. https://www.esfi.org/
Websites:
- DIY Electrical Advice. https://www.electriciansforums.net/forums/diy-electrical-advice.64/
Video References:
How To Home
HandyDadTV