12 min read
How to Test a CDI Box with a Multimeter (2 Tests)
It’s time to test a CDI (Capacitor Discharge Ignition) box if it fails to manage a charging operation satisfactorily.
This electrical ignition system is often used in outboard motors, lawnmowers, motorcycles, scooters, chainsaws, and other electrical devices. A CDI system is designed to overcome the challenges linked to extended charging times. You must test it to ensure it keeps working as it should.
To test a CDI box with a multimeter, keep the CDI connected to the stator for a hot test. Measure the blue and white resistance at the stator end. It should be within the range of 77-85 ohms, and the white wire to the ground should be 360-490 ohms.
To conduct a continuity (cold) test, disconnect the CDI box, attach one multimeter lead at each end, and check for a low resistance reading to confirm it’s fine.
I will cover common signs indicating the CDI box may be faulty before detailing the procedure for which you will need a multimeter.
Getting Started
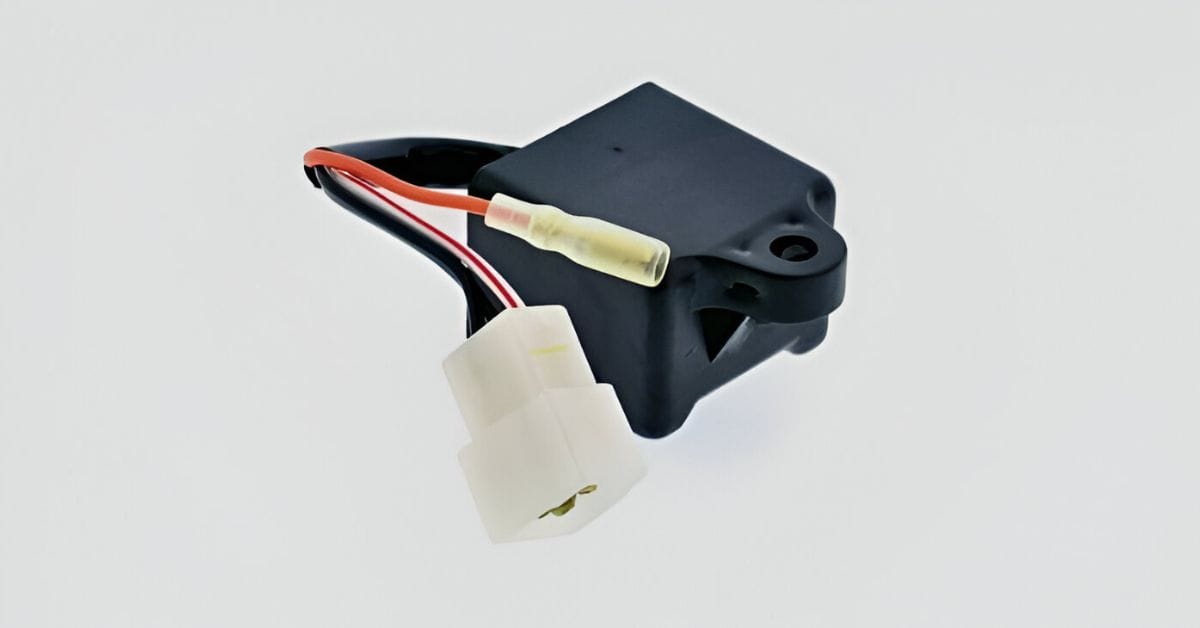
A CDI (Capacitor Discharge Ignition) box is used in vehicles to store electrical energy.
It delivers this energy to the spark plugs to make them ignite the air-fuel mixture in the cylinders. The CDI box is among the first to check if the vehicle has trouble starting or running properly.
Signs of a Faulty CDI
You’ll know the CDI box requires testing if you notice any of the following symptoms:
- A misfiring engine could be blamed on a couple of things. A worn-out ignition box inside its CDI module is one of the most common causes of misfiring engines.
- A dead cylinder could interfere with a spark plug’s ability to fire properly. Fuzzy voltage signals could originate from a faulty blocking/forward diode. You might want to check your CDI box if you have several dead cylinders.
- Backfiring happens at RPMs of 3000 and above. Although this could be due to a problem with the stator, a defective CDI box could also cause the same.
Some things that can cause a CDI to become faulty are aging (natural wearing) and a faulty charging system.
Safety Tips
Working with a CDI box or system shouldn’t be taken lightly, especially if unknowingly dealing with a bad one. Working with the mechanical aspects of a motorbike or other device containing the CDI box should be done carefully, too.
Use standard personal protective equipment (PPE), such as cut-resistant and water-proof gloves and protective eyewear. You don’t want to have to deal with the injuries linked to electrical equipment for failing to observe safety measures.
While the capacitance and the active components inside a CDI box are minimal, you must still practice caution.
Testing a CDI Box
We will conduct the following 2 types of tests on a CDI box with a multimeter:
- A hot (resistance at stator end) test by keeping the CDI box connected
- A cold (continuity) test by removing the CDI box from the vehicle
Both approaches to testing a CDI box are effective and practical.
Although they differ in the time taken, especially as the cold test requires removing the CDI box, you can choose which one you feel the most comfortable with.
Also, you must analyze the outcome, as what you do next depends on your analysis. If you fail to recognize an existing problem, the issue may not get resolved in time.
Delaying essential repairs could cause further damage to your CDI box and the interconnected parts and generally ruin the experience with your motorbike, lawnmower, or scooter. Ensure you get it right. Don’t be in a rush. Take your time!
RELATED What Does a CDI Box Do? (Guide)
Hot Testing a CDI Box with a Multimeter in 3 Steps (Resistance Test at Stator End)
Here is a 3-step guide for CDI box testing.
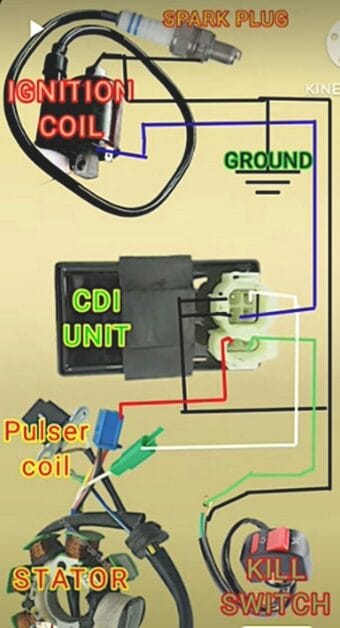
You will need access to your CDI box and a multimeter with pin leads. Here’s how it connects with other vehicle components:
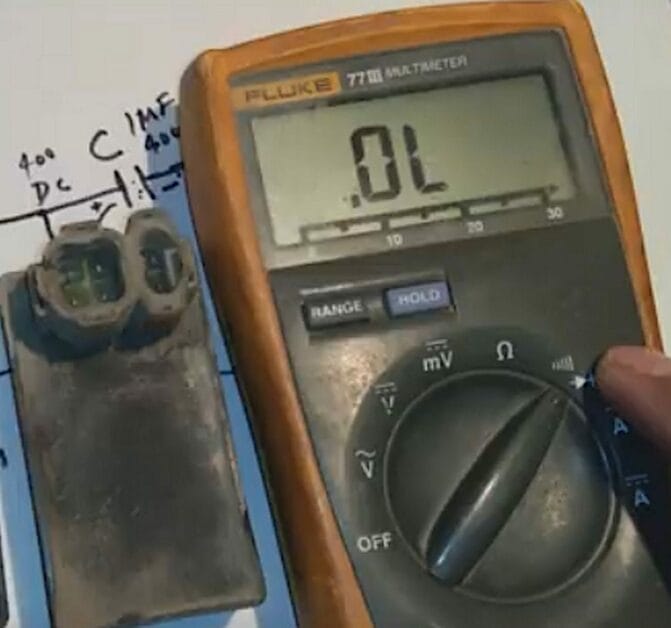
Step 1: Set the Multimeter
During a hot test, you don’t need to remove the CDI box from the stator.
You can perform the test with the CDI still connected to the stator. This is much easier and faster than the cold test method, where you must remove the CDI box.
Set the multimeter to 2k ohms.
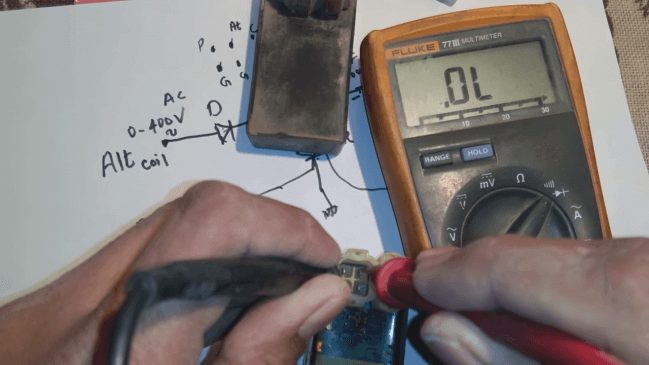
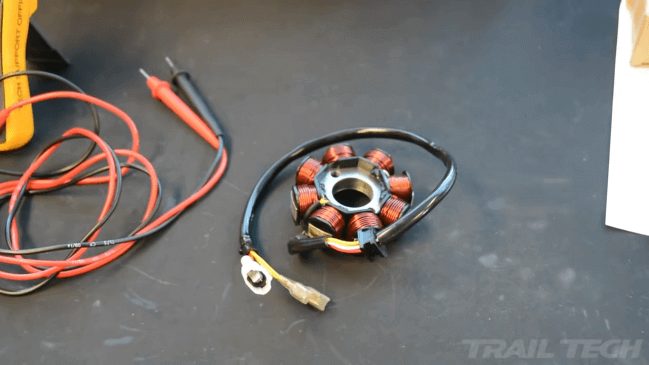
Step 2: Connect to the Stator End
Experts recommend measuring continuity on the multimeter via the stator end instead of the CDI.
Achieving any test lead connection via a connected CDI box is not easy. The good news is that the continuity, voltage, and resistance are the same as at the stator end.
We will measure the resistance between the blue wire and the white wire and the white wire and the ground.
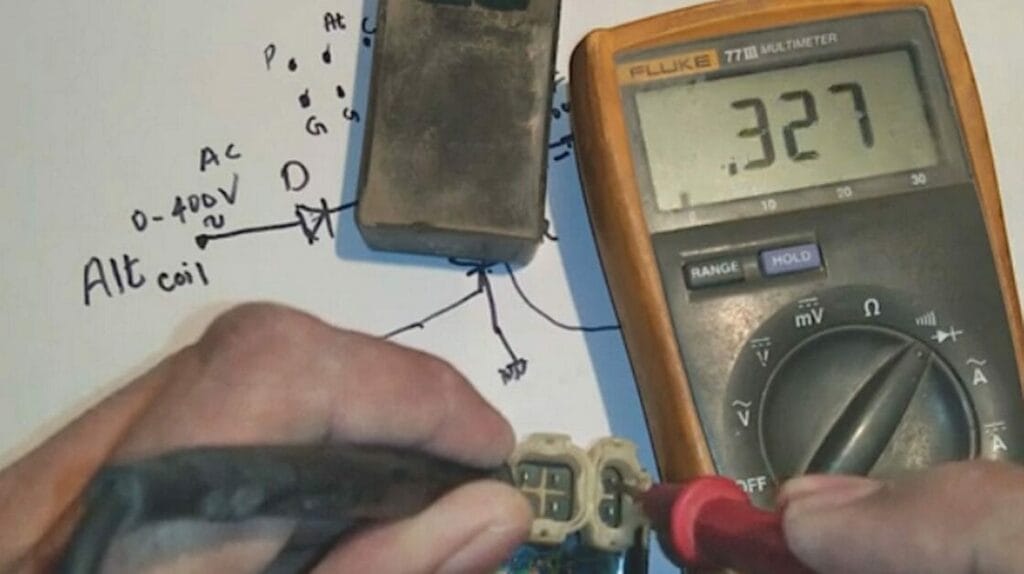
Step 3: Interpret the Readings
While conducting the hot test, you should check for the following:
- The resistance between the blue and white wires should range between 77 and 85 ohms.
- The resistance between the white wire and the ground should be between 360 and 490 ohms.
You should be concerned if the resistance values are not within these ranges. In that case, book an appointment with your mechanic.
Cold Testing a CDI Box with a Multimeter in 5 Steps (Continuity Test)
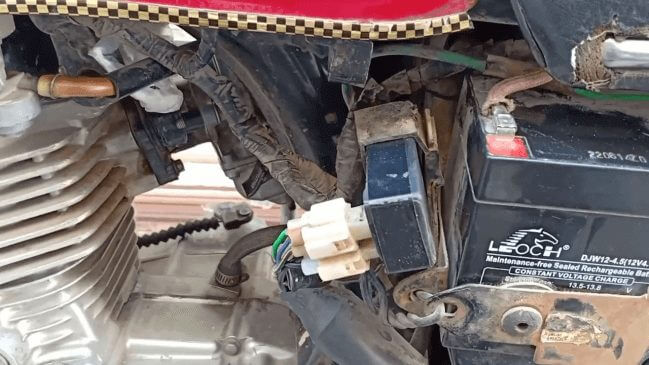
Step 1: Remove the CDI Box From the Electrical Device
The CDI box or unit will be linked to insulated leads and pin connectors.
Disconnect them to isolate the CDI box. Removing the CDI box from your motorcycle, chainsaw, lawnmower, or electrical device you are working on shouldn’t be difficult. We’ll assume you are working on a motorbike’s CDI box.
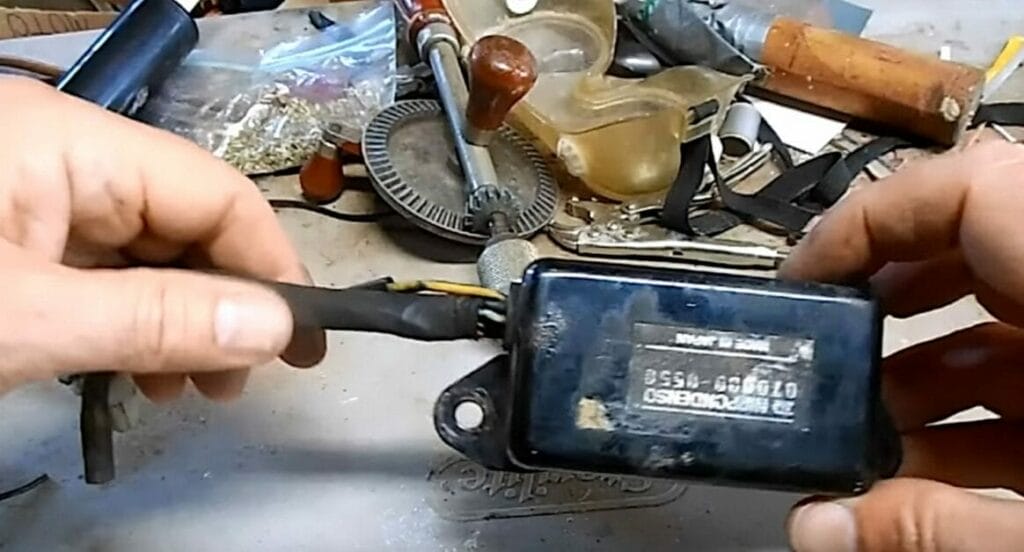
Step 2: Let It Discharge and Visually Inspect It
Once you’ve succeeded in removing it, avoid working on it immediately.
Leave it to rest for 30 to 60 minutes for the internal capacitance to release the charge. Before testing your CDI system with a multimeter, it is best to do a visual inspection. Look out for mechanical deformations that present themselves as damaged insulation from the case or heat.
Step 3: Set the Multimeter
The cold test method is for testing a CDI system’s continuity.
Set your multimeter to continuity (or ohms) mode for the cold test.
Grab the multimeter’s leads and join them together. A digital multimeter will produce a beeping sound when you do this, which confirms continuity. This test will confirm the presence or absence of continuity between all the ground points and the other points.
Step 4: Check for Continuity
Test the continuity between the ground and other terminal points within the CDI box.
Determine if you can hear any sounds when connecting the probes. If your CDI unit is working properly, you shouldn’t hear any sound because there should be no continuity. A beeping sound would indicate your CDI module is faulty.
The existence of continuity between the ground and any other terminal point means failure of the SCR, diode, or capacitor. All is not lost, though. Consult a professional electrician to have the defective component repaired if possible.
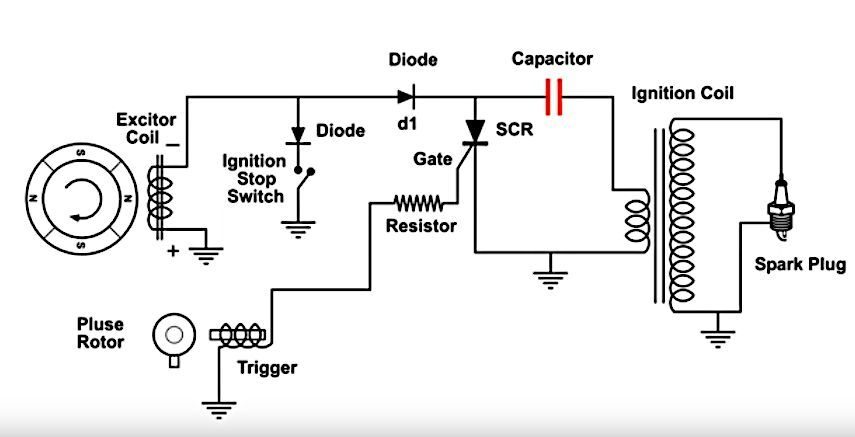
Step 5: Isolate the Problem
If a problem exists, the multimeter will give a beeping sound.
You will know the exact component of the problem and must fix it. It will be the component corresponding to where you connected the red probe when you heard the sound. See the above CDI Unit System wiring diagram.
Problems with the SCR, Diode, or internal capacitor usually cause continuity issues within a CDI.
More About CDI Boxes
A CDI stands for capacitor discharge ignition.
A trigger mechanism with coils, CDI sports a black box cover full of capacitors and other electric circuits.
The Internal Operations of a CDI Box
Before we find out the various ways of testing the CDI boxes, it might interest you to learn about the internal workings of your CDI ignition.
Also referred to as thyristor ignition, the CDI stores an electrical charge and removes it via an ignition box to facilitate the spark plugs’ production of a powerful spark in a petrol engine. The capacitor charge is responsible for providing ignition. The capacitor’s role is to charge and discharge in the nick of time, creating sparks.
CDI ignition systems allow continuous engine runtime if the power source is charged.
Testing with a Multimeter
A multimeter is a useful tool for accessing and testing the health status of a CDI box.
You can always learn if you need to learn how to use a multimeter. It is not complicated; anybody can use it to measure resistance and other parameters it was created to measure. You can check our learning section for more multimeter guides.
Confirming that the CDI unit is working properly is critical to the functionality of your motorcycle or any other electrical device. As mentioned earlier, the CDI controls fuel injectors and spark plugs and is, hence, a critical component of the proper functioning of your electrical device.
FAQs
Can a CDI box cause no spark?
A CDI box is not the only possible cause of no engine spark, but it is one possibility and one of the first to check.
If your engine fails to spark, it may be due to a problem with the CDI box. Other potential causes of no spark include ignition coil, spark plug, or wiring issues. It is important to troubleshoot all potential causes before concluding that the CDI box is to blame.
How can I tell if CDI isn’t working?
If your CDI box fails to work as expected, it may be due to a faulty connection or a problem with the unit. You will need a multimeter to test your CDI box.
First, disconnect the ground wire from the battery. Then, touch the red multimeter lead to the battery’s positive terminal and touch the black lead to its negative terminal. The battery is fine if the multimeter reads 12 volts or higher.
Next, connect the red lead to the positive terminal on the CDI box and the black lead to the ground. If you get a reading of 0 volts or close to it, there is probably an issue with the CDI box. The CDI box is most likely fine if you get a reading of 12 volts or higher.
If you suspect your CDI box is not working, take it to a mechanic or automotive specialist for further testing and diagnosis. They can confirm if the unit needs replacing.
Can you start a motorcycle without a CDI?
No, you cannot start a motorcycle without a CDI.
It’s an essential component. You need a CDI box to start a motorcycle. It provides the necessary high voltage to fire the spark plugs. The motorcycle will not start without it.
RELATED What Does a CDI Box Do? (Guide)
References
Website Resources:
- ignition systems. https://www.britannica.com/technology/ignition-system
- mechanical deformations. https://www.sciencedirect.com/topics/materials-science/mechanical-deformation
Video References:
AllAmericanFiveRadio
electrician89011
Ichiban Moto
The Engineer