12 min read
How to Test the Stator on a Motorcycle (5 Step Guide)
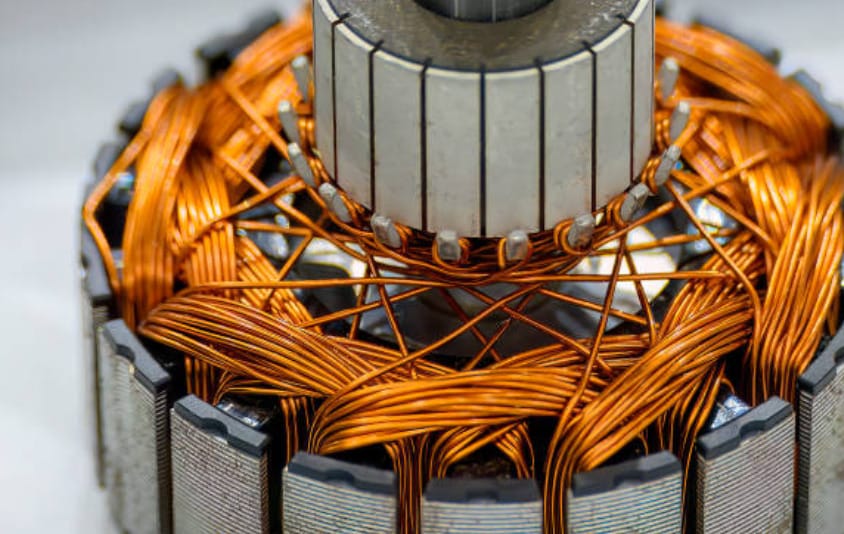
Ever wondered how your motorcycle’s electrical system works? Well, it’s all down to a crucial component called the stator. This unsung hero of your bike’s engine plays a vital role in powering your ride.
But what happens when it’s not working like it should? Testing your stator is not as daunting as it sounds. Here’s the lowdown on what you need to do:
- Step 1: Start by ensuring your battery is healthy with a voltmeter; it should show around 12.5 volts or more.
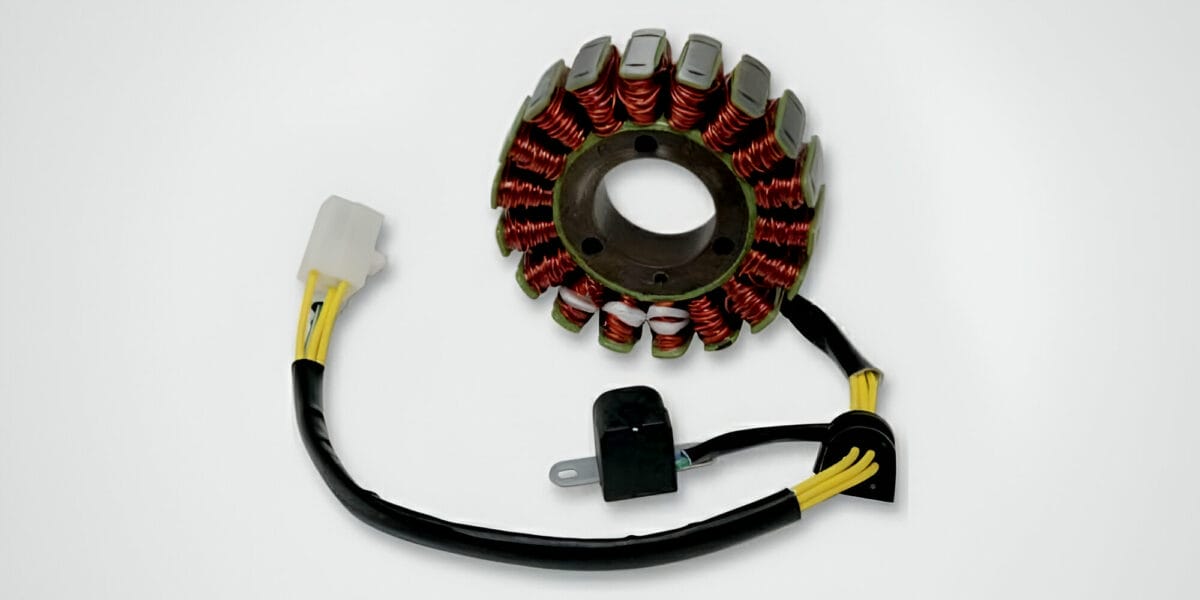
- Step 2: Find the stator under a cover, usually on your engine’s lower left side.
- Step 3: Unplug the stator from where it connects, typically leading to the regulator/rectifier.
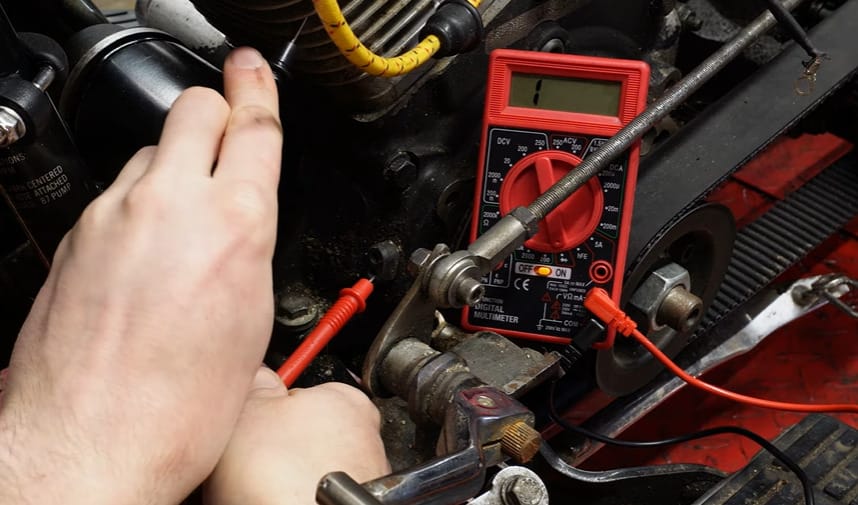
- Step 4: Use a multimeter set to continuity and check each terminal to ensure they’re not grounded.
- Step 5: Perform the continuity test on every terminal of the stator plug.
In this piece, I’ll guide you through the steps to test your motorcycle’s stator. No need for a mechanic’s degree – I’ll break it down in simple, easy-to-follow steps. So, whether you’re a biking pro or starting, you’ll find this guide handy.
Tools and Materials
Before diving into the testing process, gathering the necessary tools and materials is vital. Don’t worry! We’re not talking about extravagant and hard-to-find items. Most of these will likely be hanging around in your garage already.
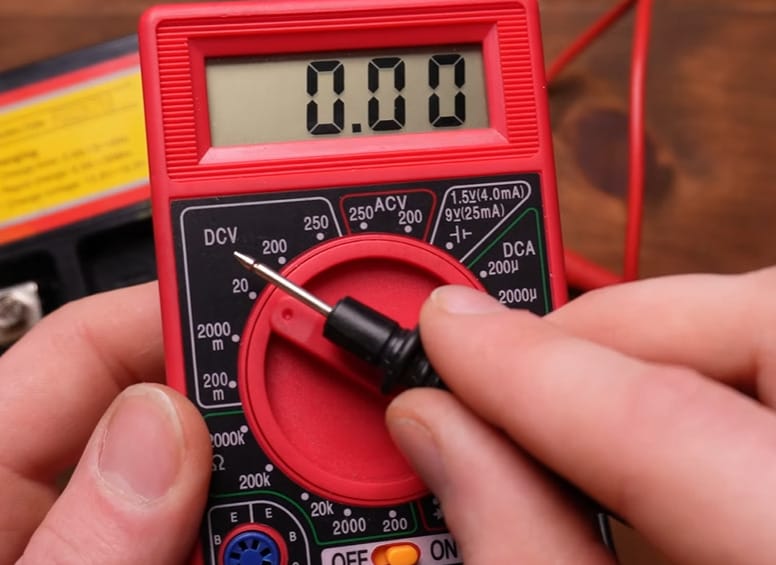
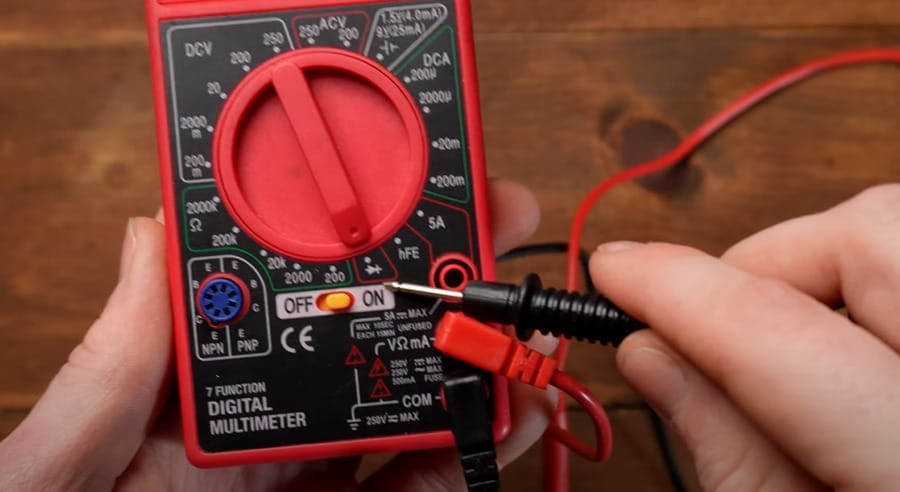
- The first and most important tool you’ll need is a multimeter. Multimeters are used to measure electrical values and are crucial when diagnosing electrical problems in your motorcycle’s system. Digital ones are best, but an analog version will also do the job.
- Next, you’ll need a set of screwdrivers. These will remove the stator’s cover and access its wires. Make sure they’re the right size for the screws on your particular bike, as they can vary.
- A pair of protective gloves is also needed. Safety should always be a priority when working with motorcycles and handling electrical components is no different. They’ll keep your hands safe from any sharp objects and electrical currents.
- Lastly, ensure a clear and clean working area. This will help you avoid losing small parts and keep you focused on the task at hand.
Oh, and don’t forget a handy pen and notepad! It’ll be indispensable to jot down readings from your tests. Trust me, your memory isn’t as great as you think. Plus, having written records of test results can also be handy for future reference.
Step by Step on Checking a Motorcycle’s Stator
Let’s dive into how you can test the stator on your motorcycle. This is a crucial part of keeping your ride in top shape. Here’s how to do it:
Step 1: Check Your Battery First
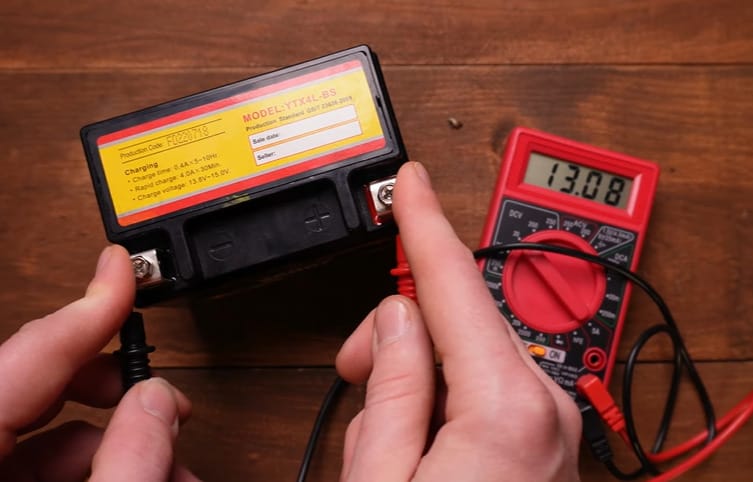
Start with the basics. Ensure your battery is in good condition because a bad battery can throw off your stator test.
Use a voltmeter, set it to DC, and check your battery’s voltage.
You’re looking for something around 12.5 volts or more.
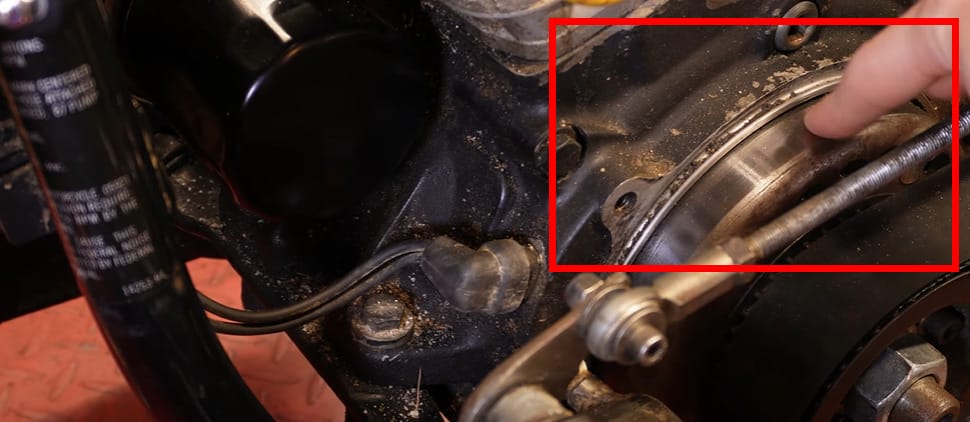
Step 2: Getting to Your Stator
The stator is usually tucked under a cover on your bike, often on the lower left side of the engine. Pop open the cover to get access. This little guy is what keeps your bike’s electrical system humming.
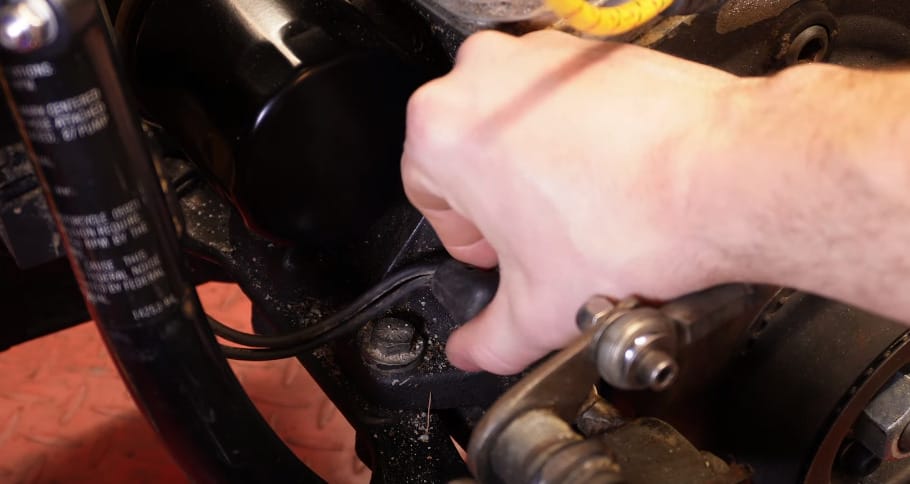
Step 3: Disconnect the Stator Plug
Find where your stator connects to the rest of your bike, usually through a plug leading to the regulator/rectifier. Disconnect this plug to test the stator directly.
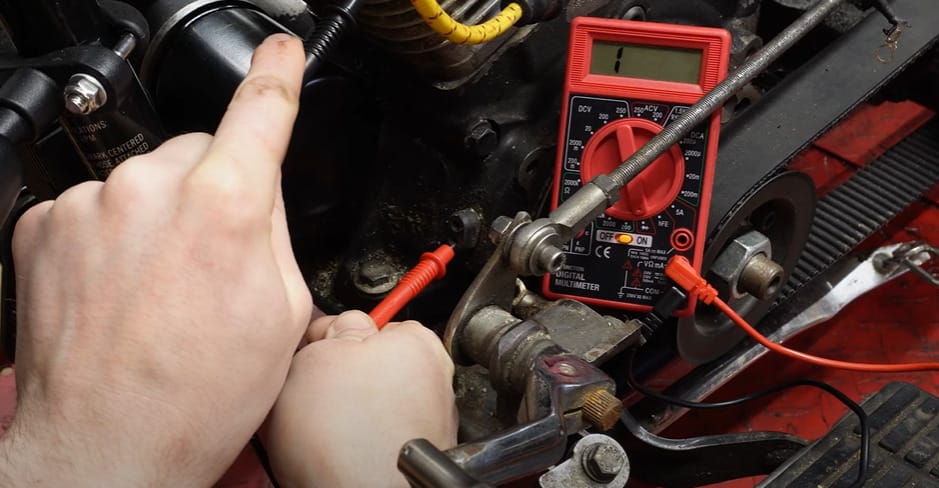
Step 4: Test for Continuity
Set your multimeter to the continuity setting.
You’ll test the stator’s terminals to make sure they’re not grounded. Put one probe on a terminal and the other on a ground point on your bike. No reading on the meter is a good sign here.
Step 5: Check Each Terminal
Do this continuity test for each terminal on the stator plug.
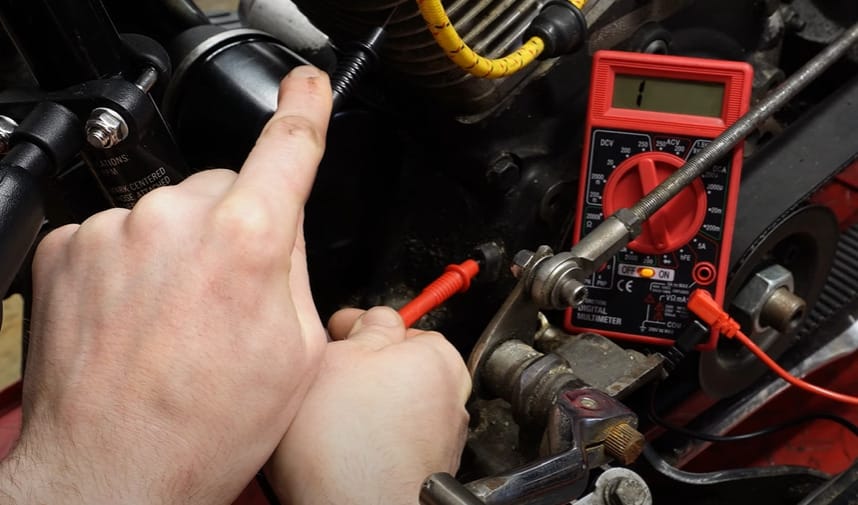
Remember, you don’t want these terminals to be grounded, so no reading on your multimeter means things look good.
That’s it, folks! A step-by-step guide with a pinch of safety precautions, a handful of patience, and a dash of diligence thrown in for good measure.
Smart Tips for Stator Testing: Avoiding Common Mistakes
When testing the stator on your motorcycle, there are a few common slip-ups you’ll want to avoid to prevent misdiagnosis or, worse, damage to your bike. Let’s break them down:
- Not Checking the Battery First: Before you even start poking around the stator, make sure your battery is in good shape. A lot of stator test issues can be battery problems in disguise.
- Skipping the Visual Inspection: Don’t dive straight into using your multimeter. First, take a good look at the stator. Check for any visible signs of damage or wear, like frayed wires or burn marks. Sometimes, the problem is right there in front of you.
- Incorrect Multimeter Settings: Using the wrong settings on your multimeter is a classic mistake. Ensure it’s set correctly for the type of test you’re doing – DC volts for the dynamic and ohms for the static test.
- Testing in the Wrong Order: Always start with the static test (engine off) before moving to the dynamic test (engine on). This order matters because it helps you identify different kinds of issues without unnecessary complications.
- Not Consulting the Service Manual: Every bike is different. Your service manual will have the specific electrical specs for your model. Without it, you’re just guessing, leading to wrong conclusions.
- Ignoring the Simple Stuff: Sometimes, it’s the basic things – like loose connections or corroded terminals. Always check these before concluding it’s a stator issue.
- Forgetting Safety Precautions: Always ensure your bike is off and cooled down before you start. Safety comes first, always.
- Rushing the Process: Take your time. Rushing through the testing process can lead to mistakes or missing subtle signs of stator issues.
- Overlooking Other Potential Issues: Other components, like the regulator/rectifier, could cause symptoms like weak sparks or battery problems. Keep an open mind about what the problem could be.
- Assuming it’s Always the Stator: Sometimes, the problem isn’t the stator. Don’t immediately conclude that the stator is at fault without thoroughly checking everything else.
Remember, taking your time and being thorough are your best tools for motorcycle maintenance. Stay safe and happy troubleshooting!
RELATED What Does a CDI Box Do? (Guide)
Troubleshooting Tips for Identifying Stator-Related Issues
Let’s dive into some troubleshooting tips to help you figure out if your motorcycle’s stator might be causing some sneaky problems. Here’s a handy table to guide you through:
- Inconsistent Headlights: The stator might not provide consistent voltage if the headlights are unstable. You can troubleshoot this by checking the brightness of the headlights at various RPMs.
- Electrical Accessories Acting Up: If your GPS, heated grips, or other electrical accessories malfunction, it could indicate insufficient power from the stator. Test these gadgets for any malfunctions.
- Battery Dies Quickly: A battery that dies quickly or fails to charge properly may be a sign that the stator isn’t charging it as it should. To diagnose this issue, check the battery voltage with a multimeter while the bike runs.
- Engine Performance Issues: If you notice misfiring or rough running, especially at different speeds, it could be due to the stator affecting the ignition system. Look out for these signs, as they can indicate a stator problem.
- Bike Hard to Start: When the bike takes multiple attempts or seems harder to start than usual, it could be a symptom of a weak or inconsistent power supply from the stator.
- ECU Malfunctions: If the bike’s electronic functions are not working correctly, it might be because the stator fails to supply enough power to the ECU. Observe any malfunctions in the bike’s electronic systems.
- Engine Stalls: Frequent engine stalling, especially under different riding conditions, may indicate that the stator is not adequately powering the fuel system.
- Unusual Noises or Odors: Strange sounds or smells from the area where the stator is located could be signs of a burnt or overheating stator.
- Frequent Fuse Blowing: If the fuses related to the electrical system are blowing out often, it could be caused by electrical overload due to stator issues.
Remember, these tips are to help guide your investigation. Consulting a professional is always a good idea if you’re unsure or the problem seems complex.
Keeping Your Stator in Peak Condition
Keeping your motorcycle’s stator in top shape is key to a smooth ride. Here are some maintenance tips to help you ensure your stator’s longevity. Let’s break it down in a table format for easy reference:
| Maintenance Task | Schedule | Details |
|---|---|---|
| Regular Visual Inspections | Every 3-6 months | Check for any signs of wear, damage, or corrosion. Look for frayed wires, burnt spots, or loose connections. |
| Clean the Stator Area | Every oil change | Keep the stator area clean. Dirt, grime, and debris can cause overheating and damage. |
| Check Electrical Load | As needed | Avoid overloading your bike’s electrical system. Too many accessories can strain the stator. |
| Battery Health Check | Every 3-6 months | Ensure your battery is in good condition. A failing battery can put an extra load on the stator. |
| Cooling System Maintenance | According to the service manual | A well-maintained cooling system helps prevent stator overheating. Regularly check coolant levels and the condition of radiator hoses. |
| Vibration Check | During regular service | Excessive vibration can loosen stator connections. Ensure everything is tight and secure. |
| Professional Inspection | Annually | Have a professional mechanic inspect your stator as part of annual maintenance. They can spot issues you might miss. |
Remember, regular care can go a long way in keeping your stator, and therefore your motorcycle, running smoothly. Stick to these maintenance tips, and you’ll likely avoid common stator issues. Keep riding safe!
Frequently Asked Questions
- Is It Possible to Repair a Stator, or Should I Replace It?
- Reproducing a stator is possible, but it can be a bit complex. If you’re handy and patient, you can do it yourself, but often, it’s more straightforward to replace it. If you’re not confident in your repair skills, it might be best to let a professional handle it.
- Can a Faulty Stator Damage My Motorcycle’s Engine?
- Directly, no. But a bad stator can lead to electrical issues that might indirectly affect your engine. For instance, if it causes your battery to drain, it can lead to starting problems or poor engine performance.
- Can I Ride My Motorcycle with a Bad Stator?
- It’s not recommended. While you might be able to start and ride the bike, a bad stator can cause electrical problems that might leave you stranded or cause further damage to your bike’s electrical system.
- How Long Does a Stator Typically Last?
- It varies, but a well-maintained stator can last tens of thousands of miles. Regular checks and not overloading your bike’s electrical system can help prolong its life.
- What’s the Cost to Replace a Motorcycle Stator?
- The cost can vary widely depending on your motorcycle model and whether you go for a professional repair or do it yourself. You might be looking at a few hundred dollars, including parts and labor.
References
Organizations:
- Rick’s Motorsport Electrics. https://ricksmotorsportelectrics.com/
Website Resources:
- Motorcycle Maestros. https://www.motorcyclemaestros.com/
- The Seasoned Wrench. https://theseasonedwrench.com/
Video References:
Grease’s Garage