10 min read
How to Straight Wire a Cooling Fan (7-Step Guide)
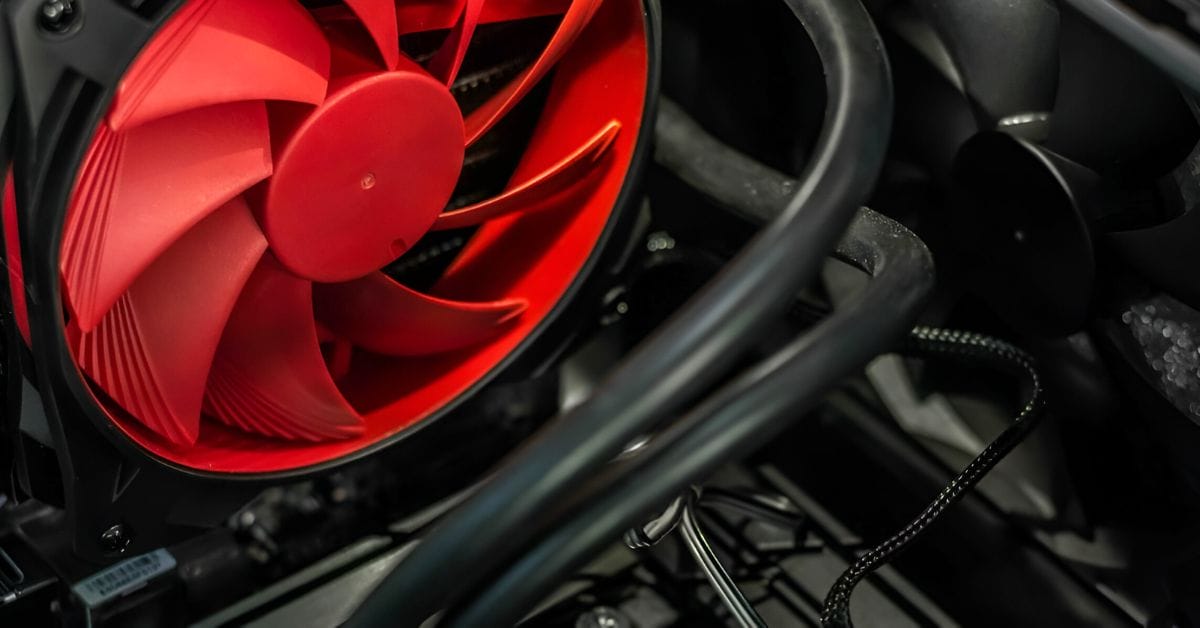
Hey there, folks! Today, we’re diving into a project that’s as cool as it is crucial—straight wiring a cooling fan.
Straight-wiring a cooling fan might sound like a task only for the pros, but I’m here to tell you that with the right tools and a bit of know-how, you can tackle this project head-on and add another notch to your DIY belt.
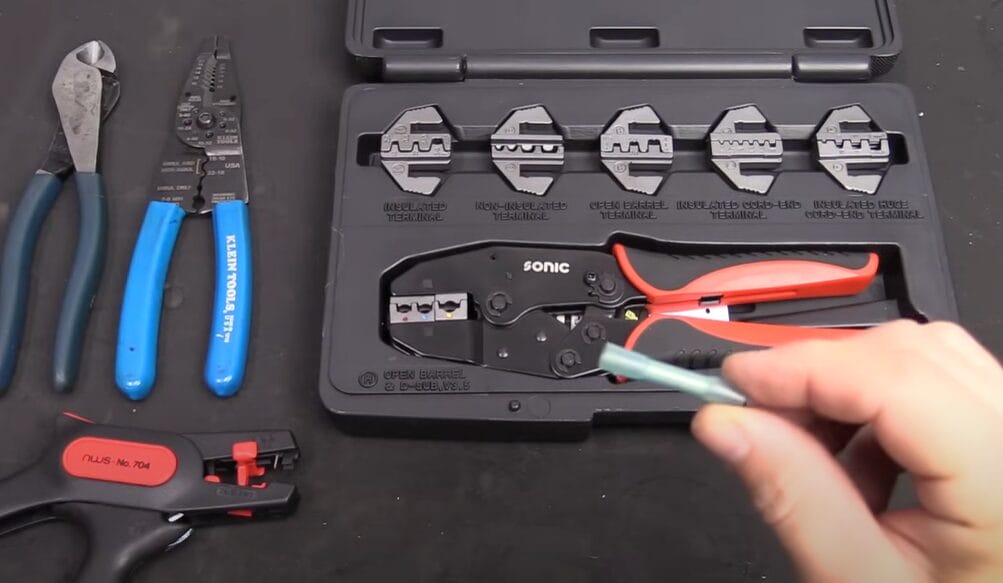
- Step 1: Gather your DIY toolkit: wire cutters, strippers, crimpers, butt connectors with heat shrink, wiring harness tape, and heat shrink tubing.
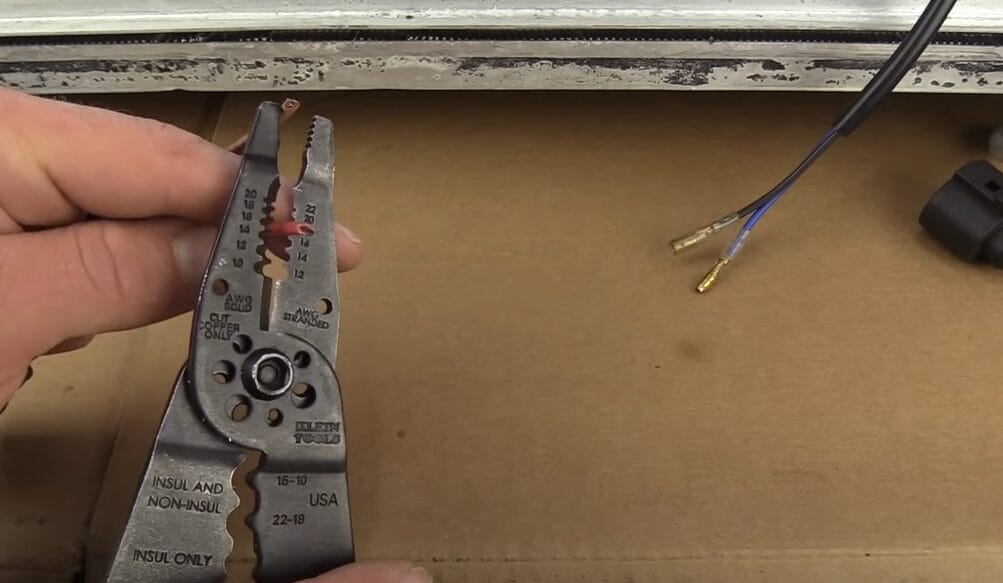
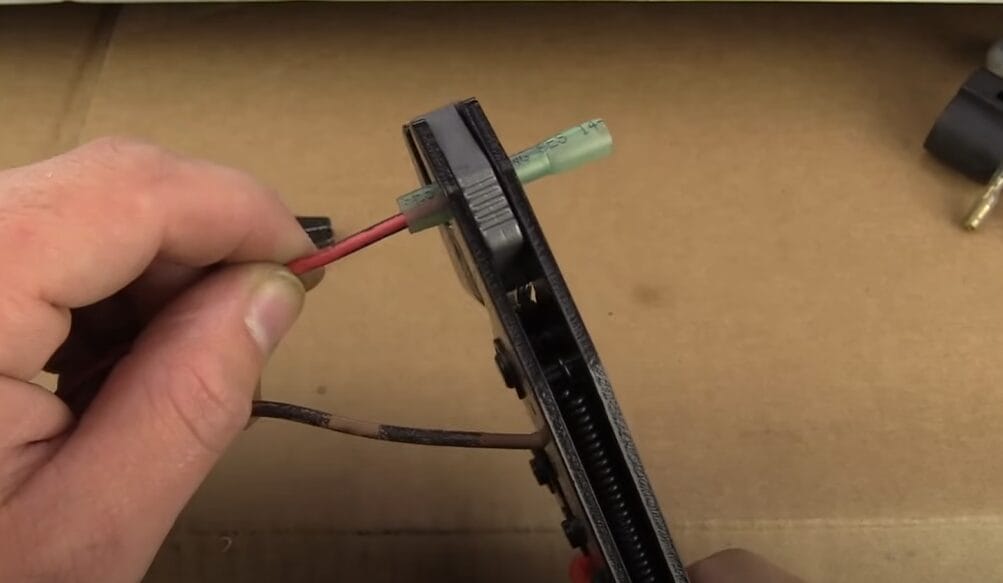
- Step 2: Strip the insulation from the wire ends to reveal their true potential.
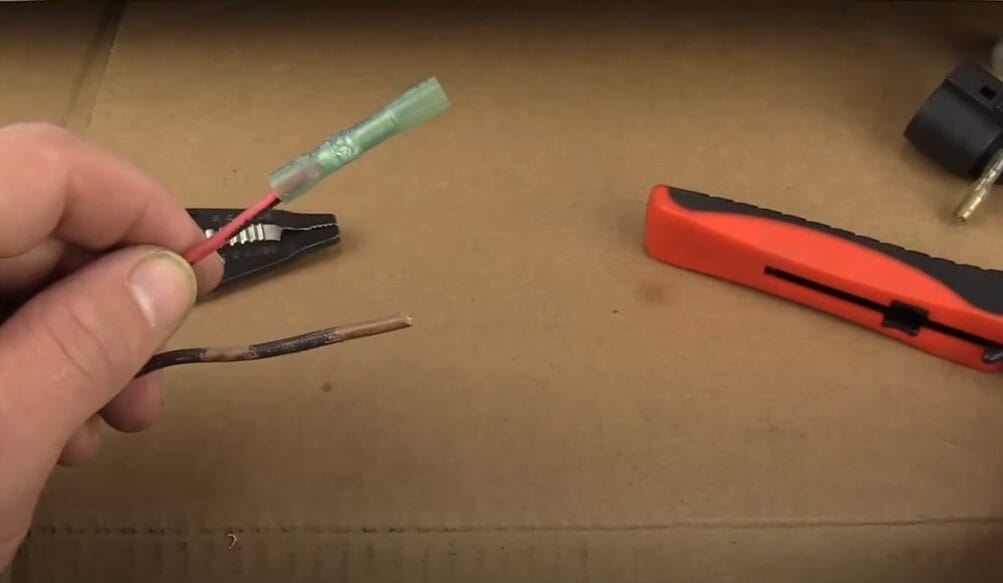
- Step 3: Connect those wires with crimp connectors, ensuring the polarity is spot on.
- Step 4: Crimp confidently, then gently tug to ensure a solid connection.
- Step 5: Dress the connections in heat shrink tubing and apply heat to seal the deal.
- Step 6: Test the fan by hooking it up to the battery.
- Step 7: Secure the wires with tape, away from danger, and give your fan one more test in its natural habitat.
In this guide, I’ll walk you through the process step by step, sharing tips and tricks I’ve picked up along the way. So grab your tools, roll up those sleeves, and start straight-wiring a cooling fan.
Precautionary Measures and Safety Tips
Before diving into straight-wiring cooling fans, let me walk you through some precautionary measures and safety tips. Trust me, I’ve been there; these steps are your best friends.
- Turn Off the Ignition: Ensure the vehicle’s ignition is off before starting. I learned that skipping this step can lead to unexpected and unwanted surprises.
- Avoid Hot Work Areas: Don’t work on your cooling fan in direct sunlight or hot spots. I once set up in my driveway under the blazing sun, making the job unnecessarily tougher.
- Double-Check Connections: Treat wire connections with utmost caution. Always refer to the manual or consult someone knowledgeable if you’re unsure. Mixing up wires can lead to a whole lot of nothing happening with your fan.
- Keep Your Workspace Clear: Maintain a clean area and keep tools and devices away from the cooling fan. Dropping a wrench on a running fan blade turned my workspace into a no-fly zone for tools.
- Allow the Engine to Cool: After shutting down your engine, give the fan a few minutes before you turn it off. It helps the engine cool down more effectively. Ignoring this can make your engine bay feel like a sauna.
- Work in Safe Conditions: Avoid flammable or crowded areas for your wiring project. Attempting to multitask in a cluttered garage taught me that disaster loves chaos.
By sticking to these bullet points, you’re not just ensuring the success of your project but also prioritizing safety and efficiency. Remember, the goal is to enjoy the process and the results without drama.
A Step-by-Step Guide on How to Straight Wire a Cooling Fan
Today, I’m pumped to show you how to wire electric cooling fans with crimp connections. It will be a game-changer for your ride, especially on those hot summer days.
Let’s get our hands dirty and make your engine cool and happy.
Step 1: Gather Your Tools and Materials
- Collect wire cutters, wire strippers, crimpers, butt connectors with heat shrink, wiring harness tape, and heat shrink tubing.
Step 2: Prepare the Wires
- Use the wire cutters and strippers to strip the insulation from the ends of the wires carefully you’ll be connecting.
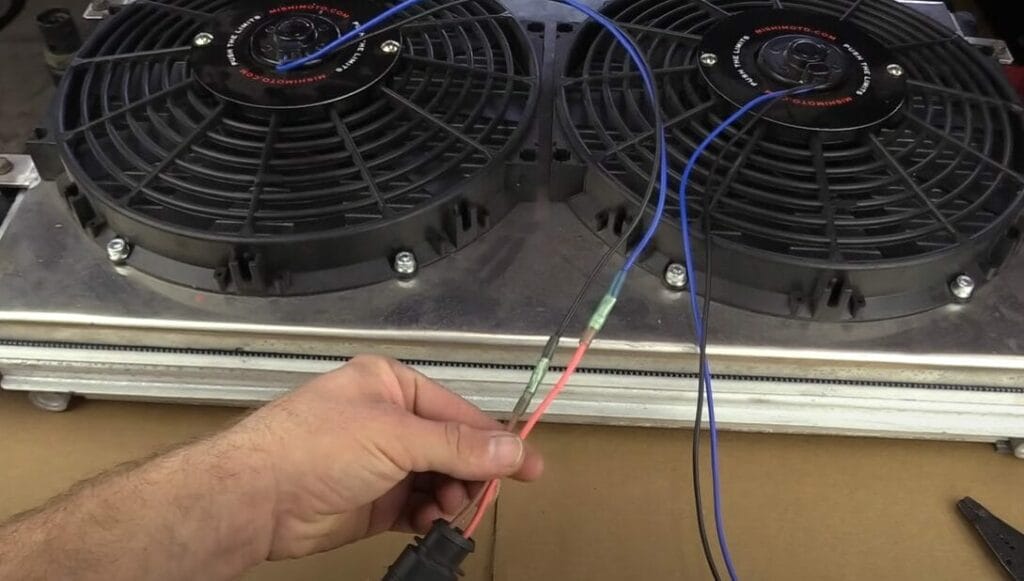
Step 3: Connect Using Crimp Connectors
- Attach the stripped wire ends to the appropriate crimp connectors. Ensure the connections match the fan’s polarity requirements.
Step 4: Secure Connections with Crimping Tool
- Crimp the connectors securely around the wires. Test the connection by gently pulling the wire and connector to ensure they are tightly secured.
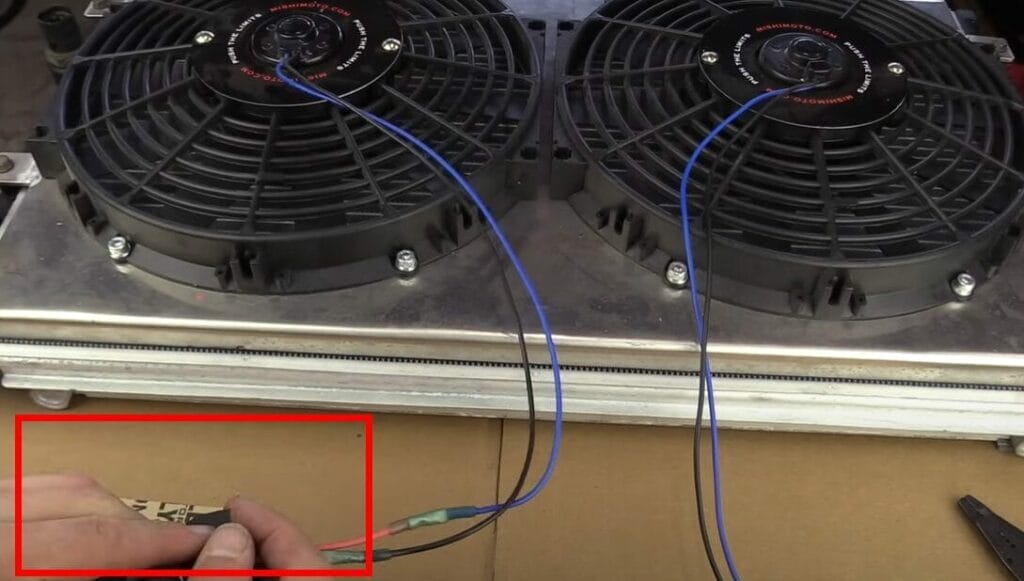
Step 5: Apply Heat Shrink Tubing
- Slide heat shrink tubing over the connections and apply heat to seal. This step provides additional protection and durability.

Step 6: Test the Fan
- Temporarily connect the fan to the vehicle’s battery to test its operation. Ensure the fan rotates correctly, indicating proper polarity and connection strength.
Step 7: Finalize and Secure Wiring
- Use wiring harness tape to neatly bundle and secure the wires, ensuring they are away from moving parts or sources of heat.
- Re-test the fan operation within the vehicle’s system to confirm successful installation.
These 7 steps will ensure a secure and efficient setup for your electric cooling fans, enhancing your vehicle’s cooling system performance.
Troubleshooting Tips for Straight Wiring a Cooling Fan
Over the years, I’ve run into a fair share of hiccups and learned a thing or two about navigating these waters. Let me share some wisdom to keep you from pulling your hair out.
| Common Problem | Solution |
|---|---|
| Fan Doesn’t Start | Double-check your connections. It sounds simple, but ensuring your wires are properly connected to the battery and fan is crucial. A loose connection can make all the difference. |
| Fan Overheats | Ensure your fan is the correct type for your vehicle and isn’t drawing more power than your system can handle. Upgrading your wiring and fuse can sometimes be the fix. |
| Erratic Fan Operation | This often points to a grounding issue. Ensure the fan’s ground wire is securely connected to a clean, paint-free metal surface on the vehicle’s body or engine. |
| Blown Fuse | A blown fuse usually means the fan is drawing too much power. Consider installing a relay between the fan and the battery to reduce the load on the fuse. |
These tips come from my own bumps and triumphs in the garage. The key is patience, persistence, and a bit of creativity. And always keep safety at the forefront of your mind – working on cars is fun, but only when done safely. Happy tinkering!
Maintenance Tips for Your Straight-Wired Cooling Fan
Maintenance is key to keeping that cooling fan spinning smoothly and your engine at the perfect temperature. Let’s dive into some essential maintenance tips to keep your setup cool under pressure.
Weekly Checks:
- Visual Inspection: Once a week, pop the hood and look at your cooling fan. Check for any loose connections or signs of wear on the wires. It’s like giving your fan a quick health check-up.
Monthly Checks:
- Clean the Fan Blades: Dust and debris are the enemies of your cooling fan. Each month, gently clean the fan blades to keep them running efficiently. A soft brush or a blast of compressed air can do wonders.
- Check for Obstructions: Ensure nothing’s blocking the airflow around your cooling fan. A clear path means better cooling and less strain on the fan.
Seasonal Checks:
- Tighten Connections: With the change of seasons, it’s a great time to tighten any connections that might have loosened. A snug wire is a happy wire.
- Inspect for Corrosion: Look for any signs of corrosion on the connectors or wires. If you spot any, it might be time for a little touch-up or replacement to keep everything in shape.
Signs of Trouble to Watch For
- Overheating Engine: If your engine starts running hotter than usual, it could be a sign your cooling fan isn’t pulling its weight. Time to check it out!
- Strange Noises: Hear something odd coming from the fan area? Please don’t ignore it. A rattling or grinding noise could indicate something amiss with the fan’s operation.
- Intermittent Operation: If your fan is acting like a moody teenager—on and off again without any clear reason—it’s a sign that something’s wrong. Electrical connections are often the culprit.
Sticking to this schedule and watching for those tell-tale signs of trouble will ensure your engine stays cool and your rides are smooth. Here’s to many happy, cool-running miles ahead!
Frequently Asked Questions
- Can I Straight-wire any Cooling Fan to My Vehicle?
- Absolutely, but with a caveat. While most cooling fans can be adapted to straight wiring, ensuring the fan’s specifications match your vehicle’s requirements is crucial.
- How Do I Know If My Fan is Properly Grounded?
- Ah, grounding, the unsung hero of electrical work. A properly grounded fan should securely attach its negative wire to a clean, metal part of the vehicle’s frame or engine.
- What Size Jumper Wire Should I Use?
- A 12-gauge wire is your best bet for most vehicles. Too big, and it’s overkill.
- Is It Necessary to Use a Relay?
- Using a relay isn’t just necessary; it’s smart. A relay can handle the high current of the fan without putting strain on your vehicle’s electrical system.
- What Should I Do If the Fan Keeps Blowing Fuses?
- This usually means the fan is drawing too much power. Look into installing a higher-rated fuse and relay, and double-check that the wiring isn’t shorting anywhere.
- What Precautions Should I Take to Ensure Safety?
- Always disconnect the battery before starting your work to avoid any shocking surprises. Wear gloves and protective eyewear.
References
Organizations:
- SEMA (Specialty Equipment Market Association). https://www.sema.org/
- SAE International (Society of Automotive Engineers). https://www.sae.org/
Books:
- “Automotive Wiring and Electrical Systems” by Tony Candela. https://valsec.barnesandnoble.com/w/automotive-wiring-and-electrical-systems-tony-candela/1013702545?ean=9781613250198
- “The Haynes Automotive Electrical Manual” by Haynes Publishing. https://www.abebooks.co.uk/9781850106548/Automotive-Electrical-Haynes-TECHBOOK-Repair-1850106541/plp
Website Resources:
- HumbleMechanic.com. http://humblemechanic.com/
- AllDataDIY. http://alldatadiy.com/
- Instructables. http://www.instructables.com/
Video References:
HumbleMechanic