13 min read
How to Remove a Circuit Breaker (7 Easy Steps)
Hey there, DIY enthusiasts! Are you ready to tackle removing a circuit breaker? It’s not as daunting as it sounds – you need a few basic tools and a bit of know-how.
I’ve been through this process plenty of times and am here to guide you safely and efficiently. Here’s the rundown:
🔌 Step 1: Shutting Down the Main Power
🔧 Step 2: Panel Cover Removal
🛑 Step 3: Individual Breaker Shutdown
🤏 Step 4: Gently Loosening Breaker
🛜 Step 5: Pulling the Breaker
🔩 Step 6: Disconnecting the Wire
🧤 Step 7: Wire Removal
I’ll take you through these steps in detail in this guide. We’ll discuss the necessary tools, dive into why you remove a breaker, and emphasize those all-important safety precautions.
Gearing Up for Circuit Breaker Removal
Alright, DIYers, let’s gear up. I’ve been down this road a few times, and I’ll let you know what you’ll need. It’s not a long list, but each item is key to getting the job done right and safely.
Essential: The Screwdriver. This is your main tool for removing the panel cover and loosening the wires from the breaker. I’ve got a whole collection of them, but for this job, make sure you’ve got one that fits your panel screws snugly.
For Extra Safety: Safety Gloves. Safety comes first, always. A pair of safety gloves can be a real hand-saver. They protect you from sharp edges inside the panel and give you a better grip on the breaker. I never skip these – it’s better to be safe than sorry.
Testing for Faulty Breakers: The Multimeter. A multimeter is your best friend if you check for a faulty breaker. Set it to AC voltage to test the breaker’s output. My multimeter is invaluable for this job and all home electrical projects.
With these tools, you’re all set to tackle the job.
How to Remove a Circuit Breaker: A Step-by-Step Guide
Alright, DIYers, let’s dive into the nitty-gritty of removing a circuit breaker. I’ve done this more than I can count, and I’ll walk you through each step. Just remember, safety is our top priority!
Step 1: Powering Down
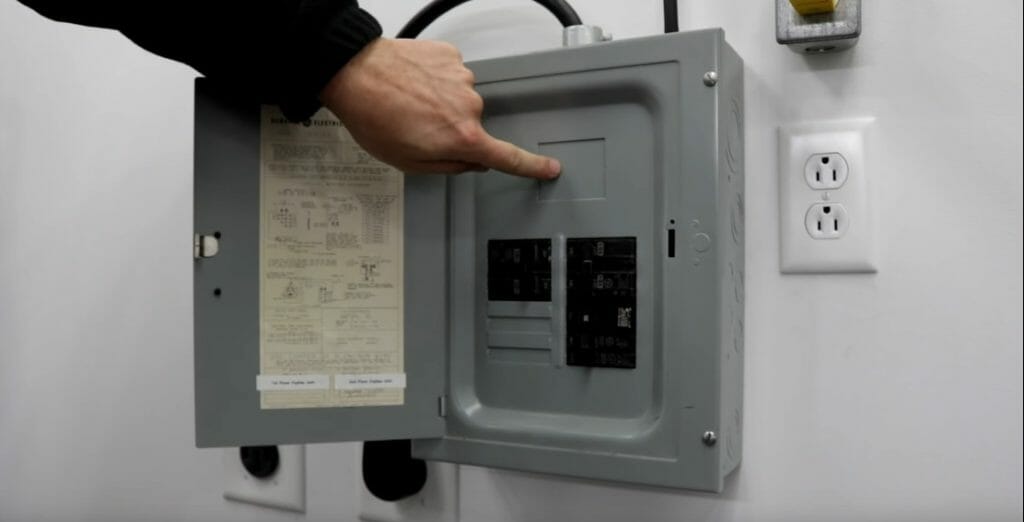
First up, we’ve got to shut down the main power. Head to your circuit breaker panel and flip off the main switch. It’s like turning off the stage lights before the show – everything goes dark, but it’s necessary.
Step 2: Accessing the Panel
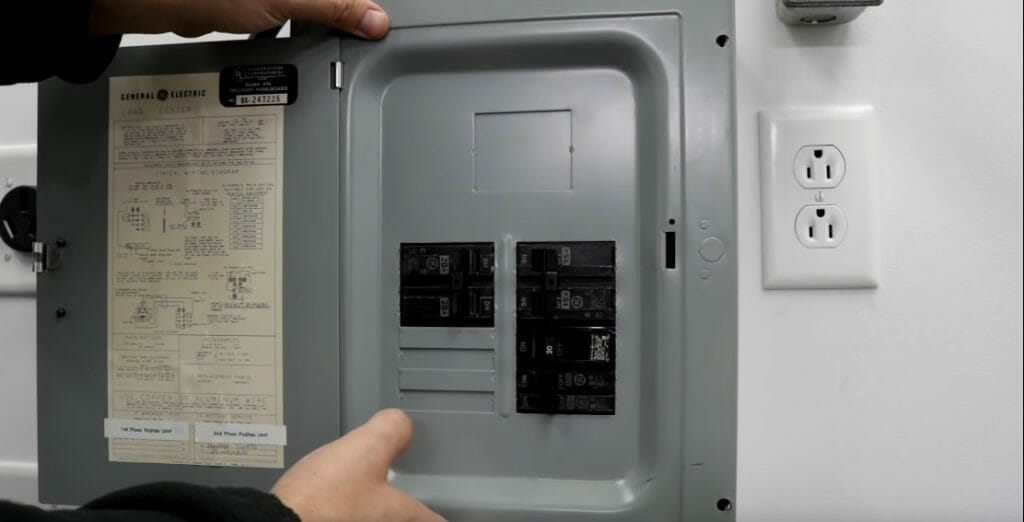
Next, let’s get into the panel. If your main breaker is off, it’s time to remove that panel cover. This will give you full access to the breakers. I always keep my screws in a cup so they don’t wander off.
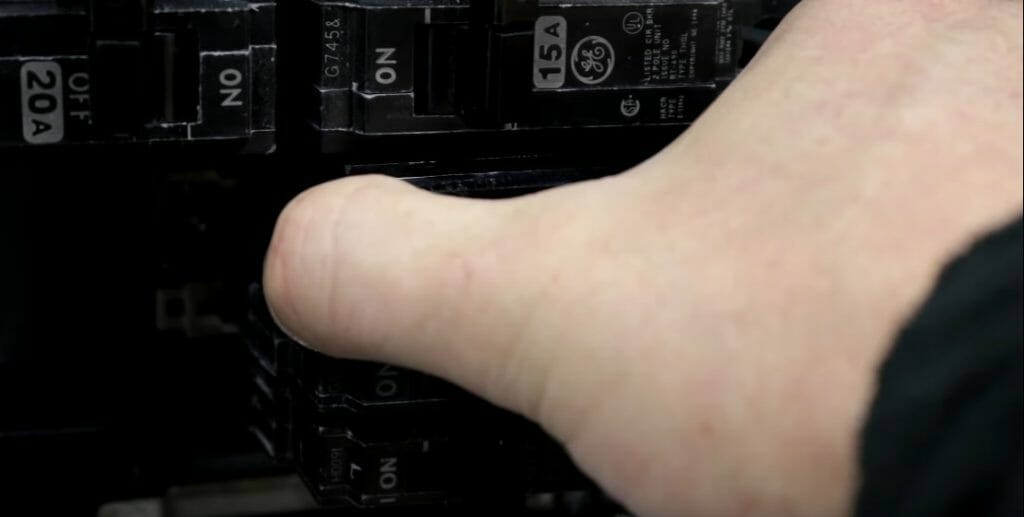
Step 3: Isolating the Breaker
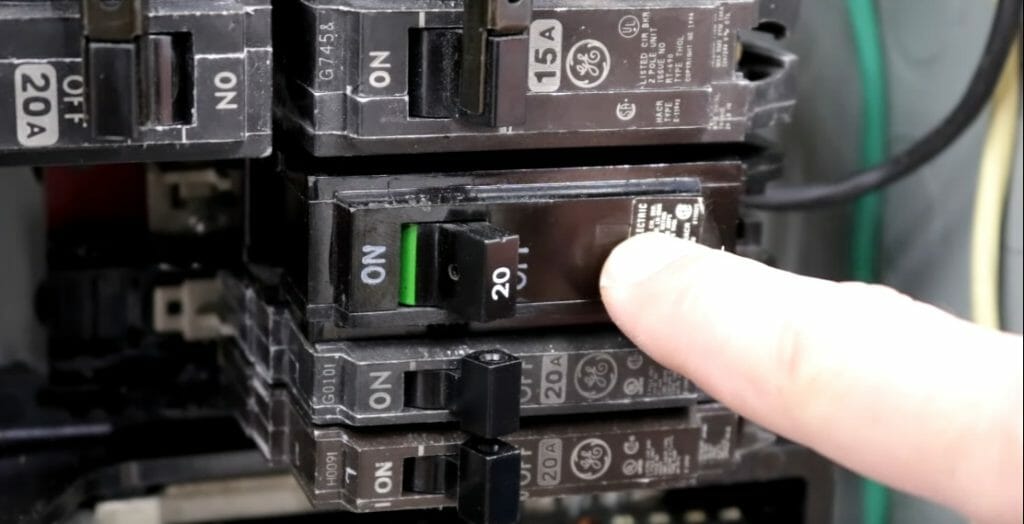
Now, let’s focus on the breaker you want to remove. Even though the main power is off, I always turn off the individual breaker. It’s like double-checking the doors are locked – better safe than sorry.
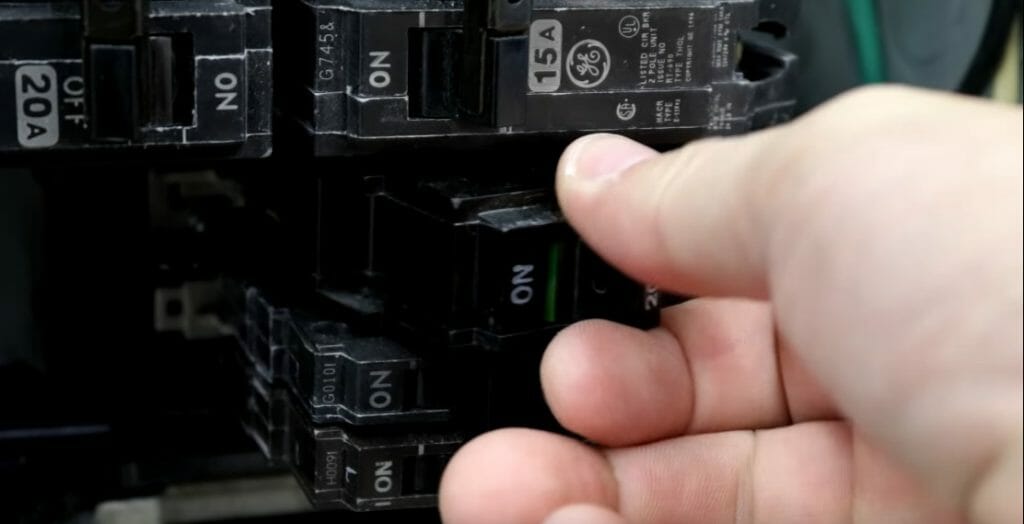
Step 4: Loosening the Breaker
Here comes the hands-on part. Grab the breaker – usually lengthwise works best – and gently wiggle it to dislodge it from its position. Be firm but gentle; we don’t want to force it.
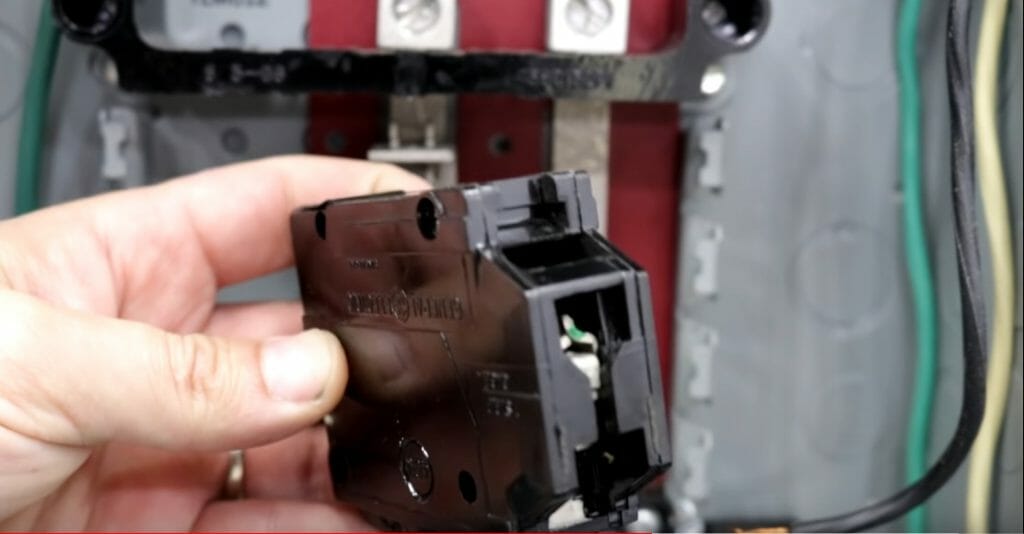
Step 5: Removing the Breaker
Once it’s loose, you can pull the breaker out. It should come out pretty easily. It slides right out when you’ve got it right.
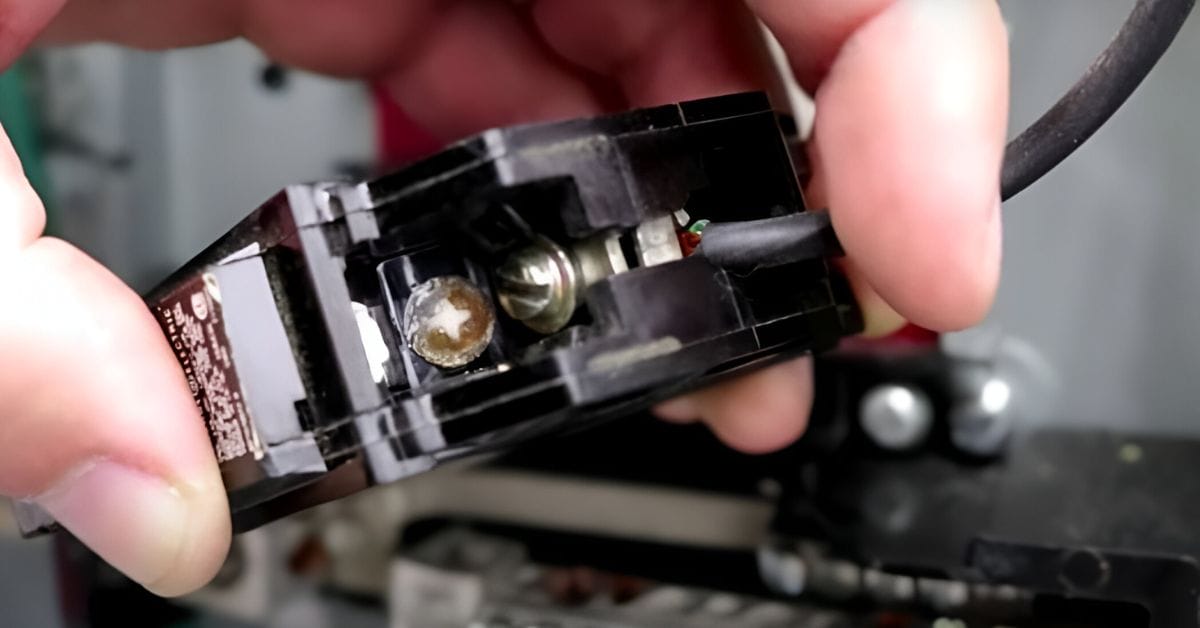
Step 6: Disconnecting the Wire
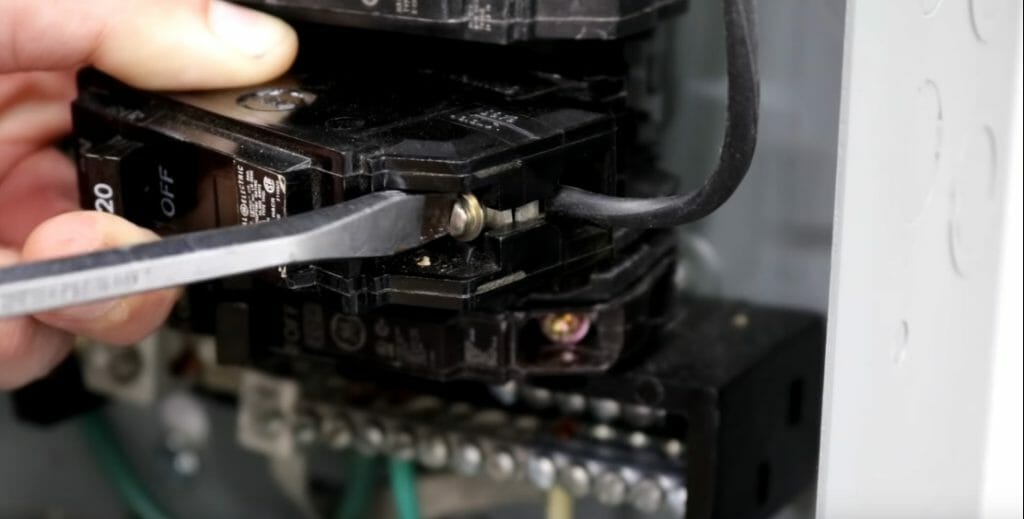
Now, grab your screwdriver. You’ll need to loosen the screw holding the wire to the breaker. Once it’s loose, gently pull the wire free. This step always needs a bit of finesse – it’s important not to yank it.
Step 7: Pull the Wire Out
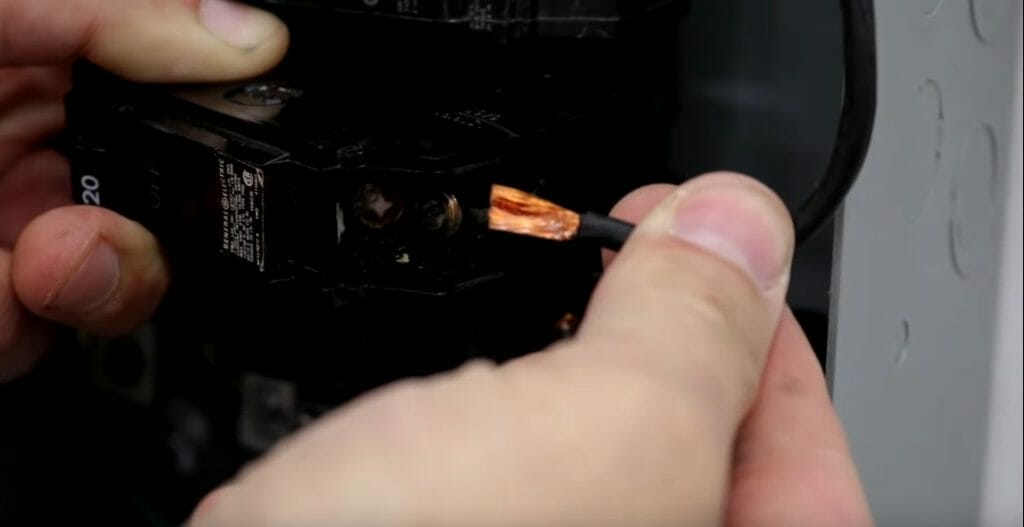
With the wire disconnected, the breaker is now completely free. You can remove it and set it aside. Voila! The breaker is out, and you’re ready to replace it if needed.
And there you have it – a step-by-step guide to removing a circuit breaker. Remember, don’t hesitate to call a professional if you’re in doubt or feel uncomfortable with these steps.
Electrical work is serious, and it’s always better to be safe. Happy DIY-ing!
Understanding the Need for Removing a Circuit Breaker
Let’s talk about when and why you might need to roll up your sleeves and remove or replace a circuit breaker.
I’ve encountered two main reasons in my time tinkering with electrical systems. Let’s break them down:
When Power Won’t Flow Through
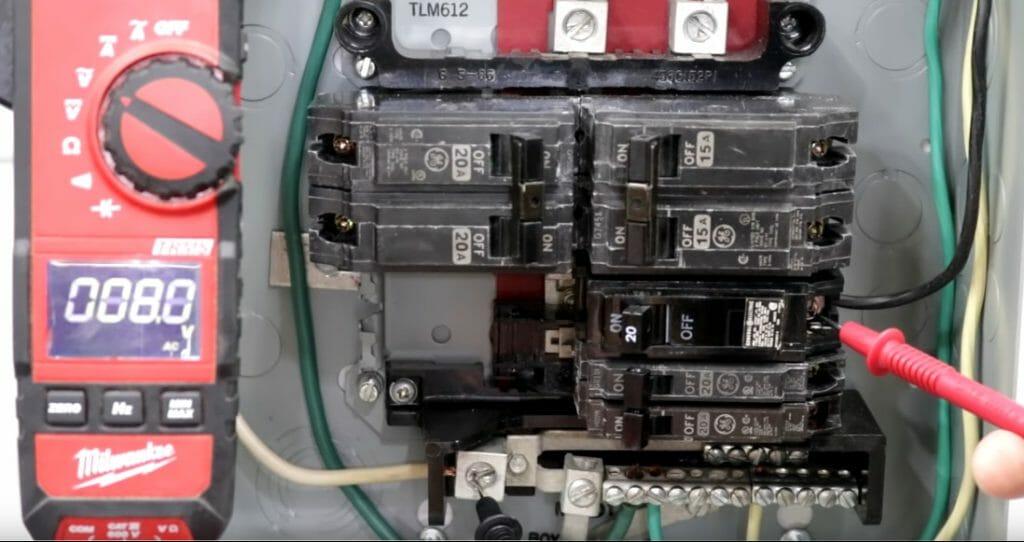
Sometimes, you have a breaker that won’t let power through.
In these cases, I grab my multimeter, set it to AC, and do some detective work. With the breaker on, I place the black probe on the neutral wire connection and the red one on the screw holding the wire in the breaker.
If the reading matches my electricity supply voltage, we’re golden. But if it’s showing zero or low, it’s time for that breaker to hit the road.
When the Breaker Trips Too Soon
Then there’s the overeager breaker, tripping way before it should. Picture this: you’ve got a load needing up to 16 amps, but your 20 amp breaker throws in the towel at just 5 or 10 amps after only a short while.
It’s like having a bodyguard that jumps at every shadow – not very helpful. In these cases, the breaker might be overly sensitive or worn out, and replacing it becomes necessary to keep your electrical system running smoothly.
Understanding the issue is key to ensuring your electrical system is safe and reliable in both scenarios. Always remember, though, that electricity is no joke. If you’re unsure or uncomfortable handling electrical components, there’s no harm in calling a pro. Stay safe, and happy fixing!
Safety Precautions
Before you start removing a circuit breaker, follow three important safety precautions:
- Are you confident enough? Only work on the main panel if you feel confident you can remove the breaker. Otherwise, call an electrician. Don’t risk doing a potentially dangerous but simple job if you are in any doubt.
- Turn off the power to the main panel. This can be done easily at the main panel if it’s a sub-panel. Otherwise, if the breaker to be removed is in the main panel, shut off the main breaker, but beware that the two main feeder wires to the main panel will remain live/hot.
- Treat the main panel wiring as if it is still live. Even after turning the main panel off, treat it as if it is still live. Only touch what you need to touch, and be careful while working. This is only an extra precautionary measure.
Troubleshooting Tips for Removing or Replacing a Circuit Breaker
Hey DIYers, let’s face it: we sometimes hit a snag even with the best-laid plans. A few hiccups can happen when you’re working on replacing or removing a circuit breaker.
Don’t sweat it, though – I’ve been there and have some tips to get you through. Here’s a handy table to guide you:
| Common Problem | What To Do | My Experience |
|---|---|---|
| Breaker is Stuck | If the breaker won’t budge, gently wiggle it back and forth. Avoid using excessive force, which could damage the panel. Sometimes, they need a bit of persuasion. | I remember this one breaker, stubborn as a mule. A steady hand and a bit of wiggling did the trick. Patience is key here. |
| Difficult to Disconnect Wire | If the wire is tough to disconnect, first ensure the screw is fully loosened. Use a pair of needle-nose pliers to pull the wire out gently, if needed. | I had a wire once that just wouldn’t come out. It turned out the screw wasn’t fully loose. A quick twist and some pliers got it out smoothly. |
| Breaker Not Seating Properly | Check for any obstructions in the panel. Ensure the breaker is aligned correctly with the panel slots. Sometimes, they must be at a certain angle to fit in right. | I’ve seen breakers that seemed like they just wouldn’t fit. A closer look revealed they just needed to be aligned a bit differently. |
| New Breaker Tripping Immediately | Ensure you’re using the correct amperage breaker for your circuit. Also, check for wiring issues or short circuits in the connected circuit. | I once had a new breaker trip instantly. The issue was a frayed wire in the circuit, not the breaker. |
Remember, safety is always your top priority for electrical work. If you’re unsure or if something doesn’t feel right, don’t hesitate to call in a professional. Better safe than sorry, especially with electricity involved!
Common Mistakes in Circuit Breaker Removal and How to Avoid Them
Let’s discuss avoiding common slip-ups when removing circuit breakers and DIYers. Over the years, I’ve seen a few repeat offenders that can complicate this job.
Here’s what to watch out for and how to avoid these pitfalls.
Over-Tightening Screws
One of the classic mistakes is over-tightening the screws when disconnecting or reconnecting wires. It’s like tightening a jar lid too much – hard to open next time, and you might even damage the threads. To avoid this, tighten screws firmly but don’t force them. When you feel resistance, give it just a small nudge. That’s usually enough.
Incorrect Alignment of the New Breaker
Does it fit a new breaker? Make sure it’s aligned properly. A misaligned breaker can lead to poor connections or even damage. It’s like fitting a puzzle piece in the wrong spot – it just doesn’t work. Take your time to line up the breaker correctly with the panel slots. It should feel like it fits naturally without forcing it.
Forgetting to Test the Breaker Before Full Installation
This one’s crucial. Always, and I mean always, test the new breaker before you call the job done. It’s like trying a recipe without tasting it – how do you know it’s right? Use your multimeter to check that the breaker is functioning before you put everything back together. This saves time and ensures safety.
Not Securing the Panel Cover Properly
After you’re done, putting the panel cover back might seem like the last unimportant step, but it’s quite the opposite. A loose panel can be a safety hazard. Ensure all screws are back in place and the cover is secure. It’s like checking all the doors are locked before leaving the house – a necessary final check for security.
Ignoring Safety Precautions
And finally, the big one – skipping safety steps. Always turn off the main power and use proper protective gear. It’s like crossing the road without looking – not worth the risk.
Remember, these jobs are about precision, not strength. Taking your time to do it right ensures safety and saves you from future headaches. And if you ever feel out of your depth, there’s no shame in calling in a pro. Stay safe, and keep on improving!
Frequently Asked Questions
- What is the Lifespan of a Circuit Breaker?
- Circuit breakers don’t last forever, but they have good innings. On average, you can expect about 30 years from a breaker. But hey, if it starts acting up before then, like tripping too often, it might be time for a check-up.
- Is It Normal for a Breaker to Feel Warm?
- A little warmth is okay, but if it’s hot to the touch, that’s a red flag. It could mean an overload or a bad connection. Don’t ignore this – a hot breaker needs attention to avoid bigger problems down the line.
- Can I Upgrade My Breaker Panel Myself?
- Upgrading a panel is a bit more complex and usually best left to the professionals. It often involves more than just swapping out parts – you’re dealing with your home’s electrical system, so it’s worth getting an expert.
- Can I Mix and Match Brands of Circuit Breakers and Panels?
- It’s like trying to fit a square peg in a round hole. Always use breakers that are compatible with your panel’s brand. Mixing brands can lead to poor fit, malfunction, or even safety hazards. Stick to what’s recommended for your specific panel.
- Should I Turn Off My Circuit Breaker When Going on Vacation?
- It’s not a bad idea, especially for non-essential circuits. Turning them off can reduce the risk of electrical fires and save energy. But remember, keep the essentials running, like your fridge and security systems.
References
Organizations:
- The Electrical Safety Foundation (ESFI). https://www.esfi.org/
- National Fire Protection Association (NFPA). https://www.nfpa.org/en
Books:
- “Circuit Breakers: A Technician’s Guide to Low- and Medium-Voltage Circuit Breakers” https://www.buildersbook.com/circuit-breakers-a-technician-s-guide-to-low-and-medium-voltage-circuit-breakers.html
- “Principles of Electrical Safety” https://ieeexplore.ieee.org/book/7043964
Website Resources:
- Electrician Talk – Professional Electrical Contractors Forum. https://www.electriciantalk.com/
- The Spruce. https://www.thespruce.com/
Video Resources:
Bill Newberry Second