9 min read
How to Hide Dash Cam Wires (Step-by-Step Guide)
Today, we’re diving into a nifty little project that’s as practical as it is essential for your ride. We’re talking about tucking away those pesky dash cam wires that can turn your car’s interior from sleek to messy in seconds.
In general, here’s how to hide dash cam wires:
- Step 1: Attach the dash cam to the windshield or the console at the top center if your vehicle has one.
- Step 2: Connect the USB power cable to the dash cam.
- Step 3: Gently pull down the edge of the headliner and begin tucking the wire inside, moving towards the passenger side to avoid any obstruction while driving.
- Step 4: Use electrical tape or wire clips to secure the wire alongside the window, then direct it towards and beneath the dashboard.
- Step 5: Find hooks or spots under the dashboard to secure your power cable with adhesive wire clips or electrical tape.
- Step 6: Bundle any excess wiring with a tie wrap if the cable is longer than needed, and tuck it near the car’s 12/24v cigarette lighter or another discreet area.
So, buckle up and get ready. Whether you’re a DIY newbie or a seasoned pro, I promise you’ll have those wires out of sight in no time, leaving your car’s interior as clean and organized as the day you drove it off the lot. Let’s roll up our sleeves and jump right into it!
Steps to Hide Dash Cam Wires
I’m thrilled to guide you through six straightforward steps to take your dash cam setup from messy and mundane to neat and discreet.
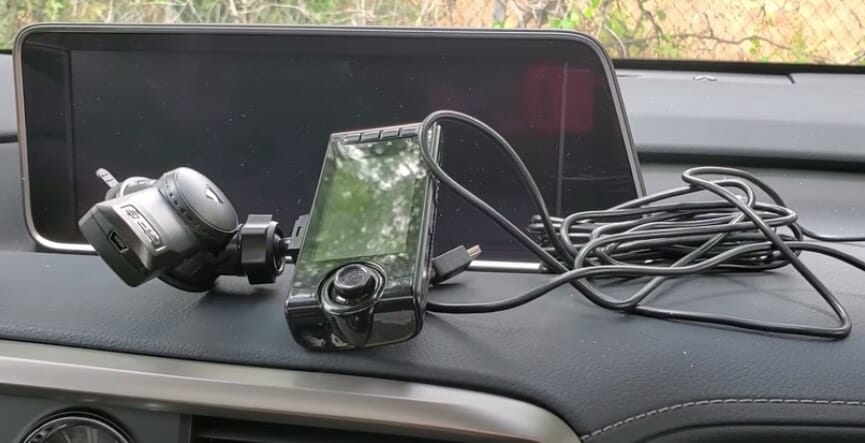
Step 1: Mount Your Dash Cam

Attach your dash cam to your windshield and lock it in place. Some vehicles have a console in the top center of their windshield.
If your car has that console, you can stick your dash camera instead of your windshield.
Step 2: Plug in the Cable

Plug in the USB power cable. On newer vehicles, there may be a cover that conceals the cable.
For older vehicles, if your wire is close to the mirror post, you can tape it to that post. Otherwise, keep it straight; don’t attach it to the windshield because it’s unnecessary.
Step 3: Start on the Headliner
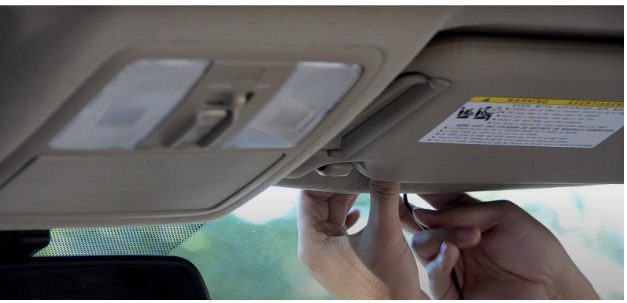
In most automobiles, the headliner can usually be softly pulled down. So, tuck the wire inside the headliner’s edge. I recommend tucking the power cable towards the passenger side because a dropped cable will not interfere with your driving. Then, keep tucking until you reach the car’s A-pillar.
Step 4: Run the Wire Down the Window or into the Weather Stripping
Once your wire reaches the A-pillar(one of two support posts that are positioned on either side of the windshield of a vehicle), you can either:
Run the Wire Down the Window
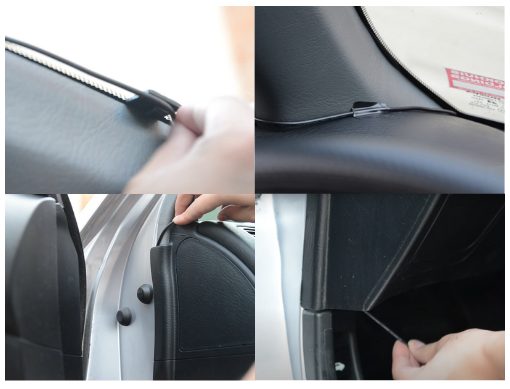
If you prefer to run the wire alongside your window, you may need to use electrical tape or wire clips because the trim on your windshield can be tough to press into.
When you reach the end, pull it out, place it alongside your dashboard, and run it until it reaches beneath your dashboard.
Run the Wire Inside the Weather Stripping
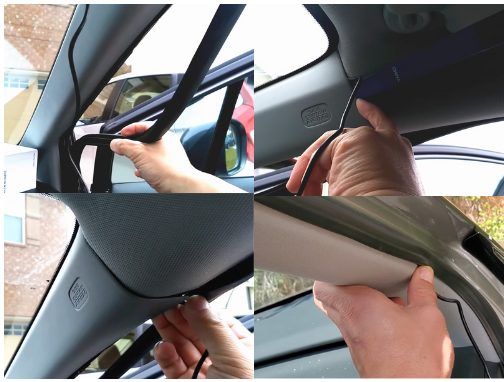
I recommend this method over the other one because it’s easier and hides more cabling. Pull back the weather stripping and open the plastic trim piece on the side of your car with a trim removal kit.
Once that trim piece is slightly open, tuck the cable behind it and bring it to the weather stripping. Then, tuck the dash cam cable to the edge of the weather stripping, down to your dashboard’s bottom. After that, reattach the weather stripping.
Step 5: Tuck the Cable Underneath Your Dashboard
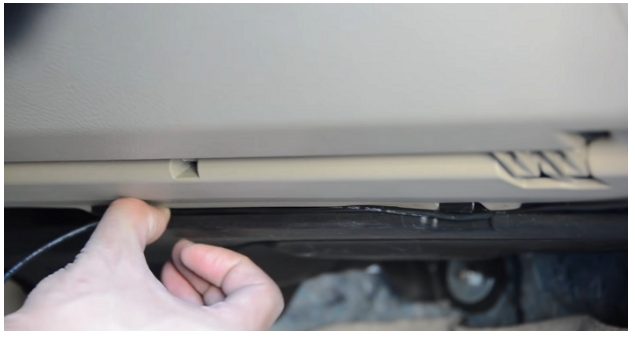
Look beneath the dashboard for any hooks or spots for your power cable. You can also fasten the wire to that area with adhesive wire clips or electrical tape.
Step 6: Finishing Touches
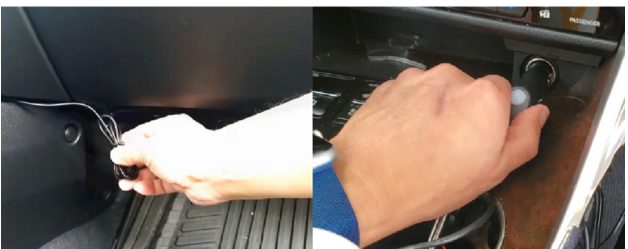
If your dash cam’s cable length is much longer, you’ll likely have excess wiring after you fasten the wire underneath your dashboard.
You can use a tie wrap to bundle the extra wiring in that case. Then, tuck it in the panel near your car’s 12/24v cigarette lighter, where you will plug in your dash cam charger.
However, it’s good if the cable length is enough and there’s no excess. Plug your dash cam charger into your car’s cigarette lighter, and you’re ready!
Essential Guidelines for a Seamless Dash Cam Installation
Let’s get into the heart of turning your car into a high-tech haven with a dash cam installation.
I’m here to guide you through this exciting upgrade, sharing some essential tips to make the process as smooth as a fresh coat of paint on an old wall.
Tip 1: Specific Model Research
Look for wiring diagrams, airbag positions, and instructions for removing trim pieces for your vehicle.
Knowing this will make it easier to conceal your dash cam wiring without causing damage. Your user manual and online forms will provide all the necessary information.
Tip 2: Purchase a Trim Removal Kit
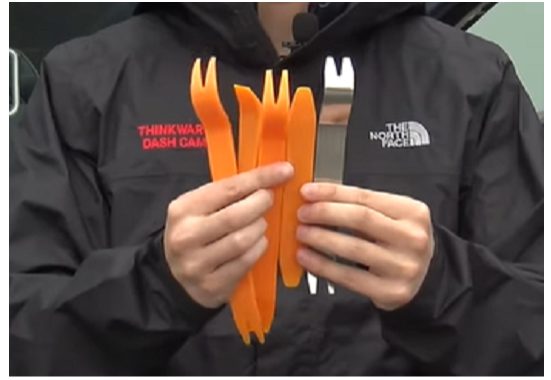
Investing in a trim removal kit can make concealing your wiring much easier. A trim tool kit usually includes various plastic and metal pry tools in various sizes.
However, I suggest using plastic rather than metal tools because they are less likely to damage your car’s interior.
Tip 3: Use Adhesive Wire Clips or Electrical Tape
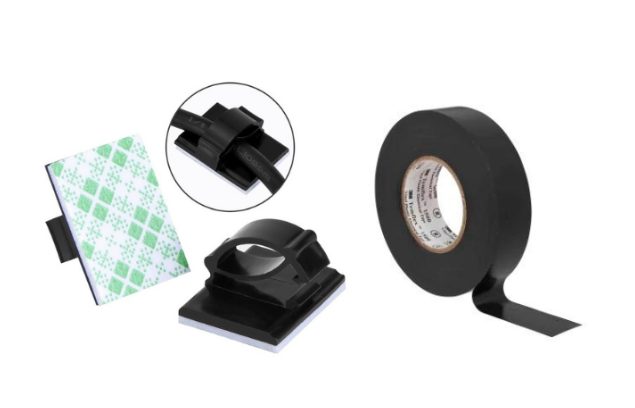
Ideally, you’ll want adhesive wire clips to make arranging your dash cam cable a snap. They’re often included in your tool kits. An adhesive wire clip has a sticky side for sticking to a surface and a hook on the other for inserting the wire.
You can purchase these clips at a cheap price online. However, if you would like, you can use electrical tape instead. That is still a good idea, especially if it will be hidden behind your dashboard.
Tip 4: Clean the Windshield’s Surface
It is a good idea to clean the area of your windshield where your dash cam will be mounted before installing it.
Rub the area with a cotton ball soaked in rubbing alcohol. This will help remove any grease or filth from your windshield.
Tip 5: Put Water into Your Dash Cam’s Suction Cup
Adding a drop of water to the suction cup on your dash cam will help it stick to your windshield much better. I suggest using hot or warm tap water. The heat will soften the suction cup, making it malleable enough to provide a more secure grasp.
Frequently Asked Questions
- What Should I Do If the Wire Is Too Short?
- If you find the wire too short, consider this a simple fix: just like adding a little extra paint to finish a project, you can purchase an extension cable compatible with your dash cam. This will easily extend your reach to the nearest power source.
- How Can I Handle Vehicles With Unique Interiors?
- Dealing with a vehicle’s unique interior is like customizing a room to your taste. Use adhesive clips strategically for those hard-to-reach areas and employ flexible trim tools to maneuver around the vehicle’s unique features without leaving marks.
- What If My Dash Cam Keeps Falling Off?
- If your dash cam won’t stay mounted, treat it as you would a picture that won’t stay hung on the wall. Sometimes, they need warm water from suction cups to rejuvenate their grip. If an adhesive pad is giving you trouble, consider replacing it with stronger, automotive-grade double-sided adhesive tape.
- What Should I Do With Excess Wire?
- When you have excess wire, consider it leftover materials from a DIY project. Neatly bundle the surplus wire with tie wraps and tuck it away in a discreet location, such as under the seat or glove compartment, to keep your vehicle looking tidy.
- How Do I Run Wires in a Convertible?
- Running wires in a convertible requires a bit of creativity, much like tailoring a project to fit a unique space. It would help if you routed the wires in areas unaffected by the movement of the convertible top, focusing on under-dash spaces to avoid any pinching or tangling.
Resources
Organizations
- Consumer Electronics Association (CEA) – https://www.standardsportal.org/usa_en/sdo/cea.aspx
- National Highway Traffic Safety Administration (NHTSA) – https://www.nhtsa.gov/
Books
- “Automotive Wiring and Electrical Systems” by Tony Candela – https://books.google.com/books/about/Automotive_Wiring_and_Electrical_Systems.html?id=myi2QmV5RmUC
Website Resources
- Garmin – https://www.garmin.com/
- Nextbase – https://www.nextbase.com/
Video Reference
World of Tech