6 min read
How to Drill a Hole for a Door Strike Plate (5 Steps)
In this article, I’ll teach you to drill a hole for a Door Strike Plate. It is always advisable to drill a neat and precise hole before a door strike plate installation.
As a handyman, I have installed multiple door strike plates and have some tips and tricks I’ll teach you below so you can get it right. Learning how to drill a door strike plate hole and then completing the installation process correctly will result in a gorgeous front door with a new lockset.
In general, you need to follow these steps to drill a perfect or near-perfect hole for the door strike plate:
- Mark the edge of the door with the knob height measurement
- Extend the mark with a square
- Place the pilot bit from the hole saw and cut a pilot hole directly into the mark of the face bore
- Cut through the door edge with your drill at medium speed
- Mark the location of the strike plate
- Install the door strike plate
I will cover more detail below.
Recognizing the Basics
Before drilling a hole to install a strike plate on a door frame, it’s critical to know some measurements and dimensions of interior parts. These are essential to the installation process.
The knob height from the finished floor is the first and most important. The distance from the close edge of the door to the center of the knob is then measured. Referred to as backset, the first variable normally stays between 36 and 38 inches. To keep everything in line, you can look to other doors in your home.
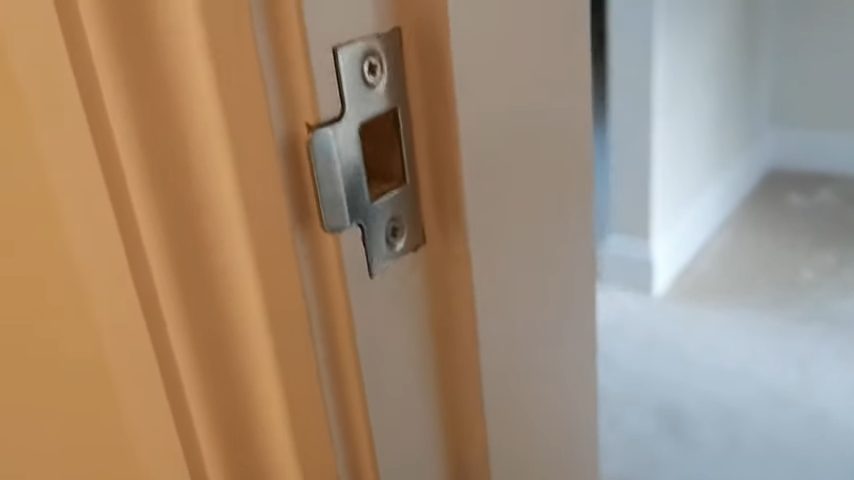
On the other hand, the backset for inner doors should be 2.375 inches, while it should be approximately 2.75 inches for exterior doors. The backseat and knob height intersection is known as the face bore center. To enter the lockset, you must make a circular hole.
The second latch assembly hole is known as the edge bore. Many locksets have a cardboard template to maintain alignment between the two bores. Drill bits should be selected using the template’s specified diameters.
Getting Started – How to Drill a Hole to Install a Door Strike Plate
Now, let’s focus on how to drill a neat hole for the installation of a door strike plate.
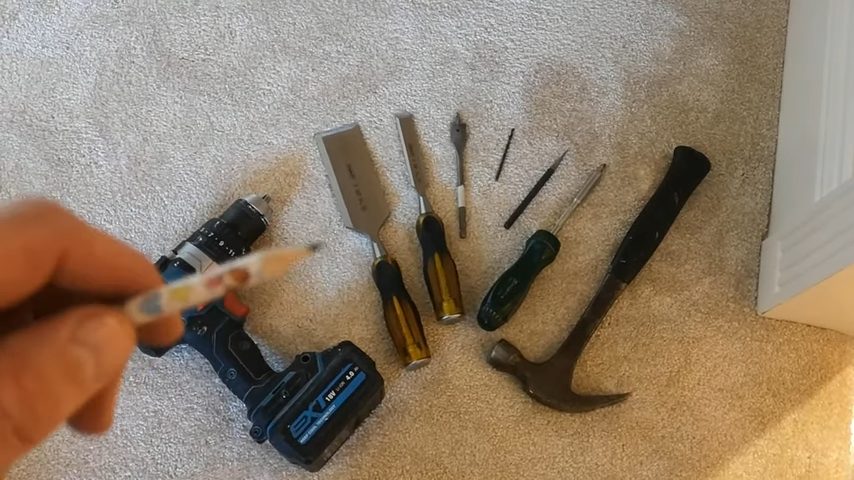
The image below shows the tools you will require:
Step 1: Make the Necessary Marks After Taking the Measurements

The door should remain partially open. Then, to ensure stability, tap on one shim from each side. Mark the edge of the door with the knob height measurement.
After that, extend the mark with a square. It should cross the door’s border and land three inches from one face.
Ensure the template is properly aligned before placing it on the door edge.
Punch an awl or nail straight through the middle of the template face bore to mark it on the door. The same technique should be used to designate the door’s edge bore’s center.

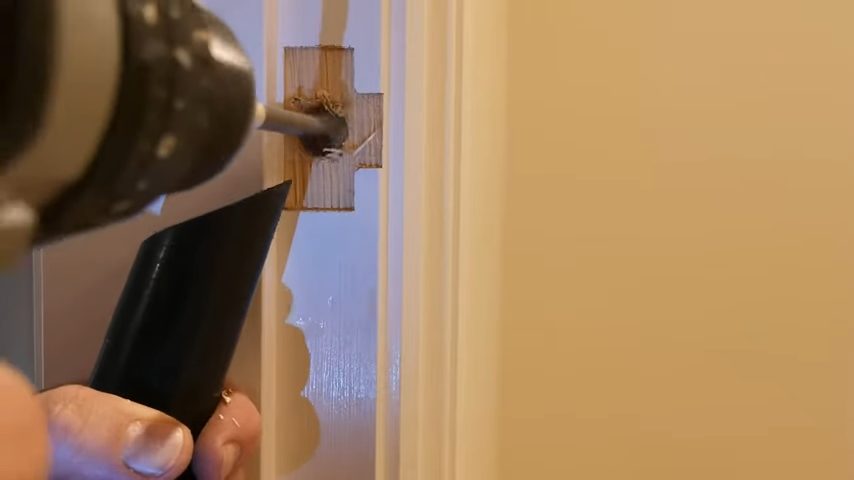
Step 2: Make a Pilot Hole
Place the pilot bit from the hole saw and cut a pilot hole directly into the mark of the face bore.
There must be uniform contact between every tooth. The bore can then be drilled after that. It’s crucial to keep the area around the cut free of sawdust. Thus, be sure to remove the saw periodically to remove dust. (1)
Stop when you see the tip of the pilot bit poking through.
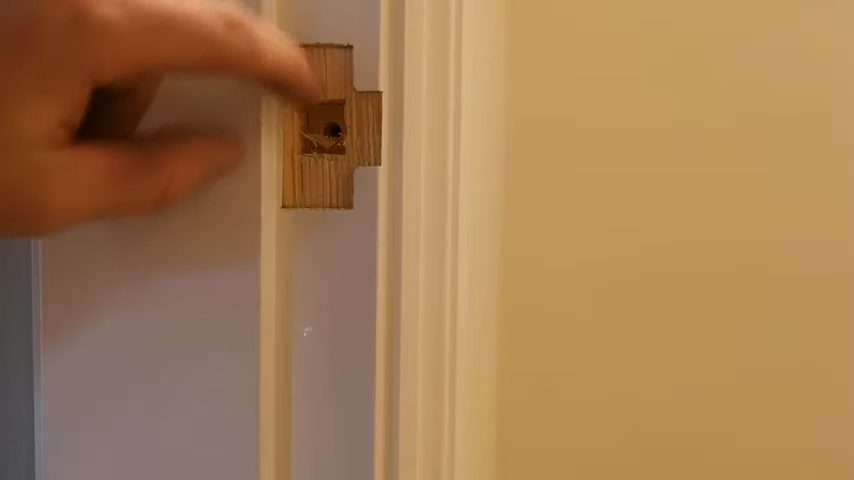
Go around to the other side of your door now. You will use the previously created pilot hole as a template to orient the hole saw. Use that to drill the face bore.
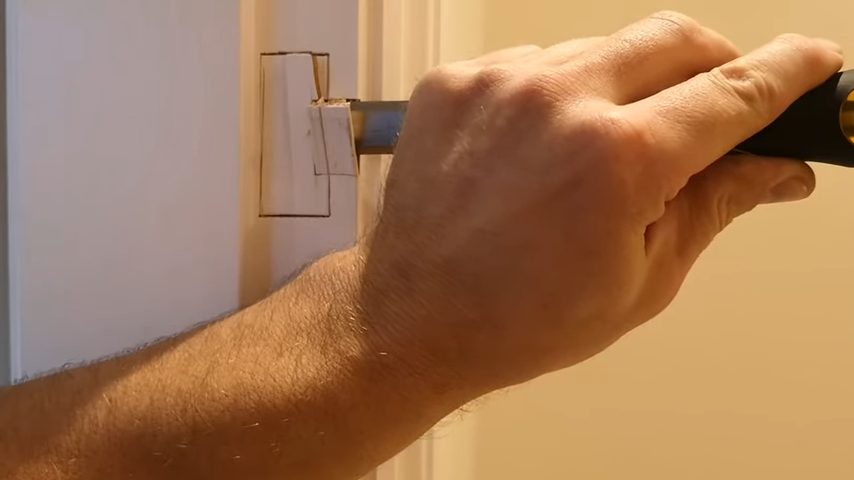
Step 3: Drill a Hole for The Door Strike Plate Installation
Next, you need a 7/8-inch spade bit. Put the tip exactly where the edge bore mark is.
Cut through the door edge with your drill at medium speed. Cease when the bit’s tip is visible through the face bore.
Avoid using too much force when using the drill. Otherwise, there is a possibility of over-cutting the wood. Continue drilling the edge bore while using caution.
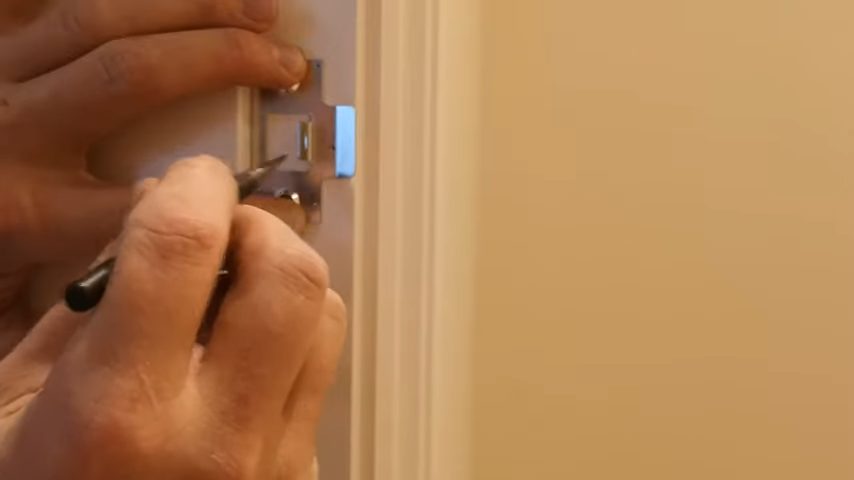
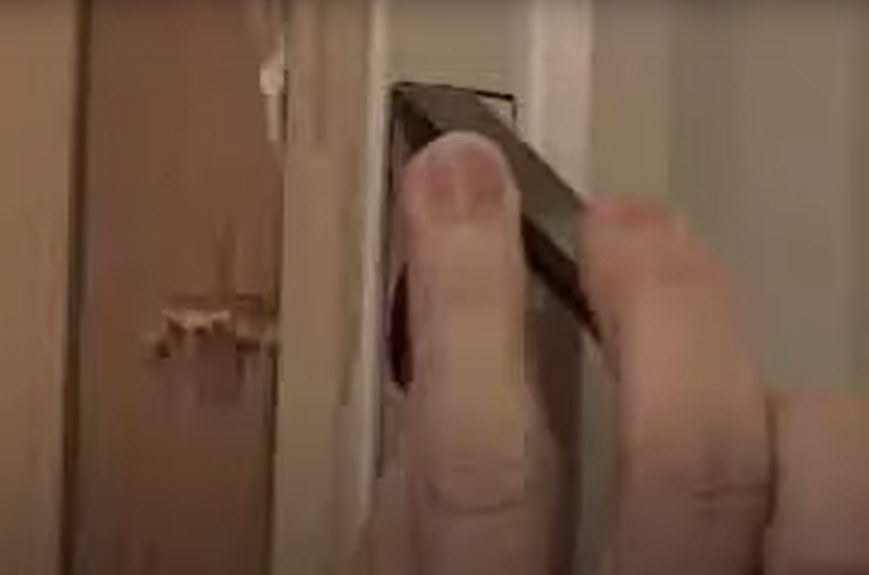
Step 4: Mark the Location of The Strike Plate
Make a cross mark of 11/16 inches or 7/8 inches from the jamb’s edge for interior doors, depending on where the lock bolt strikes the jamb. On this mark, center the strike plate and temporarily secure it with a screw. Draw a line around the strike plate with a utility knife, then take it off. (2)
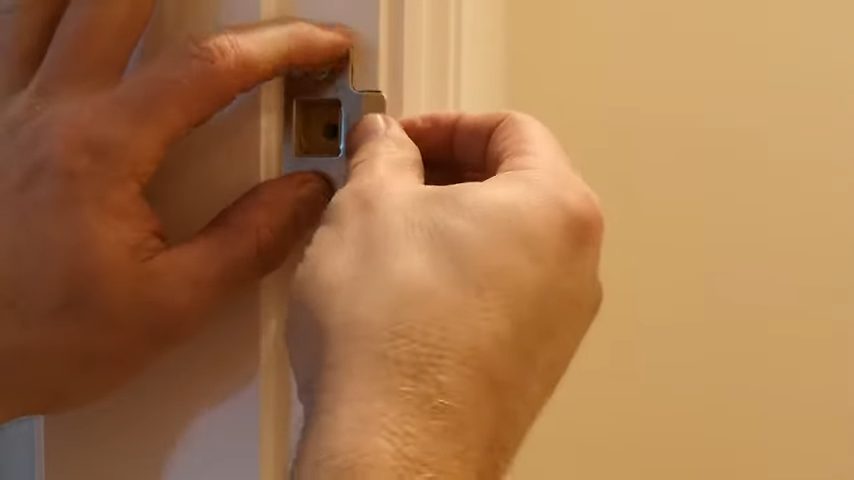
Step 5: Install the Door Strike Plate
You can now install the door strike plate.
Take a look at some of our related articles below.
- What is the best drill bit for porcelain tile
- How to drill hole in stainless steel sink
- How to drill a hole in wood without a drill
References
(1) tooth – https://www.britannica.com/science/tooth-anatomy
(2) utility knife – https://www.nytimes.com/wirecutter/reviews/best-utility-knife/
Video Reference