17 min read
How to Make a Power Hammer (10-Step DIY Guide)
In today’s article, I’ll teach all you DIYers how to make a power hammer.
A power hammer is a mammoth of a device to save you energy on hammering. But buying a power hammer can be expensive, and you might not get the exact design and power you want. I would say making one by yourself is an advanced but great alternative.
Below ill teach you to make a power hammer through the following steps:
- Gather the necessary tools.
- Prepare a plan for the power hammer.
- Wear safety gear.
- Build the hammer frame.
- Build the hammer base.
- Prepare the pulley assembly.
- Connect the pulley assembly to the frame.
- Prepare the hammerhead.
- Connect the hammerhead to the frame.
- Connect the motor.
Continue reading the below step-by-step guide for more details.
10-Step Guide to Make a Power Hammer
Important: Even though this homemade power hammer-making process seems straightforward, it is a time-consuming and energy-draining task. And it requires some level of skill. So, if you aren’t comfortable with this process, get help from a professional.
Step 1 – Gather the Necessary Things

First and foremost, gather the following things.
- Angle grinder
- Arc welder
- Few welding rods
- Stationary drill
- Power drill
- Few drill bits
- Ratchet
- 2-by-2 inch 5mm angle bar
- 10-inch diameter thick steel plate (10mm thickness)
- 5mm thick steel plate
- 8-inch pulley
- Motorcycle shock spring
- Steel rod, 2-foot long and 2-inch diameter
- Induction motor
- 1-inch steel rod
- ¾ inch shafting
- Two P205 pillow block bearings
- Two P004 pillow block bearings
- Two P211 pillow block bearings
- Different types of nuts and bolts (type and size might change according to what you are building)
- Few clamps
- Measuring tape
- Steel ruler
- A rubber belt
- Claw hammer
- Marker pen
- Plans for power hammer
After gathering all the things, move on to the next step.
Step 2 – Prepare a Plan for the Power Hammer
Preparing or finding a plan for the power hammer can be challenging for most people. In truth, You can create your plan if you are skilled enough, but if not, we have some alternatives.
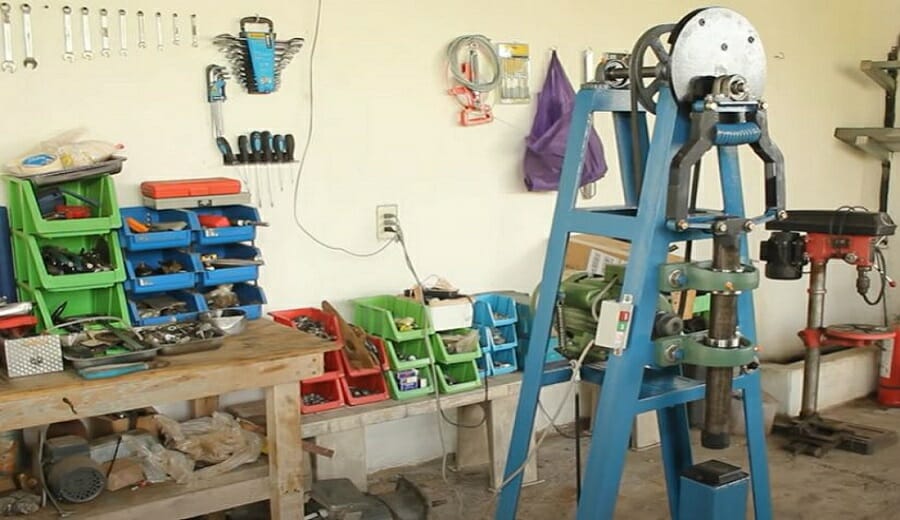
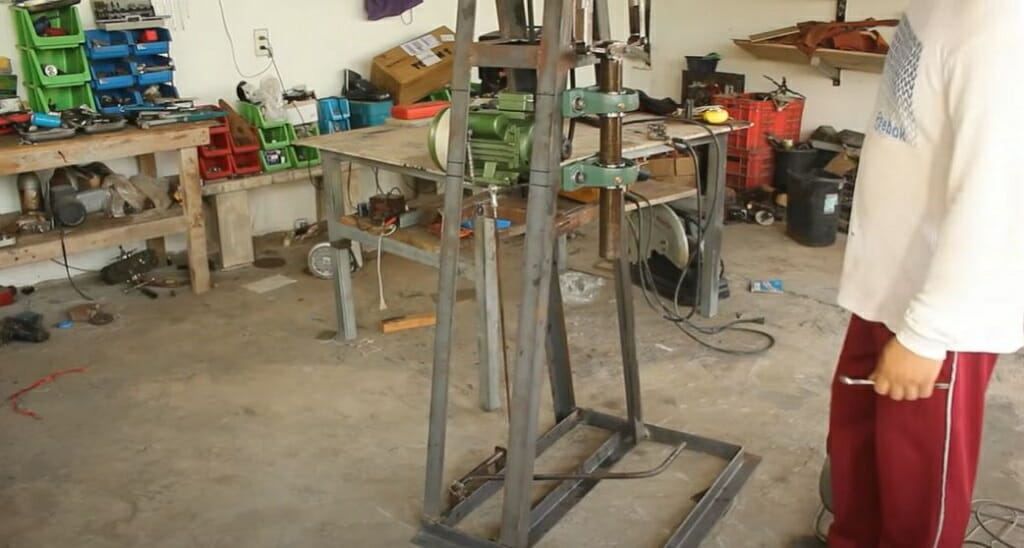
For instance, this is the completed power hammer (check the image above). In this plan, I placed the motor at the 3 feet mark and the hammerhead (2-inch steel rod) just under 4 feet. The pulley assembly is at the top of the frame, and the striking plate is around 2 feet. The hammer frame is an A-frame. It is a simple design that you can pull out easily at your home.
Also, in this guide, I’m not going to give you any specific lengths and heights; you can change the length and height according to your needs.
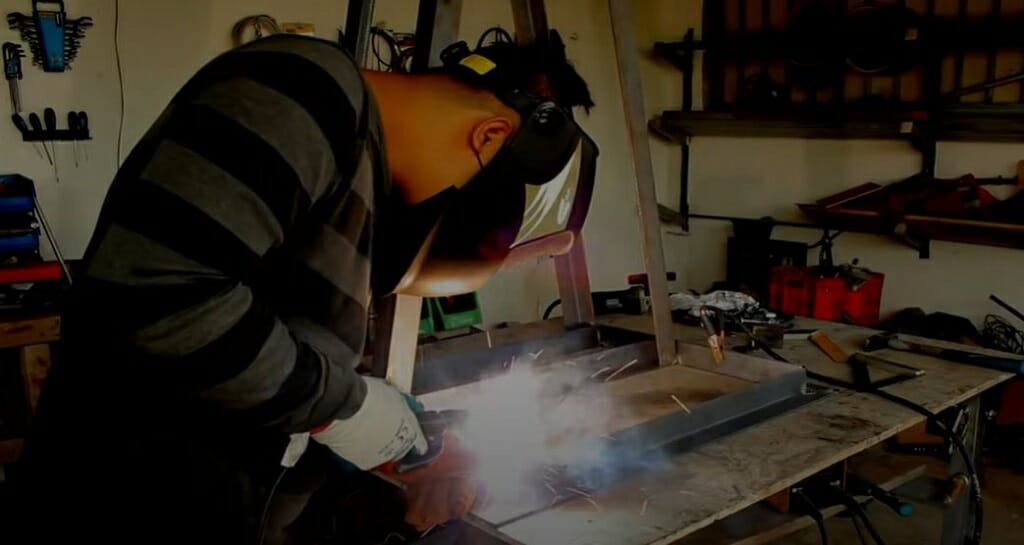
Step 3 – Wear Safety Gear

Before starting the power hammer-making process, it is essential to wear the necessary safety gear.
- Wear rubber gloves to protect your hands.
- Wear safety glasses to protect your eyes while cutting steel items.
- Remember to wear a welding helmet during the welding process.
- Wear safety shoes to protect yourself from electrical shock.
Quick Tip: You are dealing with lots of metals and electricity here. Hence, electrical shock is a genuine concern in this process.
Step 4 – Build the Frame
When making a power hammer, building the frame should be done first. Apply this method to any type of power hammer you are building. Also, you’ll need two identical frames for this.
Take the 2-by-2 angle bar and cut the bar according to the height and shape of the frame. Use the angle grinder for this.
Then, grab the pieces on the table and mock up the frame.
After creating the shape on the table, clamp the parts to the table.
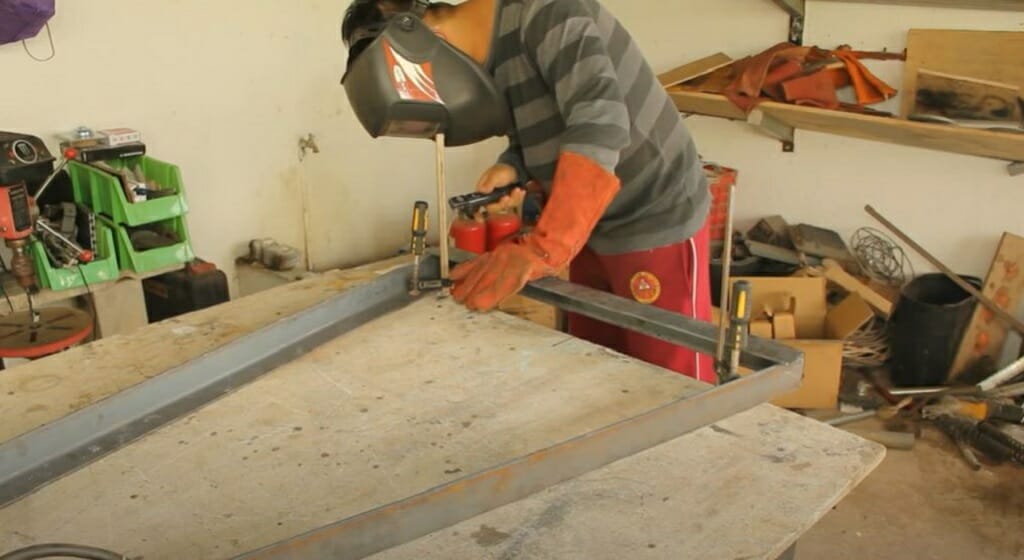
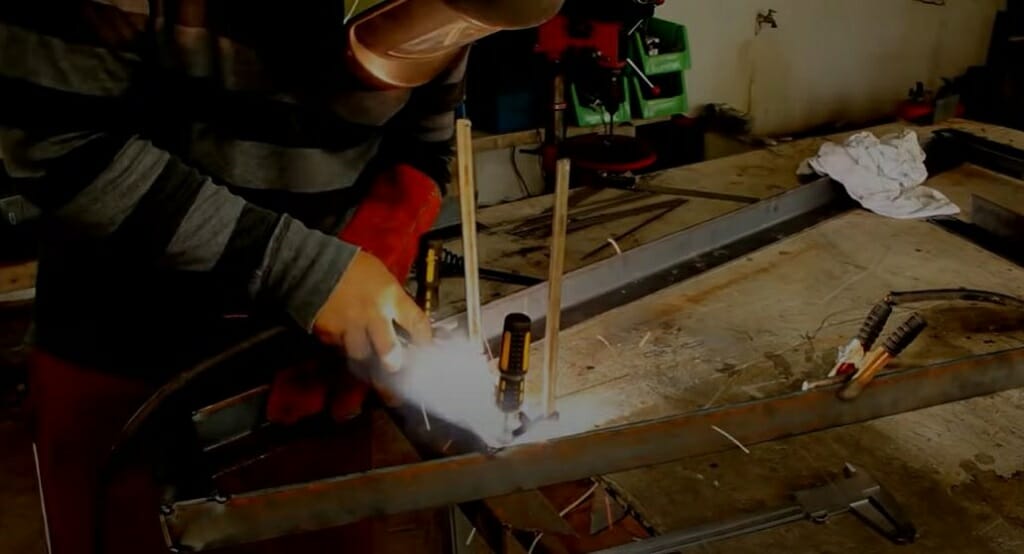
Next, take the arc welder and weld the first hammer frame.
Then, repeat the same process and build the second hammer frame.
Quick Tip: Remember to be careful while cutting the angle bar. The above two frames should be identical (As much as possible).
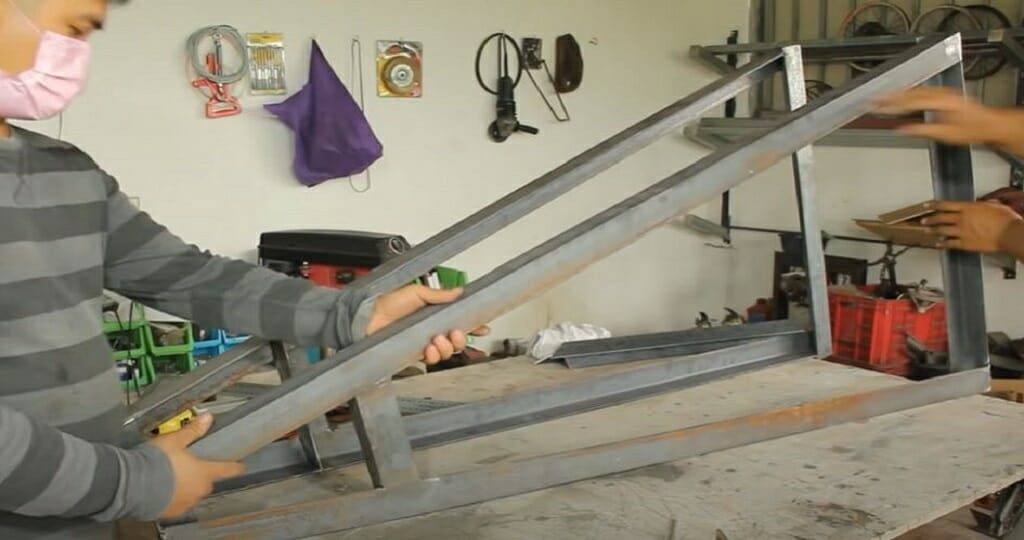
Place the completed two frames together like in the above images and weld them.
Step 5 – Built the Base
Now, you can build the base of the power hammer. For this, use a 2-by-2 angle bar and create a rectangular-shaped base frame. Use the grinder to cut the angle bar and arc welder for the welding process.
Then, place the A-frame on top of the base and weld them together.
Step 6 – Prepare the Pulley Assembly
Then, take the 10mm thick steel plate and cut a 10-inch diameter disk. A powerful enough grinder can cut disk shape plates without any trouble.
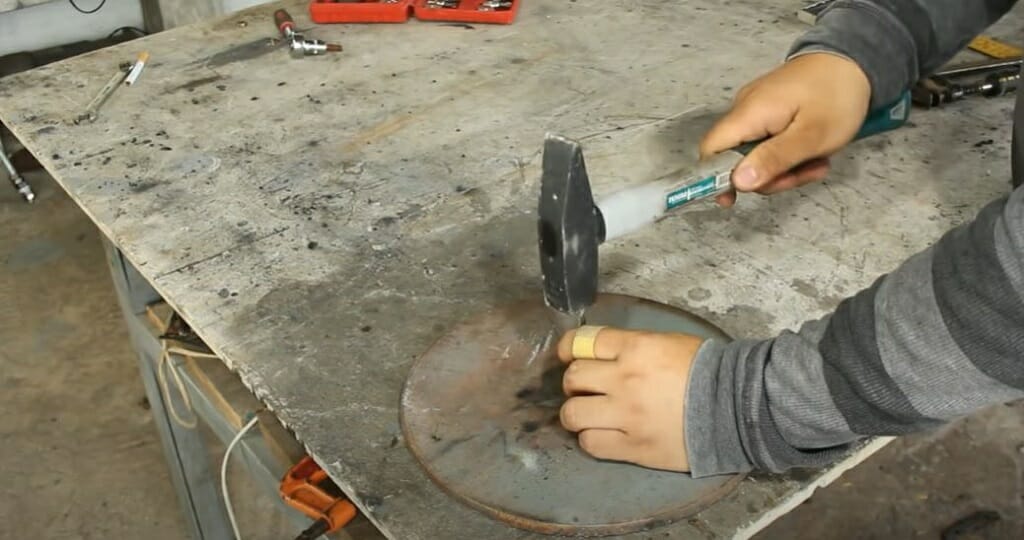
After that, mark the center of the plate.
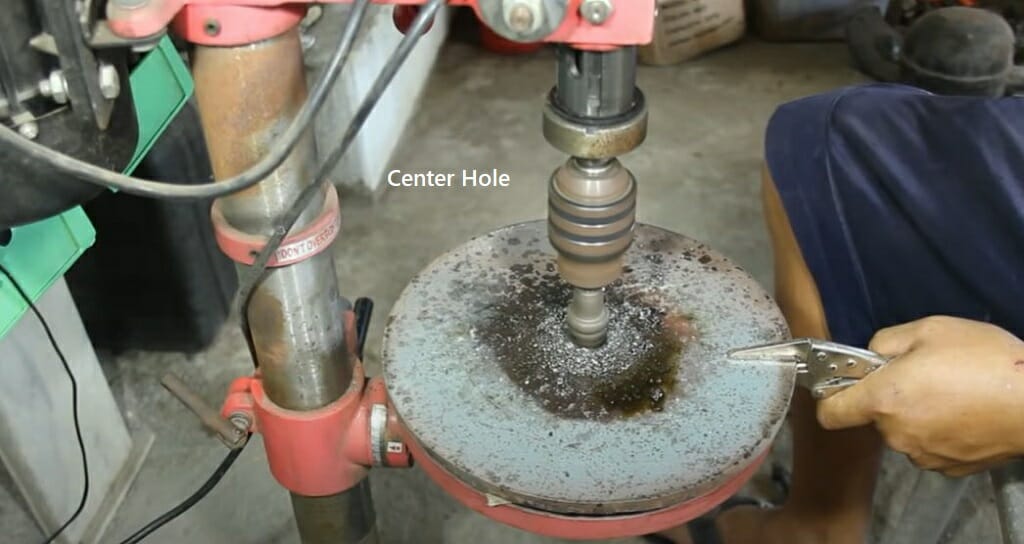
Place the plate on the stationary drill and drill a hole for a 1-inch steel rod. This hole should be at the center of the disk.
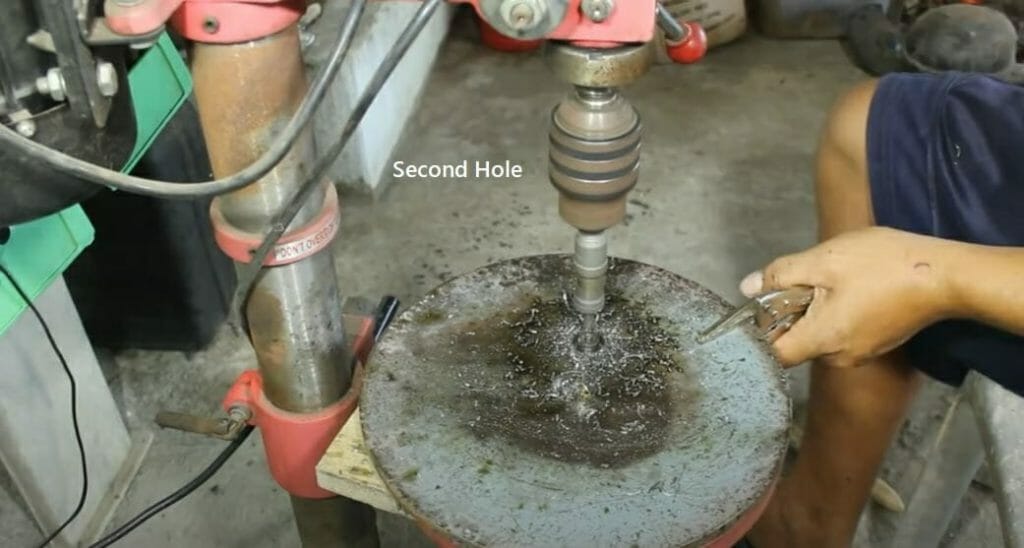
Next, drill another hole near the center hole. The second hole is used for ¾ inch shafting.
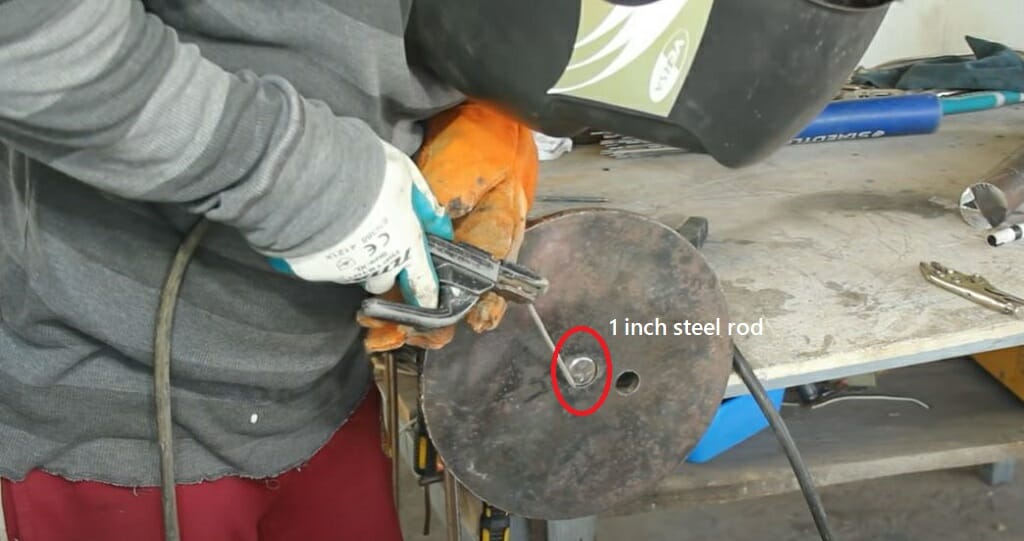
Connect the 1-inch steel rod to the disk and weld them properly.
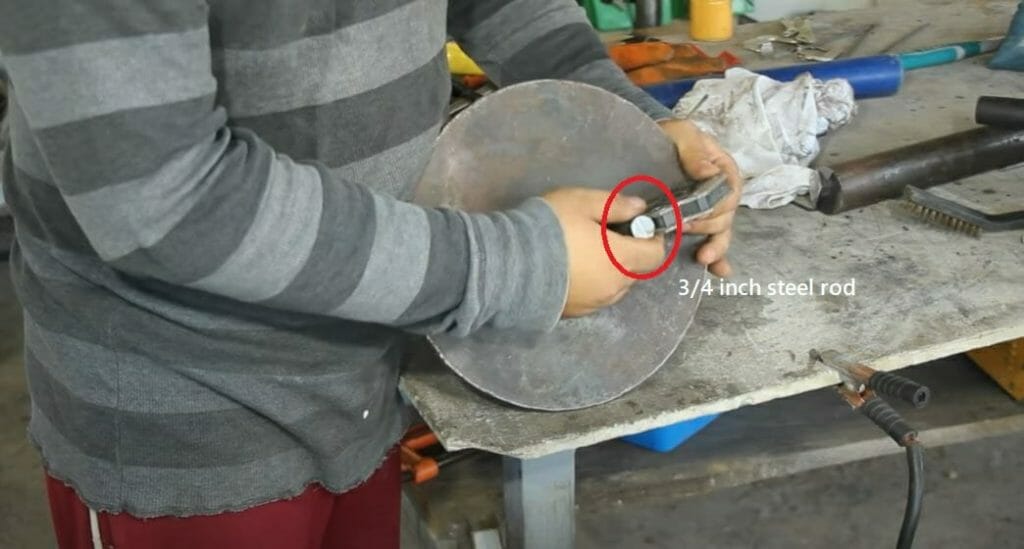
Then, take ¾-inch shafting and weld it to the second hole.
Tip of the Day: The shafting is used to rotate the power hammer.
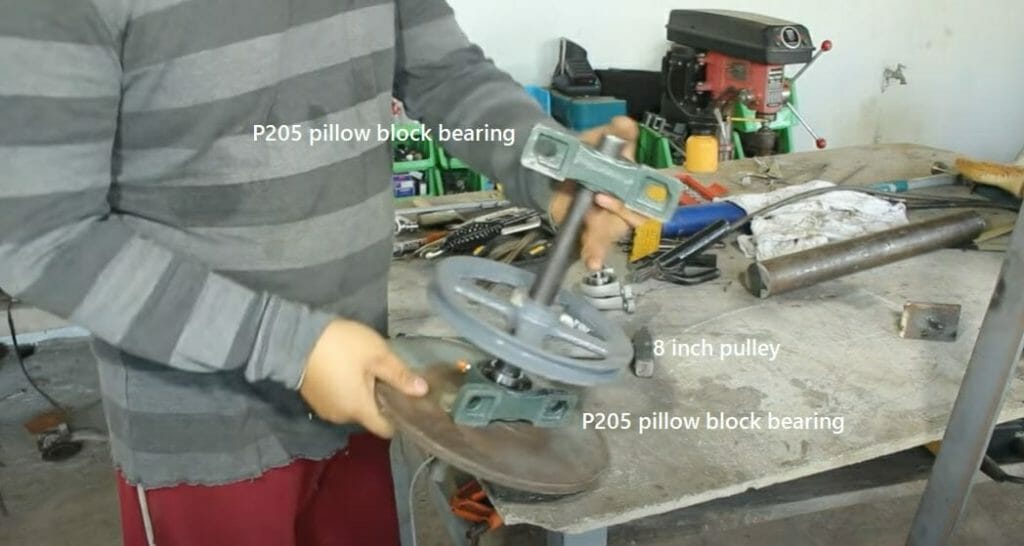
Now insert one P205 pillow block bearing into the welded center steel rod. The bearing should be close to the steel plate.
Then, insert the 8-inch pulley. And finally, insert the second P205 pillow block bearing to the edge of the steel rod. Don’t forget to insert the rubber belt into the pulley.
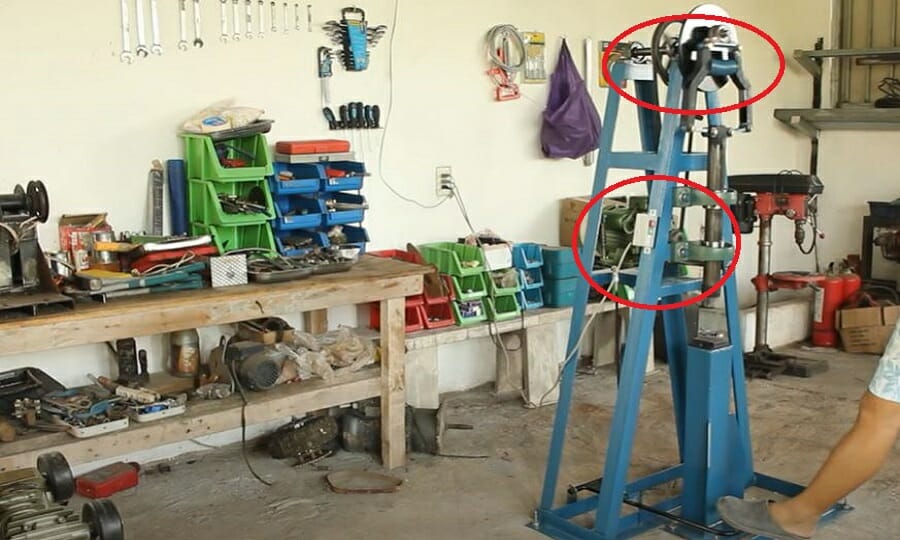
Step 7 – Connect the Pulley to the Frame
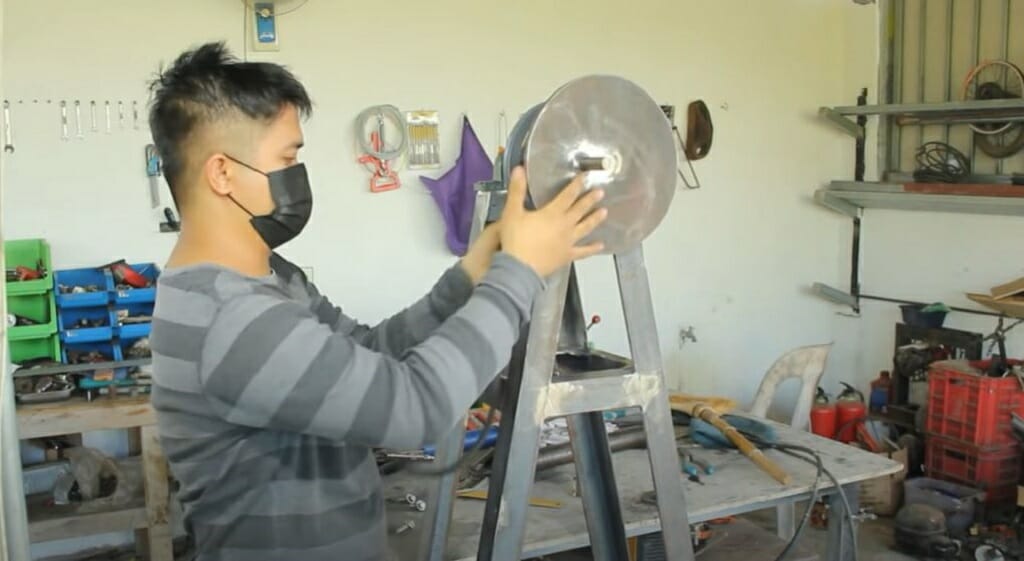
Next, place the pulley assembly on top of the hammer frame. Mark the locations of the block bearing’s holes.
Then, drill the four holes and connect the assembly to the frame with suitable-sized nuts and bolts. Rotate the assembly a few times using the shafting.
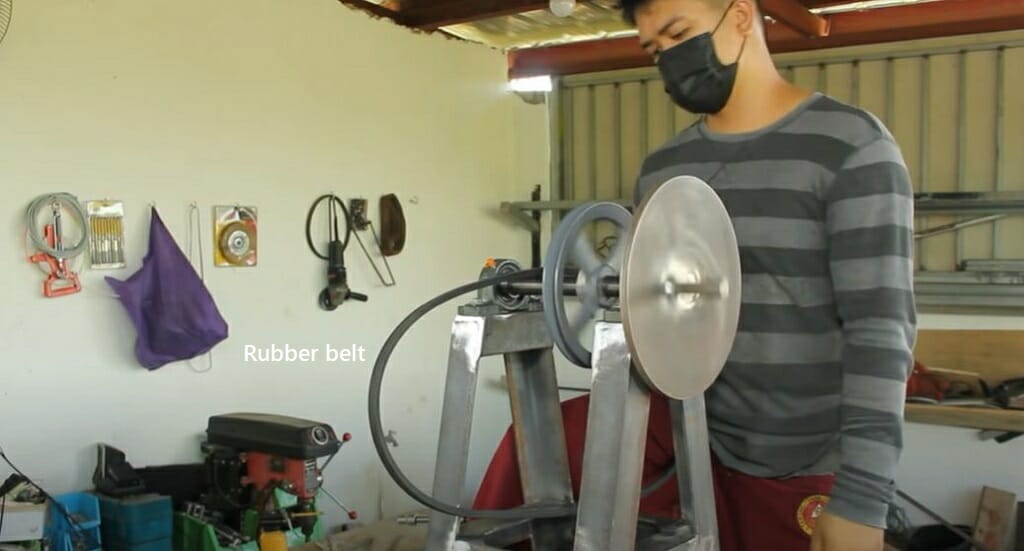
Quick Tip: You should place the rubber belt on the pulley assembly before tightening the nuts.
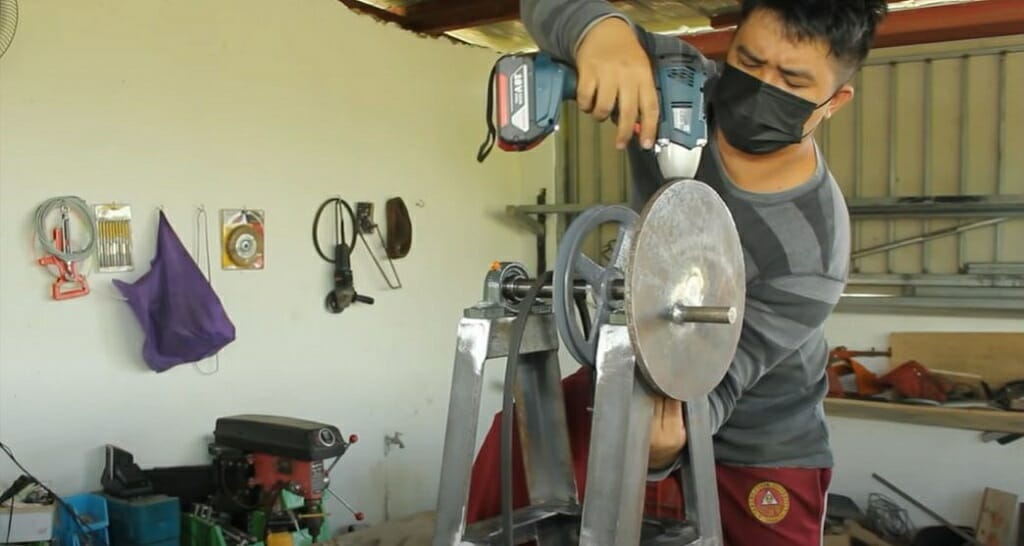
Step 8 – Prepare the Hammerhead
Now you can start building the hammerhead.
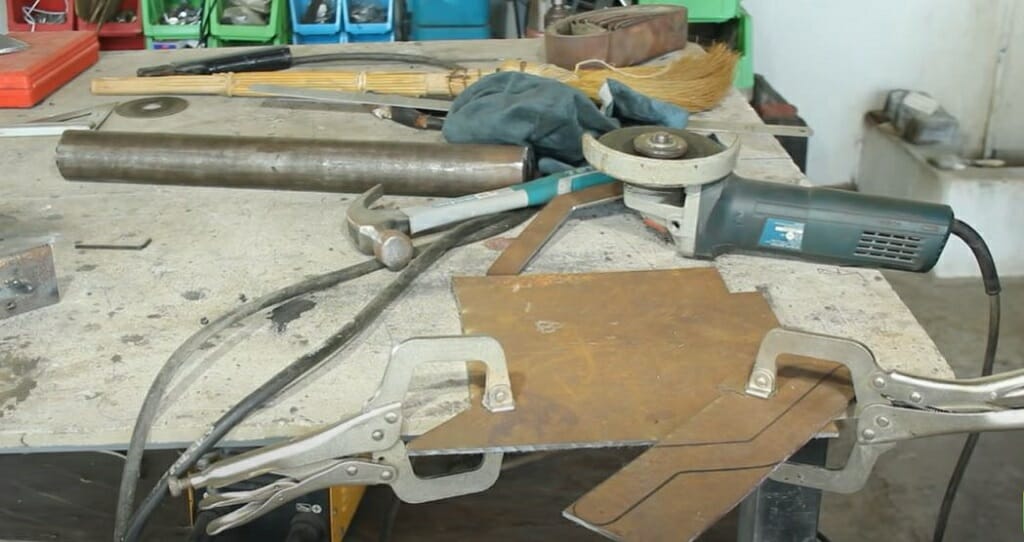
First, take the 5mm steel plate and draw the above-shown shape.
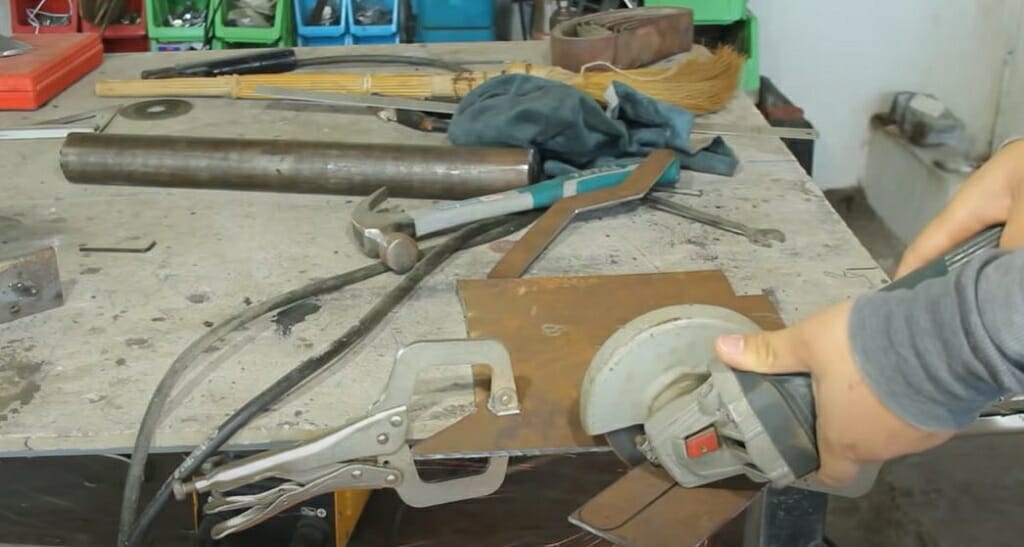
Then, clamp the plate to the table and cut the shape using the angle grinder.
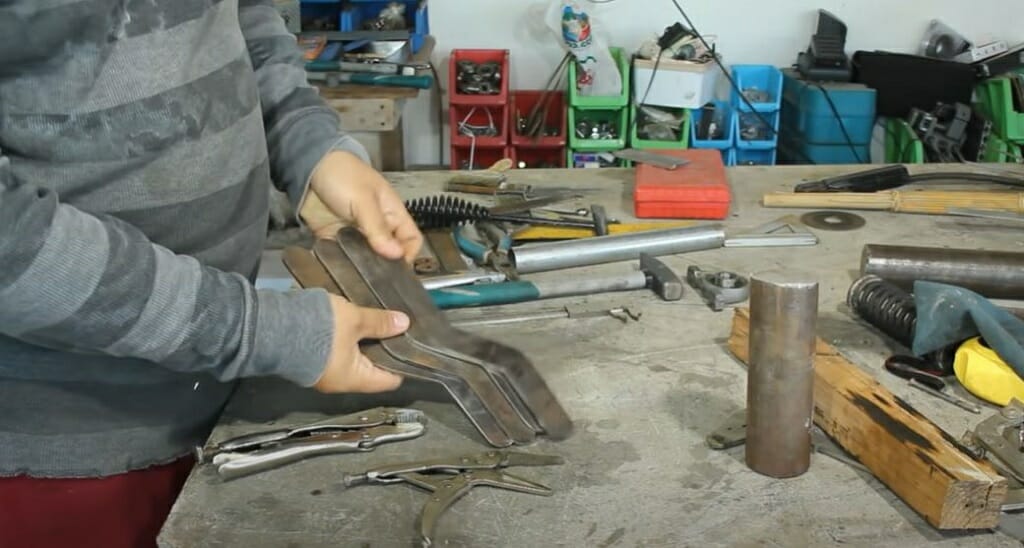
You’ll need at least four of these shapes. So, make sure to arrange them. If needed, smooth the edges using the grinder.
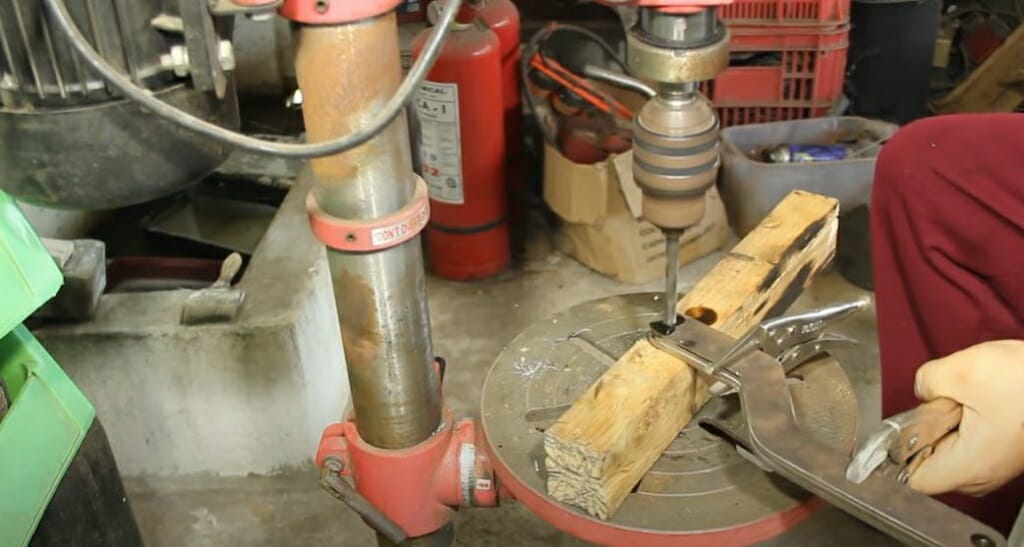
Clamp all four pieces together. Place them on the stationary drill. Drill a hole in each corner.
Now, take two pieces and connect them using nuts and bolts. Tighten the connection using the ratchet.
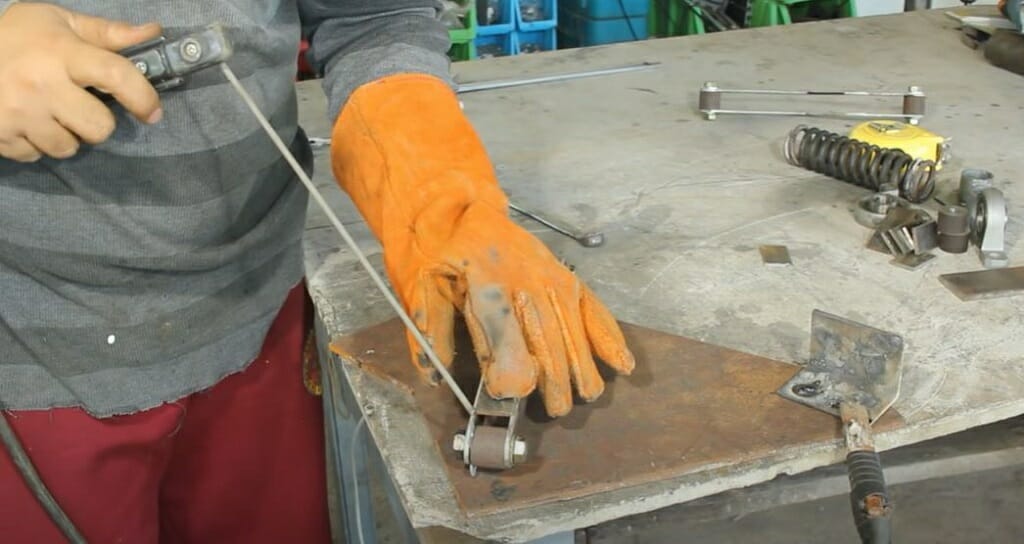
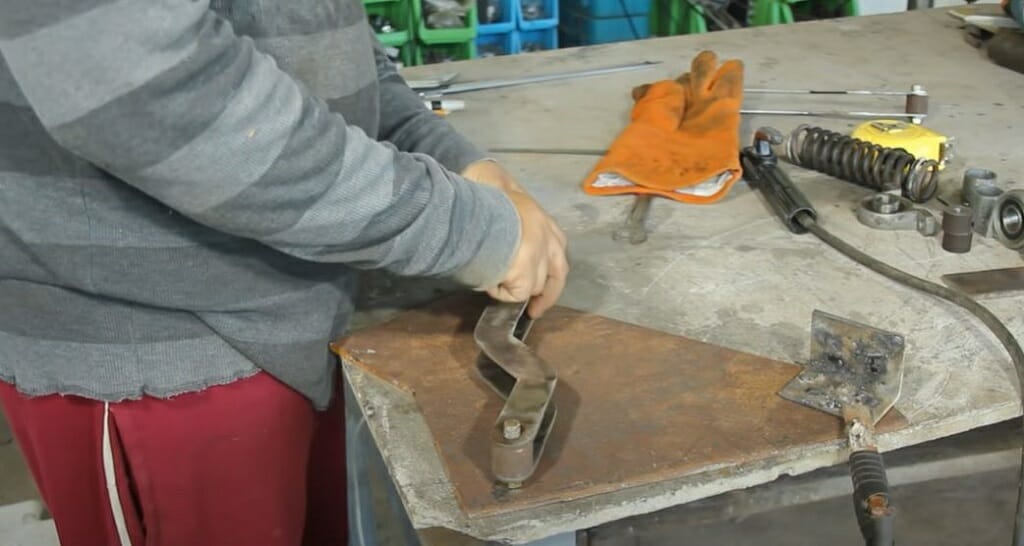
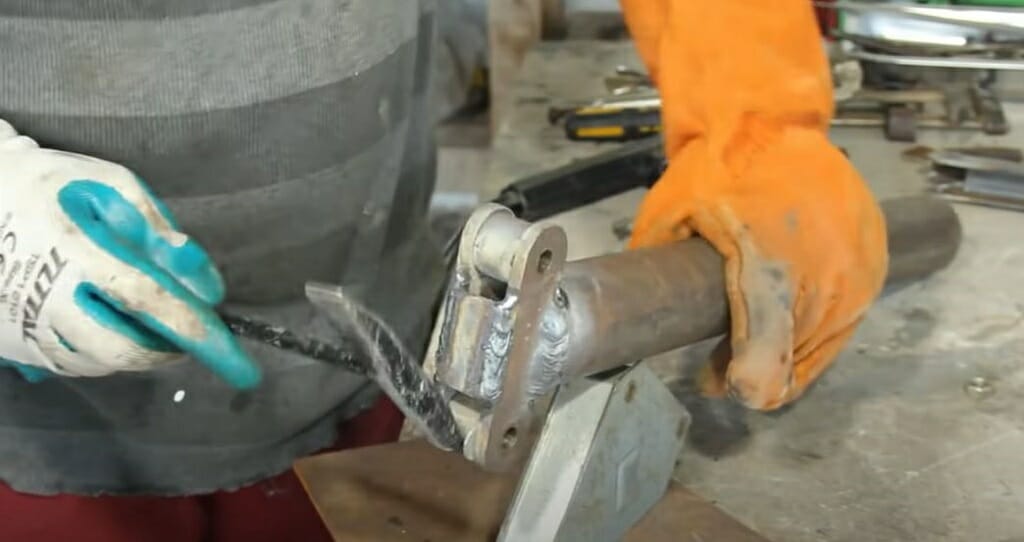
Take two small pieces from the steel plate and weld them to the created support piece.
And connect the small pipe piece as shown in the image.
Do the same for the other two pieces.
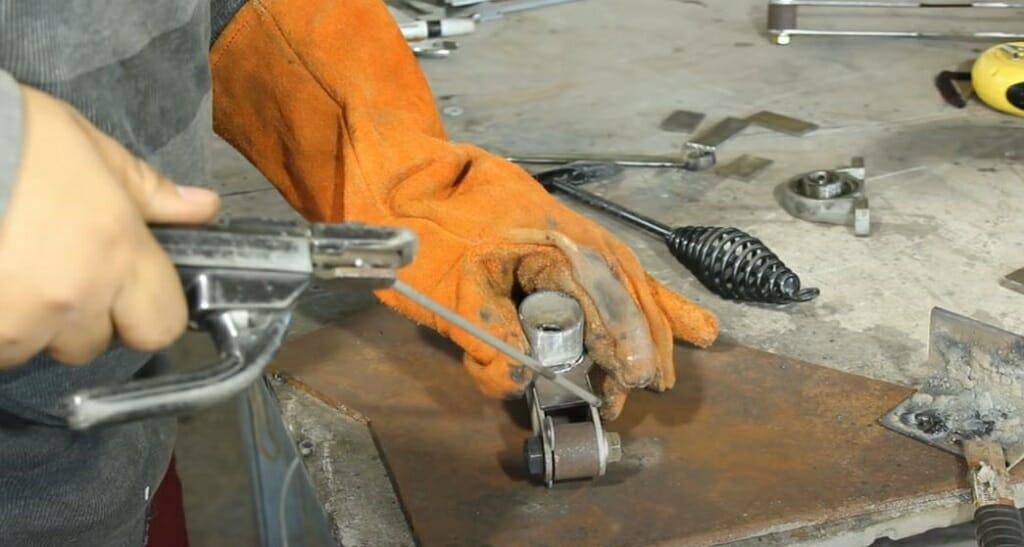
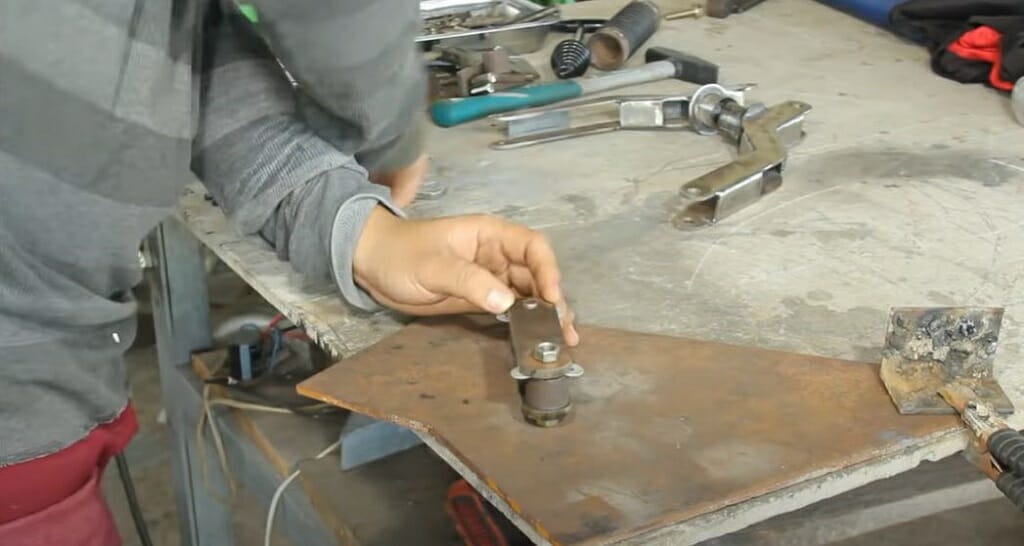
And connect the two parts to the motorcycle shock spring and the P004 pillow block bearings.
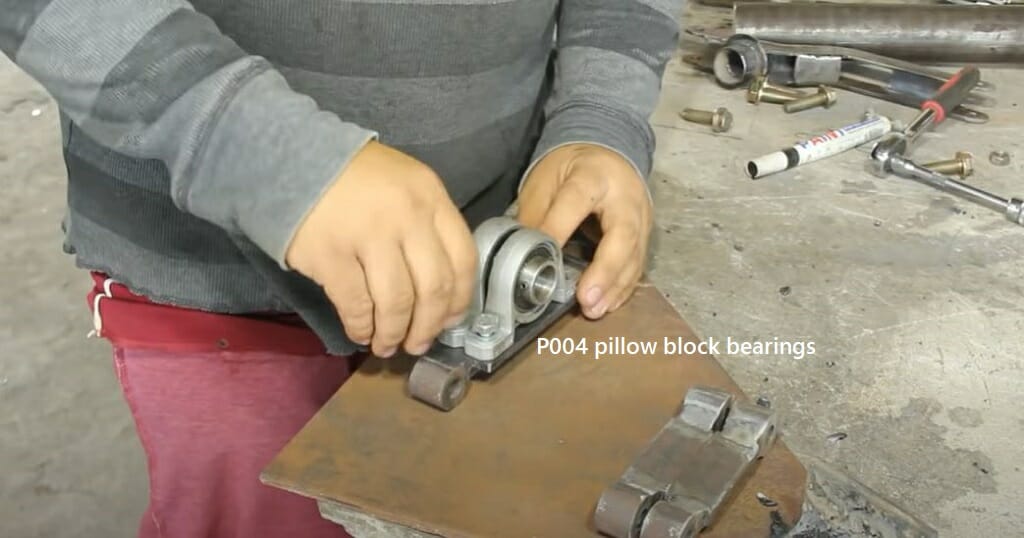
Assemble the two P004 pillow block bearings as shown in the above images (before connecting).
Next, make another support piece, as shown in the image.
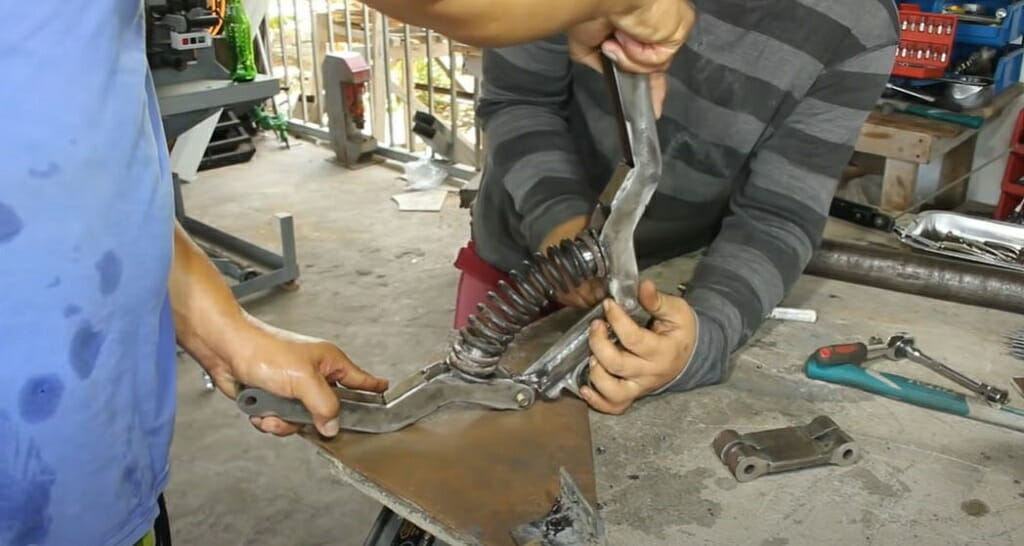
Then, take the 2-inch-thick steel rod (hammerhead) and connect it to the support piece.
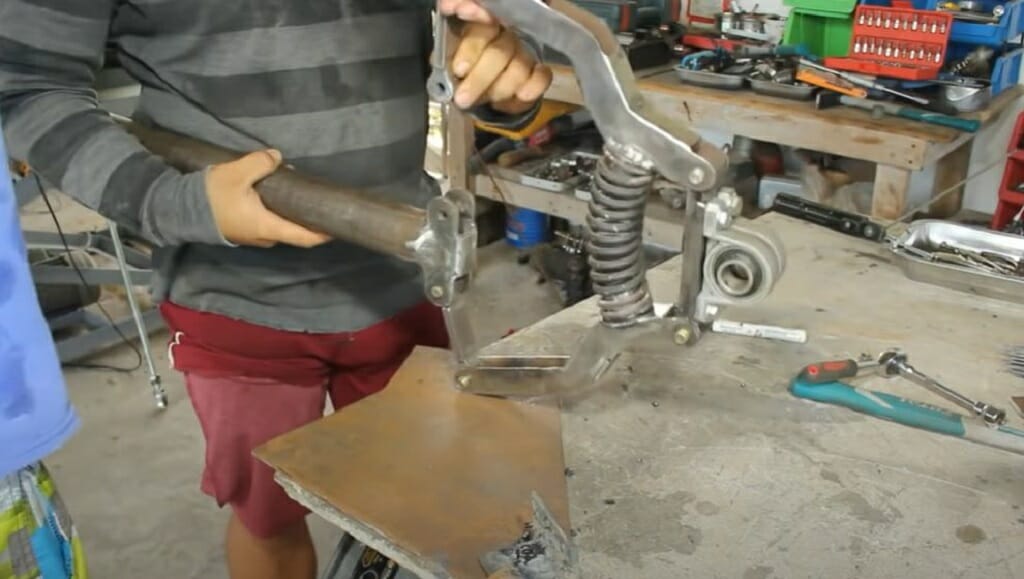
Connect the 2-inch steel rod to the shock spring (check the image). You might need some help to connect these parts correctly.
Now, your hammerhead is ready.
Step 9 – Connect the Hammerhead to the Frame
After making the hammerhead, you can now connect it to the frame.
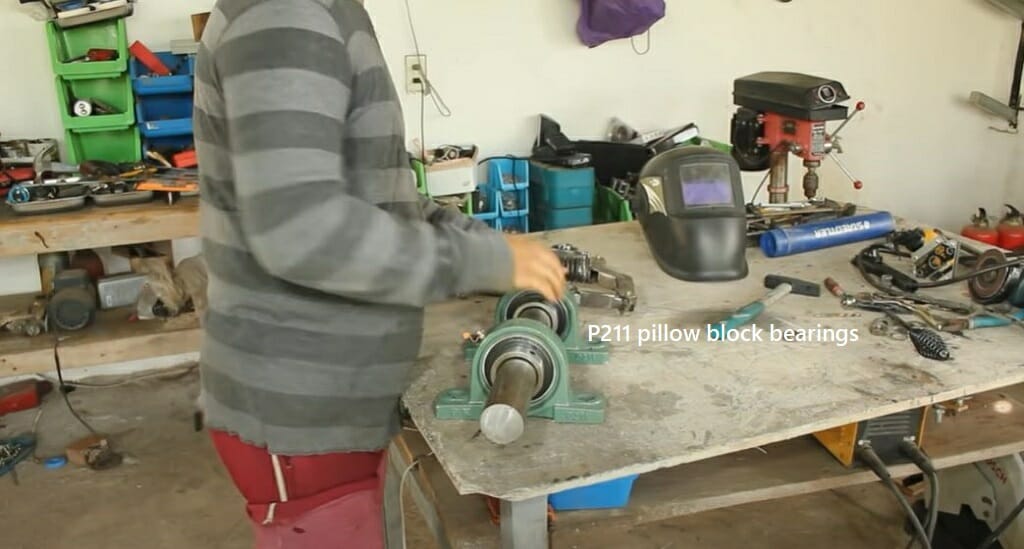
But first, place the two P211 pillow block bearings on the two edges of the hammerhead rod.
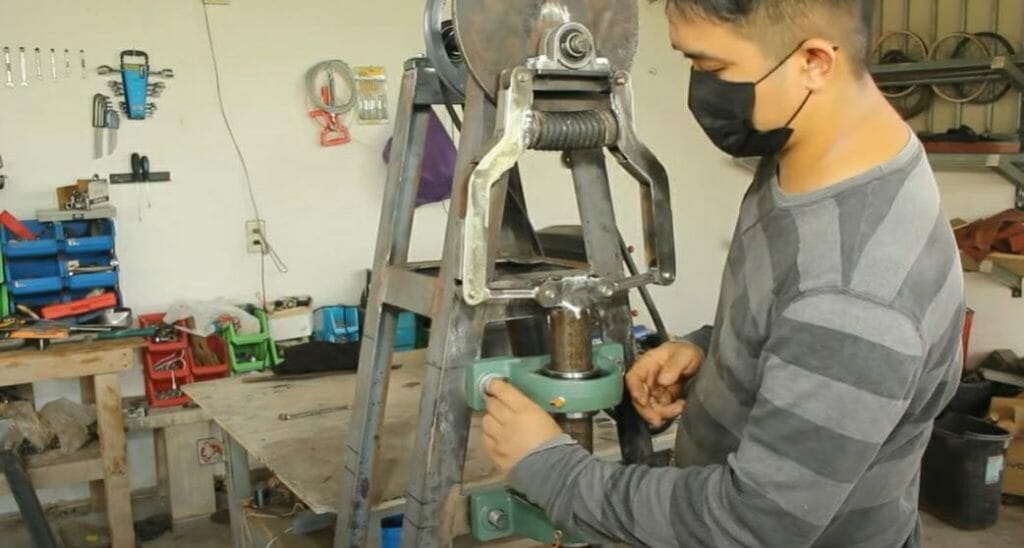
Then, connect the pulley assembly’s shafting to the P004 bearing, which is located at the top of the shock spring. If you follow the above process correctly, the P004 bearing hole should match the shafting. Next, connect the two P211 bearings to the power hammer frame.
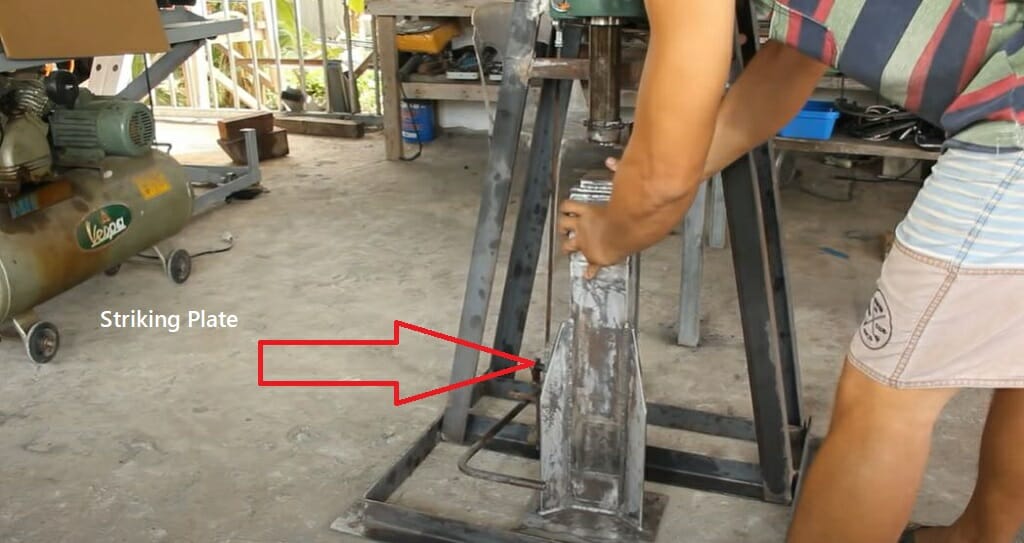
Step 10 – Connect the Motor
To place the motor, you’ll have to make a platform. So, grab some steel plates and weld them into the frame.
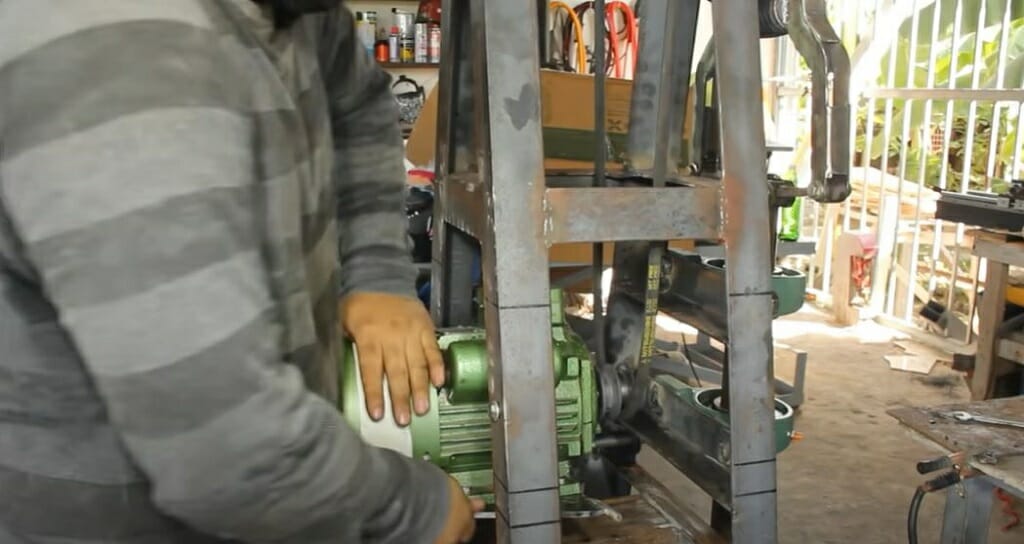
Place the motor on the platform and connect the rubber belt to it.
Then, connect the motor to the frame using a steel rod. As you can see, the steel rod is connected to the bottom of the frame.
Finally, place the striking plate just below the hammerhead.
Quick Tip: If you have the time and resources, make sure to paint a newly constructed power hammer.
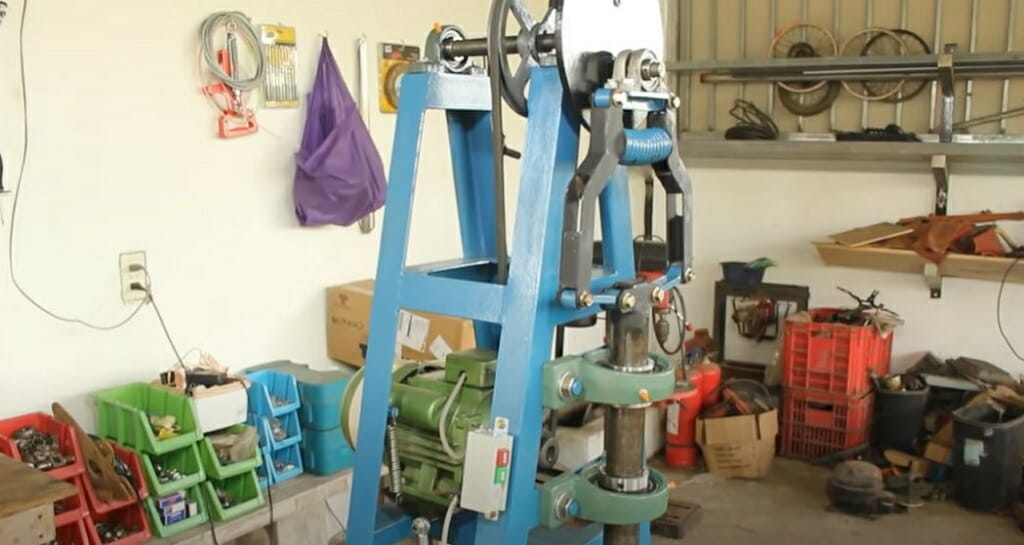
Use anti-corrosive paint and any other paint for the exterior. Supply the power to the motor and check the power hammer.
Important: If the above 10-step guide is confusing to you, please check out the full video tutorial here.
Few Other Ways to Make Power Hammer
Apart from the above 10-step guide, there are many different approaches to making a power hammer.
In this section, I’ll give you a short explanation of those power hammers.
DIY Pneumatic Power Hammer
If you want to make a pneumatic power hammer, you’ll need the following parts.
- A cylinder
- Cylinder cushion
- Foot pedal
- Plastic exhaust silencers
- Quick exhaust valves
Homemade Power Hammer
This power hammer runs using a treadmill motor. Finding a treadmill motor is a little tricky. And the same goes for the other parts that need for this process.
However, you can start the process by making the base. Then, weld the other parts into the base. Finally, connect the motor.
Drill-Powered Hammer
Drill powered hammer is one of the coolest power hammers you can make. After all, this is a budget-friendly way to make a power hammer. Here are some of the things you’ll need for this process.
- Drill
- Wood
- Nuts and bolts
- Sledgehammer head
You can start the process by building the platform where the power hammer sits. Then, it is all about woodworking. If you have some experience in woodworking, you’ll surely love this task.
Bicycle-Powered Hammer
Here is another method by that you can easily build a homemade power hammer. However, for this process, you’ll need a bicycle. First, you’ll have to remove the bicycle tires; you only need the rims for this process. Then, you can complete the base. Watch the full video for more details.
These are the different types of power hammer-build ideas. Choose one, make a plan and build a DIY power hammer.
Take a look at some of our related articles below.
- How to screw into concrete without a hammer drill
- How to fill a drilled hole in wood
- How to drill hole for door strike plate
Video References
Sek Austria
Светлана Вячеславовна
Advanced engineering technologies