4 min read
How to Drill a Hole in a Stainless Steel Sink (3-Step Guide)
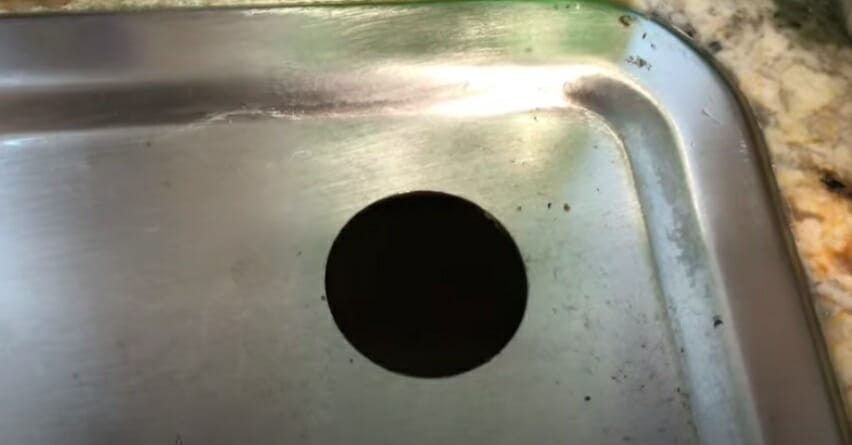
By the end of this guide, you should know how to drill a hole through a stainless-steel sink.
Working with many clients, I have installed water taps, piping, and other equipment in sinks. I know you can drive a nice hole through a stainless-steel sink with the correct drill bit and patience. Carbide-tipped drill bits are arguably the best choice for the task since they can withstand friction and heat though you should allow them to cool regularly, there’s more to it, including techniques that I’ll teach you, so you do it right.
In general, to drill holes through a stainless-steel sink:
- Start the hole with a hole or center punch and drill press
- Apply Teflon lubricant around the pilot hole to reduce heat generation through friction
- Set the drill bit’s speed to half of the maximum and start drilling
- Use a ¼-inch carbide tipped bit to further the pilot hole
- Allow everything to cool down before continuing
I will go into more detail below.
The You Need for the Job
Gather the following tools and materials:
- Hammer
- Center punch
- Hole punch
- A sharp galvanized nail
- Teflon lubricant
- Drill press
- ¼ inch carbide tipped bit for the drill bit
Step 1: Mark the Hole
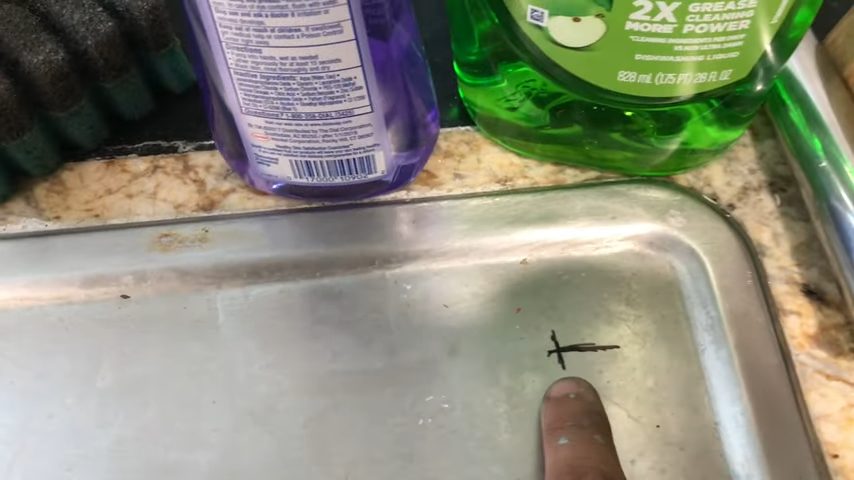
If the sink is not yet installed use a center punch and a drill press. But if the sink is stationary, start the hole with a hole punch and a hammer.
To make the pilot hole, align the center punch or hole punch perpendicularly right above the spot where you want a hole. Hit the punch with a hammer.
Alternatively, you may use a sharp galvanized nail and always keep the taps short and controlled. Put in a nice dent to simplify the drill’s work in finding the hole.
Step 2: Lubricate

The process involves the heat through friction between the drill bit and the steel surface. Obviously, the drill will spin very fast increasing heat generation. That may cause warping and eventually burn up the bit.
I recommend the application of Teflon lubricant to the drill region before and after drilling. Keeping the spinning sections lubricated reduces friction and consequently heat generation tremendously.
Step 3: Begin Drilling the Steel Sink
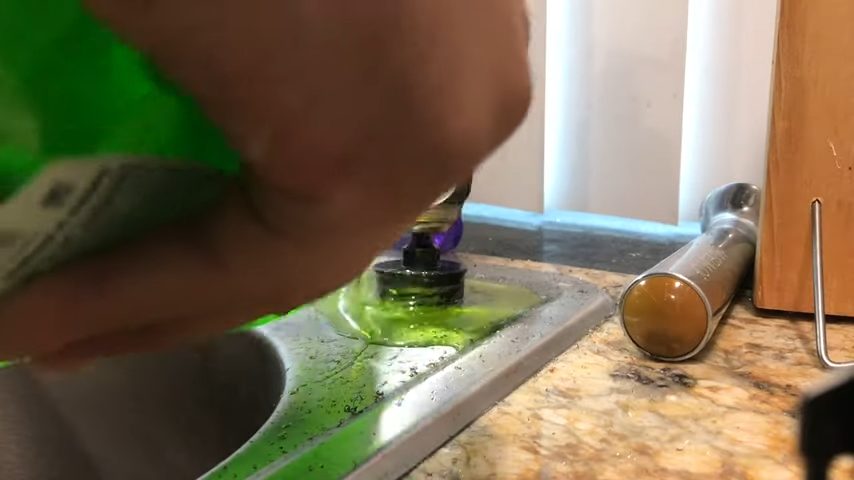
Once you have created pilot holes and applied Teflon lubricant, start drilling. Proceed as follows:
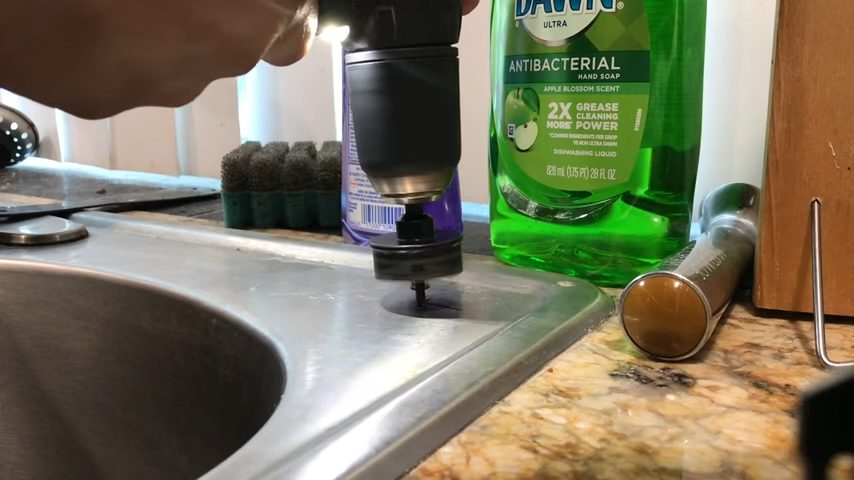
- Affix ¼ inch carbide tipped a bit and begin drilling a hole in your stainless-steel sink. Ensure you don’t run the drill at full speed. Instead, set the speed to a half or a third of the maximum speed. That way, you will reduce the rate of heat generation and overheating. (1, 2)
- Exert constant downward pressure to keep solid contact; do not interfere with the drill’s work. The process is too slow, but patience is the key here.

- After drilling for some time, take a break if you notice too much heat. Allow the bit and stainless-steel surface to cool for a while before you resume drilling.
- Once the drill breaks through the steel, smooth the edges with a file. Then, wipe out debris from the hole.
- Finally, lubricate your stainless steel sink and install a filtered water tap or whatever you are installing.
Wrapping Up
Drilling into a stainless-steel sink should be easy.
Fetch the right drill bit, lubricate, and start drilling a hole. Ensure you take regular breaks to avoid overheating that can destroy your drill bit.
Take a look at some of our related articles below.
- What is a step drill bit used for
- How to drill a hole in plastic
- How to drill a hole in wood without a drill
References
(1) maximum speed – https://journals.lww.com/nsca-scj/fulltext/2012/04000/maximum_speed__misconceptions_of_sprinting.7.aspx
(2) heat generation – https://www.sciencedirect.com/topics/engineering/
heat-generation
Video Reference