10 min read
Where to Ground Negative Battery Cable (Terminal Identification)
Grounding your wires is crucial for keeping your car safe. But where exactly should you ground something as important as the negative battery cable?
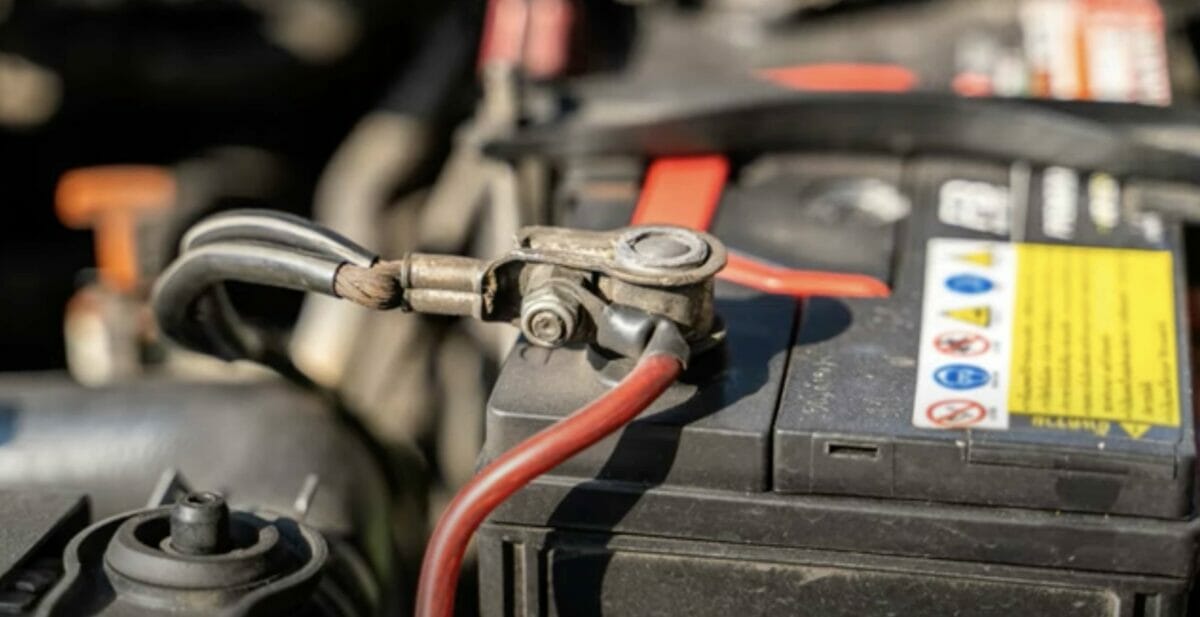
The negative battery cable is grounded to the negative terminal of the battery. You can easily identify the negative terminal by looking for the minus symbol near the metallic part of the terminal.
Grounding the Negative Battery Cable to the Negative Battery Terminal
Most vehicles are grounded to the negative battery terminal for convenience and safety.
A car’s negative battery terminal is connected to its chassis (also known as the car’s main body), making the chassis act as a path for electricity to pass through as it travels from the positive to negative terminals. Note that not all cars have a negative-grounded body. There are some models around where the car body is positively grounded, but these are rare and often found in custom-made models.
The minus symbol located near the metallic battery terminal identifies the negative terminal.
Don’t confuse the positive and negative terminals for each other. A plus symbol marks the positive terminal, and the terminal itself usually has a red plastic cap around it or a red wire coming out from the terminal.
Components You’ll Need to Ground Any Electrical Cable
The components needed to ground the negative battery cable are almost the same as grounded any other wire. We’ll review what you need to ground any cable on your car properly.
Electrical Cable
Use an electrical cable with the appropriate wire gauge size for your vehicle.
Electrical cables are colored black to distinguish them from positive ones easily. Cars generally use a 6 AWG (American Wire Gauge) size wire but check the appropriate size for your vehicle before buying one.
Using a thinner ground wire produces more resistance that may cause components to malfunction, while a thicker wire may not fit properly on the mounting point.
Soldering Tool and Soldering Wire (Optional)
Soldering the ground wire is recommended if you know the soldering process.
Typically, wires are soldered into place when grounding them to a terminal or stud. Soldered wires are less likely to loosen over time but are more troublesome than using tools like a cable lug.
A soldering tool is needed if you traditionally ground your negative battery cable. Use a 63/67 leaded solder wire to easily ground the wire to the terminal.
Cable Lug (If opted not to solder the wire)

A cable lug is a small, metallic tip used to connect cables to terminals, ground points, or other cables.
You’ll need to attach the cable lug to the battery cable before proceeding with the grounding process. You can do this by doing the following steps:
- Insert the cable into the cable lug barrel. Ensure that the palm (the wide, metallic part) faces the terminal to be connected.
- Use crimping dies or other tools to press the barrel to the cable and lock it into place.
- Clean the surface of the connected area.
Steps to Grounding an Electrical Cable
1. Prepare the Terminal or Grounding Stud
Thoroughly clean the terminal or grounding stud before proceeding with the grounding process. This ensures that the cable stays in place. Use a contract cleaner, then clean the area with a wire brush. Ensure the area is dry by wiping off any excess residue.
2. Ground the Electrical Cable Using a Soldering Tool or Cable Lug
If you opt to use the cable lug, ensure that the cable lug is properly attached to the cable by following the steps mentioned above. Ground the cable by hooking the palm to the negative battery terminal.
If you opted to solder the cable to the terminal or stud, follow these steps:
- Strip 1 inch (2.5 cm) of the cable insulation from each end of the wire. Twist the exposed wires together to combine them. Do this for each exposed end.
- Place one exposed end on the terminal or grounding stud, then melt the soldering wire directly on top of the connected area.
- Let the solder cool for 1 to 2 minutes or until it solidifies.
- Apply silicone paste onto the soldered area to make it water-resistant.
Spots to Connect Your Car’s Ground Wires To
Cars have multiple wires that connect to components like the headlights or the radio. Grounding each wire is important to prevent them from damaging other components.
Grounding a wire is done for safety reasons. A ground wire is an alternate path for excess electricity to pass through the circuit harmlessly. It keeps you and your engine safe by preventing overvoltage and power surges.
Keep yourself safe by knowing where you can ground a negative battery cable.
Negative Battery Terminal
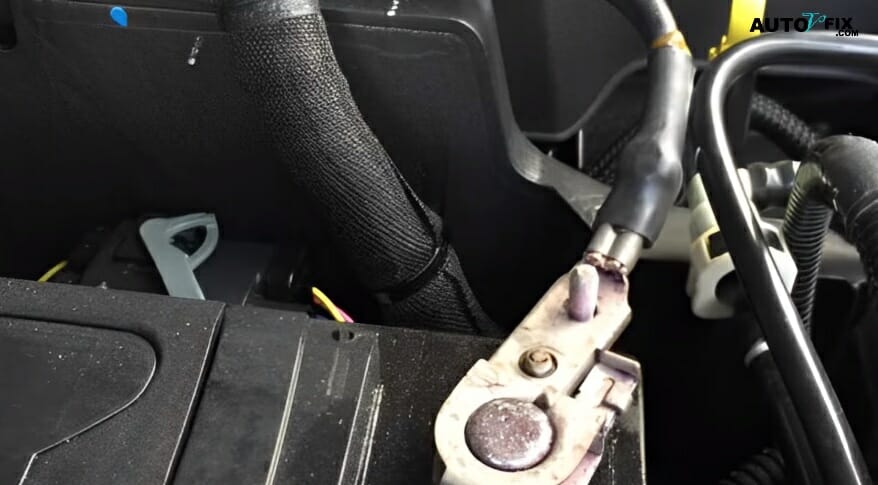
The negative battery terminal acts as the ground for the battery. Naturally, you can also use it to ground other wires.
Technically, you can connect wires to the negative terminal, but limiting it to one or two additional wires is recommended. Doing so lessens the chances of knocking the wire connection loose and preventing it from grounding electricity during emergencies.
Car Chassis
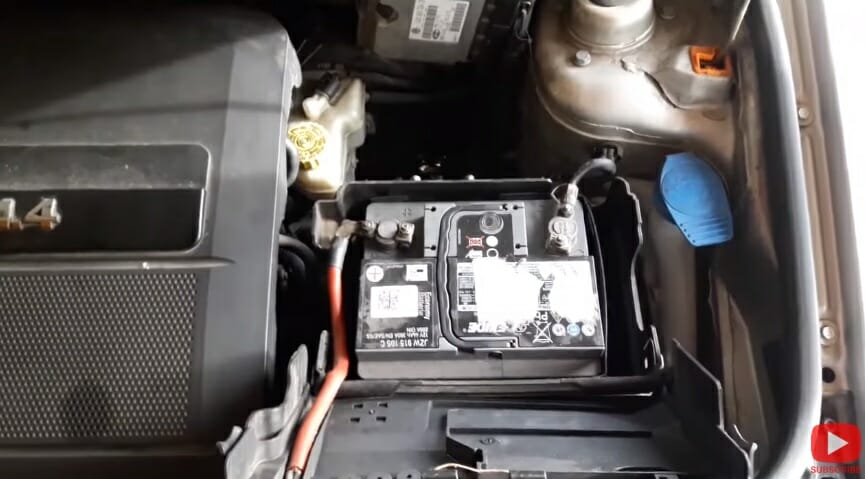
The battery’s terminals are already connected to the chassis, so it makes sense to ground the negative battery cable to the chassis itself.
Ensure the chassis is already grounded to the battery terminal before grounding other wires to the chassis. Otherwise, your electrical components will fail to work since they don’t have a clear path to the negative battery terminal.
You can ground the wires to factory ground points or make your point by securing a bolt to the chassis.
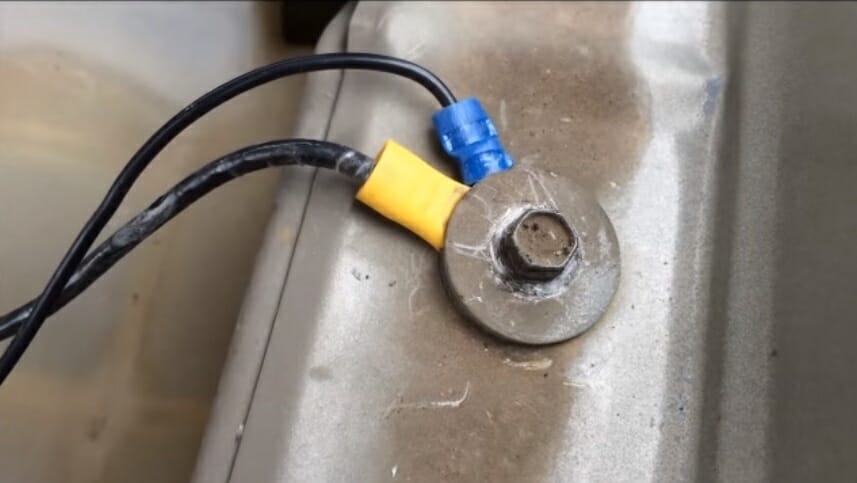
Factory ground points are bolts or metal studs on the chassis meant to ground your wires. The points’ exact locations vary depending on the manufacturer or vehicle model. Some common locations for the factory ground points are near the glove box and behind the removable panel of the driver and passenger sides.
You can add studs by drilling or mounting them to the chassis and then soldering them to secure them. Remove any paint between the added studs and chassis to remove electrical interference. This is useful for situations where the wires are short and can’t reach any of the factory ground points.
Try to locate the factory ground points by consulting your car’s wiring diagram or the owner’s manual before creating additional points. There might be a convenient point near the component you’re grounding.
Car Engine
The engine is arguably the best place to ground your wires.
Thanks to its unique construction, there’s little to no current flow within the engine’s components. As such, any ground points on the engine are guaranteed unhindered by electricity. The engine is also located near other accessories and components like the headlights to make grounding easier.
Some common locations of ground points on the engine are:
- On the Engine Block
- On the Transmission to Engine Bolt
- On the Cylinder Head
- On the Intake Manifold (if it’s made out of aluminum or cast iron)
Keep the wirings away from plug wires or the ignition system to prevent the wires from loosening due to the ignition rumbles and avoid ignition noise issues.
Signs of a Bad Ground Wire Connection
It can be hard to tell whether your negative battery cable is properly grounded to the battery terminal. In many cases, car owners don’t notice a bad connection until the signs of one appear.
LED Warnings on the Dashboard
A lit-up battery voltage LED on your dashboard typically means a low battery. However, it can also point to a bad ground wire connection.
A bad ground wire connection will cause issues with the battery voltage. This causes your battery warning light to sporadically light on and then off.
Whining Sounds from the Alternator
Voltage fluctuations occur if the grounded negative battery wire isn’t properly connected to the negative battery terminal. In turn, the alternator will work double time since it doesn’t receive enough voltage from the battery. You’ll hear loud whirring and grinding sounds from the alternator as it continues to work overtime.
Ignition Coil Failure
The ignition coil is especially sensitive to voltage fluctuations.
The ignition coil uses power from the battery to ignite the fuel and turn the engine over. It can’t perform its function if there isn’t enough power. Moreover, supplying too much power (around 20,000 to 40,000 volts) and the presence of any resistance will damage the ignition coil.
Too many instances of ignition coil failure will burn out the coils, requiring them to be replaced for the car’s ignition system to work.
References
Georgia State University. http://hyperphysics.phy-astr.gsu.edu/hbase/electric/bregnd.html
The Dashcam Store. https://www.thedashcamstore.com/how-to-identify-a-proper-ground-point/
TWI Ltd. https://www.twi-global.com/technical-knowledge/faqs/what-is-soldering
Video References
Auto V Fix
FIRST CLASS AMATEUR
Despair Repair
Paged Out, LLC
Mad Motor Repair