11 min read
How to Wire Tweeters without Crossover (4-Step Guide)
A tweeter is an essential part of your stereo system. Without it, the speaker won’t be able to catch high frequencies. But, at the same time, your stereo system needs a woofer, subwoofer, and a mid-range driver too. The combination of the above drivers produces a perfect car audio system. However, to run multiple drivers on a single speaker, you’ll need a crossover. But sometimes, you can run a tweeter without a crossover. So, today, I’m hoping to shed some light on how to wire your tweeters without a crossover.
In general, to install a tweeter without a crossover on your car, you will learn how to do the following steps (more detail below).
- First, disconnect the negative terminal connection of the battery and turn the ignition key off.
- Then, remove necessary panels such as the dashboard panel and door panel.
- Mount the tweeter in the desired location.
- Finally, complete the wiring process for the tweeter.
Different Types of Speaker Drivers and Their Frequencies
Depending on the various frequencies, you can enhance your car audio system with different types of speaker drivers. Here are some most common drivers you can get from the market.
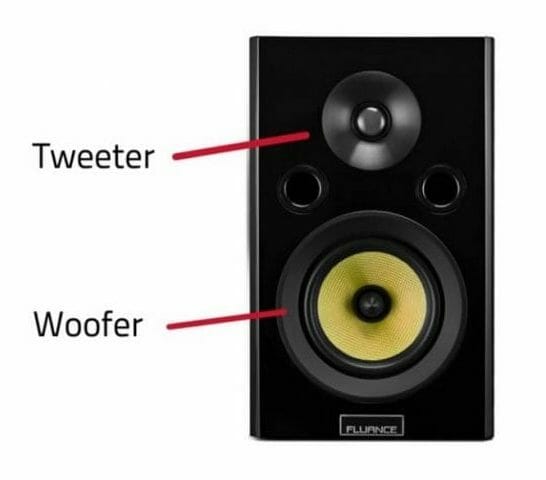
Woofers
Woofers are capable of playing frequencies from 40Hz to 3000Hz. These frequencies are considered low-range frequencies.
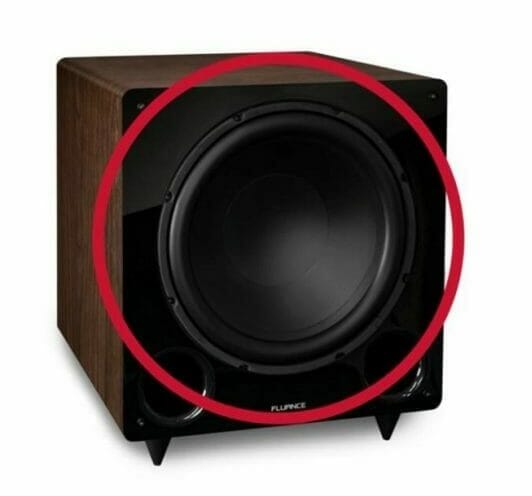
Sub Woofers
Subwoofers are capable of playing low frequencies from 20Hz to 120Hz.
Tweeters
Tweeters play high frequencies from 2000Hz – 20000Hz and these drivers are smaller than other drivers. They are capable of producing excellent sound quality with low amplifier power. Tweeters convert electrical energy to sound waves by using electromagnetism.
Mid-Range Drivers
These Drivers are capable of playing frequencies from 250Hz to 3000Hz.
Types of Speakers
In general, there are three types of speakers. Here are some details about them.
Coaxial Speakers
This loudspeaker system comes only with one individual driver known as coaxial speakers.
2-Way Speakers
Usually, a 2-way speaker has a tweeter and woofer. This type of speaker is the best option when considering budget and performance.
3-Way Speakers
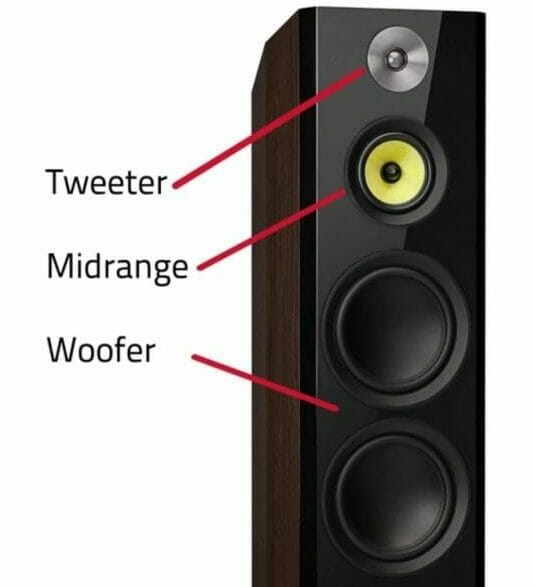
3-way speakers have three or more drivers. For instance, it might have a tweeter, woofer, and mid-range driver.
The Function of a Speaker Crossover
Speaker Crossovers are a valuable technology that can be used to optimize your speaker performance. As mentioned earlier, each driver has a designed frequency. The speaker crossover is capable of delivering these designed frequencies to their devices. In other words, speaker crossover ensures a woofer gets 40Hz to 3000Hz frequencies.
Low and High Pass Filters
When learning about the crossover, you cannot miss out on low pass and high pass filters. Most people get confused when they hear about the above two filters. But they shouldn’t. A high pass filter only allows the higher frequencies to go through. These filters will block any low frequencies. The low pass filter works the other way around. Also, you can adjust these low and high-frequency settings accordingly.
Can I Run a Woofer and Tweeter Without a Separate Crossover?
Yes. You can do that. Most amplifiers come with a built-in high pass filter and low pass filter. So, you don’t need a separate crossover.
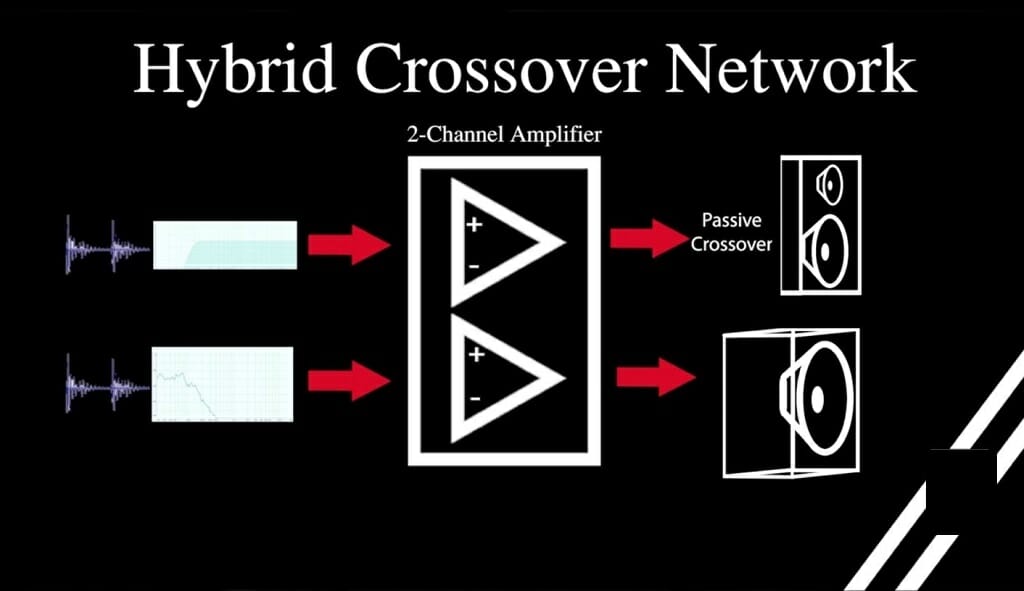
Tip: You can use active crossover amplifiers to run low signal levels. That means active crossover amplifiers are capable of splitting the audio signal to separate frequencies.
4-Step Guide on How to Install Tweeters Without a Crossover
Installing a tweeter without a crossover is not that difficult at all. Here is how you can do it.
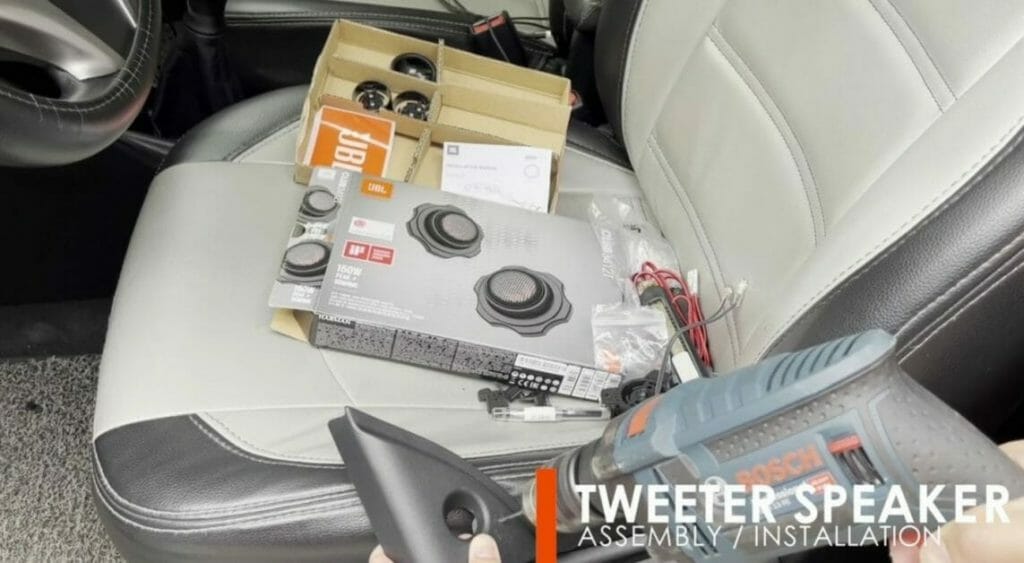
Things Needed
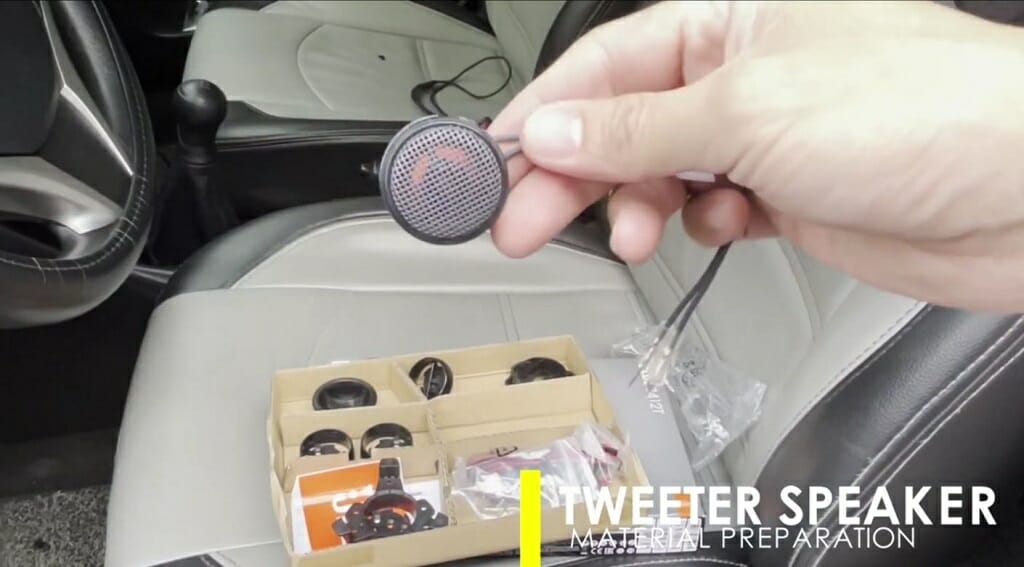
- Tweeter
- Screwdriver
- Wrench
- Drill
- Nuts and bolts
- Soldering gun
- Flush mounting housing
Step 1 – Disconnect the Negative Battery Terminal and Turn off the Power
First and foremost, disconnect the negative battery terminal. Use the wrench for this. Then, turn off the car’s ignition key. You must follow this step, otherwise, during the installation process, some devices might get damaged.
Step 2 – Remove the Necessary Panels
Depending on the location of the speaker, you might have to remove the door or dashboard panel.
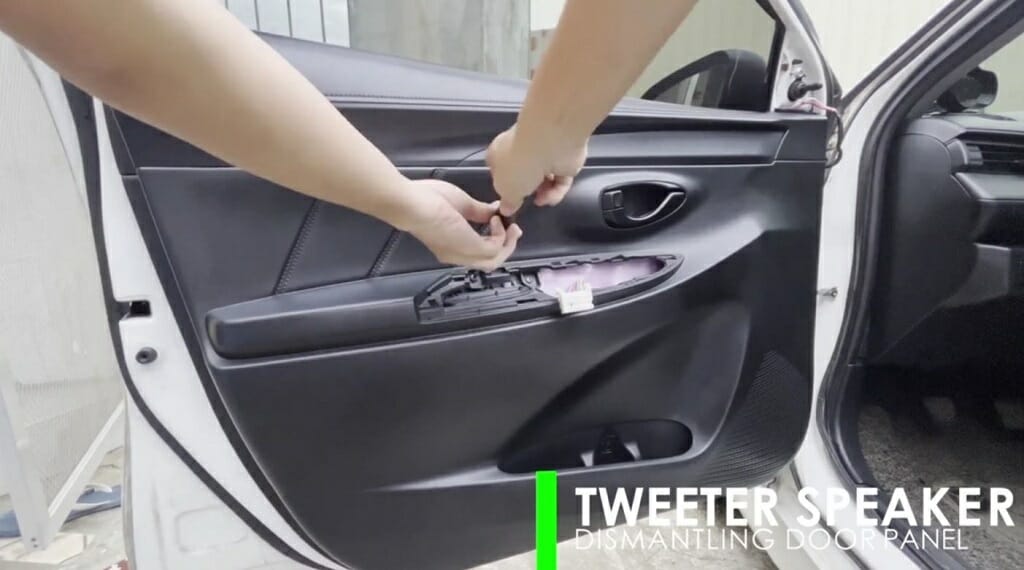
Loosen the screws using the screwdriver and remove the necessary panels.
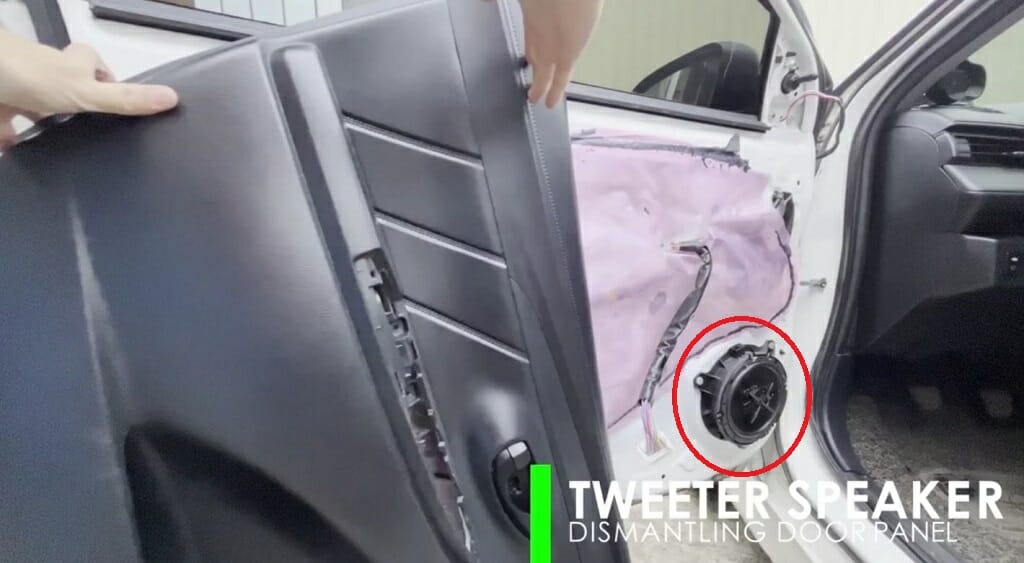
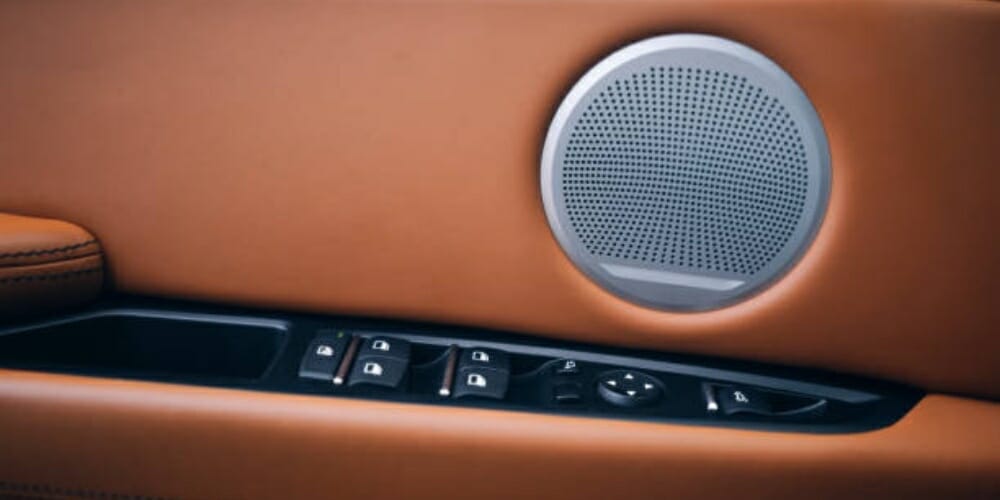
Most of the time, the speaker is located inside the door panel.
Step 3 – Mount the Tweeter
Now it’s time to mount the tweeter. There are three different mounting types. Try out any of the below methods. (1)
Surface Mounting
This is the easiest method to install a tweeter. You can mount the tweeter on the door pillar, dashboard, or rear deck. But, you’ll have to place the tweeter on a surface mounting housing.
Angle Mount
Similar to surface mounting. But, the tweeter will be placed at a specific angle.
Flush Mounting
With this method, you’ll have to drill a hole on the particular panel that you are going to install the tweeter. The hole should match perfectly with the tweeter. Also, don’t forget to soften the hole.
Bottom Mounting
If your car already has a previously installed tweeter, you can mount the new one on the old tweeter spot.
Keep in Mind: For this demonstration, we are going to use the flush mounting method.
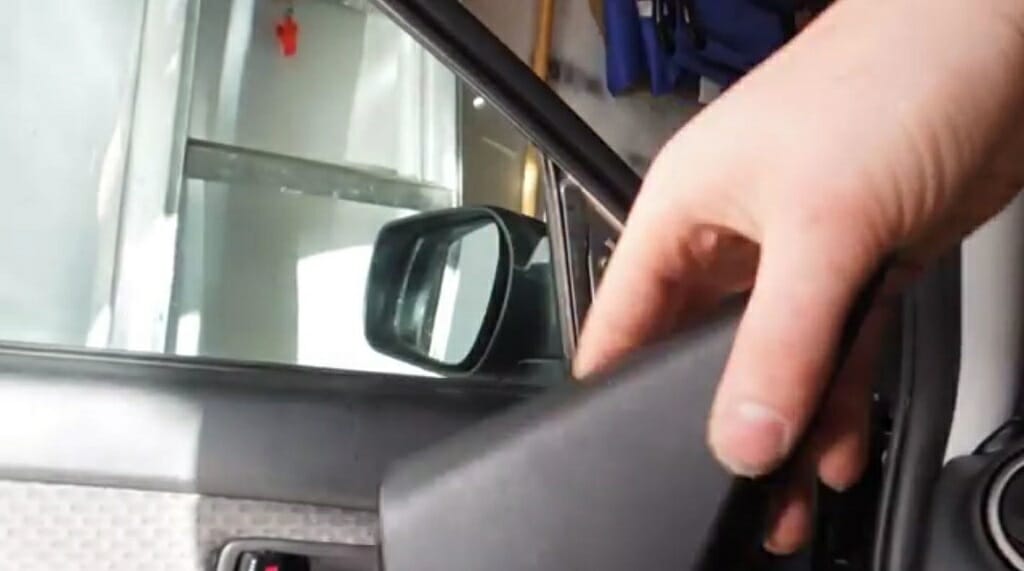
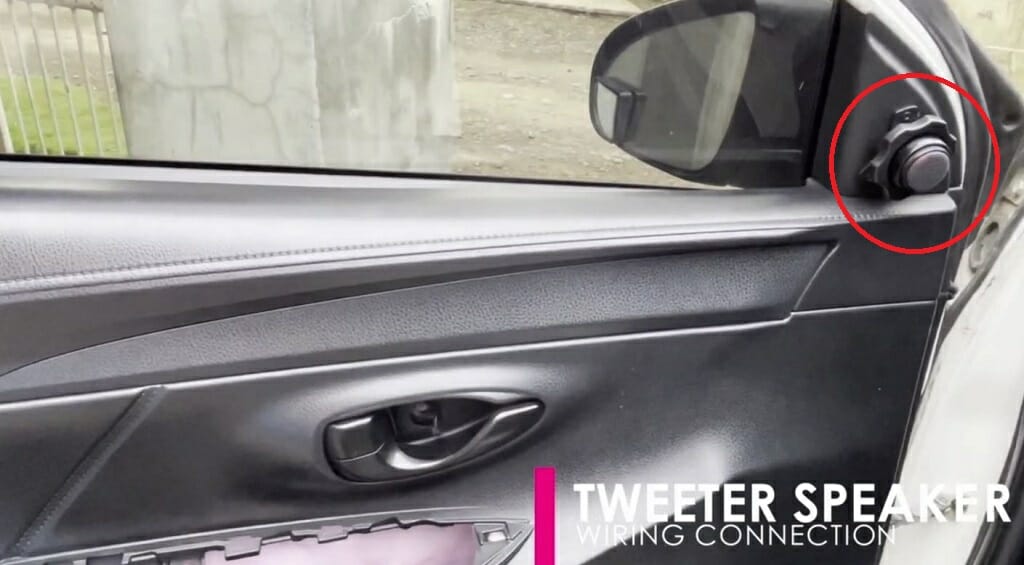
Pull out the side mirror adjustment cover of your car.

Then, mark the tweeter’s location on the cover. Next, make a hole on the cover.
This hole should match the size of the tweeter.
Tip: Use the tweeter or the flush mounting housing to mark the tweeter size on the side mirror adjustment cover.
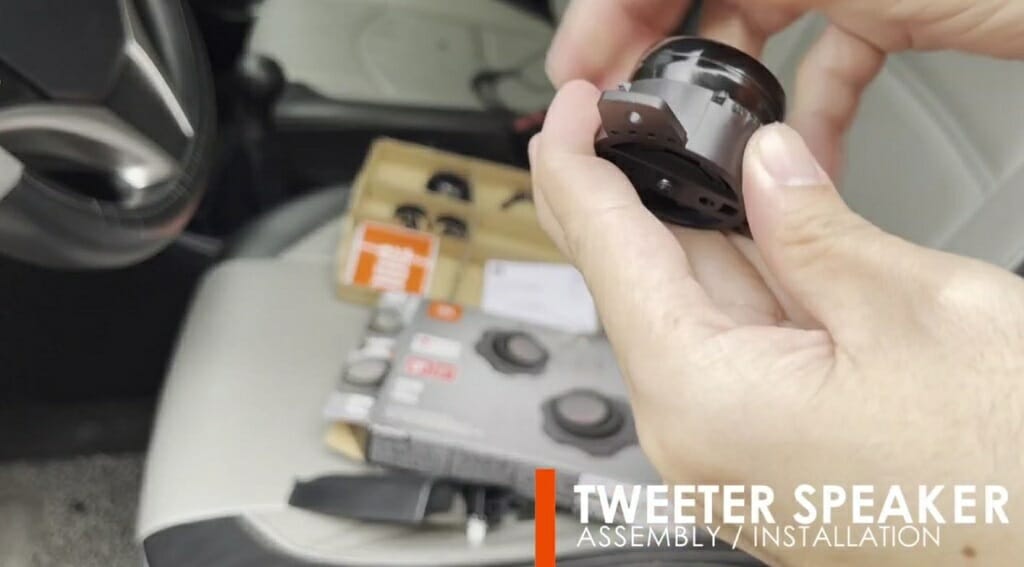
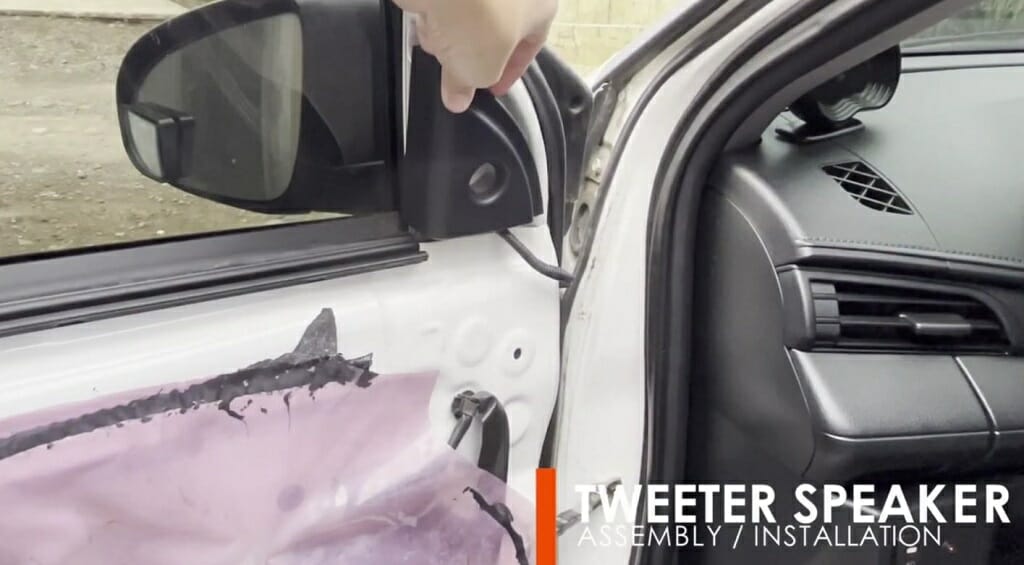
Then, connect the tweeter to the flush mounting housing.
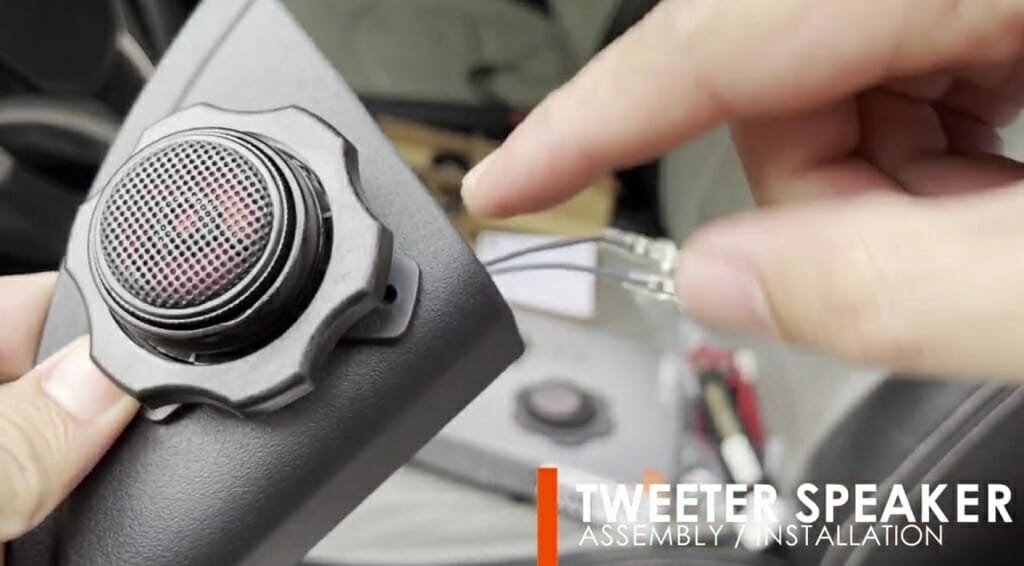
Now, position the tweeter on the side mirror adjustment cover’s hole.
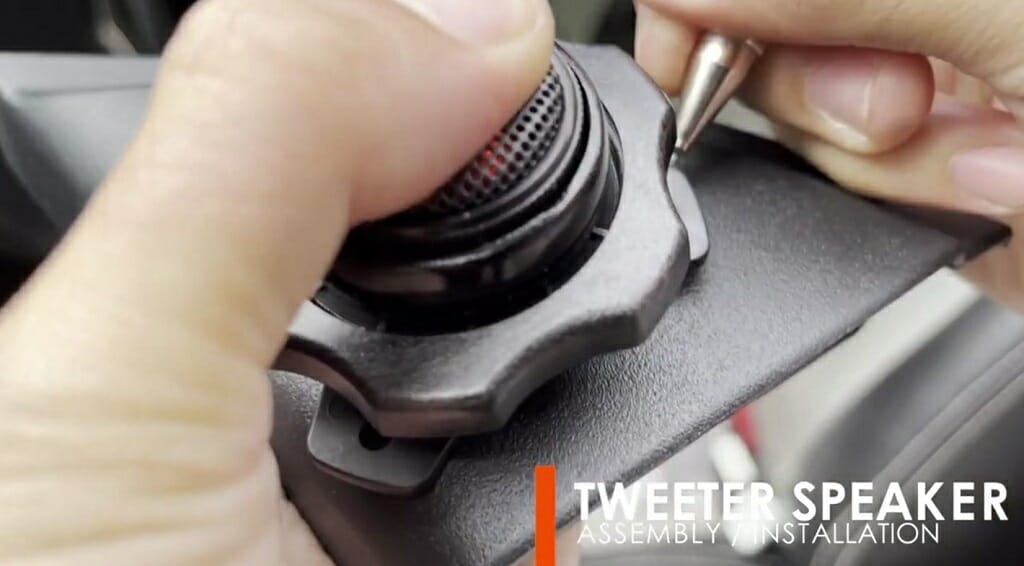
Mark the position of the screws on the cover.
Use the drill to create the screw holes.
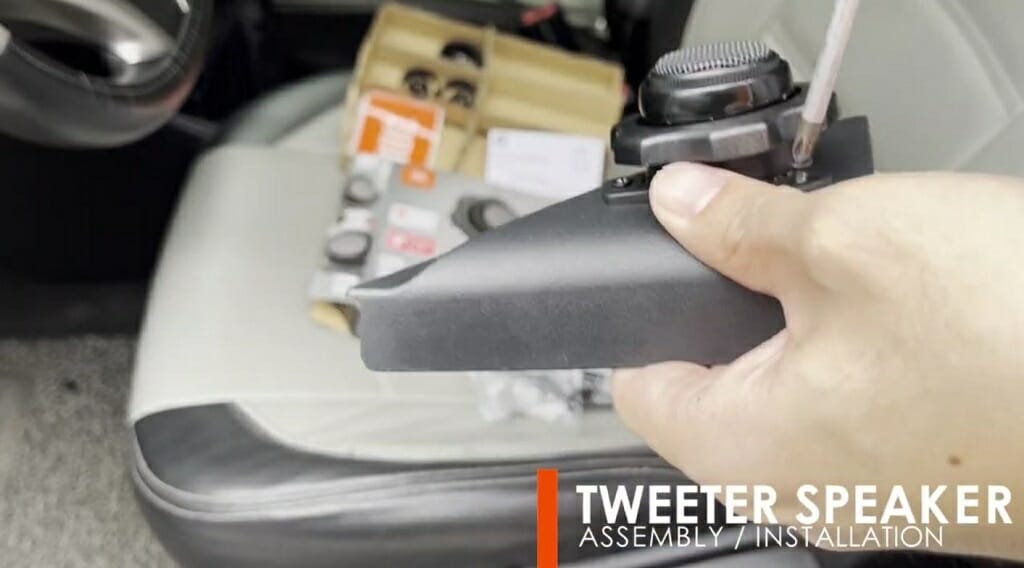
Now connect the side mirror adjustment cover and the tweeter.
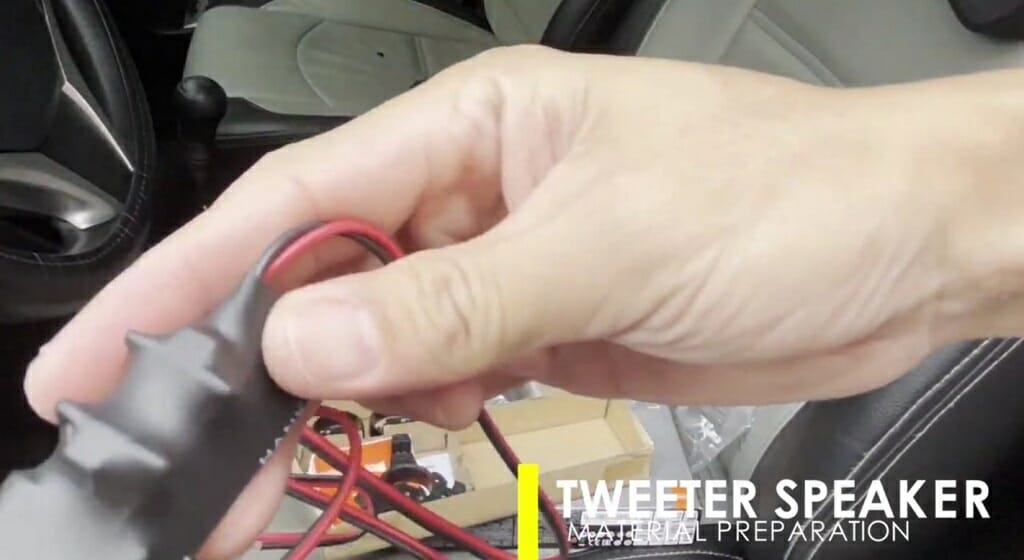
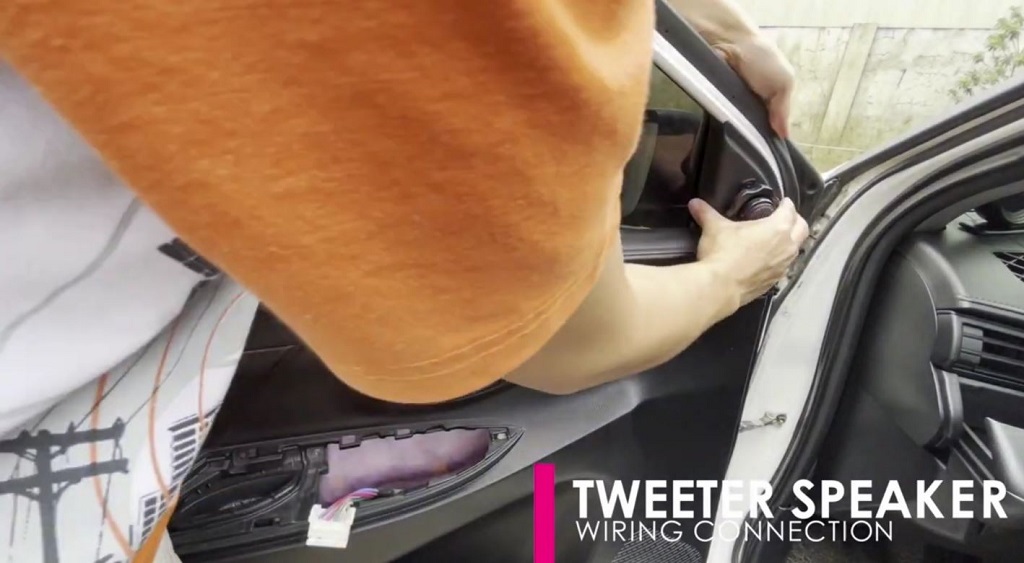
Step 4 – Wire the Tweeter
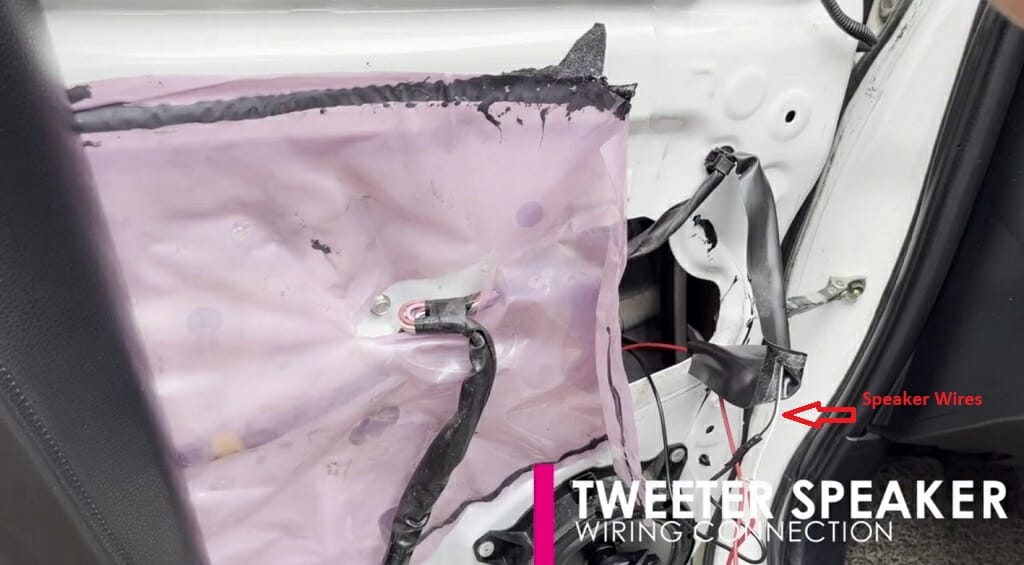
Now you are ready to wire the tweeter. For this, first, you’ll have to pull out the existing speaker wires.
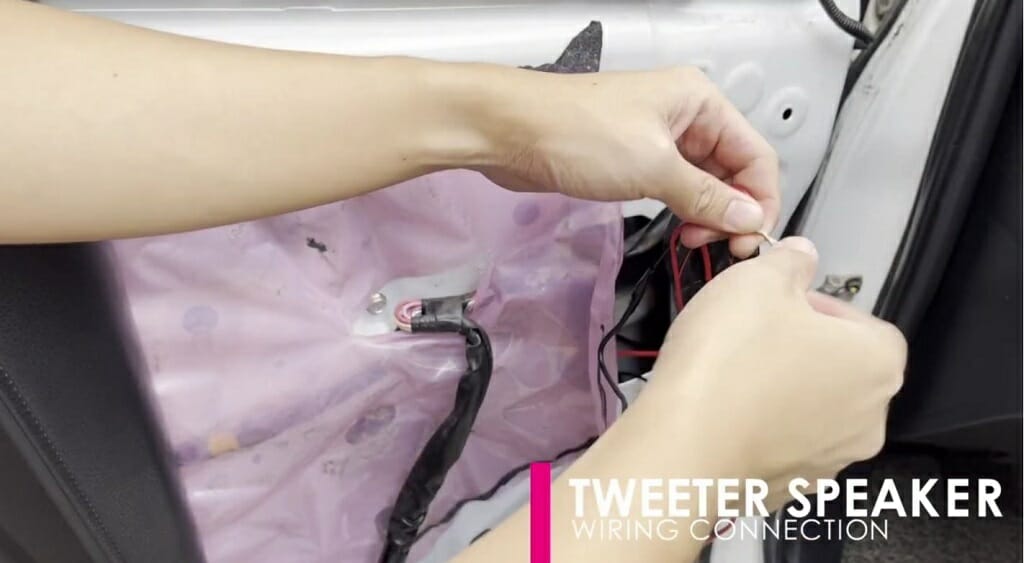
Next, connect the positive speaker wire to the positive tweeter wire. Do the same for negative wires. Usually, positive wires are red and negative wires are black. Check the polarities by using a polarity connector. (2)
Then, weld the connected wires using the soldering iron.
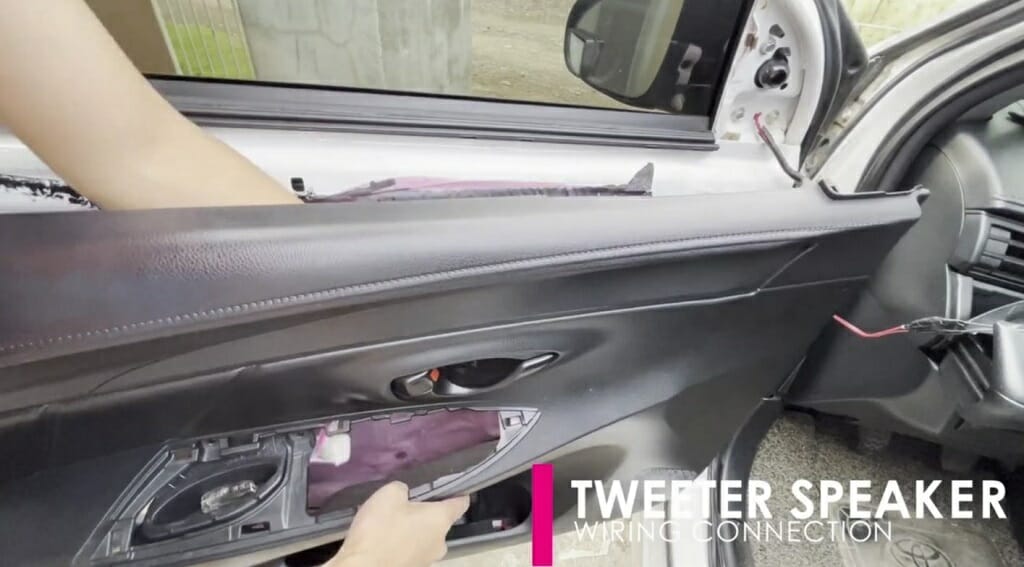
Now, connect the door panel.
After that, install the side mirror adjustment cover on the door. Finally, turn on the power and check the newly installed tweeter.
Wrapping Up
Even though crossovers play a significant role in a car’s audio systems, sometimes you won’t need these devices, especially if you are using an amplifier that has a built-in crossover. For that kind of situation, the above 4-step guide will help you remarkably.
Take a look at some of our related articles below.
References
(1) mounting types – https://adsabs.harvard.edu/full/1966IAUS…27..106R
(2) polarity – https://www.britannica.com/science/polarity-chemistry
Video References
Rj Learns DIY
Fluance Audio
Audio University
ghostlyrich