17 min read
How to Wire a DRL to Turn Off with Headlights (SPDT) (10 Steps)
This article shows how to wire the DRL to turn off when turning on the headlights.
DRLs (Daytime Running Lights) are a useful car lighting feature to make the car more visible to others during the daytime. It’s an extra safety measure, but you might prefer to rewire it so the DRLs turn off when unnecessary. I’ll show you how to do that along with the headlights, i.e., they will turn off automatically when you turn them on.
We use a relay switch to wire the DRL to turn off automatically with the headlights on. I will show you how to do this with a 1×4-pin change over the SPDT relay spliced at the BCM in 10 steps.
I also show how to install a DRL controller, which you can modify using a relay in the circuit for the same result, and how to use the fog lights for the DRLs instead. Plus, I’ve explained how to turn the DRLs off manually from inside the car and by removing the fuse.
In addition, I’ve given more detailed information for readers interested in understanding the electronics behind the DRL operation, including different ways they can be controlled and a brief DRL troubleshooting guide.
Daytime Running Lights
A DRL is a low-wattage light fitted to a vehicle used during the day.
It increases a car’s visibility during the day, especially for pedestrians and other road users. It is usually dim because, unlike the headlights, the DRL is not used to illuminate the road ahead. So it serves a different function from the headlights and tail lights and should never be used as a substitute.

The DRL is not a substitute for the tail lights. Driving using only your DRLs is dangerous and illegal. It should not be used to replace dipped headlights in low light conditions either because there won’t be a DRL at the rear.
Terms
BCM: Body Control Module
DRL: Daytime Running Light
SPDT: Single Pole Double Throw
DRL Options
A DRL is usually wired to turn on automatically when you start the engine and drive.
It might turn on with the low- or high-beam headlight or if you’re in parking mode and the headlights are off. Regardless, we’re looking at ways to turn it off.
I will show you how to automatically wire the DRL to turn it off. Otherwise, you can turn a DRL off manually by turning a knob or changing a setting on the vehicle’s control system.
Wiring a DRL to Turn Off Automatically
To wire a DRL to make it turn off automatically, you must use a relay spliced at the BCM.
Requirements
You will need a 1×4-pin “Change Over” SPDT relay (single pole, double throw) and a 5-amp fuse. Other electrical items you will need are:
- Red butt connectors (x2)
- Red scotch lock connectors (x2)
- Wire (4 lengths, as required)
- Female spade connectors (only if the relay doesn’t have a socket)
- Electrical tape
Additionally, have the following tools to hand:
- Wire stripper
- Crimper
Wiring Diagram
We will use this wiring diagram to accomplish our task:
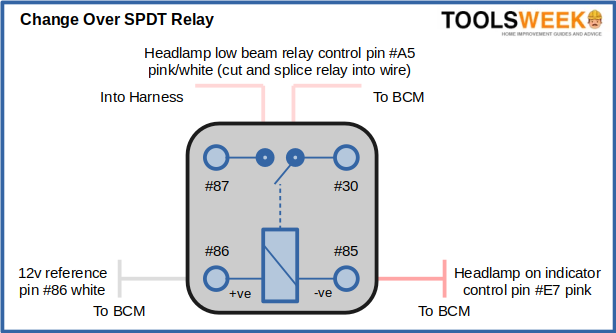
The wires will be color-matched to the BCM. Let’s begin.
Step 1: Disconnect the Battery
Make sure to disconnect the battery before doing any electrical work in your car. Please don’t touch the wiring without disconnecting it first.
Step 2: Access the BCM
You will need to locate and have access to the BCM.
It might be under the driver seat at the rear end or the back seat. Remove the fuse box cover to gain access.
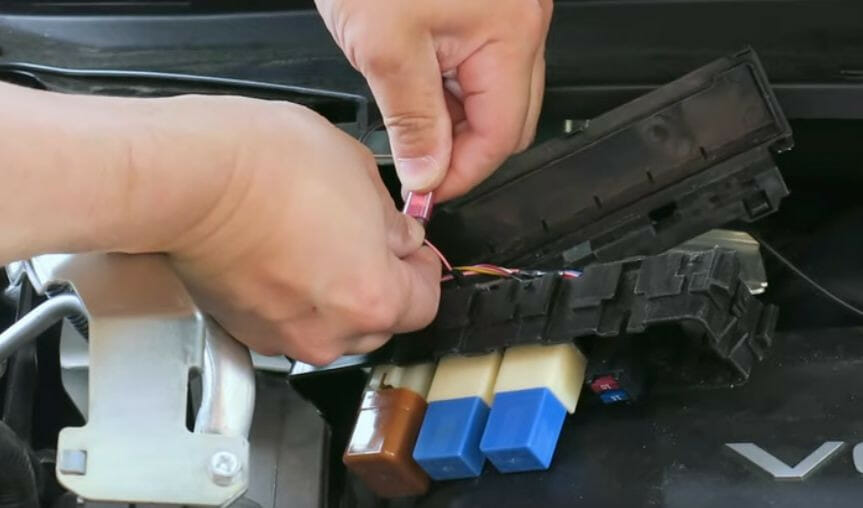
Step 3: Disconnect the Plugs
Disconnect the two plugs on either side of the BCM.
They’re usually tan and gray. You may need to remove the tape around the wire ends.
Step 4: Prepare the Pink/White Wires
Follow the pink/white wire in pin A5 of the gray plug about 4” and cut the wire.
Then, strip the wire ends. For the other wires, we will only splice without cutting the wires.
Step 5: Connect the Wires
Connect the pink/white wire from the BCM to the relay’s pin #30 using a butt connector.
Then, connect the pink/white wire from the harness to the relay’s pin #87.
Step 6: Prepare the White Wire
Follow the white wire in pin B6 of the gray plug about 4” and connect it to the relay’s pin #86 using a scotch lock.
Step 7: Follow the Pink Wire
Follow the pink wire on the tan plug-in pin E7 about 4” and connect it to the relay’s remaining pin, #85, using a scotch lock.
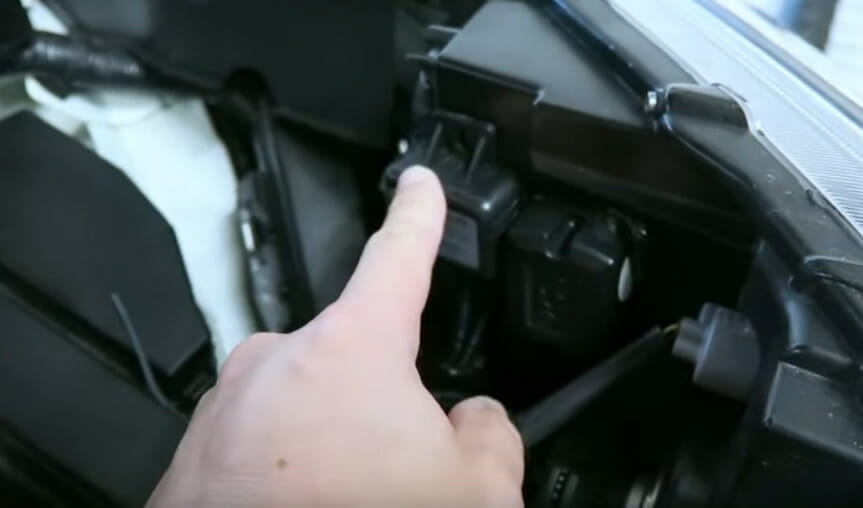
Step 8: Plug the Relay into the Socket
Now that you have made all four wire connections, you can plug the relay into the socket.
Step 9: Reconnect the Battery
Reconnect the battery and ensure the DRL is disabled.
Step 10: Replace the Cover and Seat
After confirming that the relay is disabled, secure the relay, put the fuse box cover back on, and replace the seat.
Using a DRL Controller
You can also use a purpose-built DRL controller to achieve the same but only for dimming the DRL.

However, the circuit can be modified to turn the DRL off completely with the headlights on. In this example, the user installed an additional pair of DRLs horizontally along the bottom. The installed DRLs are shown on the right in the picture below, and the DRL controller is on the left.
Requirements
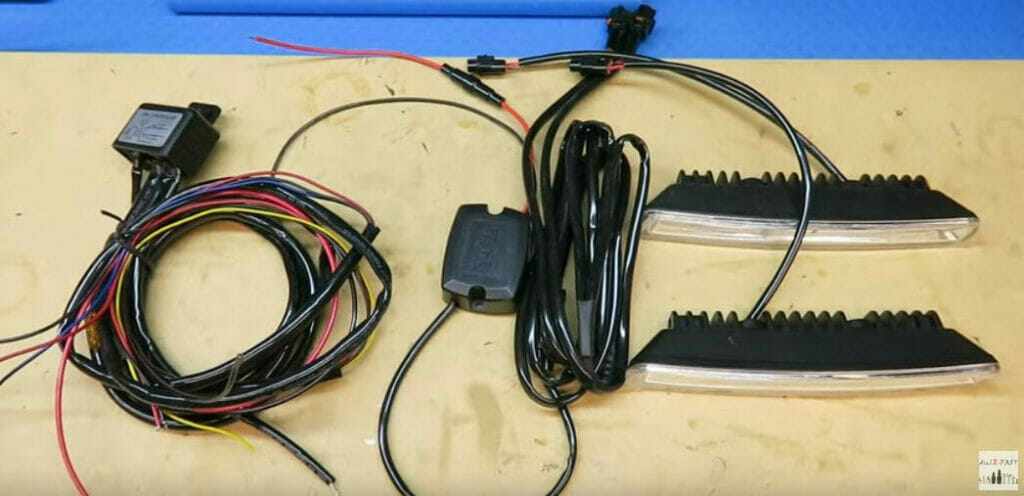
When the car is turned on, the DRL controller feeds 12 volts directly into the DRL driver and outputs full brightness. With the headlights turned on, the output is reduced to half the voltage, thus dimming the installed DRL to half brightness.
Step 1: Locate the Accessory Relay
The accessory relay provides the required 12 volts.
It may be marked ACC on the cover. The red wire provides a constant 12 volts, and the pink wire is a 12-volt switch that provides this output only while the ignition is turned on.
Step 2: Connect the Wire
Connect the wire for the installed DRL using a D-cap.
Step 3: Mount DRL Controller and Driver
Mount the DRL controller and driver near the fuse box.
You will see three wires from the DRL controller:
- The red wire is for power.
- The black is for the ground.
- The white wire will connect to the parking lights.
Connect the wires accordingly. You can use a wire loop to protect the exposed sections of the wires.
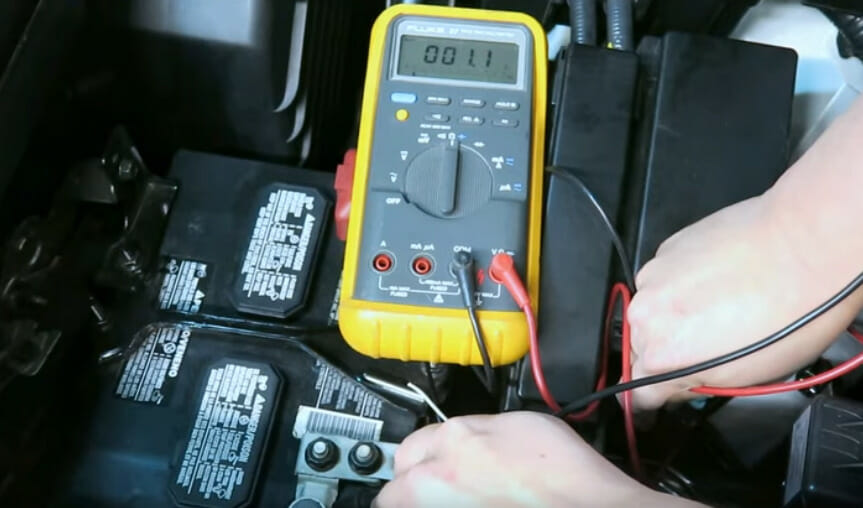
Step 4: Test the Ground
Remember to test the chosen ground before using it (see below).
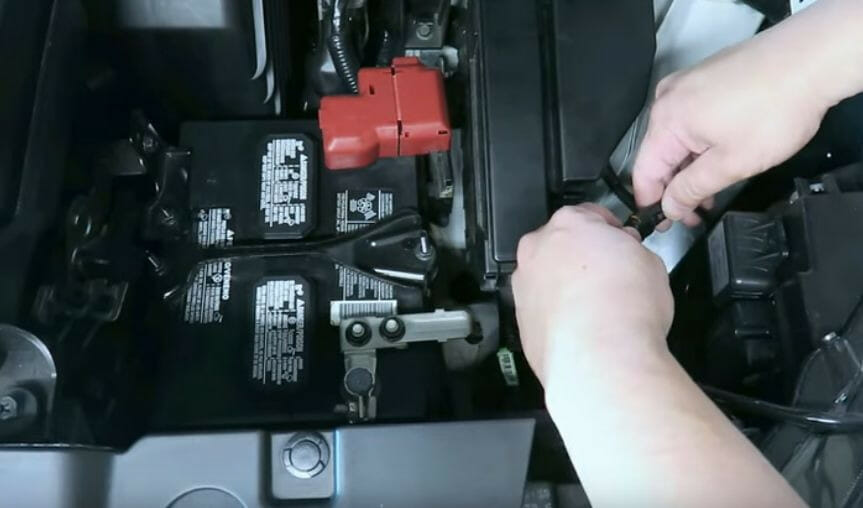
Step 5: Connect the DRL Harness and Driver
Connect the DRL wire harness to the output of the DRL driver.
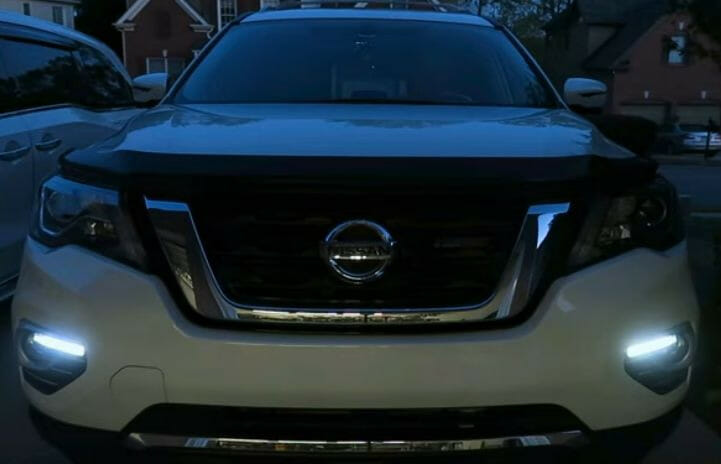
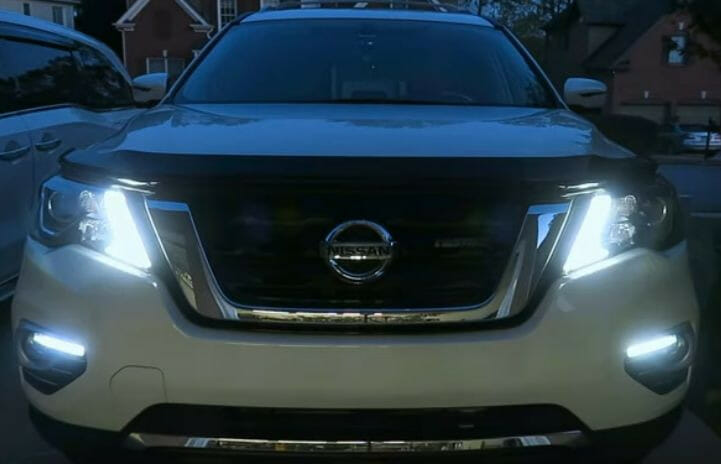
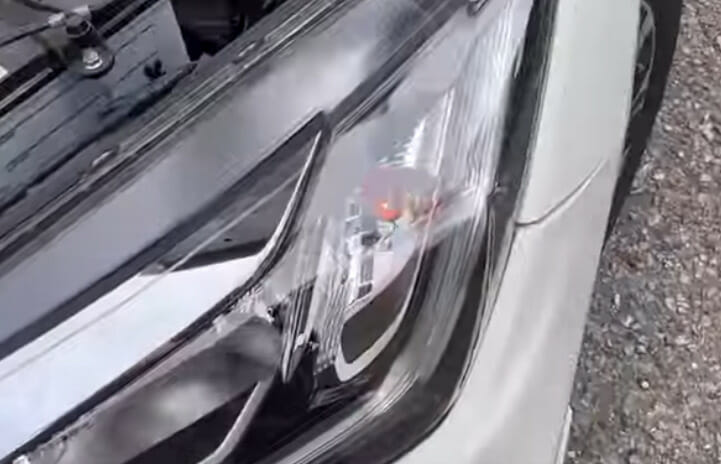
The Final Result
With the new DRL controller, it’s now possible to have either or both DRLs turned on, as shown below. The installed DRLs are horizontal, along the bottom, and the factory DRLs are vertical, next to the headlights.
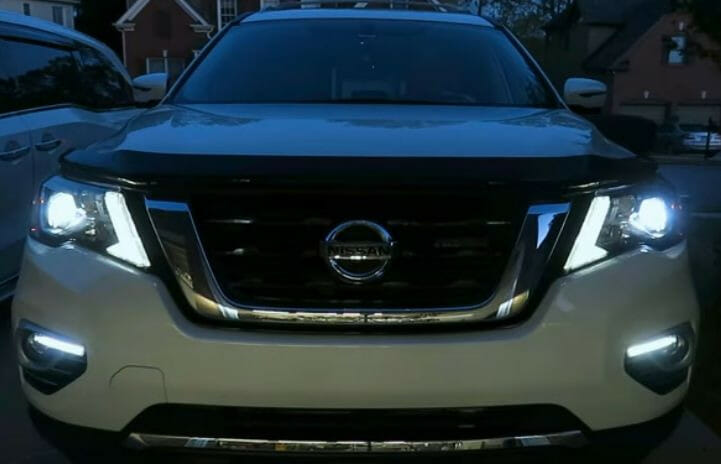
With the headlights now on, both DRLs are automatically dimmed.
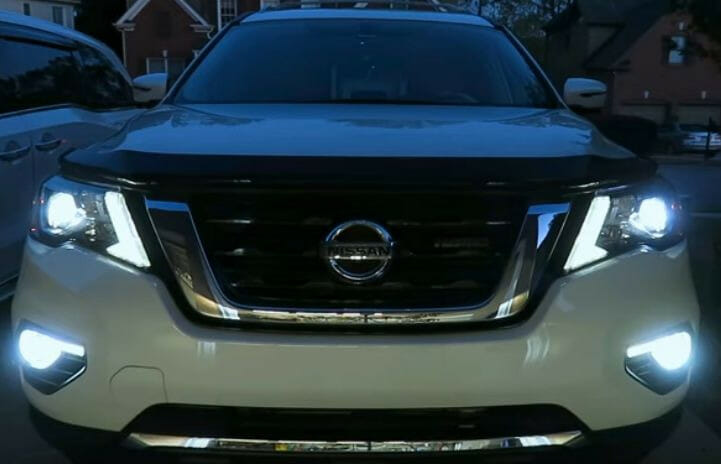
The DRLs also remain dimmed if the foglights are turned on.
Modification
The modification to make the DRLs turn off completely requires using a relay switch (as in the method described first).
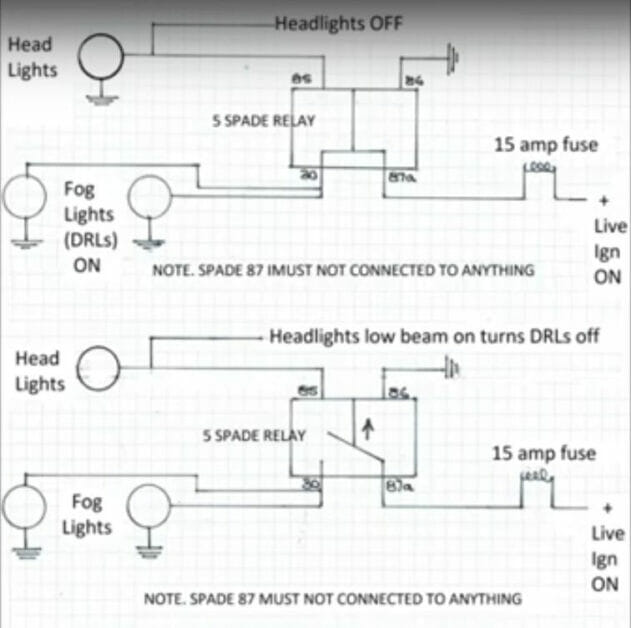
Here’s another diagram you may find useful to achieve this in which the fog lights are used instead for the DRLs. The DRLS will turn on while the ignition is on but will turn off whenever the headlights run. The fog lights can still be used independently when required.
This method uses a 5-spade relay but spade 87 is not connected to anything.
Turning a DRL Off Manually
Here’s how you turn the DRL off manually using a knob, if available:
Turn the headlight control knob to the “DRL Off” position to turn the DRL off. Turn it to the left to bypass the DRL or all the way to the left to turn the DRL off at night.
If you don’t have a knob to control the DRL, you might have to look for a “dome light” override button or control box. You may need to press the dome light override button more than once (between 3 and 5 times) to switch the DRLs off).

If you only have a control box, it may be mounted on the firewall and have a small connector attached. Simply remove that connector to disable the DRL.
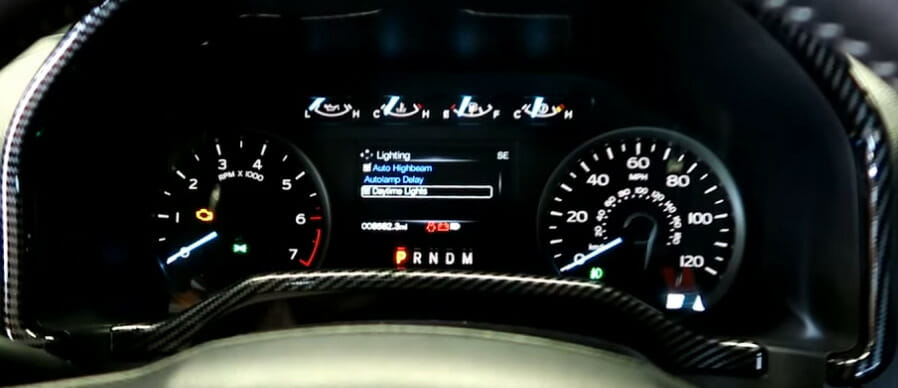
In a modern car, turning the DRL off is probably available via a setting, as in the Ford F150. It’s usually done like this, although the same options may differ, depending on your car:
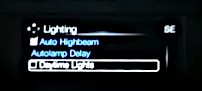
Select the option “Vehicle”, then highlight the option “Lighting” by pressing OK. You may see a checkbox next to “Daytime Lights” checked, which you will need to uncheck. Press OK to either enable or disable the DRL.
In one vehicle, the path to the setting was found here:
Settings > Advanced Settings > Vehicle > Lighting > Daytime Lights
Turning the DRL Off by Removing the Fuse
In this example, I will show how to turn off the DRL by removing the fuse.
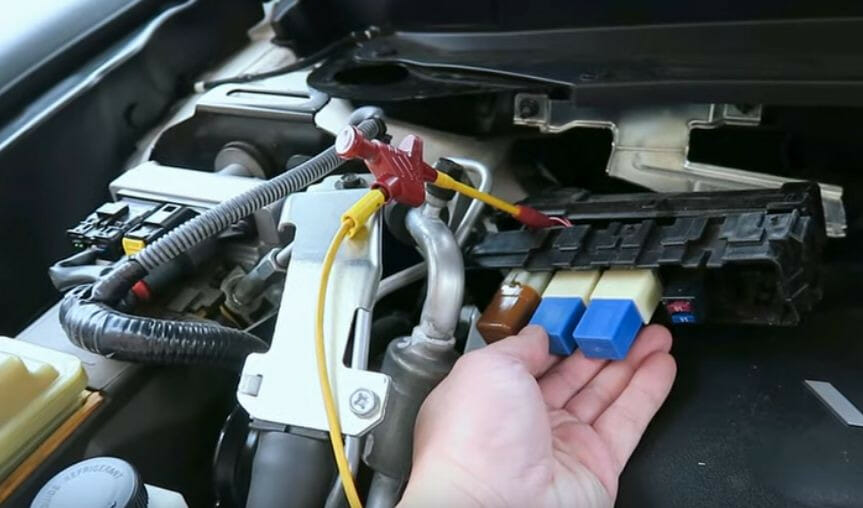
Step 1: Open the Fuse Box
Turn the car off. Then, open the hood and the fuse box.
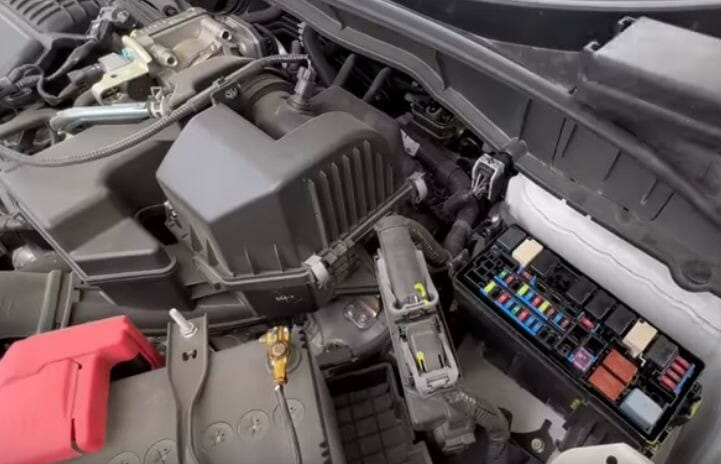
Step 2: Locate the Fuse
Locate the right fuse for the DRL. It’s the third from the right (brown) in the top row of this particular car.
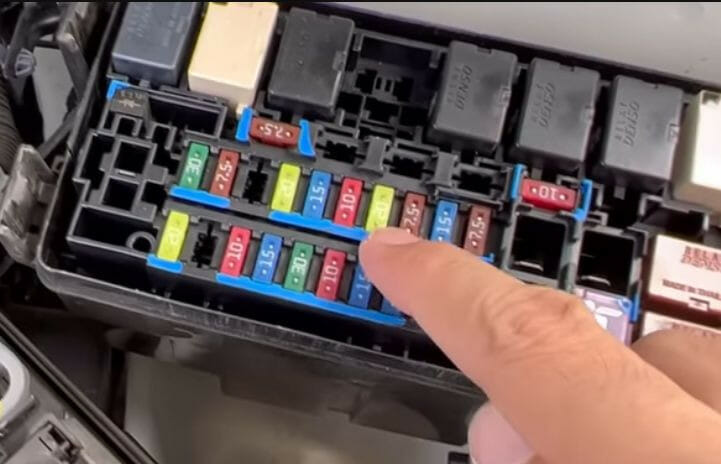
Step 3: Remove the DRL Fuse
Use the fuse remover, which should be provided under the fuse box cover, to remove the DRL fuse.
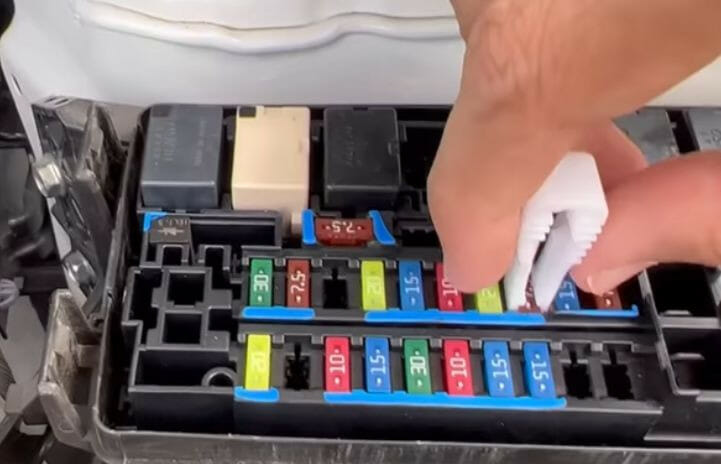
The DRL should now be off.
It would be best to replace the fuse to allow the DRL to turn on again.
Understanding DRL Electronics
The DRL is typically a low-beam or high-beam headlight system at reduced intensity.
Theoretically, one way to achieve dimmed lighting is by passing the current through a resistor while the DRL is active. The resistor can then be bypassed during normal headlight operation.
In practice, the DRL is controlled by either a control module, relay, or BCM. We used the latter in the above method.
Control Module or Relay-Controlled System
Cars usually have a control module or a relay to turn the DRL.
The DRL is activated while the engine is running and allows normal full headlight operation when the headlights are turned on. LED lights are a common choice for DRLs because of their low power consumption.

A control module sends a duty-cycled output to a low- or high-beam headlight.
It is usually a reduction of about 50-70%. Where a high-beam headlight is used for a DRL, and while it is activated, there may be an option to turn it off from within the instrument cluster. The high-beam indicator may be lit dimly during a DRL operation.
With the addition of an ambient light sensor, the DRL can be made to light the low-beam headlights at full intensity when low-light conditions are met [Hollembeak, 2017]. As light intensity increases, the sensor’s resistance decreases, and the module allows the voltage across the DRL diode assembly and the low-beam headlights. The voltage drop then makes the low-beam headlights come on with low intensity.
In contrast, the DRL assembly senses high resistance if the light intensity decreases. The module then closes the relay, allowing the low-beam headlight to illuminate at full intensity.
The parking brake functions as the input in most DRL systems. The DRL feature turns off when the parking brake is applied while the engine runs.
BCM-Controlled System
In a BCM-controlled system, the BCM determines the switch position and gives inputs to the DRL module.
The DRL module sends a PWM signal to the headlight beam when the ambient light is above a critical level but below the level required for full headlights while the switch is in the auto or off position. The headlight will turn on at a reduced illumination level.
If the parking lamp is used for the DRL function, the headlight’s position will determine whether the headlights are on. IF THE HEADLIGHTS ARE OFF, the BCM or DRL module turns on the park lamp relay.
Troubleshooting
Several possible causes of a DRL failing to turn on or off.
You must investigate by following the possible causes according to how your DRL system is wired. The possible causes are [Hollembeak, 2017]:
- A faulty headlight switch input or circuit
- Parking brake switch or circuit
- Defective relay or relay module
- Power circuit to DRL relay or relay module
- Module ground circuit
- System voltage to the module
- Faulty controller
- Bus network failure
Use a scan tool or DMM to diagnose either type of DRL system described above. Refer to your vehicle owner’s manual and determine the proper power and ground circuit operations.
Note that where the parking brake is used as the input for the DRL system, the DRL may be disabled even if a faulty parking brake switch indicates that the parking brakes have been applied.
References
Barry Hollembeak. Today’s technician. Automotive electricity & electronics. 7th edition. Cengage Learning. 2017
DRL controller. https://www.amazon.com/Mobilistics-Daytime-Running-Universal-Control/dp/B01IFWNSFI
Video References
612 Motorsports
Dial2fast
John William
Youcanic
Wajahat Ahmad Garage