10 min read
How to Wire an RV Plug for 30 Amps (Step-by-Step)
So, you’ve got an RV and are ready to hit the road. But wait a minute – do you know how to wire that RV plug for 30 amps? If not, don’t worry! I’m here to help.
Key Takeaways – Wiring a 30 amp RV plug involves understanding its configuration: the black wire is the hot wire, the white wire is the neutral, and the green or bare wire is the ground. After stripping the ends, securely attach each wire to its designated terminal in the plug.
In this article, I’ll guide you through each step necessary for wiring a 30-amp RV plug. So grab your tools, and let’s get started!
Tools and Materials Needed for Wiring an RV Plug
Hey there! Before diving into the heart of wiring your RV plug, let’s chat about your needs. Trust me, prepping beforehand will make all the difference.
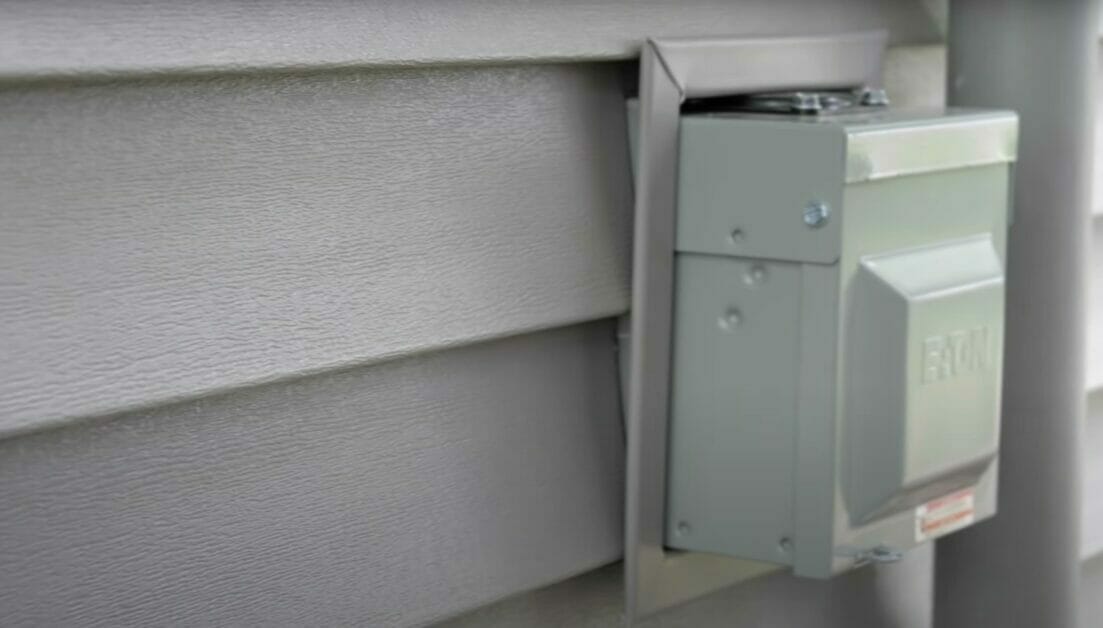
First off, you’re going to need a 30-amp RV plug. It’s specifically designed to handle the power demands of your rig without any hiccups.
Then, it’d be best to have some electrical wires – usually, 10-gauge wires do the job well.
Now let’s talk tools:
| Tool | Description |
|---|---|
| Wire Strippers | Used to strip insulation from electrical wires. |
| Screwdrivers | Used for turning screws. Available in Flathead and Phillips types. |
| Circuit Tester | Used to test whether an electrical circuit is live or not. |
| Electrical Tape | Insulating tape is used to wrap and secure electrical connections. |
| Pliers | Gripping and cutting tools are used for various tasks, such as bending wires. |
That covers our toolbox check-in! I promise these tools will make your wiring project much easier and safer!
Safety Precautions to Consider Before Beginning
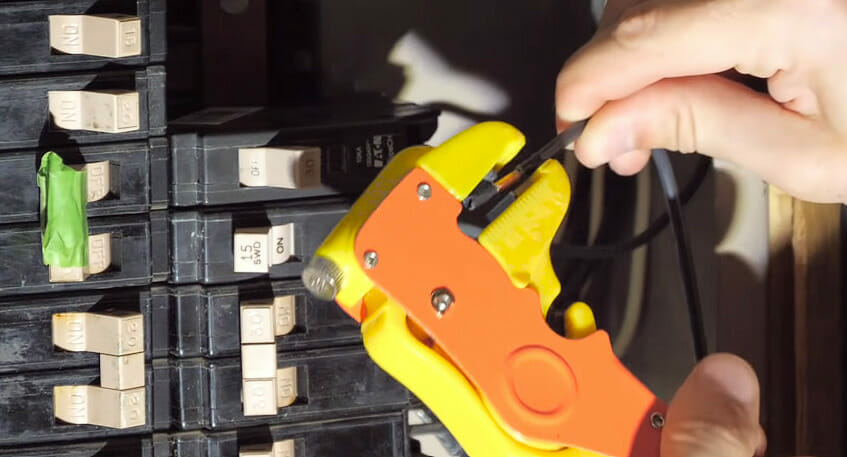
First off, ensure that the main power supply is turned off. This might seem like a no-brainer, but it’s easy to forget when you’re eager to get going.
Next up – tools! Make sure that your tools are suitable for electrical work and are in good condition:
- Insulated screwdrivers
- Wire strippers
- Voltage tester
Having the right gear can make all the difference between a smooth operation and a trip to the ER.
Another point I’d like to drive home is on personal protection equipment (PPE). You’ll need:
- Rubber gloves
- Safety glasses
This isn’t just fancy talk – these items are essential for protecting yourself from potential electric shocks or eye injuries from flying debris.
Lastly, remember: You don’t have to do this alone. If you feel unsure or unsafe during this process, don’t hesitate to call in a professional electrician.
I’m all about DIY-ing it up, but nothing beats proper training and experience regarding safety.
So there you have it—my top tips on staying safe while wiring your RV plug for 30 amps.
Now grab those rubber gloves, and let’s get started!
Steps to Wiring a 30-Amp RV Plug Effectively
Once you’ve got everything ready, let me walk you through each step.
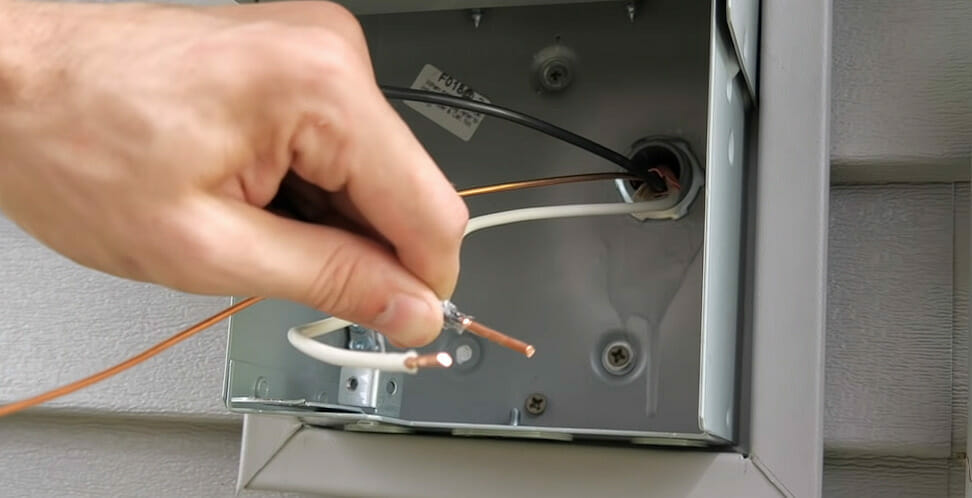
Step 1. Start by cutting four pieces of your 10-gauge wire to length. Make sure they’ll reach from your breaker box to where the RV plug will be located.

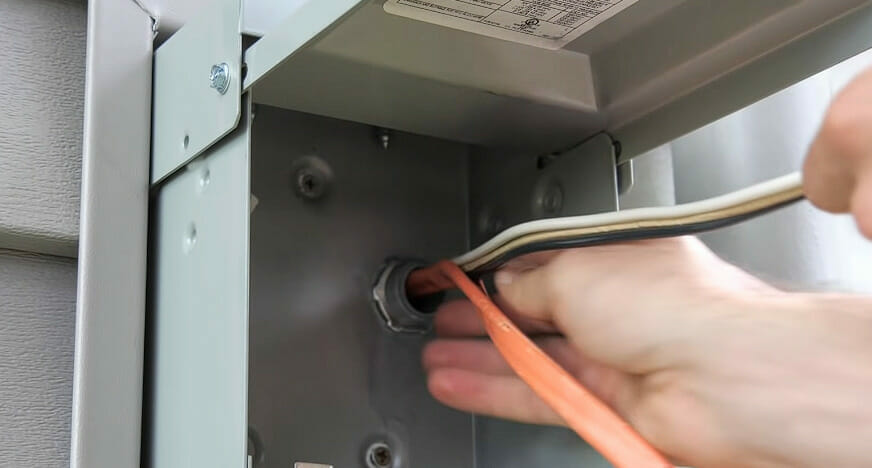
Step 2. Now strip about half an inch off both ends of each wire with your stripper – but be careful not to cut into the copper wire!
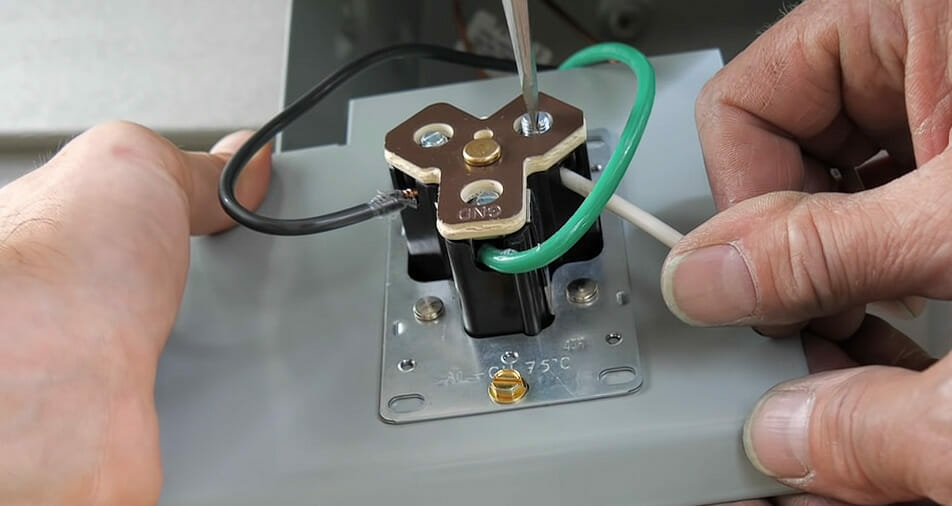
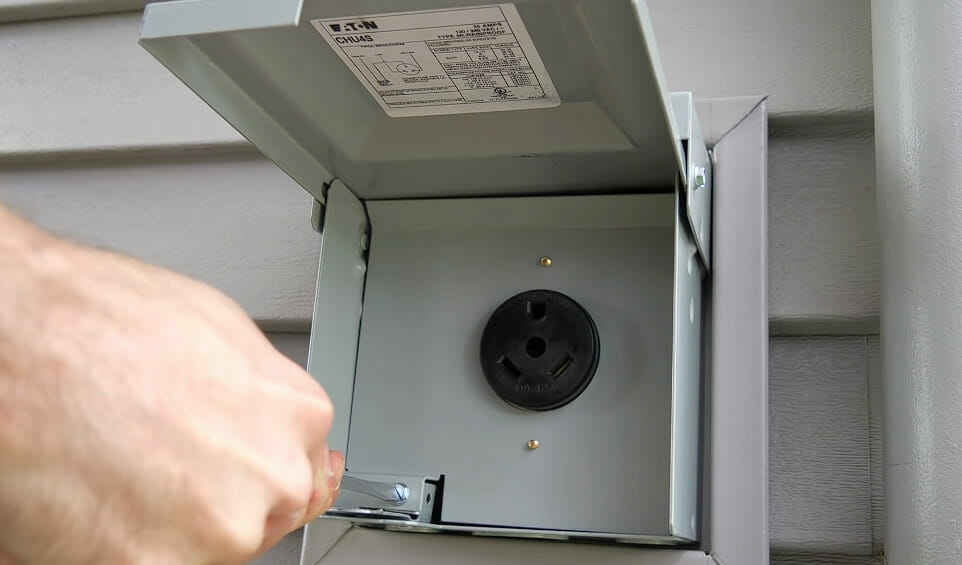
Step 3. Next up is connecting these wires to your new 30-amp RV plug – and here’s how:
- Connect the green wire to the ground terminal
- The black one goes on a brass (or ‘hot’) terminal
- White is for neutral terminal
- And finally, bare grounding wire goes into the base ground bus
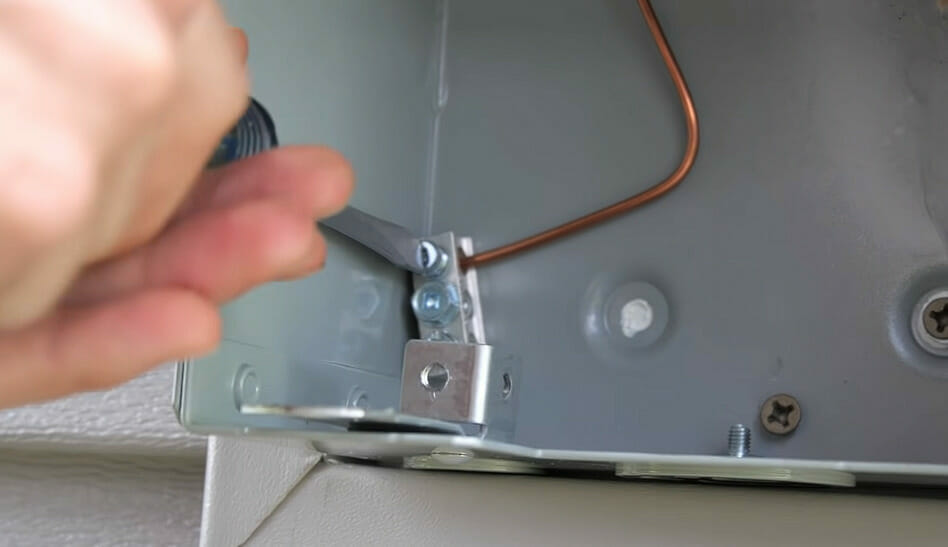
Step 4. Attach the receptacle cover once all wires are secured, and screw it in tightly.
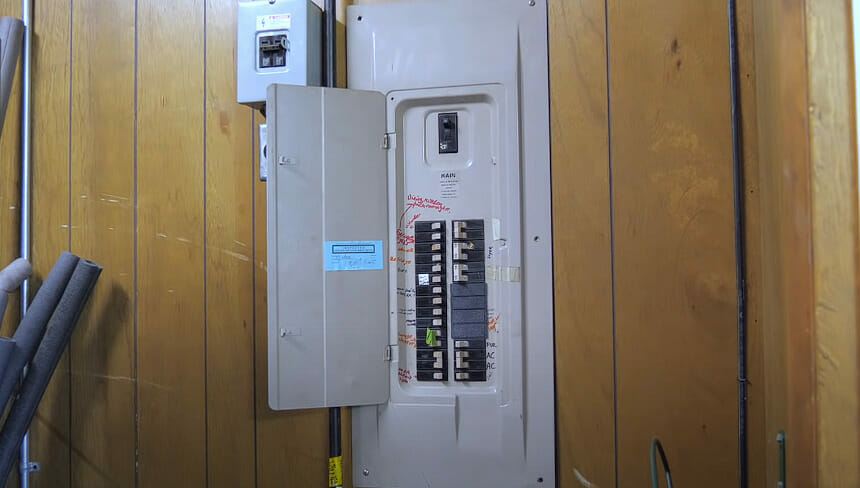
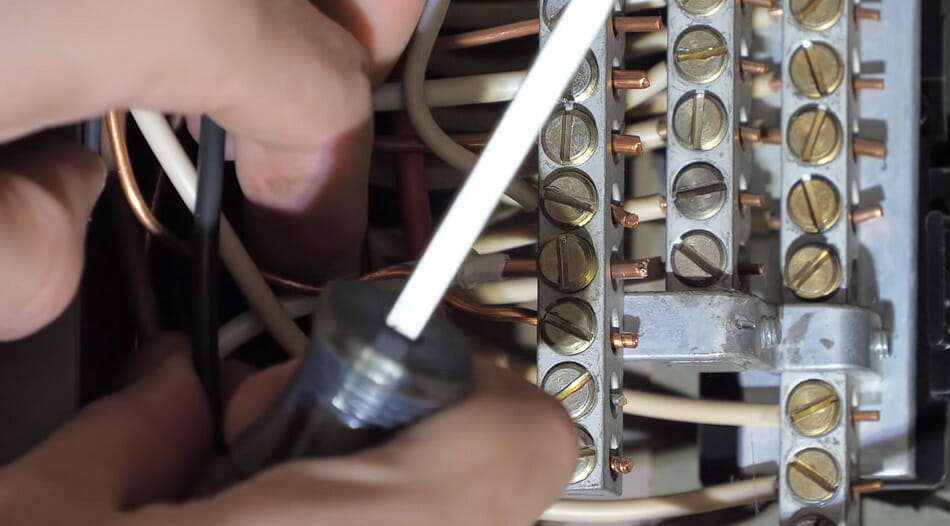
Step 5. Finally, connect the other ends of these wires back to your breaker box like before; bare for ground, black for hot, and white for neutral.
And voila! You’ve wired up a 30-amp RV plug like a pro!
Verifying the Connection and Testing
Now that we’ve wired our RV plug for 30 amps, it’s time to verify the connection and do a bit of testing. This step might seem daunting, but trust me; it’s easier than you think.
Step 1. First off, we’re going to check all the connections again. Give everything a good once-over. Make sure your green wire is connected to the grounding post, your white wire is on neutral, and your black (or red) wire is hooked up to hot.
Step 2. Turn on your power source, but keep your appliances off for now.
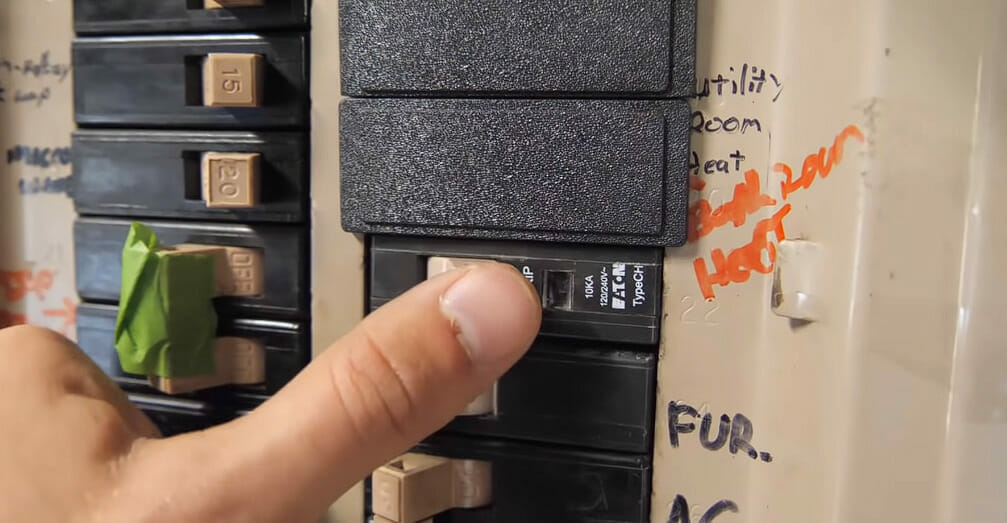
We’re just looking for basic juice flowing in the right direction. If there are no sparks or unusual smells (which would indicate you need professional help), then you’re probably good!
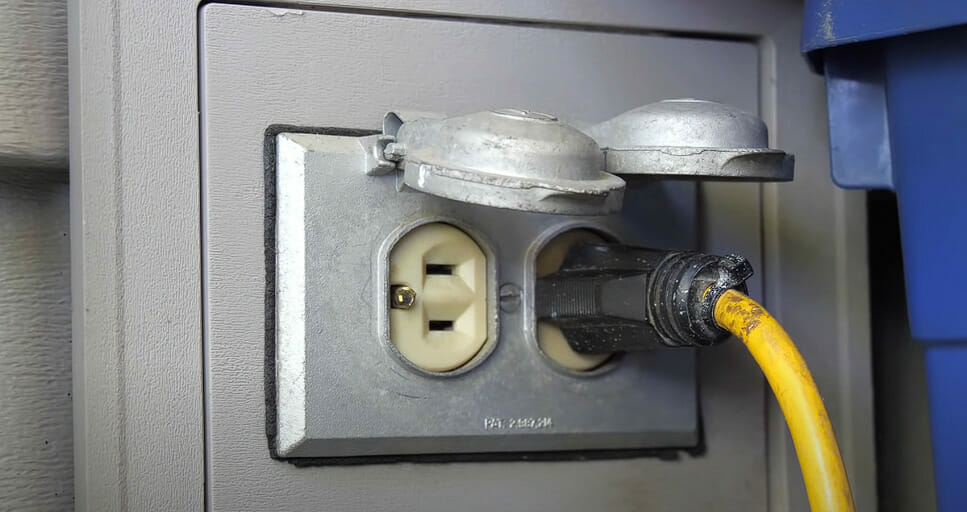
Step 3. Now we’ll move on to testing with an RV surge protector.
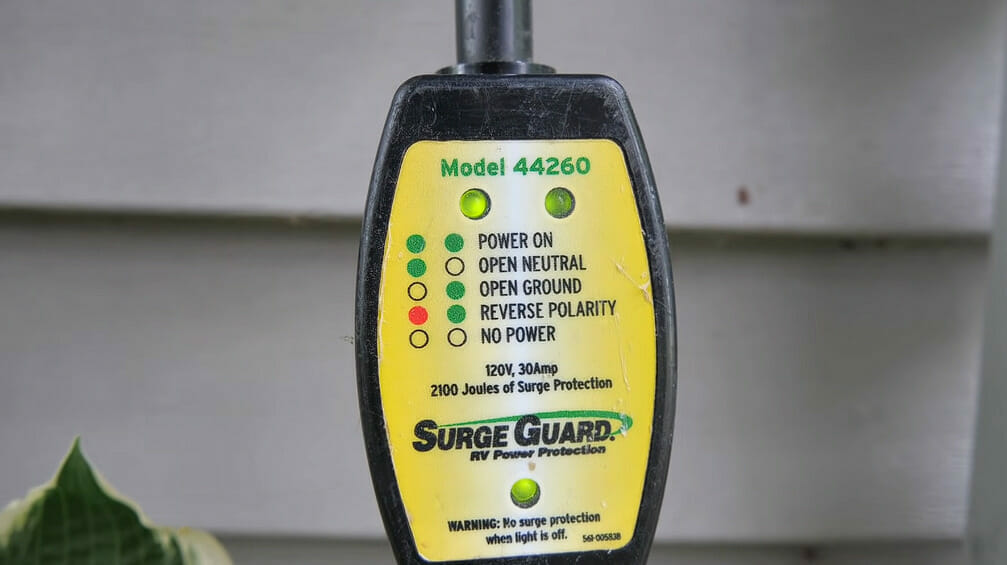
Don’t worry if you don’t have one handy – they’re not too pricey and easy enough to find online or at a home improvement store.
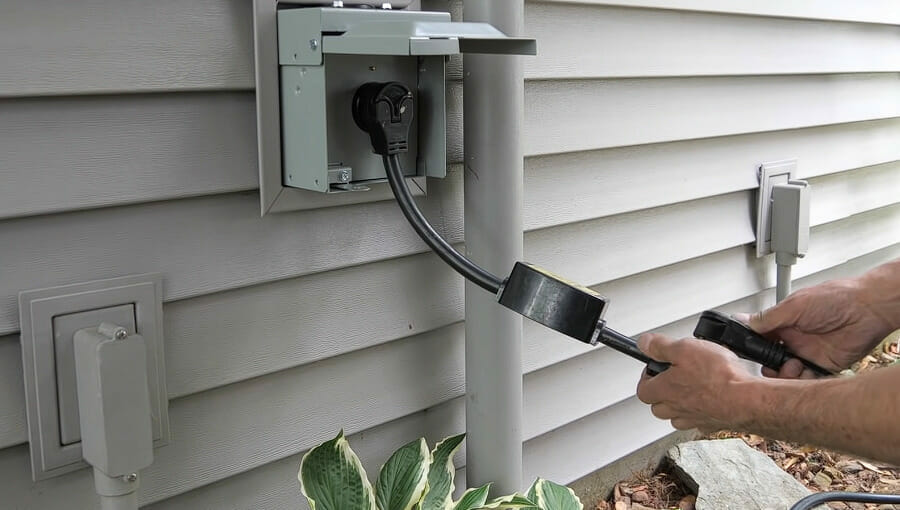
Here’s what you’ll be checking:
- A green light means “Go!” Your wiring job was successful.
- Red light? Hold up there! There could be issues with reversed polarity or open ground.
- No light? That indicates no power is coming through.
| Indicator | Status |
|---|---|
| Green Light | Wiring Successful |
| Red Light | Reversed Polarity/Open Ground |
| No Light | No Power |
Remember, safety comes first! If something doesn’t seem right during this process – call in a pro immediately. It’s better to play safe than risk any harm.
Potential Troubleshooting Scenarios
“Uh-oh!” That’s usually the first thing that pops into my head when something isn’t working right.
Wiring an RV plug for 30 amps is no different – things can go wrong. Don’t sweat it! I’m here to walk you through some common issues and how to fix them.
First off, let’s talk about no power. If you’ve got everything hooked up, but nothing is coming on, we need to check a few things:
- Make sure your RV is connected to a source of electricity.
- Check if your RV’s circuit breaker or fuse has tripped or blown.
- Verify that all connections are tight and secure.
If all these check out and there’s still no juice flowing, it might be a faulty plug or a problem with your cable.
Now, onto intermittent power situations. You know those times when the power keeps cutting in and out? Yeah, they’re super annoying! Here’s what you can do:
- Look for loose connections again.
- Inspect your cord for any damage, like cuts or fraying.
- Ensure that your plug fits snuggly into the outlet.
Next up on our troubleshooting list – overheating plugs. If your plug feels too hot to touch after being plugged in for a while, here are some potential causes:
- The receptacle could be worn out.
- There may be corrosion on either end of the connection points.
No one wants their vacation ruined by electrical complications, so remember these tips next time you’re prepping your RV for an adventure.
Maintenance Tips for Prolonged Plug Life
We’ve made it to the final section of our RV plug-wiring guide. Now that you’re a pro at wiring your 30-amp RV plug, let’s talk about maintenance.
Keeping your plugin in top-notch shape is just as vital as wiring it correctly in the first place.
First things first – cleanliness is key! Dirt and grime can reduce conductivity and even lead to corrosion over time. So do yourself a favor and keep that plug spick-and-span. A clean toothbrush works wonders for this task.
Next up on my list? Regular inspection. I can’t stress enough how important it is to regularly check your plug for any signs of wear or damage. Also, ensure no loose wires are hanging around, which could cause a short circuit or worse!
Now let’s talk about those pesky water elements. If you’re camping out in rainy weather or near water bodies, ensure your plugs are dry before connection because water and electricity aren’t best buddies!
Here are some quick tips:
- Keep your plug clean
- Regularly inspect for damages
- Avoid contact with water
Lastly, invest in a high-quality 30-amp RV cord with an integrated surge protector because who doesn’t love some extra protection?
So there you have it! By following these simple maintenance tips, I guarantee you’ll significantly extend the life of your 30-amp RV plug. After all, taking care of what takes care of us should always be our priority.
References
Organizations:
- Recreational Vehicle Industry Association (RVIA). https://www.rvia.org/
Websites:
- The RV Forum Community. https://www.rvforum.net/
- RV How-To’s. https://www.gorving.com/tips-inspiration/how-tos
Video References:
Fate Unbound