11 min read
How to Wire a Garbage Disposal (8 Steps)

This article shows how to wire a garbage disposal in 8 steps.
Whether you’ve bought one for the first time or are replacing an old unit, I’ve detailed all the steps necessary to wire it.
Quick Summary: Precorded garbage disposals don’t need wiring. Otherwise, you may only need to add a plug or connect its wires as follows:
Splice the two black (hot) wires together, then the two white (neutral) wires, and finally connect the green wire to the ground terminal on the unit.
Additionally, I’ve covered what you need to know about the type of circuit, outlet, wire, and circuit breaker required and given tips to help you maintain it well.
Important Considerations
Type of Circuit (Shared or Dedicated)
The type of circuit you should arrange for your garbage disposal depends on its horsepower (HP) rating.
- If it’s less than 1HP, it can usually share a circuit (with a non-heavy load), so you can wire it to an outlet and plug it in on an existing circuit.
- Install it on a dedicated circuit if it’s 1 HP and used frequently.
- If it’s more than 1HP, go for a dedicated circuit.
If you install the garbage disposal on a dedicated circuit, a 15-amp one will suffice for up to a 1/2HP unit. Consider a 20-amp circuit for a 1HP unit, and arrange a 20-amp circuit (outlet, wire, and breaker) for one greater than 1HP.
A dedicated circuit makes it possible to use the garbage disposal without worrying about the total load on the circuit and the risk of tripping the breaker. Don’t share it on a circuit with another heavy load, such as a cooker or dishwasher.
Outlet, Wire, and Breaker
The garbage disposal’s HP rating and the type of circuit will determine what outlet, wire, and breaker you need.
The NEC code doesn’t specify whether garbage disposal must have a GFCI outlet, but see the manual for what the manufacturer recommends. If it states you must install a GFCI outlet, do so; otherwise, a regular outlet will do according to its amperage or wattage. It might still be worthwhile installing a GFCI one to provide greater protection.
The garbage disposal’s wattage is typically between 500 and 1,500 watts.
Whether it requires a 15- or 20-amp circuit, I recommend using a 12-gauge wire. But if it’s a lightweight garbage disposal (under 1HP), and you have an existing 15-amp circuit with a 14-gauge wire, you can wire an outlet for that.
The circuit breaker must correspond to the type of circuit. So, install a 15-amp breaker on a 15-amp circuit or a 20-amp one on a 20-amp circuit.
Requirements
Tools and Materials
You will need some or all of the following tools and materials:
- Cord assembly (if not included with the unit)
- Pliers
- Screwdriver
- Voltage tester
- Wire nuts
- Wire stripper
Safety Precautions
Turn off the circuit breaker if the garbage disposal is going to be hardwired. If it’s a shared circuit, it’s usually with a dishwasher, so look for the dishwasher label in the panel.
Test the circuit using a voltage tester to ensure there is no current.
You don’t have to turn the breaker off if you only need to attach a plug. Still, do not plug it in until it’s fully wired.
Before You Start Wiring
The procedure covers both types (plug only and direct wiring).
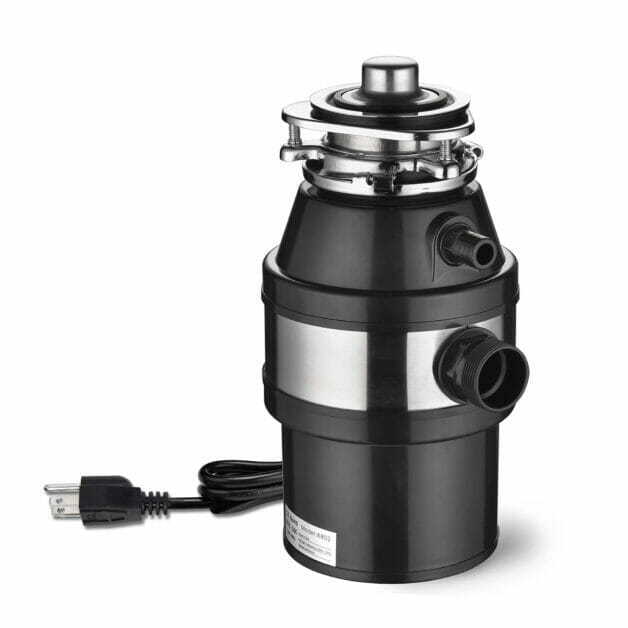
But if the garbage disposal is already corded, usually lightweight like the 1/2HP one below, you don’t need to wire anything. Just install it, plug it in, and use it right away.
Procedure for Wiring a Garbage Disposal
If you’re replacing an old garbage disposal with a new one and want to use the old cord and connector (because many don’t come with them), start from the beginning (Step 1) after disconnecting the old unit.
If your new unit comes with a cord and connector, or you will use a new one, start from Step 3.
Step 1: Inspect the Cord and Connector
Only use an old cord and connector if they are fine.
They must not be damaged. Minor signs of wear don’t matter, but don’t use it if there are any cuts or burn marks.
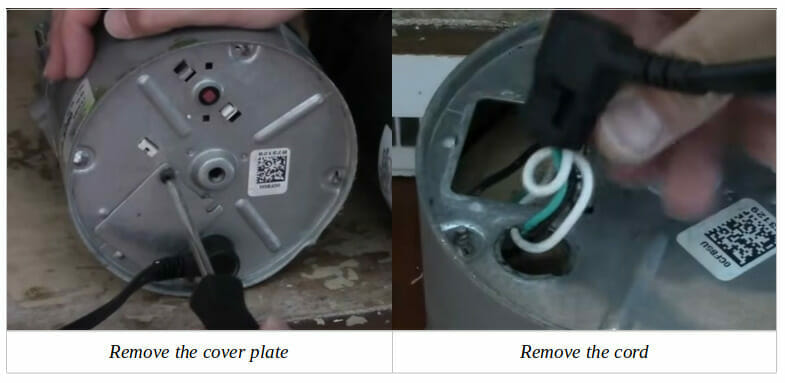
Step 2: Remove the Cord and Connector
If the old cord and connector are fine, remove them from the old garbage disposal.
First, remove the cover plate. Usually, it’s only held by a single screw. Check the cord again, this time by doing a continuity test. Pull the cord out gently from the terminals or spliced connections if it is confirmed as reusable. You can cut it near the wire nuts instead, or remove them and strip the wire ends.
Also, unscrew the ground wire from the ground terminal and the connector holding the cord in place.
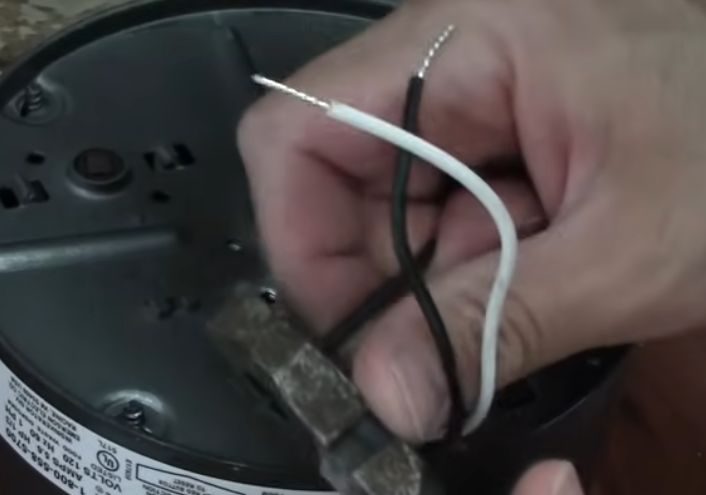
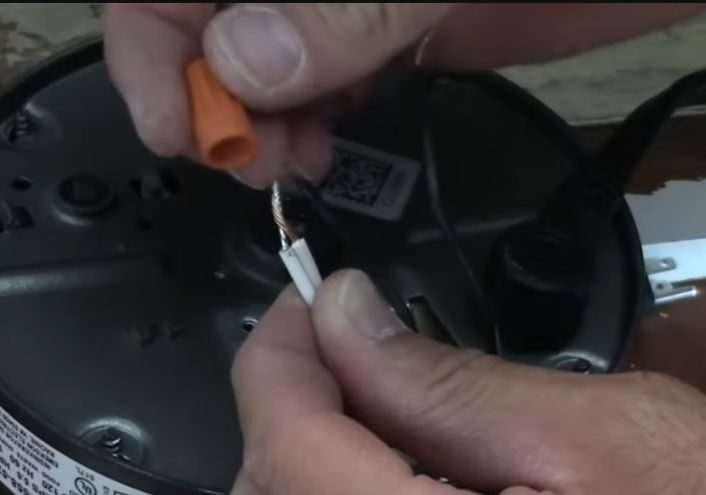
Step 3: Strip the Wires
Strip the wires of the cord using a wire stripper.
Remove about half an inch of the insulation. But leave the ring connector on the green (ground) wire if it has one.
If connecting the wires to an outlet, form hooks at their ends instead and attach them to the right terminals (see Step 6).
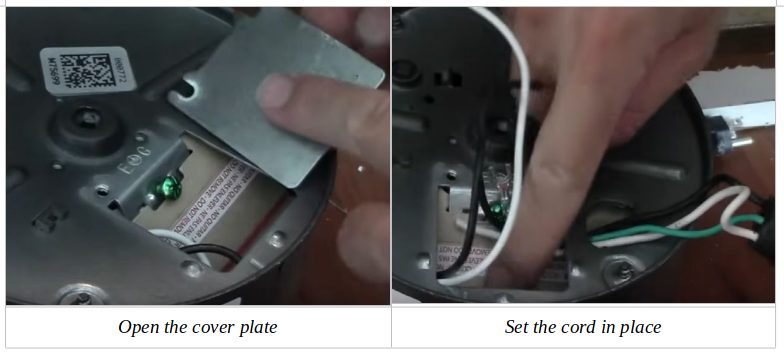
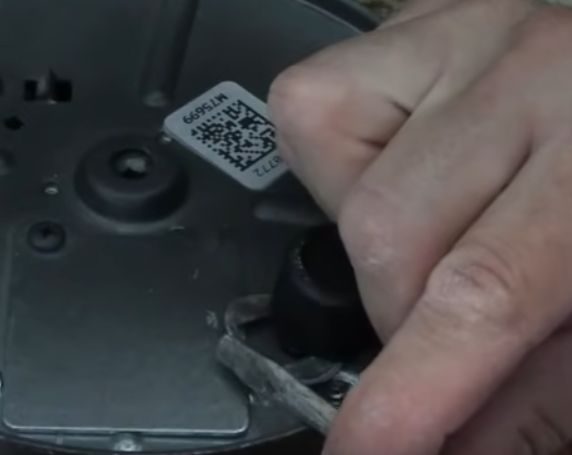
Step 4: Set the Cord or Cable
Remove the cover plate on the new garbage disposal and set the cord in place by tightening the connector (or clamp) over it using pliers. The cord or cable must pass through the connector to hold it in place.
Step 5: Splice the Wires
Splice the cord’s hot (black) and neutral (white) wires to the same wires from the garbage disposal.
So, pair the two black wires and the two white ones separately. Hold them firmly in parallel, twist the conductor, then attach a wire nut and twist further until the connection is tight.
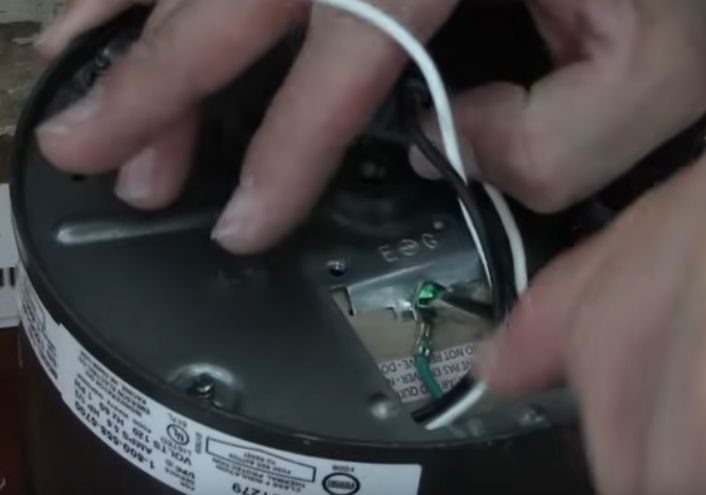
Step 6: Connect the Wires
Connect the cord’s green wire to the garbage disposal’s grounding terminal. Either a ring terminal or hook should connect easily. Then, screw the grounding terminal clockwise until it is tight.
If wiring the garbage disposal wires to an outlet:
- Connect the black wire to the brass screw terminal for the hot connection.
- Connect the white wire to the silver screw terminal for the neutral connection.
- Connect the green wire to the green screw terminal for the ground connection.
Step 7: Attach the Cover Plate
Tuck the wires inside the compartment and reattach the cover plate once the wiring is done. Or, close the plug if you wired it for an outlet.
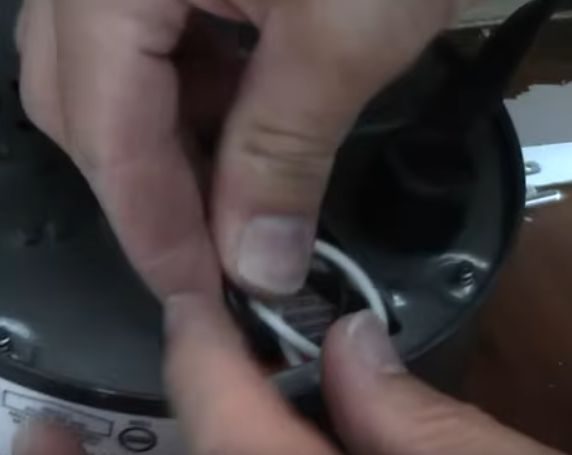
You might also need to push in the retaining ring to hold the cord in place on the outside.
Step 8: Set the Garbage Disposal
Set the garbage disposal into place after you’ve done the wiring.
Only turn it on after it is wired and installed.
More About Garbage Disposals
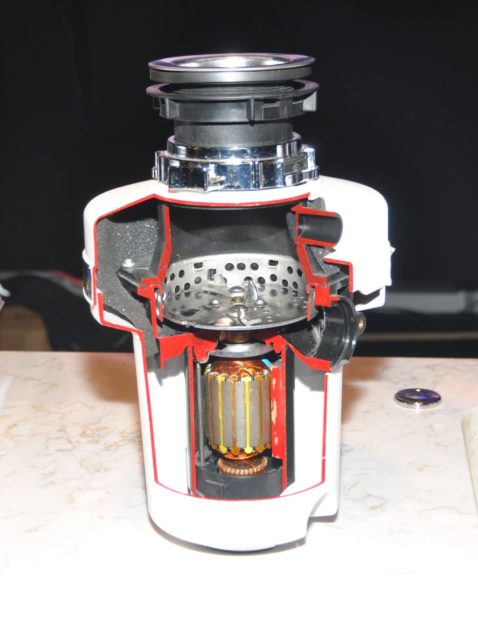
An electrical garbage disposal is a useful kitchen appliance that breaks leftover food into fine particles.
It does this by its grind ring, which liquefies the food. After the food is ground, water flushes the particles into the wastewater pipeline. A garbage disposal is a canister with a compartment for the waste food and a motor in the bottom that spins an impeller plate.
Tips for Using a Garbage Disposal
These tips for using a garbage disposal will help you minimize electrical maintenance on it and avoid rewiring it. Here are the tips:
- Don’t put large quantities of food in the garbage disposal. Only put small quantities of food into the disposal at a time. If the food scrap is too large, cut it into pieces first.
- Avoid solid or non-food items. Never put anything in the garbage disposal other than food or water, especially not bottles or cans. They can damage the garbage disposal and get stuck inside the waste pipeline. Bones are too hard for garbage disposals, as they can harm the blades. Throw such items in the trash can instead.
- Keep the water running a little longer. After disposing of the garbage, flush the water approximately 30 seconds after turning it off. Add cold water, which helps harden the fat and grease, allowing them to move freely through the waste pipeline. Use warm water when the garbage disposal is switched off.
- Use cold water frequently. Clean the garbage disposal regularly to ensure it lasts long.
FAQ: Let’s Nail Down Some Garbage Disposal Questions!
Q: Hey folks, have you ever wondered if garbage disposals are universal?
A: You betcha! While most disposals have a universal mount, they aren’t all created equal. Double-check your sink type and disposal mount before diving into that installation!
Q: I’ve been hearing some rattling noise from my disposal. What’s going on?
A: Whoa, hold on there! It could be something lodged inside, maybe a fork or a bone. Turn off the power, then peek inside or gently feel around. Just remember, safety first!
Q: Let’s say I got a new disposal. Do I have to rewire the whole thing?
A: Great question! You can reuse the old cord and connector if your old and new units have the same power requirements. Just ensure they’re in good shape and there are no signs of damage.
Q: Okay, let’s settle this once and for all – cold or hot water for the disposal?
A: Alright, team, here it is, Cold water while running! It helps keep the grease solid so it grinds and moves along smoothly. But remember to use warm water when it’s off to clean it out.
Q: Any tricks up the sleeve for a fresh-smelling disposal?
A: Oh, I’ve got just the thing! Toss in some citrus peels – lemon, orange, or lime – run the disposal, and let the fresh scent take over! An old lemon wedge from your iced tea will do the trick!
Q: Can we use chemicals or bleach to clean the garbage disposal?
A: Hold on, hotshot! While it might sound like a quick fix, harsh chemicals can damage the disposal and your pipes. Stick to natural cleaners, like baking soda and vinegar, for a safe and clean solution.
Q: What if I’ve got a clog? How do I tackle that beast?
A: Clogs can be a real pain, but no sweat! First, turn off the power. Use a plunger or a disposal wrench (NOT your hands) to try and loosen the jam. If it’s being extra stubborn, you might need to call in the cavalry or, y’know, a plumber.
References
Website Resources:
- Corded 1/2HP garbage disposal. https://www.desertcart.com.kw/products/20243970-yescom-1-hp-2600-rpm-continuous-feed-household-plug-in-garbage-disposer-for-kitchen-waste-disposal-operation-black
- Cross-section of a garbage disposal unit. https://commons.wikimedia.org/wiki/File:Garbage_disposal_unit_%2803%29.JPG
Video References:
AdamDIY