12 min read
How to Test a TPMS Sensor Battery (2 Methods)
This article shows how to test a TPMS (Tire Pressure Monitoring System) sensor battery in two ways, with and without using a TPMS scan tool. It also covers how to replace the battery.
TPMS sensors are useful devices for monitoring tire pressure. Although the battery lasts 5-7 years, it can weaken sooner if exposed to high temperatures or frequently driving over potholes. TPMS sensor batteries are typically 3V button cells; some can be tested easily, but not all.

Key Takeaways: You can test a TPMS sensor battery by checking the TPMS sensor’s voltage output using a TPMS scan tool, but it might not detect it if the battery is too weak. If you have one with a removable battery, you can use a multimeter instead. The voltage should not exceed 2.5V if it’s a 3V battery. You can also remove those inside a silicon-sealed housing but will have to scratch off the silicon and detach the battery using a soldering iron. Once removed, replace the part, seal it back, and reattach it. Otherwise, replace the entire TPMS sensor.
I will go into more detail below.
The TPMS Sensor
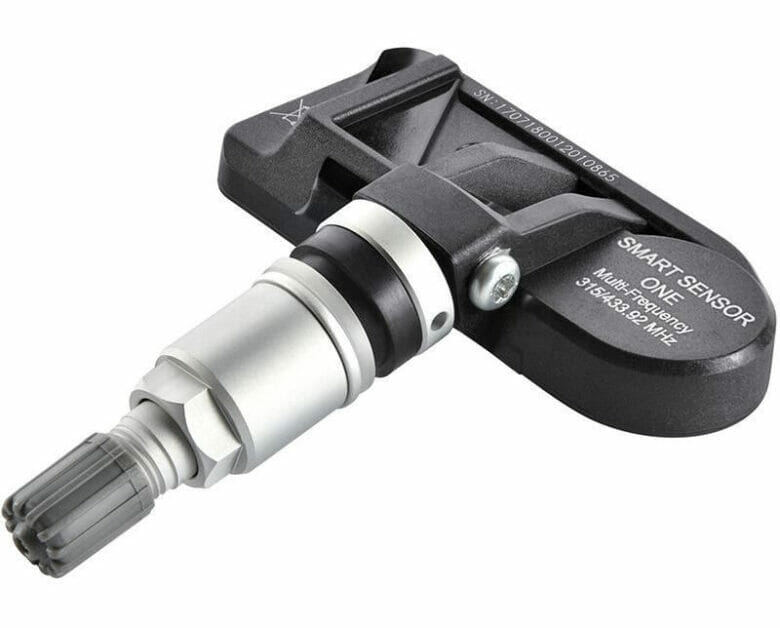
The TPMS sensor measures tire pressure and is designed to alert you when it is too low or high (+/-~25% or more).
It transmits data to a central receiver in the ECU using RF, then displays the information on the dashboard. This is important because low tire pressure can create unsafe driving conditions. Also, if one sensor indicates a problem, you could soon face problems with the other sensors if you don’t deal with the first one.
It might not necessarily be a problem with the tire, although it could be, as it might be a weak or dead battery. Regardless, you will have to test the TPMS sensor battery to find out and ensure you get accurate readings, especially if the tire looks fine.
The battery inside a TPMS sensor is typically a 3-volt li-ion battery or a 1.25-volt NiMH one, lasting 5-10 (max. 12) years. However, the battery life can shorten if the TPMS sensor is exposed to high temperatures or if you drive the car frequently over potholes.
But not all TPMS sensor batteries are designed to be replaced because some are embedded in a silicone sealant and sealed inside a molded plastic housing. This is done to protect the batteries from water and chemicals.
If so, you must open the housing and carefully remove the sealant.
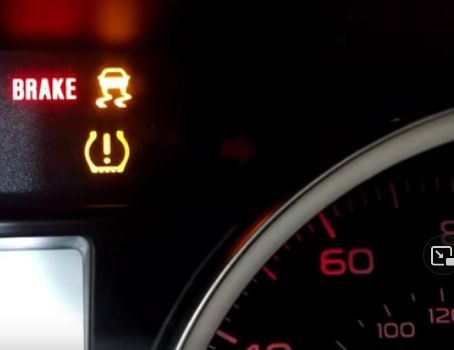
TPMS Location and Warning Light
The TPMS sensor is on the wheel, and the warning light appears below. In some vehicles, you will see the letters T-P-M-S instead.
Testing a TPMS Sensor Battery by Removing the Battery
You will need to open the sensor to test a TPMS sensor battery by removing the battery.
You will require a flat-head screwdriver and a multimeter.
Step 1: Remove the TPMS Sensor
Firstly, remove the TPMS sensor from the tire. You may need to use a flat-head screwdriver.
Step 2: Remove the TPMS Sensor Battery
Snap-in and clamp-on TPMS sensors seal the battery inside a molded plastic housing.
If you remove the battery from these TPMS sensors, you might compromise the assembly’s shock resistance and its ability to be protected from exposure to water and chemicals. In these cases, you have alternative options to consider (see further below).
The battery is embedded inside the sensor housing in the older band-style sensors. The batteries are most easily removed from the valve stem cap-type TPMS sensor, where you only have to remove the battery cover.
Step 3: Test the Voltage
Proceed to test the battery’s voltage once the battery is removed from the TPMS sensor.
Follow these steps:
- Set the multimeter to measure DC volts.
- Attach the positive (red) probe to the battery’s positive side.
- Attach the negative (black) probe to the battery’s negative side.
- Interpret the reading on the multimeter. It should be close to 3 volts if it’s a li-ion battery or 1.25 volts if it’s a NiMH one. The minimum values for the TPMS to operate normally are around ~2.5V and ~1V, respectively.
Step 4: Replace the Battery
Replace the battery if the voltage is significantly less than the rated value.
If, after replacing the battery, the TPMS sensor light goes off, then the issue is the battery. When replacing the battery, make sure the contact points are clean.
Step 5: Reattach the TPMS Sensor
Apply a thin layer of grease before reconnecting the sensor, as it will help to prevent corrosion.
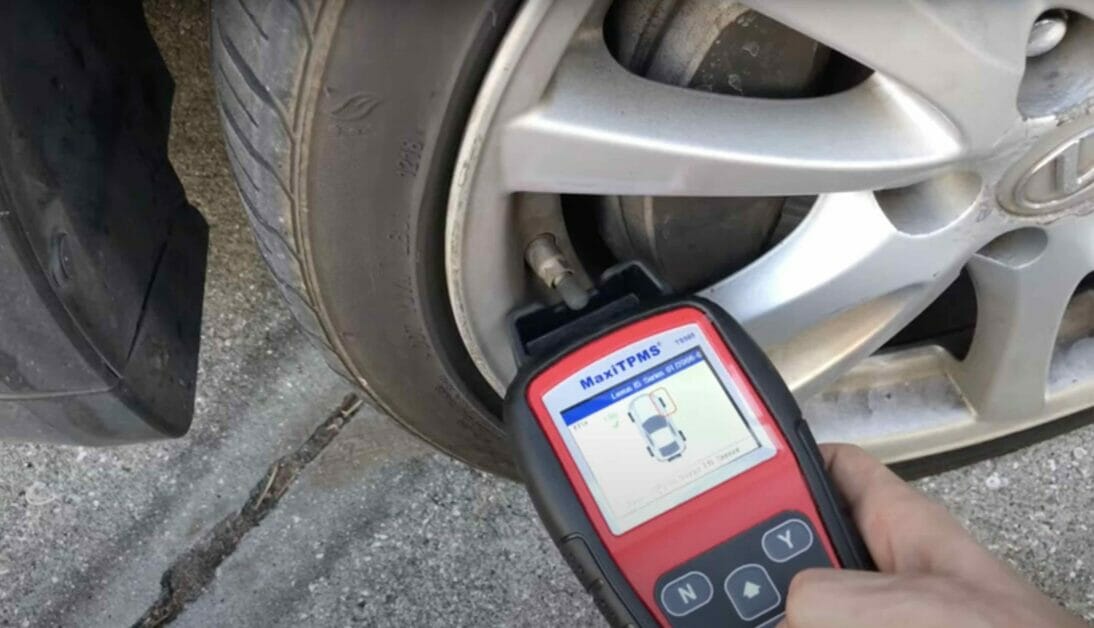
Testing a TPMS Sensor Battery Using a Scan Tool
To test a TPMS sensor battery using a TPMS scan tool, you won’t need to open the sensor unless you want to change the battery.
You will require a TPMS scan tool to test the sensor’s voltage. Simply bring it close to the location of the TPMS sensor. If the battery inside the TPMS sensor has enough power, the scan tool should detect it.
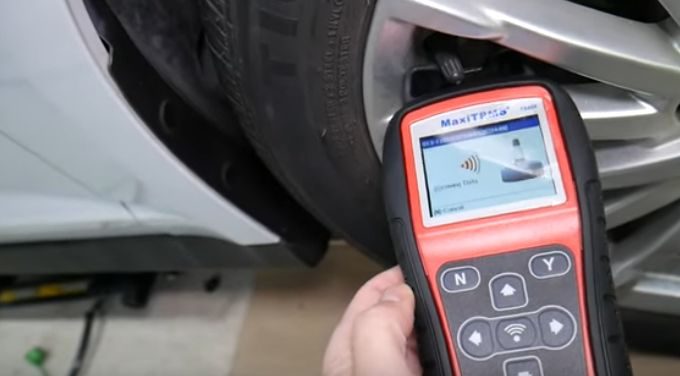
Alternatively, you can access the vehicle’s computer through the OBD-II port using a compatible vehicle diagnostic computer, but this may require the help of an auto-electrician.
If the TPMS scan tool cannot detect the TPMS sensor at all and to change the battery, proceed with the steps below. Otherwise, skip them and replace the old TPMS sensor with a new one. Nowadays, you can buy universal, configurable, and programmable TPMS sensors.
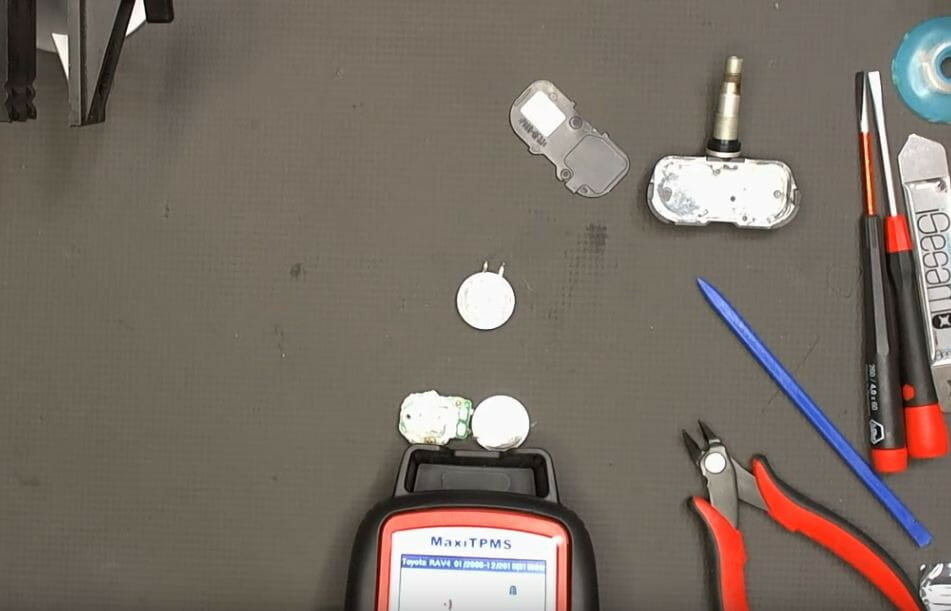
Changing a Sealed TPMS Sensor’s Battery
If the TPMS sensor is bad, you can either replace it with a new sensor or try replacing the battery, which you will have to open.
Only proceed with the steps below if you can open the sensor and change its battery.
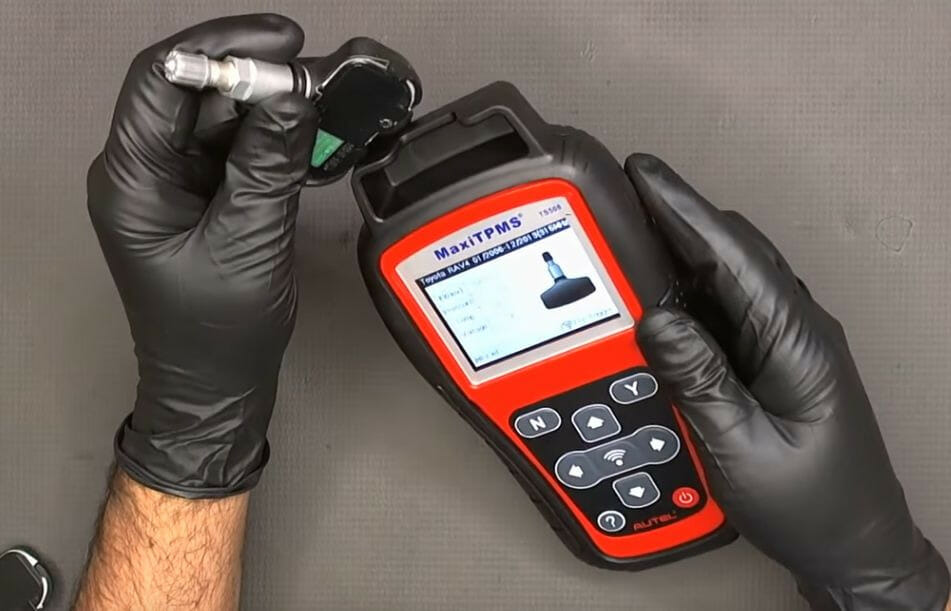
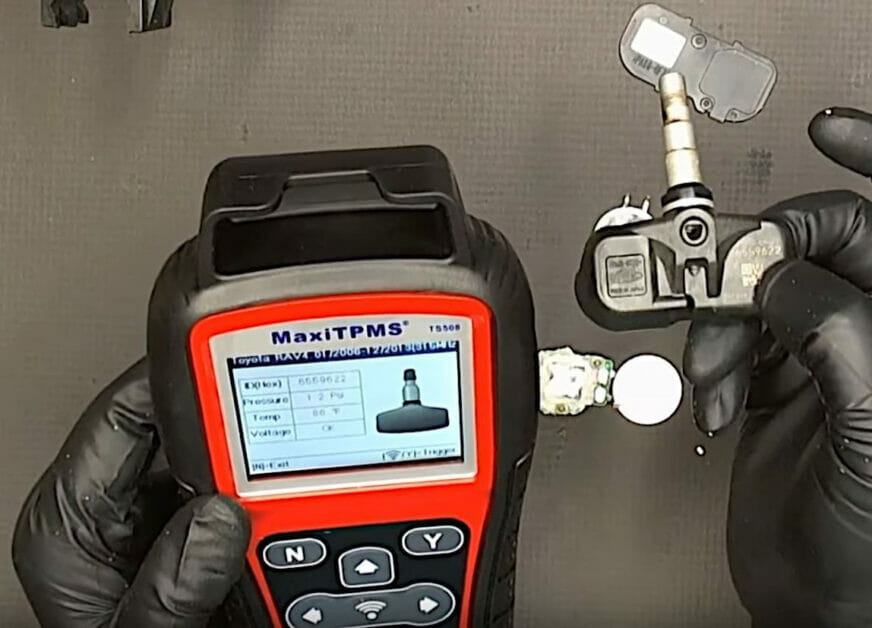
Step 1: Remove and Bring the TPMS Sensor Closer
After removing the TPMS sensor from the wheel, you must bring it closer to the top of the scan tool, as shown below.
The TPMS sensor is bad if it doesn’t register. The scan tool will only detect signals from the sensor if the battery is good.
Step 2: Remove the Cover
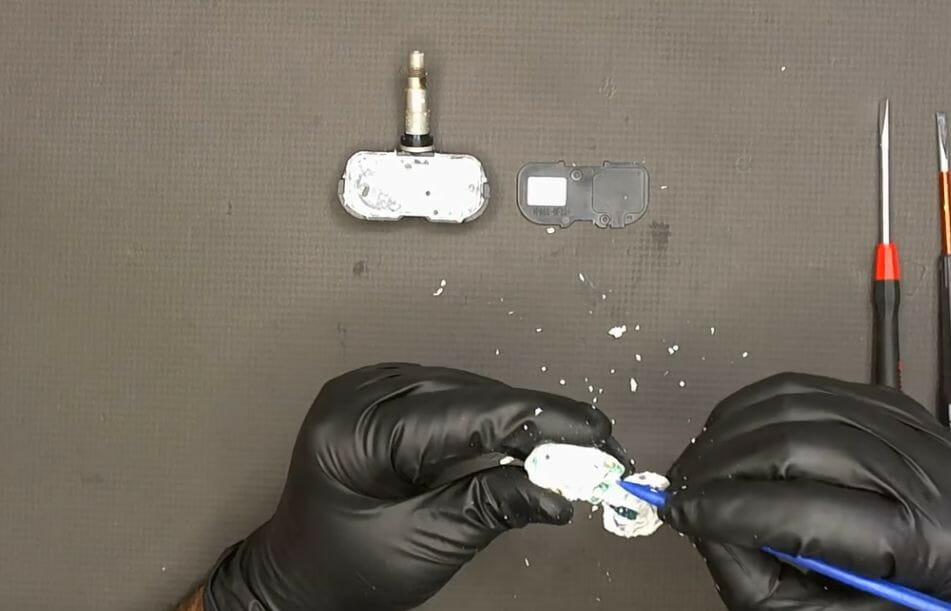
After removing the back cover, you will see the sensor covered with silicon.
Step 3: Scratch Off the Silicon
Scratch the silicon off to access the battery. Be careful not to damage the circuit board.

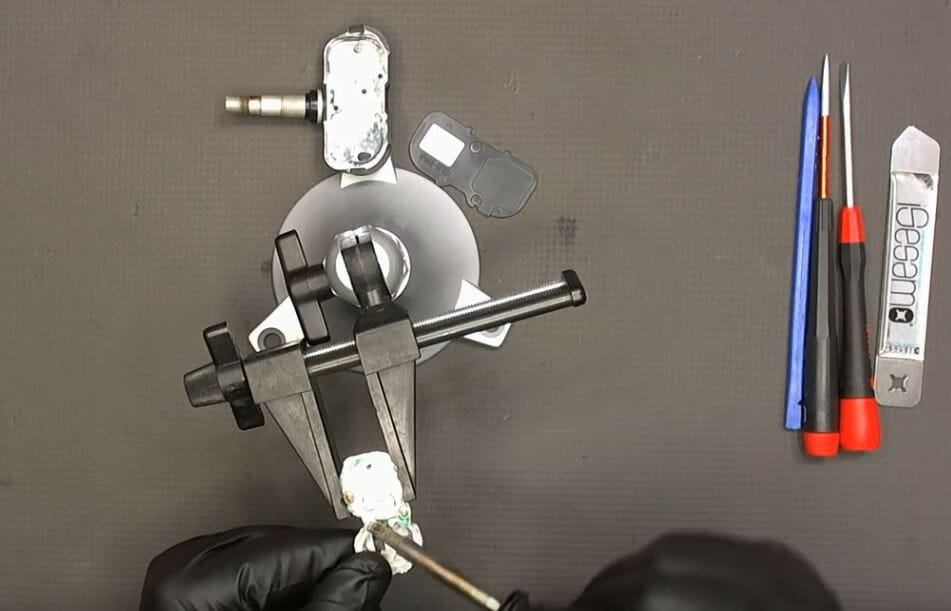
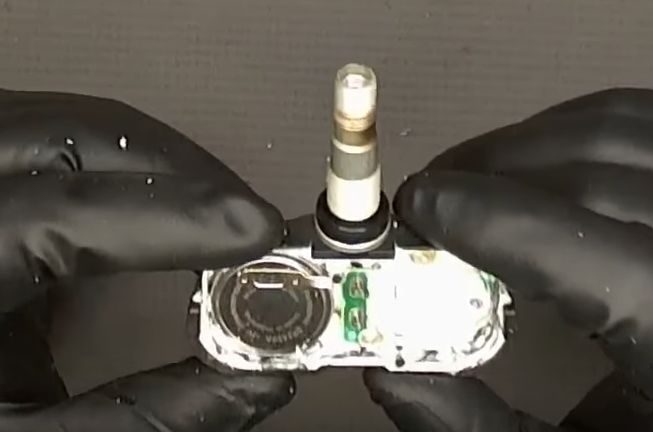
Step 4: Clean the Central Area
After removing the internal part, clean the central area, as shown in the picture below, using a plastic tool to not damage the circuit board.
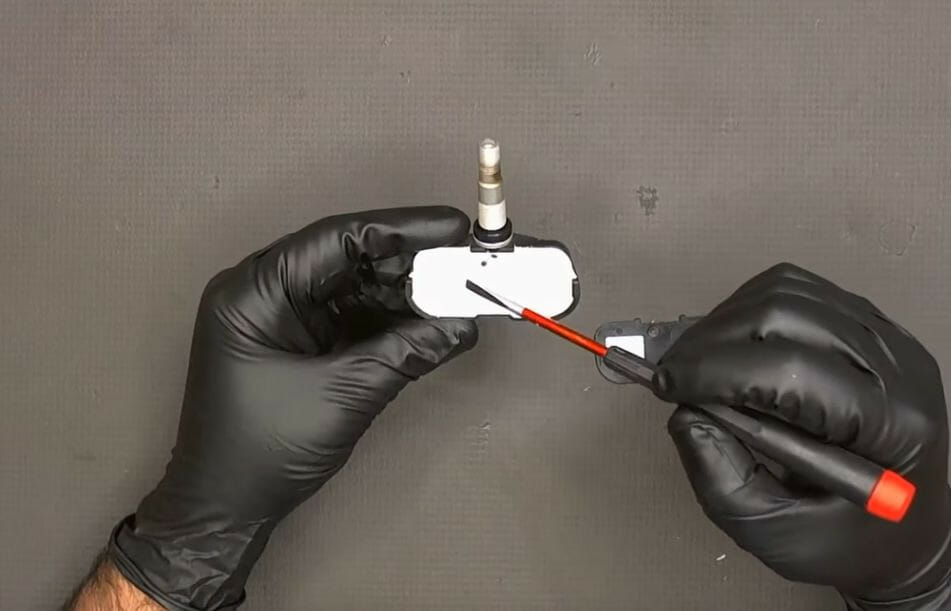
Step 5: Detach the Battery
Use a soldering iron to detach the battery from the circuit board. Clean the connections afterward.
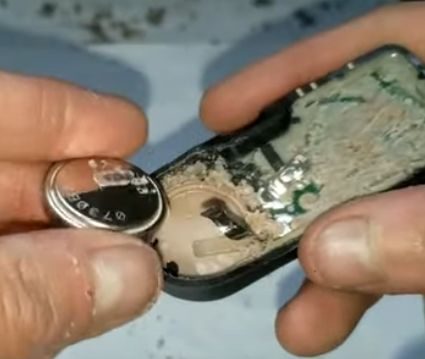
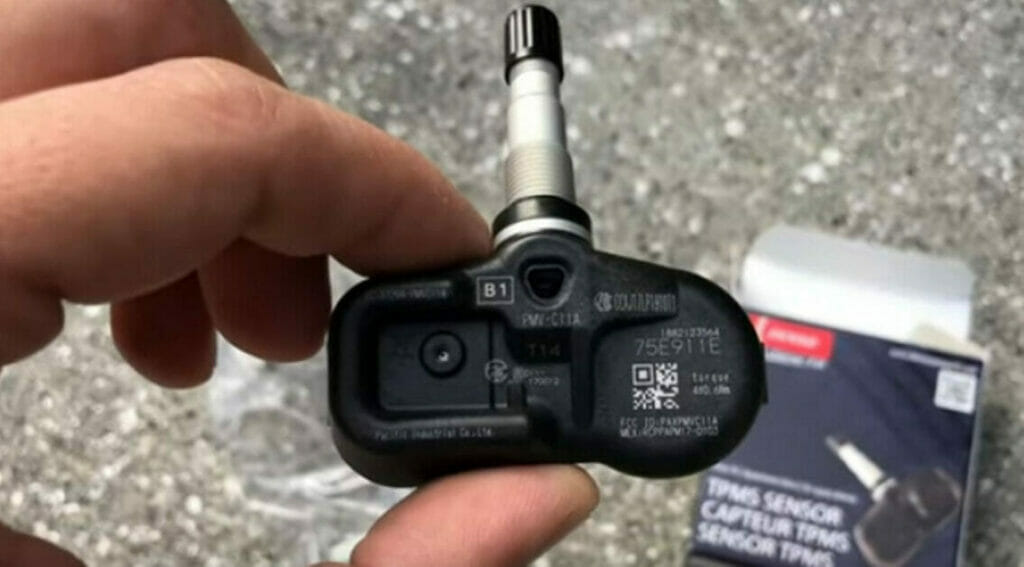
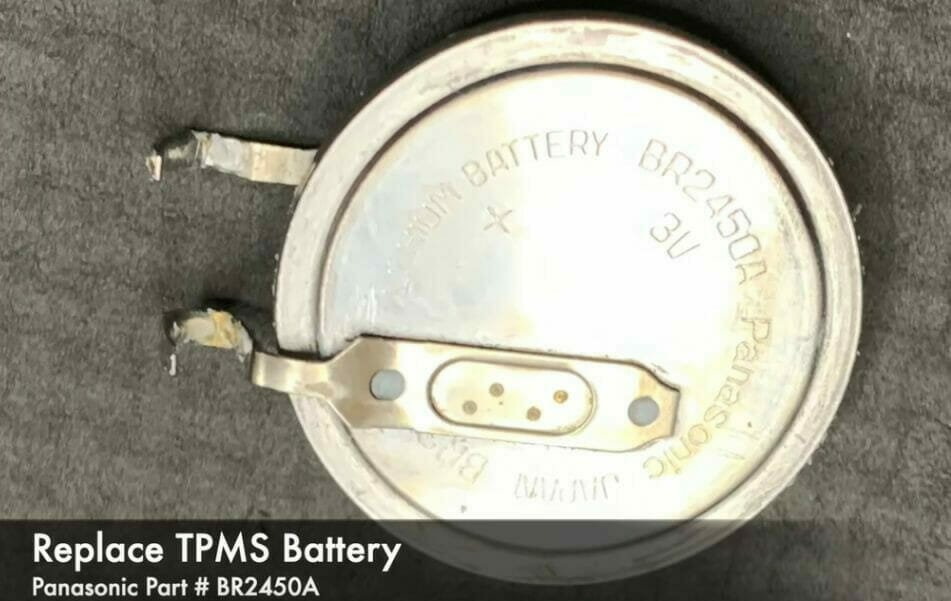
Step 6: Identify the Part Number
Next, clean the battery, too.
In this particular TPMS sensor, you can see that the battery part number is “Panasonic BR2450A”. Once you identify the exact part number in your own TPMS sensor, you can order a new one from an auto store or online.
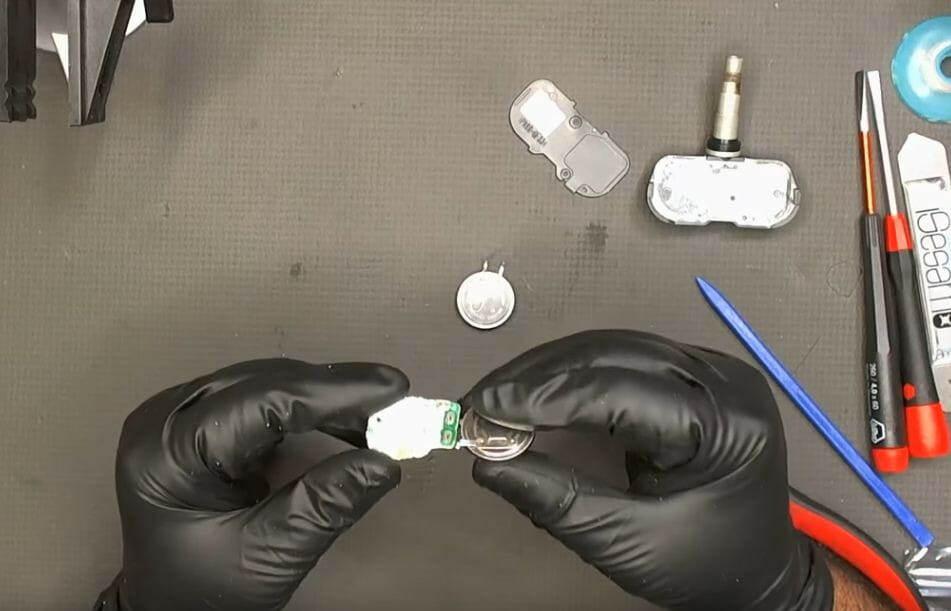
Step 7: Attach the New Battery Part
Fit the new battery part by attaching it to the circuit board.
Step 8: Test the New Battery
Bring the top of the TPMS scan tool close to the TPMS sensor with the new battery connected.
This time it should detect the sensor. If it does, all is well and good.
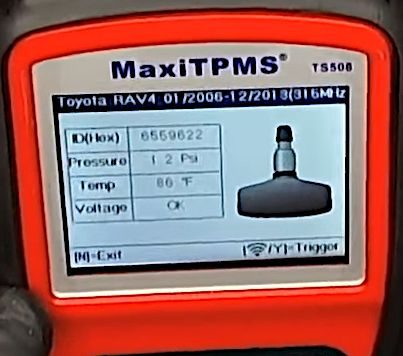
As you can see in the closeup picture below, the TPMS scan tool has successfully detected the TPMS sensor with the new battery.
Besides voltage, the TPMS sensor also displays the part number, pressure, and temperature.
In a closeup of the TPMS sensor information display, you can see that the TPMS sensor’s voltage is now “OK.”
Step 9: Close the Sensor and Reattach to Wheel
Once satisfied with the test results, you can fit the circuit board and battery inside the TPMS sensor, solder the connectors, reapply the silicon paste, close the cover, and reattach it to the wheel.
References
Kirk VanGelder. Fundamentals of Automotive Technology. Jones & Bartlett Learning. 2022
Rob D. Thompson. Automotive Maintenance & Light Repair. Cengage Learning. 2023
TPMS sensor. https://www.carid.com/articles/new-tpms-sensors-best-choice-with-your-new-wheels-and-tires.html
Wrenchers.com. https://www.wrenchers.com/group-31-17-43042-smart-sensor-tpms-sensor-17-43042-multi-freq-metal-body-min-order-10/
Video References
Avsti
Auto Repair Guys
DIY-time
Fix Car Yourself
The DIY Wizard