6 min read
How to Swage Wire Rope without a Tool (3 Steps)
By the end of this article, you should be able to swage your cables or wire ropes without using a complicated or expensive tool like a wire crimper.
Cable swaging is a handy skill to prevent cable joints from weakening. Unfortunately, crimping tools used in large-scale wire swaging are expensive. It’s unfeasible if you need to use one only once. You’ll still need a basic tool to crimp the wire, however, so I assume you have a common one around, like a hammer, plier, or something else you can use to crimp.
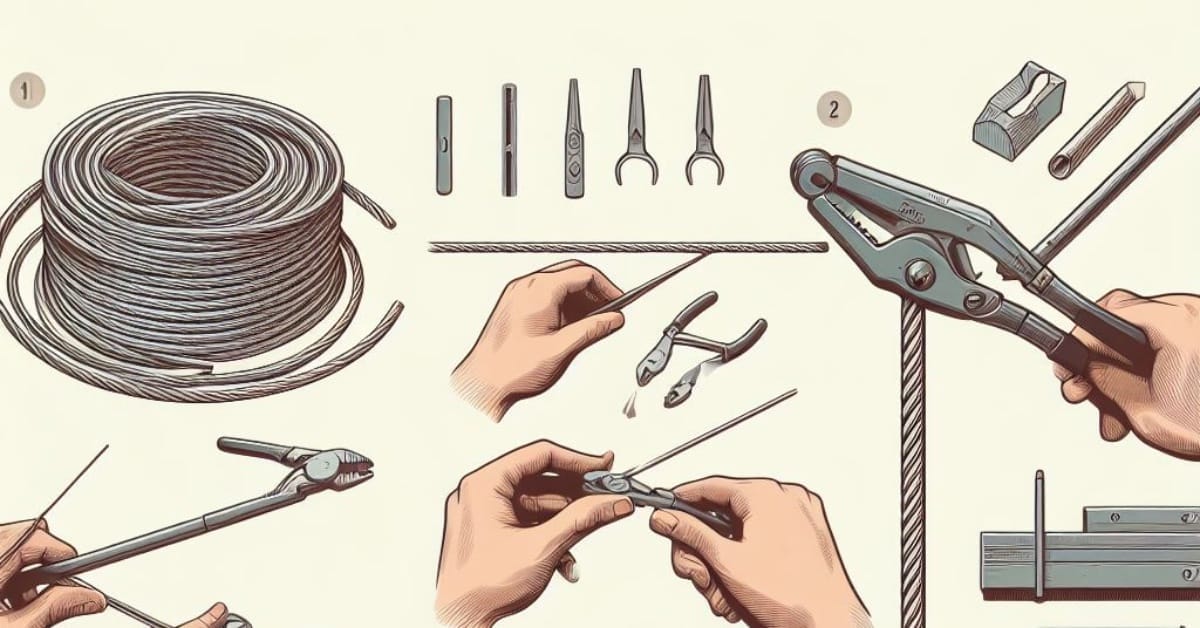
To swage wire ropes without a crimping tool, use a pair of vice grips, a hammer, a chisel, and a metal sleeve or ferrule. Then:
- 🗜️ Clamp the looped end of the wire rope with vice grips so that the ferrule sits flush with the surface.
- 🔨 Position the chisel on top of the ferrule and firmly strike it in three evenly spaced spots.
- 🔄 Flip the ferrule over and repeat the hammering process on the opposite side for an even crimp.
- 🧗♂️ Test the loop’s strength by clamping the ferrule and pulling to ensure it holds tight.
I’ll go into more detail below.
Swaging Wire Rope
Normally, swaging is accomplished with a specific tool called a wire crimper.
It involves shaping or forging metals via a series of ultra-blots delivered by tools like a hammer. It is used in both small and large-scale applications.
During the process, two metal pieces are compressed under pressure, bonded, and conjoined. A circular shape is retained around the cable during the swaging process for an assembly application.
Unfortunately, the crimping tool is expensive. So, it is not a worthwhile investment if you want to use it only once.
That’s why I’m going to show you an alternative way.
Simple Tools to Swage Wire Rope
You can use simpler and more readily available tools to swage wire rope instead of a wire crimper, which is best designed for the job.
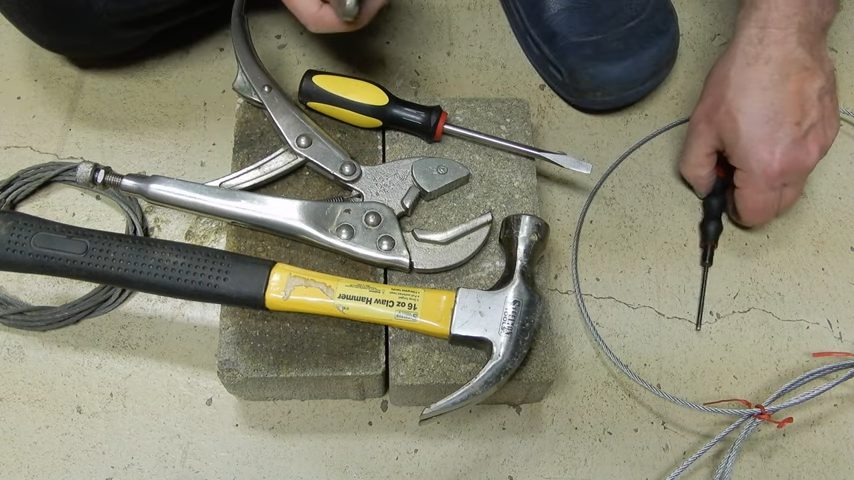
Here are the tools to use: A pair of pliers or vice grips (also called locking pliers) and a hammer and chisel.
Additionally, you will need a metal sleeve or ferrule and a sturdy working surface, preferably metallic, to avoid damage.
Swaging Wire Rope without a Tool
I will now guide you through the steps to swage a wire rope without using the regular (crimping) tool.
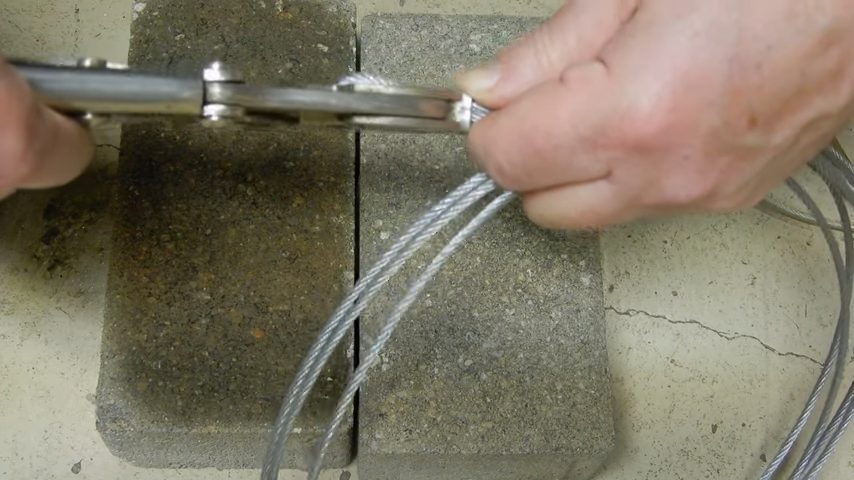
Step 1: Insert the Wire
In this step, we will insert the wire through the metal sleeve (or ferrule), as shown in the picture below.
Take measurements first. Ensure the section of the wire you are feeding into the sleeve matches. The wire and the metal sleeve should have the same diameters. It will keep the wire intact to facilitate hammering.
Stretch out the wire and carefully feed it through the other end of the metal sleeve to form a small wire loop. It should be centered in the middle of the sleeve or ferrule.
You can adjust the wire with your hand or a set of pliers to obtain the correct size loop. If the loop is too small, you can also widen it with a screwdriver.
Step 2: Press Down on the Sleeve
In this step, we will press down on the sleeve with a pair of pliers, a vice grip, or a hammer.
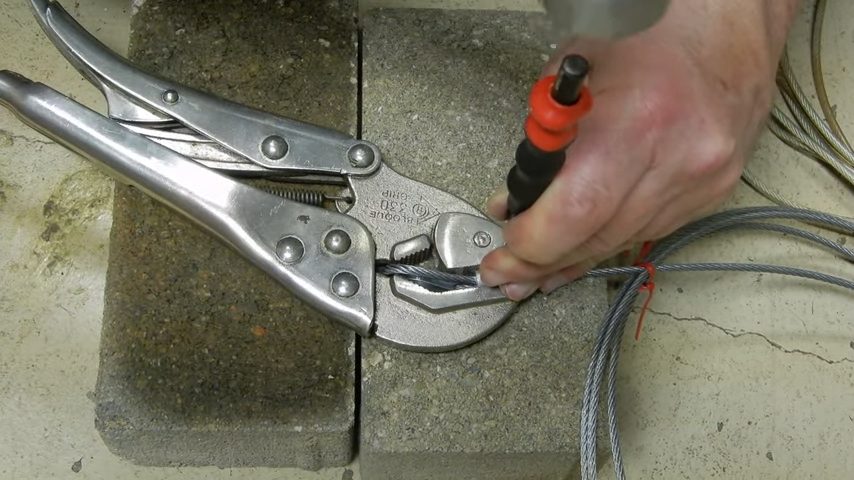
Nest the wire loop in a vice grip such that the sleeve or ferrule rests on the bottom section below the device grip.
This will facilitate hammering by preventing the vice grip from hitting the ground or metallic surface – the sleeve should hit the hard surface. Press down on the sleeve or ferrule so that it can have a proper grip on the wire. If it’s an aluminum wire, you may not need to hammer it so hard for this to work.
While securing the vice grip, position the chisel on the sleeve and give it three punches with a hammer. Hammer until you block the loop on one side.
Reopen the vice grip to release the loop. Then, tighten it on one side to ensure it is secure on that side, too. Press on the sleeve or ferrule and make any necessary adjustments.
Step 3: Pull the Wire to Check
In this step, we will pull the wires to test the connection.
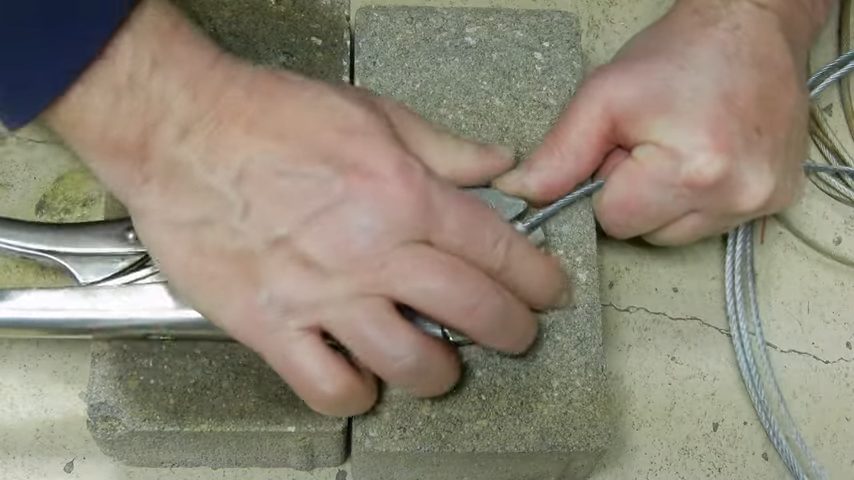
Use your body weight to pull and test the wire.
If the wire does not budge, you have swaged them successfully. Alternatively, you can grip the ferrule loop and pull the cable from the other end to test the connection. If it’s not firmly in place, nest the ferrule in the vice grip and hammer it again.
RELATED My Rope Walls on The Brick House
Reinforcement
Even if the swage was done well, you can always reinforce it later as needed.
To do so, insert the sleeve or ferrule in the vice grip and hammer it again. Position the chisel on the sleeve and make another three punches at three positions on one side. Release the loop and turn it over. Now grip it and make another three punches on the other side.
While hammering the sleeve or ferrule, do it in an alternating manner. Do not hammer on one point multiple times, but move on to the next section. Alternating the hammering enhances the evenness and stability of the loop.
Also, if you notice any kinks or malformation, you may need to repeat the swaging procedure after removing the kink.
References
Video References:
carandtrain