22 min read
Basic Tools Every Upholsterer Needs (Complete Toolkit Guide)
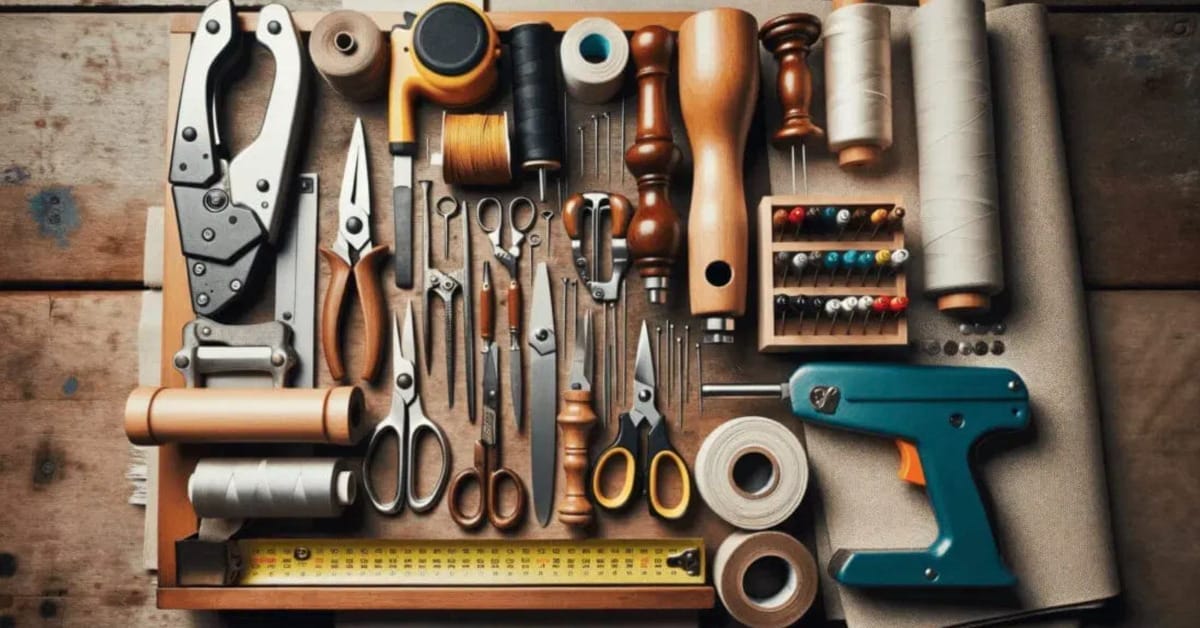
Alright, folks, here’s the deal: in the game of upholstery, your tools are your best friends. It doesn’t matter if you’re a veteran in the game or just stepping up to the plate—you have the right gear to knock it out of the park.
So, let’s break it down and look at the must-haves, from the tools that help you measure and mark to those that add the perfect finishing touch. Let’s get to it!
| Categories | Tools |
|---|---|
| 📏 Measuring and Marking Tools | – Tape Measure, Tailor’s Chalk, Straight Edge |
| ✂️ Cutting Tools | – Fabric Shears, Seam Ripper |
| 🛠️ Stapling and Fastening Tools | – Staple Guns, Decorative Nails, Hot Glue Gun |
| 🧵 Sewing and Stitching Tools | – Straight Pins, Hand-sewing needles, Upholstery Thread, Sewing Machine, Curved Upholstery Needles |
| 🔧 Prying and Removing Tools | – Upholstery Tack Pullers, Upholstery Mallet, Staple Lifter, Seam Cutter |
| 🛋️ Shaping and Padding Tools | – Foam Cutters, Upholstery Regulators |
| 🔗 Adhesives and Application Tools | – Contact Adhesive, Spray Adhesives, Glue Spreader and Silicone Brushes |
| 🎨 Finishing Tools | – Trim Gun, Tack Hammer, Staple Remover |
It’s not just about the tools; it’s also about knowing how to use them. So, as we explore each tool, I’ll give you some insider tips and tricks on how to make them work for you.
Measuring and Marking Tools
Alright, folks, measuring and marking tools are your best buddies in upholstery. They’re like Batman’s utility belt, always there when you need them, and boy, you’ll need them.
Tape Measure

- Let’s start with a good old tape measure. You’re probably thinking, “I’ve got one in my junk drawer.” Well, let me tell you, not all tape measures are created equal.
- You’ll want one that’s wide, sturdy, and extends at least 25 feet. This isn’t a DIY curtain project; this is serious business.
Tailor’s Chalk

- Next up, we’ve got marking tools. These will be your guides, the lines that lead you to that perfect cut or that flawless seam.
- Tailor’s chalk is a classic; it’s easy to use and, best of all, temporary. Messed up a mark? No worries, a quick rub, and it’s gone.
Straight Edge

- Last but certainly not least, a straight edge. This isn’t your average school ruler. You’ll need something longer, something reliable.
- A straight edge can distinguish between a crooked cut and a perfect line. Trust me, you don’t want to skimp on this one.
Cutting Tools
Cutting tools take center stage as we move ahead in our upholstery tool journey. They’re the unsung heroes of our workshop. And I’m telling you, these tools are every upholsterer’s secret weapon.
You’re probably wondering, what exactly are these cutting tools? Well, let’s dive in and take a closer look.
Fabric Shears

- You can’t talk upholstery without mentioning fabric shears. They’re no ordinary scissors, folks. These bad boys are specifically designed for cutting fabric.
- Their unique angle lets you cut without lifting the fabric off the table. Trust me when I say these are an upholsterer’s best friend.
Seam Ripper

- And let’s not forget about the seam ripper. This little tool is a lifesaver when removing stitches without damaging the fabric. It’s small but mighty!
Stapling and Fastening Tools
After you’ve made those precise cuts with your fabric shears and rotary cutters, it’s time to secure everything in place. For that, we need to talk about stapling and fastening tools.
Staple Guns

- Staple guns are a must-have for every upholsterer. They’re used to attach the fabric to the furniture frame firmly, ensuring it stays put. Trust me, once you’ve used a staple gun, there’s no going back! It’s a game-changer.
- A manual staple gun will do fine for those starting their upholstery journey or working on smaller projects. Don’t forget that the staples are just as important as the tool. They come in various sizes, so you must choose the right one for your project.
Decorative Nails

- Moving on, let’s discuss fastening tools. One of the most common fasteners used in upholstery is decorative nails. They’re not just functional; they also add a touch of elegance to your finished piece.
Glue Gun

- Another essential fastening tool is the hot glue gun. Perfect for attaching trim, piping, or any other small details to your upholstery project. Just remember, a little goes a long way with hot glue.
Sewing and Stitching Tools
Next up is the sewing and stitching tools. You might be thinking: “Sewing? Isn’t upholstery all about stapling and hammering?” You’re not wrong, but sewing is a huge part of upholstery.
Straight Pins

Straight Pins are your best friends when it comes to upholstery. They’re great for holding fabric in place before you staple or sew. You’ll need a good number of these, so stock up!
Hand-sewing Needles

- Hand-sewing needles are also a must. They come in different sizes and shapes, so you’ll need a variety because different jobs require different tools.
Upholstery Thread

- Let’s talk about the upholstery thread. It’s stronger than your regular sewing thread. Trust me, you don’t want your seams to burst after all that work.
Sewing Machine

- And don’t forget the sewing machine. Yes, you can do it all by hand, but a sewing machine will make your life much easier.
Curved Upholstery Needles

- Finally, curved upholstery needles. These babies are perfect for stitching through thick materials and getting into tight corners.
- They’re a bit tricky to use, but once you get the hang of it, you’ll wonder how you ever managed without them.
Prying and Removing Tools
Let’s dive right into the world of prying and removing tools. Oh boy, you’re going to love this!
Upholstery Tack Pullers

- Upholstery tack pullers are your best friend when removing old fabric or staples. They’re a must-have!
- They can get under any stubborn tack or staple with a sturdy and sharp end. You’ll wonder how you ever lived without one!
Upholstery Mallet

- Next up, we have the upholstery mallet. It’s not just a regular hammer, folks!
- This baby is designed to work with your tack puller. It’ll help you remove those stubborn fasteners without damaging your furniture. It’s all about the precision, baby!
Staple Lifter

- Don’t forget about the staple lifter. This tool may seem small, but it packs a punch. It’s perfect for lifting out those old, hard-to-get staples without causing any damage. It’s a lifesaver, I promise you.
Seam Cutter

- And last but not least, the seam cutter. This tool makes removing old seams a breeze. It’s designed to cut through fabric without damaging the underlying material. You’ll be able to remove old fabric in no time!
Shaping and Padding Tools
Let’s dive into the realm of shaping and padding tools. These tools are the unsung heroes of upholstery work, giving your projects a polished, professional finish.
Foam Cutters

- First up, we’ve got foam cutters. When dealing with upholstery foam, a standard pair of scissors just won’t cut it (pun intended).
- Foam cutters are designed to handle this tough material, always ensuring straight, clean cuts.
Upholstery Regulators

- We can’t forget about upholstery regulators. These long, needle-like tools are essential for adjusting and arranging stuffing materials. They’re super handy for those hard-to-reach corners and crevices.
Adhesives and Application Tools
Now, let’s talk about adhesives and application tools. You might not think it, but they play a crucial role in upholstery.
Contact Adhesive

- First off, contact adhesive. It’s a must-have for any upholsterer. It’s perfect for bonding materials that are tough to stitch or staple. It’s also great for areas that need a strong, durable bond.
Spray Adhesives

- We can’t forget about spray adhesives. They’re a lifesaver for attaching padding, foam, or fabric to larger areas. Be sure to choose a high-quality one that doesn’t soak or stain the materials.
Glue Spreader and Silicone Brushes

- To apply these adhesives, you’ll need some tools. A glue spreader is a must for evenly distributing contact adhesive.
- Silicone brushes are great for hot glue applications. And don’t forget the scissors! You’ll need a sharp pair for cutting excess fabric and thread.
Finishing Tools
Now that we’ve covered the essential cutting, stapling, sewing, and adhesive application tools, it’s time to step into the world of finishing tools.
These tools add the final touch, ensuring your upholstery work looks polished and professionally done.
Trim Gun

- First is the trim gun. This tool is a lifesaver when applying decorative trim or braiding. It ensures the trim is attached securely and evenly.
Tack Hammer

- Don’t forget about the tack hammer. Its magnetic tip is perfect for holding and positioning tacks, and its slim design allows for precise placement.
Staple Remover

- Then there’s the staple remover. This tool is an absolute necessity for any upholsterer. It makes removing old staples a breeze, saving time and energy.
Cost Analysis
In the world of upholstery, selecting the right tools is paramount to achieving professional results. This table provides a comprehensive breakdown of essential upholstery tools and cost estimates.
Equipping yourself with these tools ensures precision, efficiency, and quality in every project, whether refurbishing a beloved piece or starting a new creation.
| Tool Category | Tool | Estimated Cost |
|---|---|---|
| Measuring and Marking | Tape Measure | $10 – $25 |
| Tailor’s Chalk | $3 – $10 (pack) | |
| Straight Edge | $8 – $30 | |
| Cutting Tools | Fabric Shears | $15 – $50 |
| Seam Ripper | $3 – $15 | |
| Stapling and Fastening | Staple Guns (Manual) | $20 – $60 |
| Staple Guns (Electric) | $30 – $200+ | |
| Decorative Nails | $5 – $30 (pack) | |
| Hot Glue Gun | $10 – $50 | |
| Sewing and Stitching | Straight Pins | $3 – $10 (pack) |
| Hand-sewing Needles | $2 – $10 (set) | |
| Upholstery Thread | $3 – $20 (spool) | |
| Sewing Machine | $200 – $1000+ | |
| Curved Upholstery Needles | $5 – $20 (set) | |
| Prying and Removing | Upholstery Tack Pullers | $10 – $40 |
| Upholstery Mallet | $15 – $50 | |
| Staple Lifter | $8 – $25 | |
| Seam Cutter | $10 – $30 | |
| Shaping and Padding | Foam Cutters | $20 – $150 |
| Rubber Mallets | $10 – $40 | |
| Upholstery Regulators | $10 – $40 | |
| Webbing Stretcher | $15 – $50 | |
| Adhesives and Application | Contact Adhesive | $10 – $30 (container) |
| Spray Adhesives | $5 – $20 (can) | |
| Glue Spreader | $5 – $20 | |
| Silicone Brushes | $3 – $15 | |
| Finishing Tools | Edge Roll | $10 – $40 |
| Trim Gun | $30 – $150+ | |
| Tack Hammer | $10 – $40 | |
| Staple Remover | $5 – $20 |
Maintenance Tips
Taking care of your tools is just as crucial as mastering their use. Proper maintenance doesn’t just prolong the life of your equipment; it also ensures safety and efficiency in every project you tackle. Let’s dive in and ensure your toolkit remains as sharp and reliable as your skills!
- Clean After Use: After every use, wipe tools clean of debris, dust, or residue using a dry cloth. This prevents buildup and ensures they’re ready for the next task.
- Store Properly Store tools in a dry, cool place. This protects them from moisture, which can cause rust or degrade materials.
- Regular Inspection: Inspect tools for signs of wear, damage, or malfunction. Addressing issues early can prevent bigger problems down the road.
- Lubrication: Moving parts in tools should be periodically lubricated to ensure smooth operation and prevent wear. Use the appropriate lubricant based on the tool’s material and function.
- Sharpen When Necessary: Tools with blades or edges, like scissors or cutters, should be sharpened regularly to maintain efficiency.
- Replace Parts as Needed: Certain parts of tools may wear out or break over time. Instead of replacing the entire tool, consider replacing the damaged part, if possible.
- Avoid Overloading: Always use tools within their capacity. Overloading or using a tool for a purpose it wasn’t designed for can lead to damage.
- Handle with Care: Although many tools are robust, handling them with care can extend their lifespan. Avoid dropping them or using excessive force.
- Protect from Extreme Conditions: If possible, avoid exposing tools to extreme temperatures or conditions, as these can affect their performance or material integrity.
- Educate Yourself: Always read and follow the manufacturer’s maintenance, storage, and use guidelines. This ensures you’re taking the best possible care of your tools.
Safety Precautions

Remember, the key to any successful project isn’t just the final product but also ensuring you and everyone around you stay safe throughout the process. Safety first, always!
- Know Your Tool: Before diving into any project, familiarize yourself. Please read the manual, understand its functions, and know its limits.
- Wear the Right Gear: Safety goggles, gloves, and protective footwear are often necessary. Consider ear protection and a dust mask, depending on the job.
- Keep Your Workspace Clean: A cluttered workspace can lead to accidents. Ensure you have enough lighting and your work area is free from unnecessary items.
- Tool Maintenance: Regularly check your tools for any wear or damage. A well-maintained tool is less likely to malfunction.
- Power Down: When not in use, unplug power tools. It’s a simple step, but it prevents unintended startups.
- Stay Grounded: If using electrical tools, ensure they’re grounded to prevent electric shocks.
- Be Mindful of Others: If you’re working in a shared space, be aware of others around you. Ensure they know what you’re doing, especially when operating power tools.
- Stay Focused: Distractions can be dangerous. When using any tool, give it your full attention.
References
Organizations:
- National Upholstery Association. https://www.nationalupholsteryassociation.org/
- Upholstery Craft Training Center. https://www.upholsterycrafttraining.com/
Website Resources:
- Upholster.com. https://www.upholster.com/
- The Upholstery Forum. https://www.theupholsteryforum.com/
- Upholstery Resource. https://www.upholsteryresource.com/
Video References:
Professor Pincushion
Cucicucicoo: Eco Sewing and Crafting
Sailrite
Wild West Hardware
Mollies Make & Create
Professor Pincushion
Daniela Mellen
Mike Fn Garage
Westernkevin
Evelyn Wood
Sailrite Workbench
Rowleycompany1
CRCNZ
E Gibbons
Mzztrzz
Kasautomation1154
Journey North
Ultimate Handyman