10 min read
How to Remove Vacuum Breaker? (5 Simple Steps)
Hey there, DIY heroes! If you’ve ever found yourself staring down a vacuum breaker, wondering how to tackle its removal without causing a mini-water crisis, you’re in the right place.
I’m here to guide you through the process, step by step, turning what might seem like a plumbing puzzle into a straightforward, satisfying project. Here are the steps on how to do it:
- Step 1: Disconnect the water supply to the faucet.
- Step 2: Loosen the dust cap and pull it out.
- Step 3: Remove the body of the vacuum breaker.
- Step 4: Pull out the vacuum breaker and other parts.
- Step 5: Replace the vacuum breaker.
We’ll dive into everything from the necessary tools to the tricks that make the job a breeze. So, roll up those sleeves and prepare to give that vacuum breaker a smooth send-off.
Tools and Materials for a Vacuum Breaker Swap
Let’s gather our toolkit before swapping out that vacuum breaker headfirst. Trust me, with the right tools, this job will be smooth.
Essential Tools
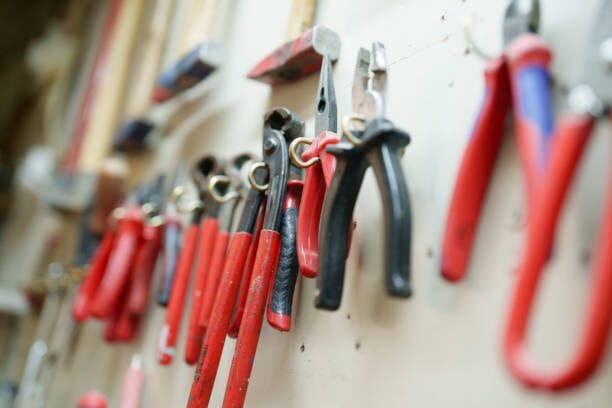
- Adjustable Pliers: These are the MVPs of today’s project. We’ll use them to grip and twist, so ensure they’re within arm’s reach. When we get to the vacuum breaker body, they’ll help us get a grip on those slots and turn counterclockwise without breaking a sweat.
Your Trusty Materials
- Your New Vacuum Breaker: Obviously, we can’t forget the star of the show. This little guy is stepping in to keep your water safe and sound, so treat it respectfully.
And there you have it! You can tackle this project like a pro with these tools and materials.
5-Step Guide on How to Remove Vacuum Breaker
Let’s get into the nitty-gritty of swapping out a vacuum breaker like a pro. Whether you’ve got a T-550 faucet or any other kind, the process is pretty much the same. Let’s dive in:
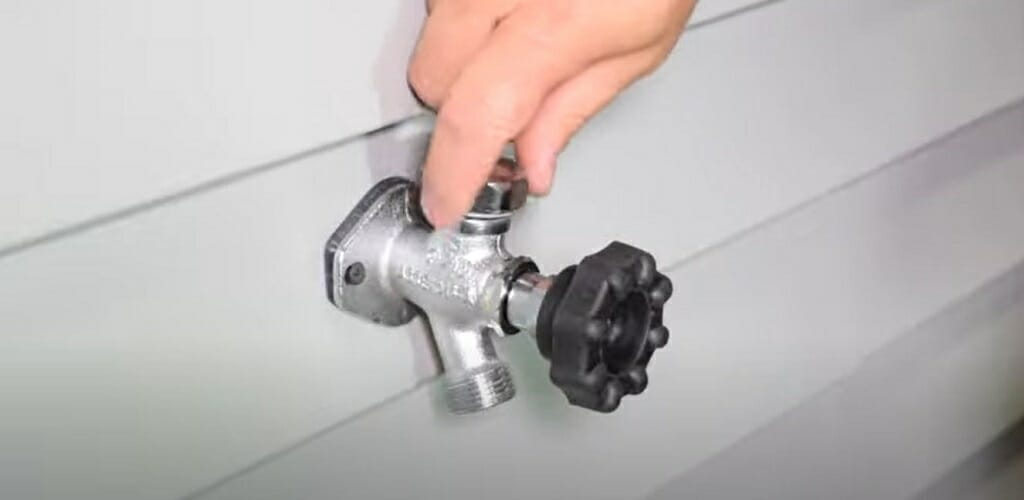
Step 1 – Shut Off the Water Supply
Here we go! First things first: find that water supply valve and turn it off. Trying to do this job with the water on is like changing tires on a moving car – not happening.
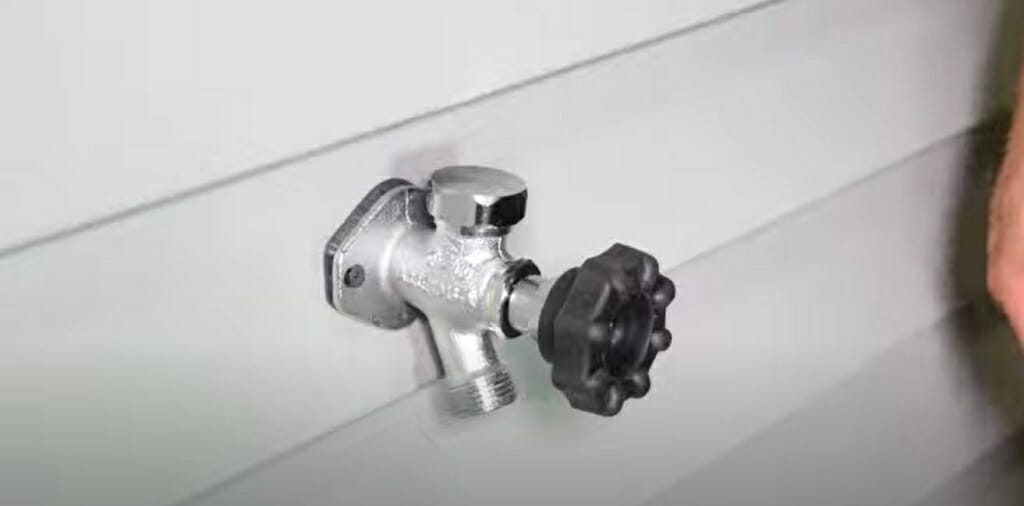
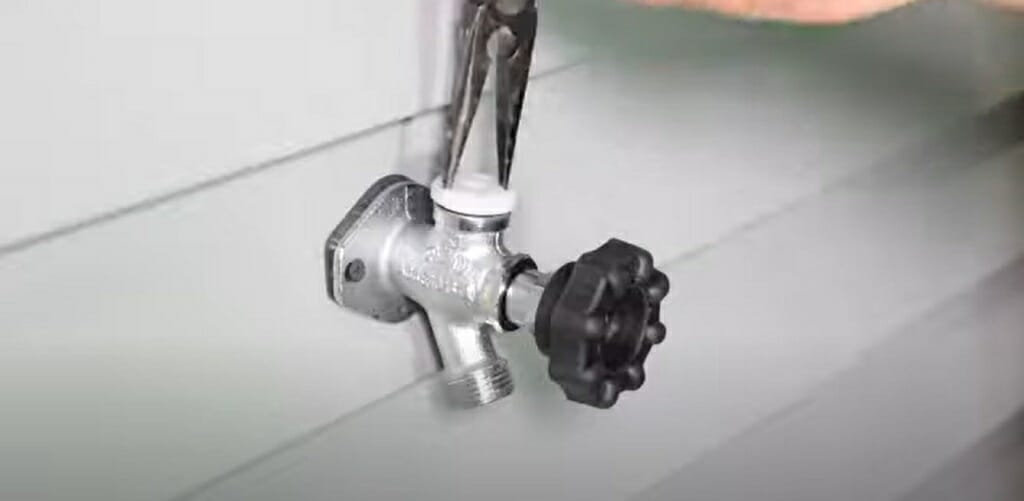
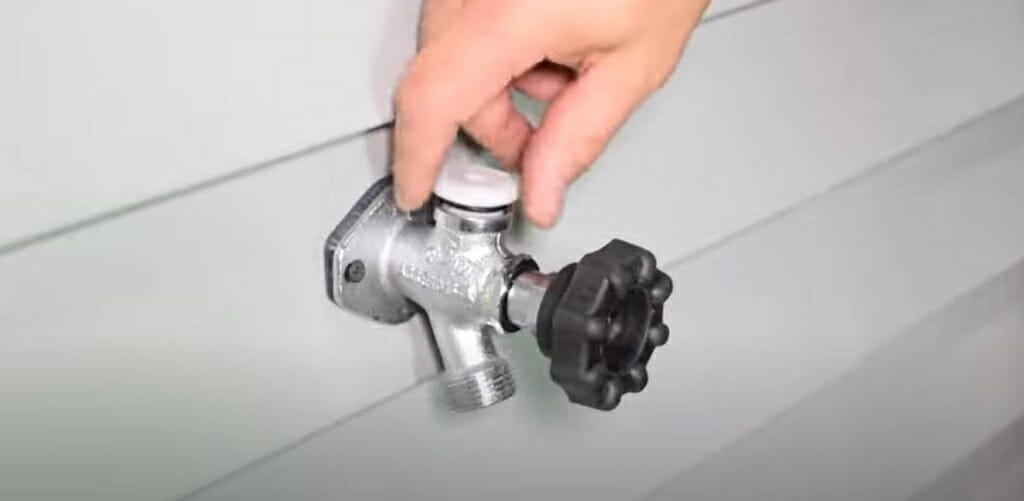
Step 2 – Say Goodbye to the Dust Cap
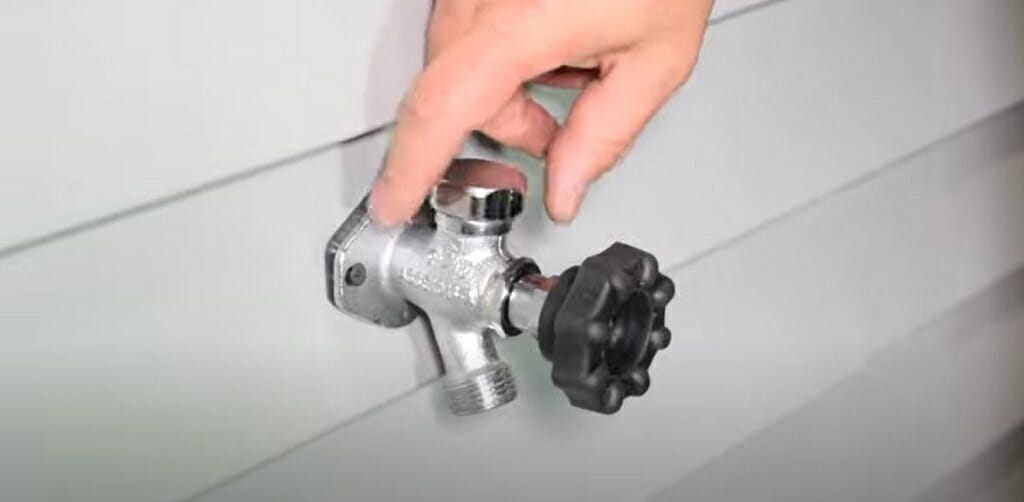
Next, find the dust cap sitting pretty on your faucet. Get a good grip and twist that cap counterclockwise. Tools are not needed here; your hands are your best equipment.
Remember, this little cap keeps your vacuum breaker clean and debris-free, often in stylish chrome brass or practical plastic.
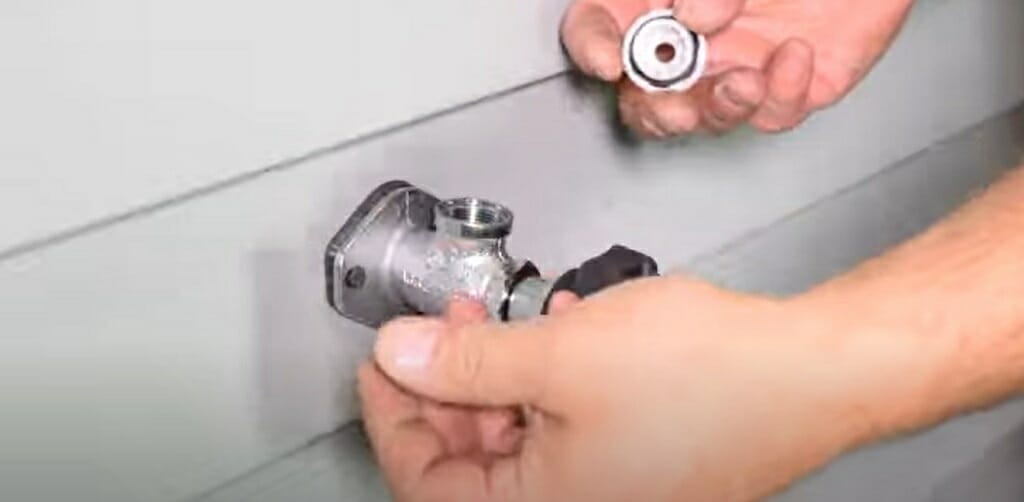
Step 3 – Remove the Body
After the cap’s off, it’s time to meet the body of the vacuum breaker. This is where those adjustable pliers come into play.
Look for 3 or 4 slots on the body, adjust your pliers to fit, and start turning counterclockwise. You should be able to take a few twists from there by hand.
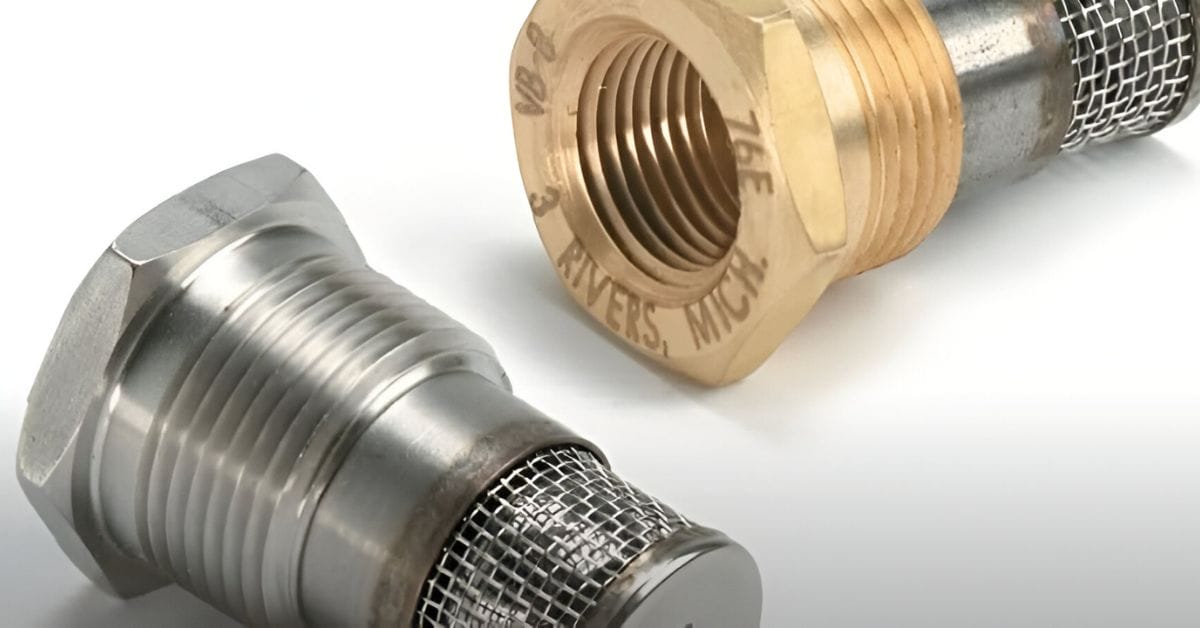
Step 4: Unveil the Inner Workings
Inside, you’ll find the heart of the vacuum breaker – the body, stainless steel ball, spring, and a retainer tube—time to remove all worn-out parts gently.
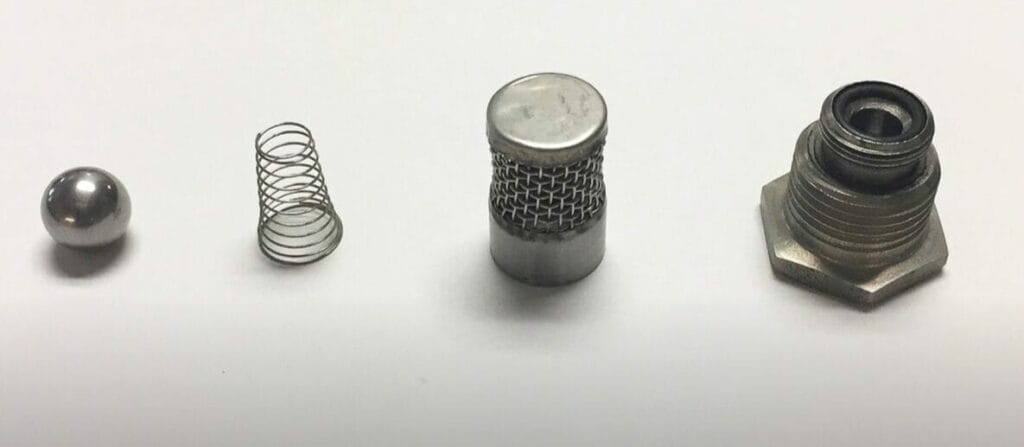
Once the body’s out, the rest should follow easily.
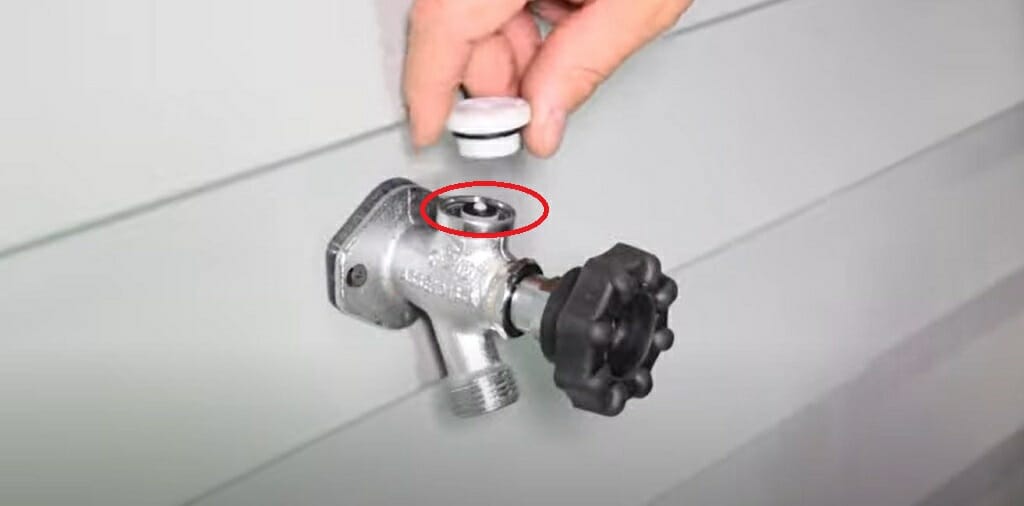
Step 5 – Vacuum Breaker Replacement
Now, grab your new vacuum breaker for the grand finale and get it seated right. Make sure to tighten both the vacuum breaker body and the dust cap back into place. Remember, this isn’t a test of strength; snug is just right.
With simple steps and a bit of DIY spirit, your faucet is back in business, safe from unwanted backflow. Stay tuned for the lowdown on garden faucets – there’s always more to learn and fix!
Troubleshooting Tips for Vacuum Breaker Removal
Let’s dive into some troubleshooting tips for when you’re knee-deep in vacuum breaker maintenance, and things aren’t going as smoothly as planned. We’ve all been there.
Here’s a handy table to keep you moving forward:
| Common Problem | Solution or Workaround |
|---|---|
| Stuck Dust Cap | If that dust cap won’t budge, don’t sweat it. Wrap a rubber band around the cap for a better grip, or gently use a pair of pliers with a cloth to prevent scratching. A little twist with the right touch, and you’re golden. |
| Vacuum Breaker Body Won’t Turn | This one can be tricky, but it’s nothing we can’t handle. If it’s stuck, apply a penetrating oil around the threads, wait a few minutes, then try again with your adjustable pliers. Patience is key here. |
| Leaking After Replacement | If you’re seeing leaks post-swap, double-check the tightness of the vacuum breaker body and dust cap. Not too tight, though. Also, ensure all parts are correctly aligned, and the O-ring is in good shape. A damaged O-ring might need a replacement. |
| Can’t Remove Internal Parts | Sometimes, the internal parts like the spring and retainer tube cling to their home. If they’re reluctant to leave, a gentle tap on the faucet might persuade them. Just be gentle; we’re not looking to start a demolition derby. |
| Missing Parts | If you open your kit and find you’re playing a guessing game with missing parts, take a breath. Check the packaging again, sometimes those small bits hide. Are you still missing? Contact the manufacturer for replacements or head to your local hardware store. |
Remember, every challenge is just an opportunity in disguise. With these tips, you’ll be back on track quickly, ready to confidently tackle the next project. Keep those tools handy and your spirit ready for action!
Vacuum Breaker Maintenance Schedule and Tips
Maintenance is key to longevity, not just in life but especially in your plumbing.
Here’s a straightforward schedule and some tips to ensure your vacuum breaker stays healthy, warding off any potential failures before they happen.
Quarterly Maintenance Schedule
- Inspect for Signs of Wear and Tear: Every season, take a moment to visually check your vacuum breaker for any obvious signs of damage like cracks, rust, or wear. Early detection is half the battle.
- Clean It Up: Use a soft brush and mild soap to remove any dirt or debris accumulated on and around the vacuum breaker. Keeping it clean prevents blockages and ensures it operates smoothly.
Bi-Annual Maintenance Schedule
- Test the Function: Give that vacuum breaker a test run twice a year. Please turn on the water and watch it work its magic. It might be time for a deeper dive or a replacement if you notice anything, like the water not stopping as it should.
- Lubricate Moving Parts: A bit of silicone lubricant on any moving parts can prevent sticking and corrosion. Just a dab will do.
Annual Maintenance Schedule
- Replace Worn Parts: Even if it isn’t broken, some parts, like O-rings or washers, might need a preemptive swap to keep things running smoothly. This is a good time to do that.
- Winterizing: Winterize outdoor faucets before the cold sets in to prevent freeze damage. This includes draining water from the vacuum breaker and covering it to keep it insulated.
Keeping up with this schedule not only prolongs the life of your vacuum breaker but also helps maintain the quality of your home’s water supply. Stay diligent and proactive, and your plumbing will thank you for it.
Frequently Asked Questions
- Are They Universal?
- Most vacuum breakers fit many faucets but always double-check compatibility.
- Why Is Using Specific Tools Important?
- Using the right tools for the job is key to a successful installation or replacement without causing damage. Adjustable pliers, for example, are recommended because they provide the grip and leverage needed without stripping or damaging the parts of the vacuum breaker.
- Can I Install a Vacuum Breaker Myself?
- You bet! With the right tools and a bit of know-how, installing a vacuum breaker is a manageable DIY project. Just follow the step-by-step guide carefully, and don’t rush.
- What Happens If I Don’t Use a Vacuum Breaker?
- Not using a vacuum breaker can lead to a backflow situation, where contaminated water could enter your clean water supply.
- Do Vacuum Breakers Reduce Water Pressure?
- Vacuum breakers can slightly reduce water pressure, but it’s typically minimal and not noticeable in most household applications.
- Can a Vacuum Breaker Be Repaired, or Must It Be Replaced?
- It depends on the model and the issue at hand. Some vacuum breaker parts, like o-rings or washers, can be replaced if they wear out.
- Is It Mandatory to Have a Vacuum Breaker Installed?
- In many areas, yes. Building codes and plumbing regulations often require vacuum breakers on hose bibs, irrigation systems, and other points connected to the public water supply to prevent backflow contamination.
References
Organizations:
- American Backflow Prevention Association (ABPA). https://www.abpa.org/
- American Water Works Association (AWWA). https://www.awwa.org/
Books:
- “Plumbing Technology: Design and Installation” by Lee Smith. https://www.abebooks.com/9781418050917/Plumbing-Technology-Design-Installation-Smith-1418050911/plp
- “Residential Construction Academy: Plumbing” by Michael A. Joyce. https://www.abebooks.com/9781401848910/Residential-Construction-Academy-Plumbing-Joyce-1401848915/plp
Website Resources:
- This Old House. https://www.thisoldhouse.com/
- Legend Valve. http://www.legendvalve.com/
Video References:
Kadant Inc
LegendValve