7 min read
How to Connect Speaker Wire to Receiver (Guide for Beginners)
Today, I will teach you to connect a speaker wire to the receiver. Sounds complicated? Trust me; it isn’t. And once you’ve got this down pat, you’ll enjoy that sweet sound quality like never before.
Quick Overview
| Step | Action |
|---|---|
| 1 | Measure & strip speaker wire using wire strippers, needle-nose pliers & a utility knife |
| 2 | Turn off the receiver |
| 3 | Connect the speaker wire to ‘SPEAKERS’ ports, ensuring correct positive/negative matching |
| 4 | Test sound quality for clarity & balance |
| 5 | Troubleshoot if needed; common issues involve no sound or distorted sound |
So sit tight and get ready – we’re about to turn that confusing spaghetti junction into a neat audio command center! Let’s get started!
Connecting to a Receiver: Step-by-Step Guide
Let’s dive into the meat of things, shall we? We’re going to connect that speaker wire to your receiver!
First off, gather all your equipment:
- Receiver
- Speaker wires
- Wire strippers, needle-nose pliers, utility knife (in case your wires aren’t pre-stripped).
Having everything within arm’s reach makes the process smoother.
Now onto the step-by-step guide:
Step 1. Turn off and unplug the receiver.
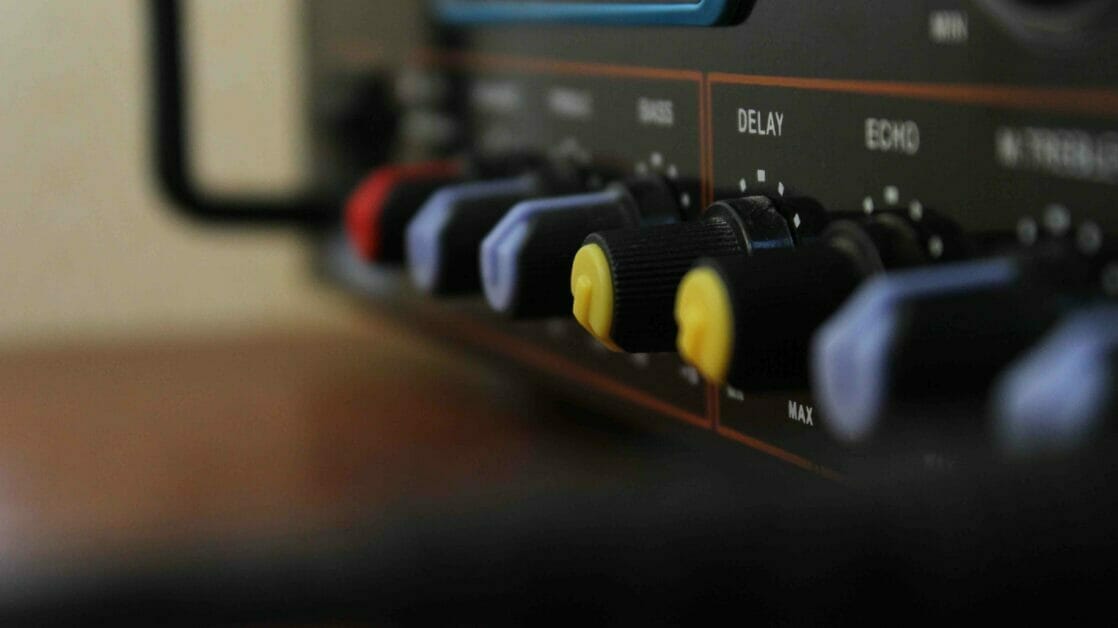
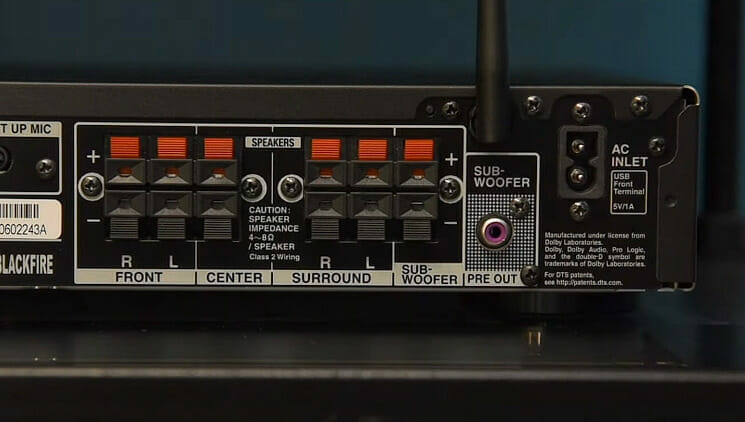
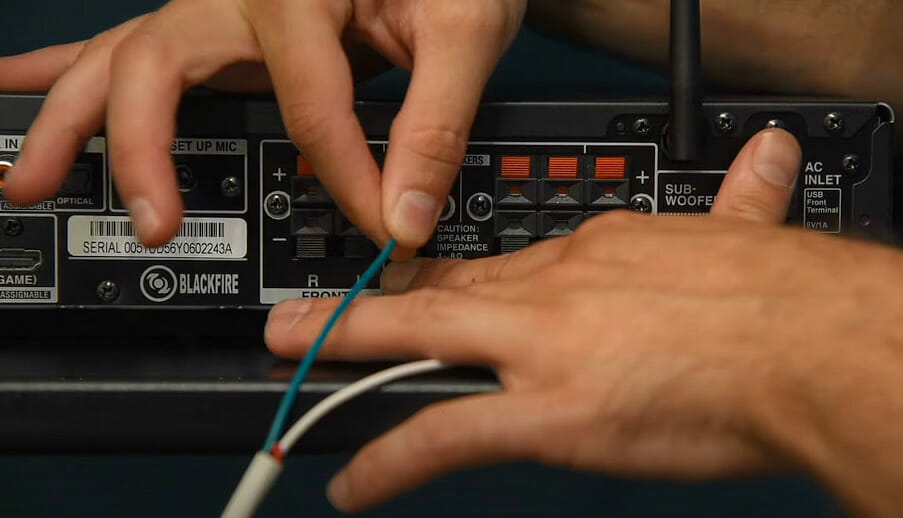
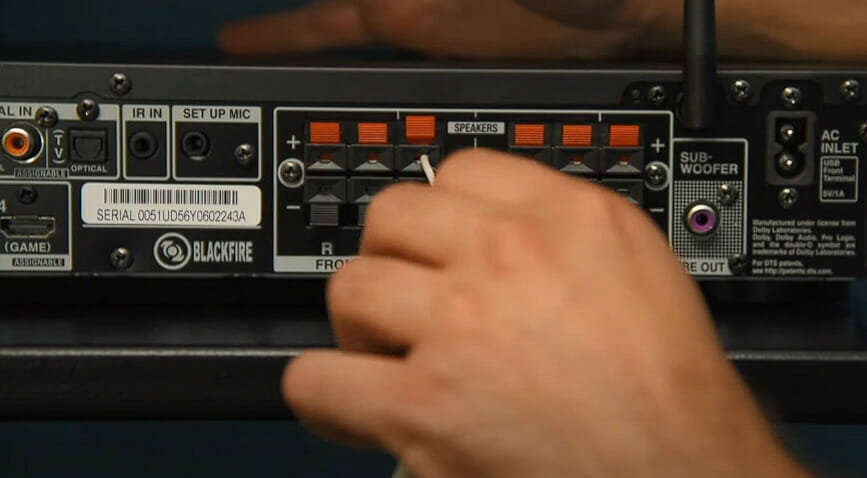
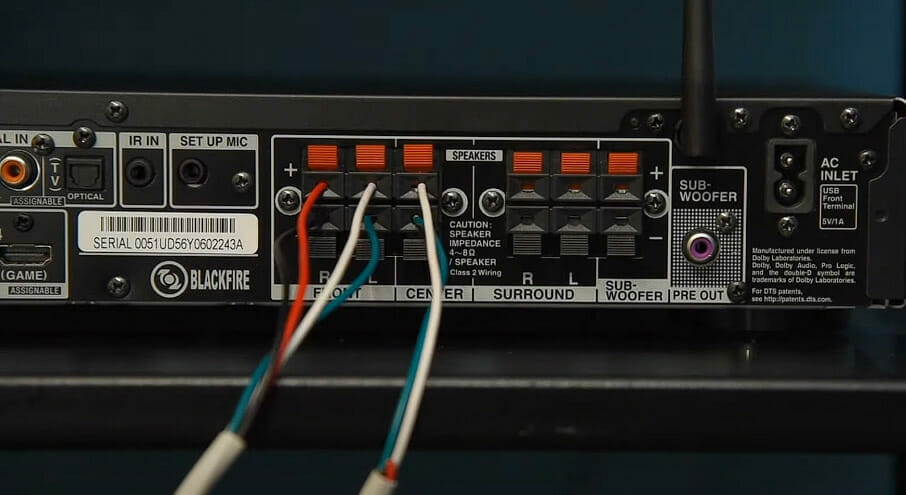
Step 2. Look at the back of your receiver – several ports labeled ‘SPEAKERS.’ These are where the magic happens!
Step 3. Grab your speaker wire; it usually has two sides – one positive and another negative.
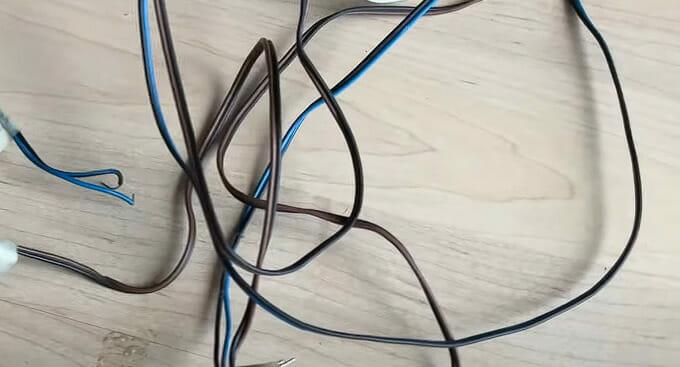
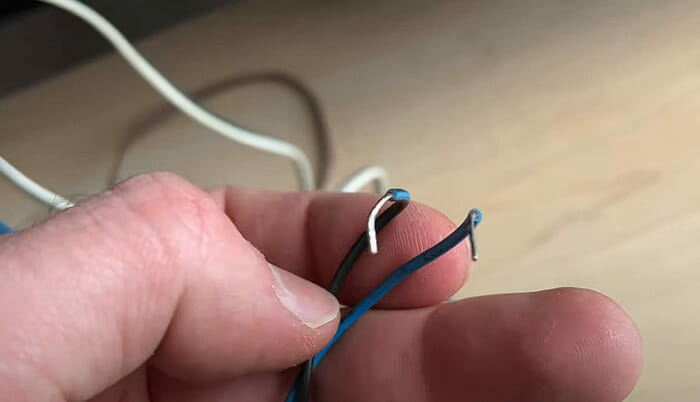
Step 4. Use those wire strippers to expose about half an inch of each end if they’re not already stripped.
Stripping Speaker Wire: Techniques and Tools
First things first, let me tell you there are a few tools you’ll need for this process:
- A wire stripper (of course)
- Needle-nose pliers
- A utility knife
| Step | Instructions |
|---|---|
| 1 | Take your speaker wire and measure the length needed from your receiver to your speakers. It’s recommended to have a bit more length than less. |
| 2 | Using a utility knife, carefully slice through the outer casing of the wire without cutting into the actual wires inside. Leave about 1/2 inch of casing from each end. |
| 3 | Use wire strippers to expose the inner wires. Place about 1/4 inch of the exposed inner wires into one of the notches on the wire strippers. Apply gentle pressure, twist, and pull until the insulation slides off. |
Step 5. Insert one end of the wire into your speaker’s port, ensuring the bare side matches the negative (-) sign & striped/text side positive (+) on the receiver (this is very important for proper sound).
Step 6. Repeat this procedure with other speakers.
And just like that, you’ve connected the speaker wire to the receiver!
Remember:
- Always ensure power is OFF when plugging in cables
- Ensure correct matching of positive/negative ends on both devices
Now enjoy that sweet music flowing through those newly wired speakers!
Evaluating Sound Quality After Connection
Now that you’ve connected your speaker wire to the receiver, it’s time for the fun part – checking out how good it sounds! This step allows you to ensure everything is working as it should.
Let’s start with playing some music. Choose a track that you’re super familiar with. I’m talking about something you’ve listened to a million times on different speakers.
You know this song’s note, beat, and rhythm by heart. Trust me – familiarity helps in evaluating sound quality.
As the song plays, pay attention to clarity and balance. Clarity refers to how well you can identify individual sounds – like vocal lines or guitar riffs – within the music.
Conversely, balance means all those sounds are at proper levels without drowning each other out.
Here are a few pointers:
- Are vocals clear and distinct?
- Can you hear instruments individually?
- Does any particular sound seem too loud or soft?
Taking notes while listening can help pinpoint what sounds great and what needs tweaking.
Next up is testing different types of audio content like podcasts or movies; this gives us an idea that our setup performs equally well across varying audio formats.
Remember that your room’s acoustics also play a big role in how your system will perform. If things don’t sound quite right even after adjusting settings on your receiver, consider making changes to your room—like adding rugs or curtains—to improve acoustics.
So there you have it! Checking out your newly connected speaker wire isn’t as hard as it seems! Listen closely, adjust as needed, and enjoy the music!
Troubleshooting Common Connection Issues
Now that we’ve connected our speaker wires to the receiver, sometimes things don’t go as smoothly as planned.
Don’t sweat it, though! I’m here to help you troubleshoot some common connection issues.
No Sound? Let’s start with the basics. Ensure your receiver and speakers are turned on and the volume isn’t zero. Also, double-check that you’ve selected the right input source on your receiver.
If that’s all looking good, but there’s still no sound, let’s check those connections again. It might seem tedious, but trust me—it’s worth it!
- Ensure all cables are firmly plugged in.
- Check for any damage or breaks in the wire.
- Test each speaker separately to determine if one is causing the issue.
Still silent? It could be an issue inside your receiver or speakers, like a blown fuse or damaged component—which might need professional repair.
Is there Distorted Sound or Static Noise? This could be due to poor-quality wires or interference from other electronic devices. Try using shielded speaker wires or moving potential sources of interference further away from your audio setup.
How about Uneven Sound Levels? If one speaker is louder than another, make sure all your settings are balanced on your receiver and check whether swapping left and right channels makes a difference.
And remember – trial and error is part of this process. So take it easy, have patience, and keep at it! You’ll get these pesky problems sorted out before you know it!
I hope these troubleshooting steps will get you back up and running without hassle.
But if things persist, don’t hesitate to seek professional help because sometimes we can’t do everything ourselves—and that’s okay!
References
Websites:
- AVS Forum. https://www.avsforum.com/
- r/audiophile on Reddit. https://www.reddit.com/r/audiophile/
- Digital Trend. https://www.digitaltrends.com/
Video References:
Sight and Sound Systems, Inc. Home Automation