20 min read
Securing Fabric (e.g., Stapling, Tacking) 5 Top Techniques
Alright, team, let’s jump right into the fabulous universe of fabrics! Now, it’s crucial to have your toolkit ready and raring to go. Remember, every fabric is like a unique character in our story, and there’s a special trick to make each one pop.
So, let’s roll up our sleeves and dive into a rapid-fire rundown of the top-notch techniques for nailing that fabric down in upholstery and figuring out when to pull each trick out of the bag!
| Technique | Description |
|---|---|
| 🛠️ Stapling | Use staplers to secure the fabric. The process includes positioning, planning the staple route, and checking the work. |
| 🔨 Tacking | Use adhesives like double-sided tape, fabric, and hot glue to join fabrics. |
| 🧵 Sewing/Stitching | A traditional method involving thread and needles to bind fabrics together. |
| 📏 Adhesive Methods | Use adhesives like double-sided tape, fabric glue, and hot glue to join fabrics. |
| 🔘 Buttoning | Attach buttons to fabric, a process that involves threading, positioning, and securing the button. |
You’ll learn to choose the right tools, pick the best fabric, and master the techniques to secure it like a pro.
Preparation Steps Before Securing
Before we dive into the art of securing fabric, let’s first look at the essential preparation steps. Getting these right is crucial to ensure a smooth, hassle-free experience!
Step 1: Choosing the Right Fabric

- First off, you’ve got to choose the right fabric. Now, I’m not just talking about the color or design.
- You’ve got to consider the fabric’s weight and texture as well. Heavier fabrics like canvas require more robust fasteners like sturdy staples or tacks.
Step 2: Picking the Right Tools
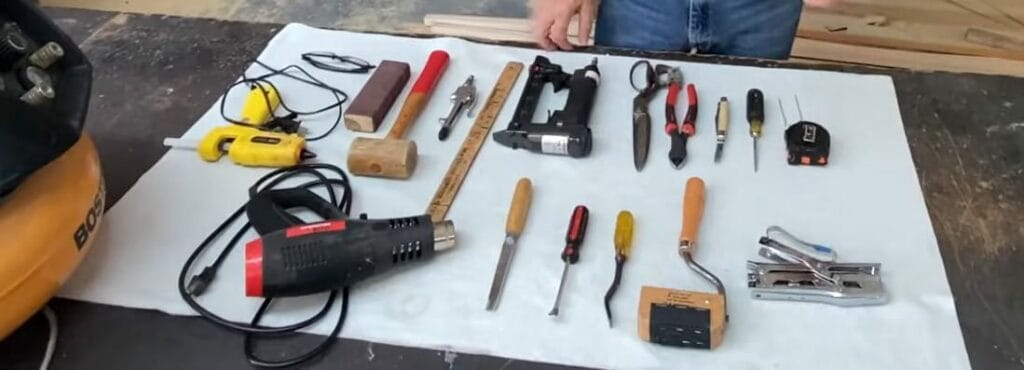
- Next, let’s talk about tools. You’ve got your regular stapler, heavy-duty stapler, and different types of tacks.
- The choice depends on your fabric and the securing you’re doing. A heavy-duty stapler works wonders on thick fabric, while a regular stapler is sufficient for lighter materials.
Step 3: Mastering the Techniques

- Securing isn’t as simple as it seems. You must understand how to position your fabric, how much force to apply, and where to place your staples or tacks.
- Practice makes perfect here, so don’t be afraid to experiment with scrap fabric!
Steps on Stapling Fabric
Once you’ve got your fabric and tools, it’s time to dive into the heart of the process: stapling. But hold your horses! It’s not as simple as just driving staples into the material.
Step 1: Positioning Your Fabric

- This is crucial. You’ll want to lay your fabric face down on a clean, flat surface. Take time to smooth out any wrinkles or bubbles to ensure a tight, even fit.
Step 2: Planning Your Staple Route

- Start from the center and work your way outwards. This strategy helps to distribute tension evenly across the fabric, preventing sagging or puckering.
Step 3: Stapling the Fabric

- Gently pull the fabric taut as you staple. Hold your staple gun at a 45-degree angle to the fabric surface.
- Remember, it’s about applying the right amount of force. Too much, and you risk damaging the fabric. Too little, and your staples won’t hold.
Step 4: Checking the Fabric

- Don’t rush. After you’ve secured your first few staples, stop and check your work. Ensure the fabric is tight and the staples are in place.
Steps on Tacking Fabric
After we’ve mastered the art of stapling fabric, our next move is tackling the tacking process. Now, tacking isn’t rocket science, but it requires some precision. You’ve got to have a keen eye and a steady hand.
With tacking, we’re securing the fabric, but we’re using tacks instead of staples. Why tacks? Well, tacks are perfect when you want to temporarily secure the fabric or work with heavier fabrics that demand more grit.
Here’s a step-by-step guide on tacking fabric:
Step 1: Choose the right tack

- Size matters regarding tacks—bigger tacks are for heavier fabrics, and smaller ones are for lighter materials.
Step 2: Position your fabric exactly how you want it

- Upholstery tacks are often semi-permanent, allowing for adjustments if necessary.
Step 3: Plan your tack route

- Just like with stapling, you don’t want to go in blind. Have a clear path in mind.
Step 4: Start tacking the fabric

- Apply gentle pressure to push the tack in. Don’t be too forceful; you don’t want to damage the fabric.
Step 5: Check your work

- Use a rubber mallet to ensure that the tacks are holding up well.
Steps on Sewing and Stitching
After getting the hang of stapling and tacking, it’s time to dive into a more traditional technique: sewing and stitching. Now, don’t get intimidated! I’ll guide you through the process and make it as easy as ABC.
Step 1: Choose your thread wisely

- Not all threads are created equal. You’ll want a strong, durable thread for heavier fabrics, while lighter fabrics call for a more delicate thread.
Step 2: Needle selection

- The rule of thumb here is the heavier the fabric, the larger the needle. Don’t forget to keep sharp needles on hand. A dull needle could snag or damage your fabric.
Step 3: Stitching

- Start by threading your needle, then make a small knot at the end of your thread.

- Position your fabric and plan your stitching route.
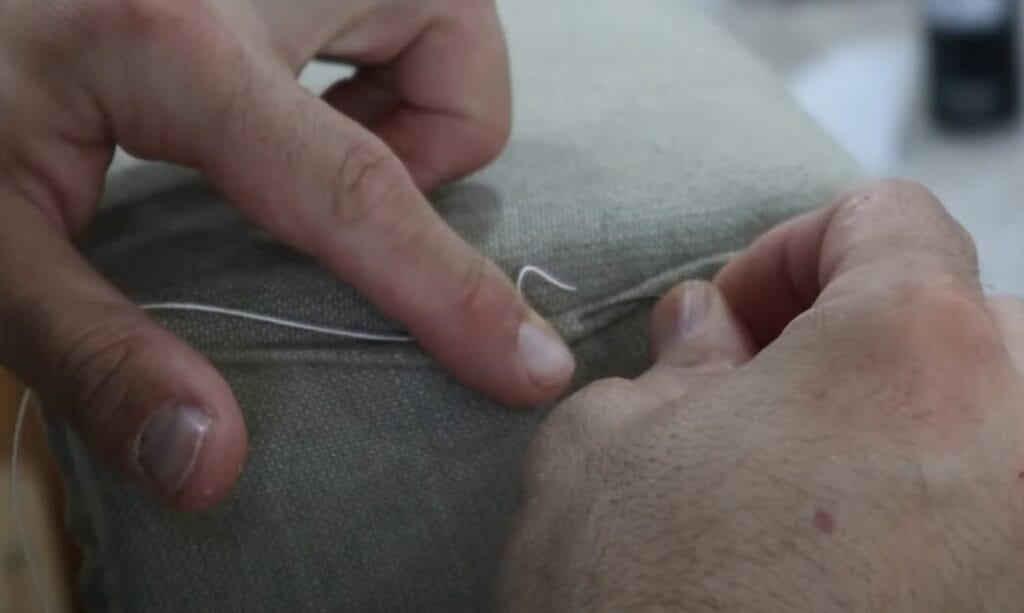
- Keep your stitches even and consistent. Remember, this isn’t a race. Take your time and enjoy the process.
Different Adhesive Methods
You might be thinking, “Adhesive?” But trust me, it’s a game changer in securing fabric. No more pricked fingers or tangled threads. It’s all about getting the job done quickly and efficiently.
Double-sided Tape
Our first adhesive method is the double-sided tape. It’s the secret weapon of many DIY enthusiasts and professionals alike.

- Cut the tape to the desired length and stick one side onto the fabric.

- Peel off the protective layer to expose the other sticky side.

Video | Sailrite
- This side will attach to the other piece of fabric, securing them together.
Fabric Glue
Another amazing adhesive method is fabric glue. It’s like magic for fabrics! It’s more of a permanent solution.

- Apply it to the fabric, press the two pieces together, and let it dry. Apply the glue evenly and sparingly to avoid lumps or hard spots.
Hot Glue
Then we have hot glue. Now, this one requires a bit of caution. It’s hot, it’s quick, and it’s permanent. You’ll need a hot glue gun for this one.

- Apply the glue to the fabric, quickly place the second piece on top, and allow it to cool.
- But remember, always work in a well-ventilated area when using hot glue.
Steps on Buttoning
Now that we’ve covered the basics of adhesives let’s shift gears and dive into another method of securing fabric: buttons. These little guys might seem simple, but they are useful in fabric projects.
Step 1: Make sure you have the right tools

- That means a good quality needle, thread, and a set of buttons. The size and style of these will depend on your project, but having a variety on hand is always a good idea.
Step 2: Threading the Needle

- You’ll start by threading your needle and tying off the end.
Step 3: Positioning the Button

- Position your button on the fabric where you want it to go.
Step 4: Beginning the Stitch

- Then, push the needle up through the back of the fabric and one hole in the button.
Step 5: Securing the Button

- Then, pull it all the way through, then push it back down through the opposite hole.
Step 5: Reinforcing the Stitch

- Repeat this process a few times until the button is secure.
Comparison of Securing Methods

When it comes to securing fabric, there’s no one-size-fits-all approach. Let’s look at some of the most popular methods out there.
| Criteria | Stapling | Tacking | Sewing/Stitching | Adhesives | Buttoning |
|---|---|---|---|---|---|
| Durability | Strong and long-lasting, especially for heavy fabrics | Suitable for temporary or semi-permanent; ideal for heavier fabrics | Traditional, durable bond; versatile for various fabrics | A bond’s permanence varies based on the type | Ideal for decorative purposes; not as strong as staples or stitches |
| Ease of Use | Requires a staple gun; quick to apply | Needs a hammer/mallet; it is easier to adjust than staples | Requires needles and thread; takes longer | Application speed varies; tapes are quick, and glues need drying time | Requires a needle and thread; a more intricate process |
| Versatility | Suitable for most fabrics, especially heavier ones | Ideal for heavier fabrics or temporary securing | Works for almost all fabrics | Works on various fabrics; suitability varies based on type | Suitable for both functional and decorative purposes |
| Aesthetics | Hidden from view; it leaves small puncture marks | Visible tacks can be decorative | Allows for decorative patterns; stitches can be hidden or showcased | Invisible once set; ensures a clean look | Adds a decorative touch; buttons can match or contrast with the fabric |
Common Mistakes

Tackling a fabric-securing project? It’s all in the details. While enthusiasm is great, stumbling into typical missteps is easy.
Here, we’ll spotlight those common mistakes to keep your work on point. Ready to get it right? Let’s get started.
- Excessive Stapling: Too many staples can damage your fabric and make it difficult to adjust later. Using the appropriate number of staples for the fabric’s size and weight is essential.
- Not Testing on Scrap Fabric: Before starting the main project, always test your tools and techniques on scrap fabric. This step ensures that everything works as expected and can prevent potential errors.
- Using the Wrong Tacks for Your Fabric: The size and type of tack should match the fabric’s weight and thickness. Using small tacks for heavy fabrics or vice versa can lead to inadequate securing.
- Not Securing Fabric Tightly: The fabric should be pulled taut when securing to prevent sagging or wrinkling. Ensure the fabric is stretched evenly to maintain its shape.
- Improper Handling of Corners: Securing corners requires careful folding to ensure a neat appearance. Avoid bunching up the fabric; instead, fold it systematically.
- Not Allowing Adhesives to Dry Properly: If using adhesives or glues, it’s crucial to let them dry for the recommended time. Rushing this step can lead to the fabric not adhering properly.
- Neglecting Safety Precautions: Always prioritize safety when working on any project. This includes wearing safety goggles, working in well-ventilated areas when using glues, and being cautious with sharp tools.
Safety Precautions
As we’ve explored the various methods for securing fabric, it’s clear that each has its strengths and weaknesses.
- Gear Up: Always wear safety glasses. Those tiny staples or tacks can fly in unexpected directions, and we want to keep those peepers safe.
- Keep It Tidy: A cluttered workspace is a danger zone. Clear out any unnecessary items so you don’t trip over them. And hey, it makes the whole process smoother.
- Watch Those Fingers: Whether using a staple gun, hammer, or needle, always be mindful of where your fingers are. We want to secure the fabric, not our digits!
- Ventilate: If you use adhesives, especially hot glue, ensure you’re in a well-ventilated area. Those fumes aren’t great for the lungs.
- Unplug Tools: Unplug any electrical tools if you’re taking a break or done for the day. It’s an easy step that can prevent unintended accidents.
- Stay Grounded: If you’re standing on a chair or ladder to reach, make sure it’s sturdy. And no balancing on tiptoes, alright? We’re DIYing, not ballet dancing!
- Store with Care: Once you’re done, store your tools out of reach, especially if you have little ones or curious pets.
Frequently Asked Questions
- What’s the Best Fabric for Upholstery Projects?
- Every project is unique, but you’ll often lean towards durable and easy-to-clean fabrics like canvas or microfiber for upholstery. But remember, the fabric’s aesthetic and feel are just as crucial, so choose something that matches the room’s vibe and your comfort preference.
- Stapling vs. Tacking: Which Is Better?
- Neither is “better” per se—it’s about the project’s needs. Stapling is often quicker and provides a strong hold, ideal for heavy fabrics. Tacking gives you more flexibility for adjustments, especially if you’re still fine-tuning the look.
- How Often Should I Replace My Upholstery Tools?
- Quality tools can last a long time with proper care. Keep them clean, and store them in a dry place. If you notice a tool isn’t performing as it used to, such as a staple gun jamming frequently, it might be time for a replacement or servicing.
- Can I Use Regular Thread for Sewing Upholstery?
- You’d ideally want to use a heavier-duty thread that can withstand the fabric’s weight and wear for upholstery. The regular thread might not give you the strength and longevity you want.
- Is There a Way to Test Adhesives Before Using Them on the Main Fabric?
- Absolutely. Always test your adhesives on scrap fabric before applying them to your main project. This way, you’ll get a feel for its bonding strength and ensure it doesn’t discolor or damage your fabric.
- I’ve Over-Stapled My Fabric. How Do I Fix It?
- It happens to the best of us! Gently use a staple remover or flat-head screwdriver to remove the excess staples. Remember to be gentle to avoid tearing the fabric. Once done, smooth out the fabric and re-staple as needed.
References
Organizations:
- National Upholstery Association. https://www.nationalupholsteryassociation.org/
Books:
- “Upholstery Basics” by Samantha Grenier
- “The Complete Guide to Chair Caning: Restoring Cane, Rush, Splint, Wicker & Rattan Furniture” by Jim Widess
Website Resources:
- Upholstery Resource. https://www.upholsteryresource.com/
Video References:
Cechaflo
Mark’s Upholstery
FaceLiftInteriors
Sewing Parts Online
Sailrite
Mollies Make & Create
Fabric Farms Interiors