7 min read
How to Wire a Train Horn to a Factory Horn (5 Easy Steps)

You don’t have to replace your factory horn when wiring a train horn. You can keep and use both of them.
To wire a train horn to a factory horn, connect the two to the relay pins 87 and 87A and install a toggle switch to the wire from Pin 30 that goes to the battery’s positive terminal.
Please continue reading to see how it’s done.
First Things First
Disconnect the battery before working on the wiring in your vehicle.
Have the following items ready for this project:
- Items: 2-wire cable (18-gauge with red and black wires), toggle switch
- Tools: wire cutter, wire stripper, electrical tape
Wiring a Train Horn to a Factory Horn
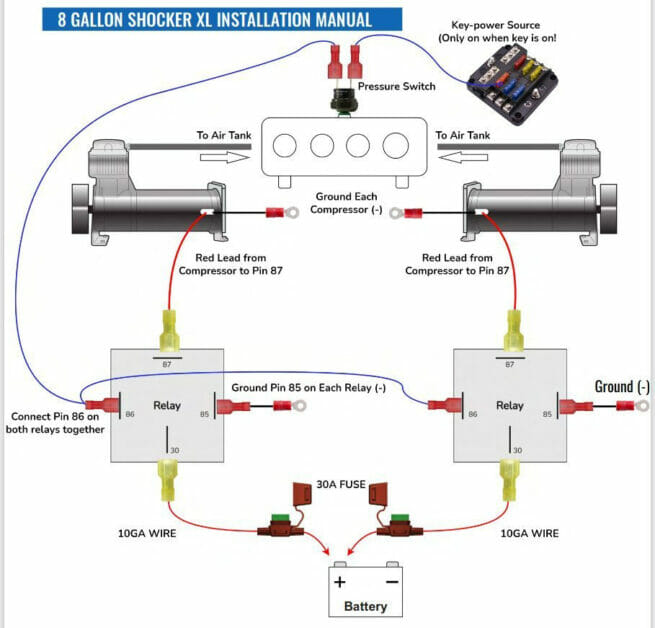
Wiring Diagram
We will follow this wiring diagram to wire a train horn to an existing factory horn:
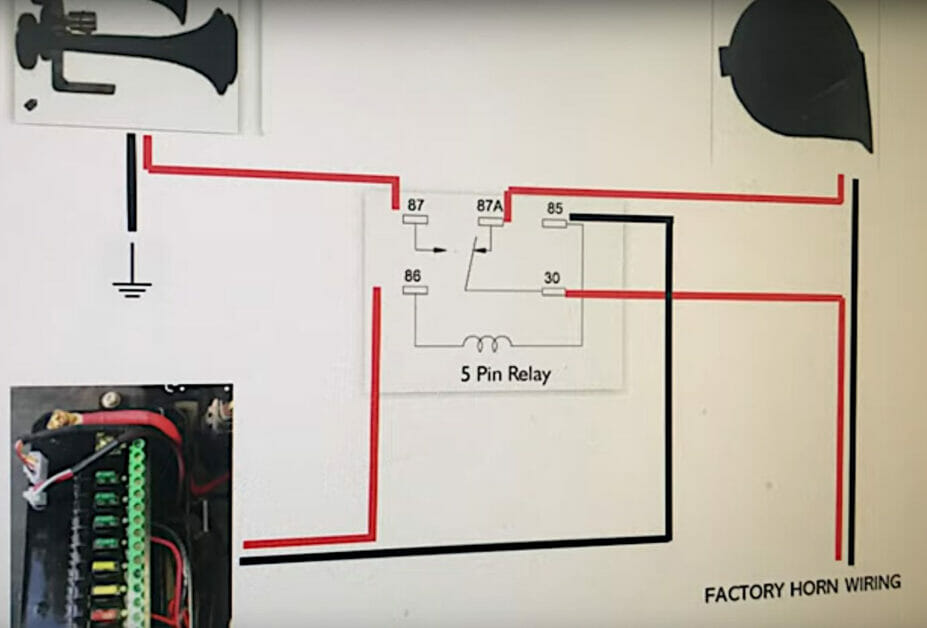
As you can see in the wiring diagram above, the train and factory horns connect to the 5-pin relay as follows:
- The red wire from the train horn connects to Pin 87 on the relay.
- The red wire from the factory horn connects to Pin 87A on the relay.
The red wire on Pin 87A is the positive one from the solenoid that controls the factory horn.
The Relay
The relay should have a wiring diagram on it like the one below.
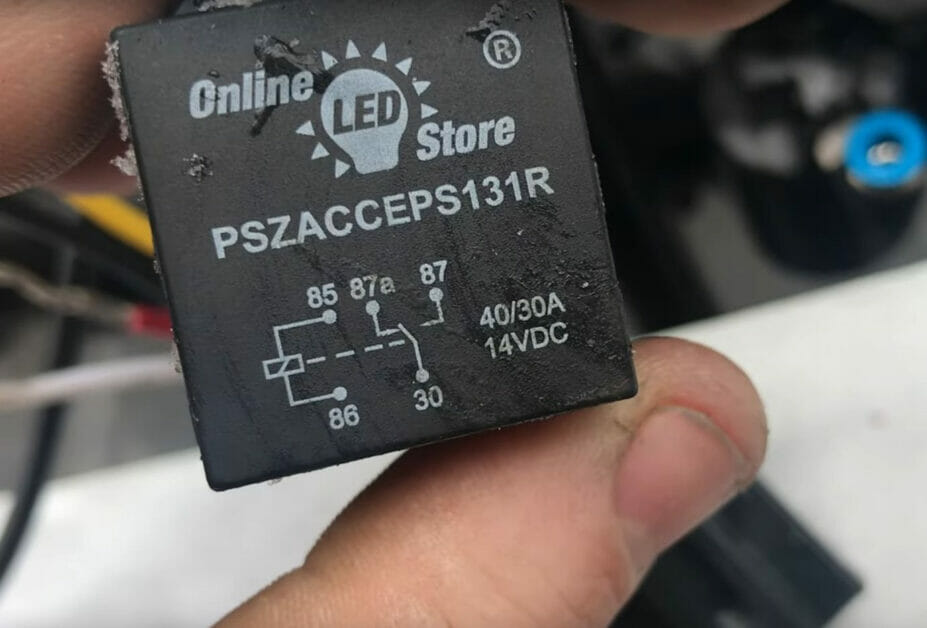
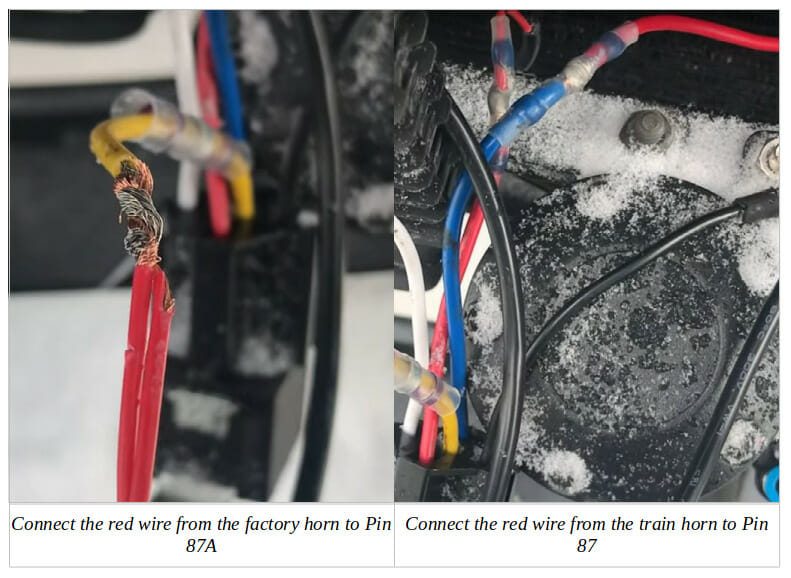
Remember that Pin 87 is for the red wire from the train horn, and Pin 87A is for the red wire from the factory horn.
You can also see in the above picture that the internal switch is connected to Pin 30, which controls whether to power Pin 87 (to blow the train horn) or Pin 87A (to blow the factory horn).
In this particular relay, Pin 87 has a blue wire connected to it, and Pin 87A has a yellow wire on it. It doesn’t matter what colors they are. The important thing is to note the relay pins they connect to.
We will splice the right wires together, so you must know how to do that to connect the right wires together.
The Factory Horn
As shown below, you might see a green wire instead of red on the factory horn.
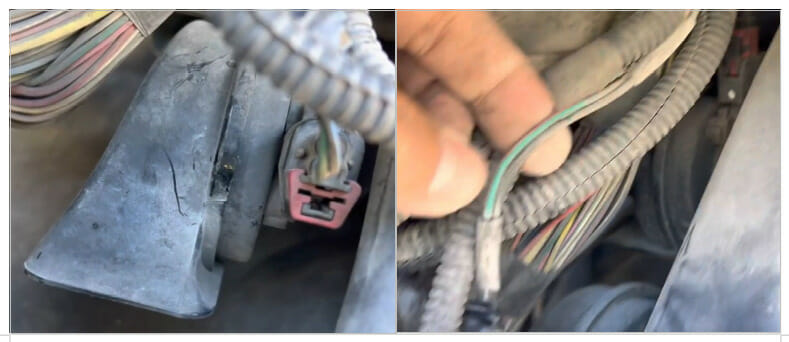
In this case, the green wire is the power, and the black wire is the ground wire.
The Train Horn
Before wiring, you must wire the train horn somewhere suitable for the vehicle.

We covered the wiring procedure for installing a train horn in this article. Here’s the wiring diagram again for that part:
Let’s get started.
Wiring Procedure
We will conduct the wiring procedure in the following order, although the order itself is not so important:
- Connect the power wires.
- Connect the rest of the relay.
- Grounding.
- Install a toggle switch.
- Testing.
Step 1: Connect the Power Wires
Connect the power (red) wires to the relay as follows:
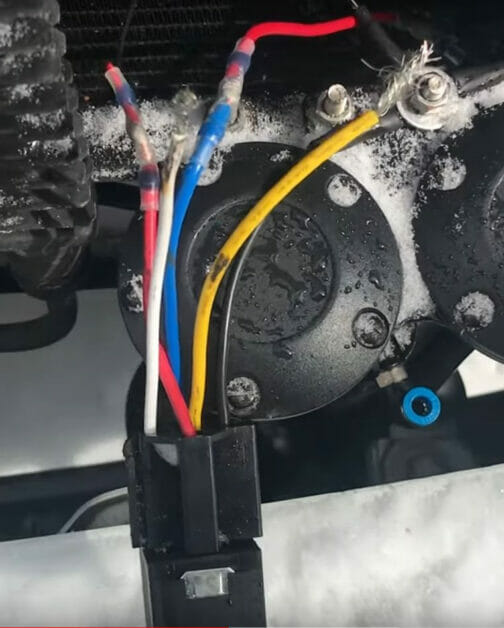
- Connect the power wire from the factor horn to Pin 87A, which has a yellow wire in this case, although yours may differ;
- Connect the power wire from the train horn to Pin 87, which has a blue wire in this case, although yours may differ. This wire will already be connected if you follow our previous guide on installing a train horn; otherwise, do so now.
Step 2: Connect the Rest of the Relay
Connect the remaining pins on the relay as follows:
- Ground Pin 85.
- Connect the pressure switch on the air tank to Pin 86 (or with Pin 86 of another relay in a two-train-horn setup).
- Connect the wire from the battery’s positive terminal to Pin 30 (via the solenoid). See also Step 4 for optionally installing a toggle switch.
Step 3: Grounding
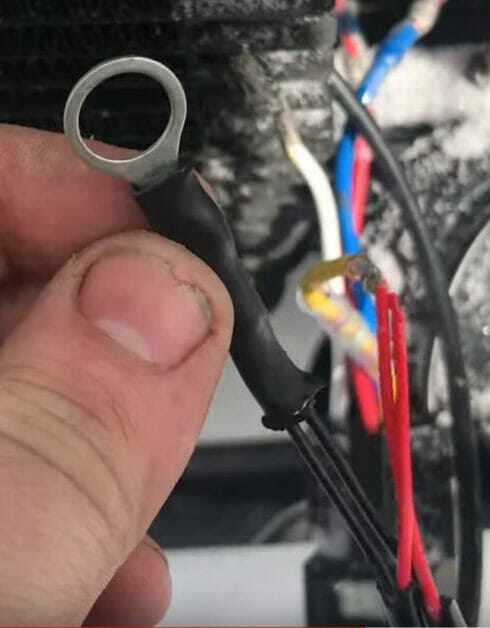
You can connect both black wires together to form a common ground instead of connecting them to separate ground points.
Splice the two wires together and remember to attach a ring connector at the end, which will attach to the ground point, such as the vehicle’s chassis.
Step 4: Install a Toggle Switch
You will need a 2-wire cable (with black and red wires) and a toggle switch.
You must install a toggle switch between the two to wire a train horn to a pre-installed factory horn. Something like the one shown here (for 12V connections) will do:
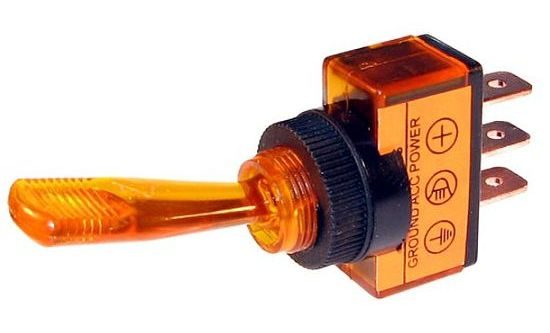
The toggle switch will have 2 or 3 terminals as follows:
- On/ACC (either 1 or 2 of these)
- Power/Supply/Volts
- Ground
It won’t be needed if the toggle switch has an extra 2nd On/ACC terminal. Use either one of the two and ignore the other.
Wiring the Toggle Switch
You will have two wires (one red and one black) to connect to the toggle switch (from the relay’s Pin 30). Wire the toggle switch as follows:
Connect the red wire to the “power” or “supply” position and the black one to either one of the “On/ACC” positions.
Step 5: Testing
You should test your setup after the wiring to ensure it works.
Change the toggle switch’s position and blow each horn at a time. Enjoy!
RELATED Horn Relay Diagram
References
Website Resources:
- SPST on/off toggle switch. https://www.wiringdepot.com/20-amp-12-volt-s-p-s-t-on/off-toggle-switches.aspx
Video References:
Jeslyn07
Joe Mulhair
Urfan Malik