8 min read
How to Wire a Horn Relay (5-Step Guide)
Wiring a horn relay can help you to prevent multiple road problems and accidents.
You may be wondering if there are better options than a horn relay. Yes, there are other options (like wiring a horn without a relay) but horn relays are more effective. Horn relay installations have become more popular in recent years since the part is one of the first things to go in a used car. I have worked as both an electrician and a mechanic, and in this guide, I will teach you how to install a horn using a relay on your own.
Below I will cover every detail. Let’s dive into the process of installing a horn relay in your vehicle.
Quick Summary: Start by locating and disconnecting the existing horn wire. Next, check the voltage in the wires using a multimeter or test light. Go on and attach the cable to terminal 85 on the relay unit, and attach terminal 86 to a metal spot on the car. Next, connect the horn wire from terminal 86 to terminal 30. Then, you can install the horn and the relay under your vehicle’s hood and near the battery. Finally, connect the solderless ring terminal by attaching one inline fuse holder’s cable to the solderless terminal and the battery’s positive terminal.
How to Wire a Horn Relay – The Procedure
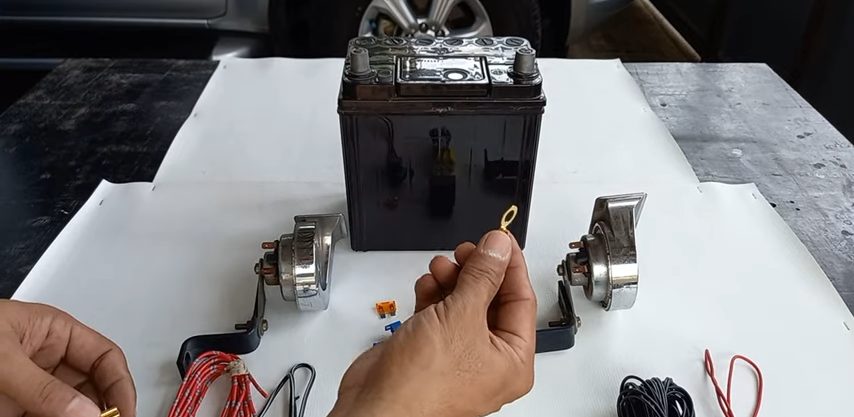
The Things You Need:
- A horn and a 5-pin relay
- Solderless ring
- 16-gauge wire
- 10-gauge wire
- Pliers
- Wire stripper
- Wire caps
- Multimeter
- Socket for the relay
- A fuse holder with a 5-ampere fuse
- Terminals for the ground and horn terminals
- Optional – shrink tubes for insulation and cable ties
To wire a horn using a relay, it is crucial to understand its components. You also need to know the steps of wiring all the parts correctly.
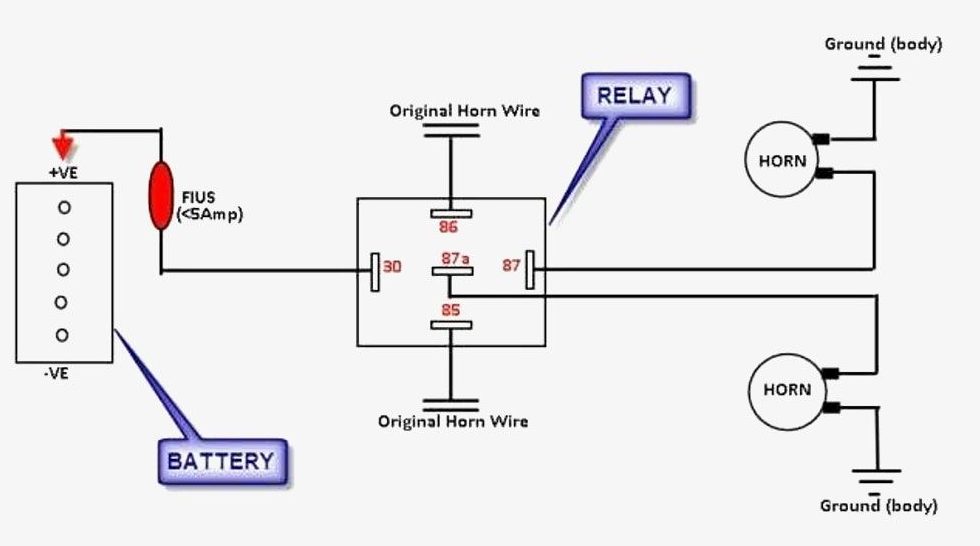
Take a peek at a common wiring diagram quickly before starting, you can refer to it later if you have issues.
The steps in the following section will guide you through the process of installing a horn relay in your car.
Step 1: Identify and Disconnect the Original Horn Cable
Locate the existing horn and disconnect its wires. Most horns are found near the battery because the position is strategic and convenient – fewer cables are required.
Insert the key into the ignition port and turn it to the ON position. Now press the horn button and check the 12 volts of power in the cable with a multimeter. You may also use a test light to verify the 12 volts of power.
Proceed as Below to Check the Voltage with A Multimeter:
- Fetch your multimeter and turn the selection dial to the DMMs setting.
- Insert the black probe/lead to the COM jack and the red lead to the port with a V.
- Ground the black probe and connect the red probe to the bare parts of the wires.
- Check the readings, volts should reflect the 12 volts of the car’s battery.
If there is no voltage in the cable, perform a continuity test between the battery’s negative terminal and the wire. You may use any continuity checker.
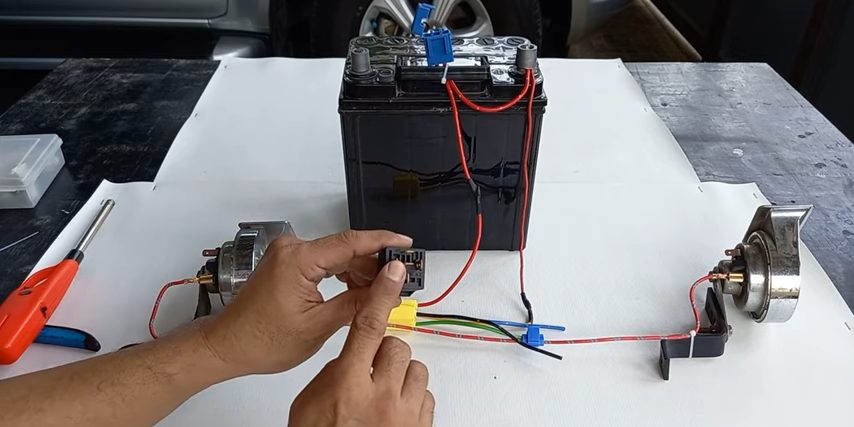
Step 2: Attach the Cable to The Relay
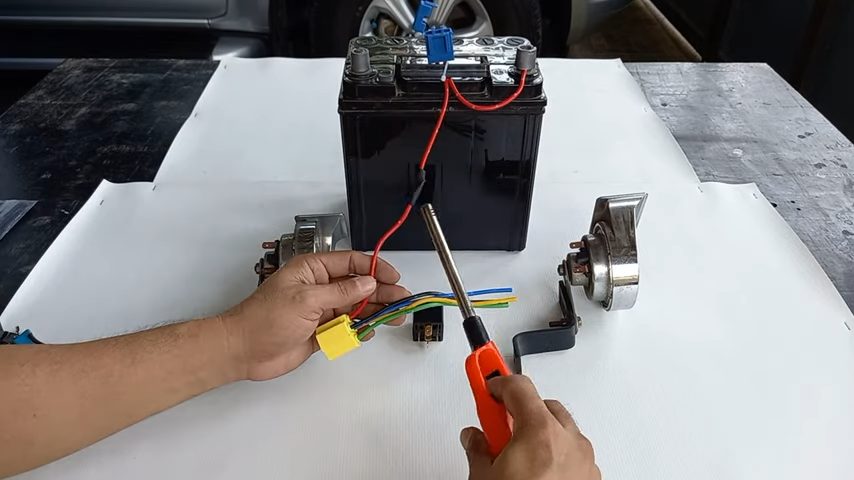
Once you are sure that the wire has power, connect it to terminal 85 on the relay unit – you may use a red wire for the live connection.
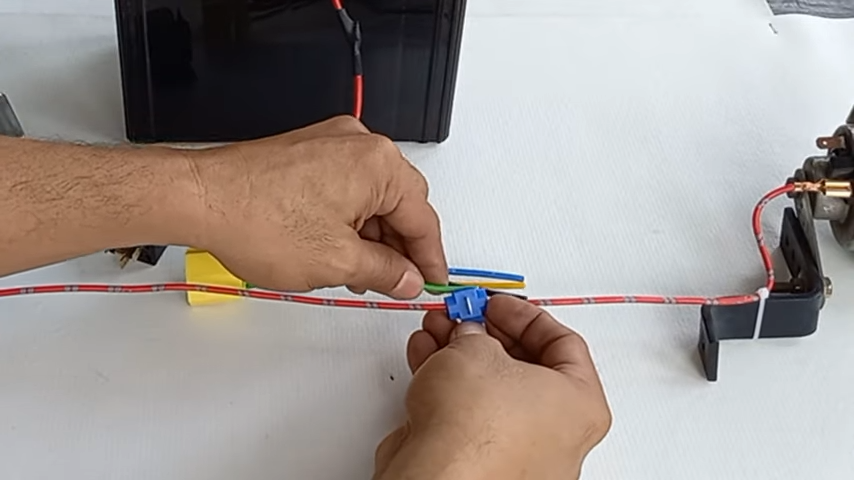
Go on and affix terminal 86 on the metal spot in your car. Use a short-length 16-gauge cable that has solderless connectors. You do not need a thicker wire because it will only be supplying electricity to the relay’s coil. However, some folks prefer 18-gauge wires. (1)
Note: if the cable terminals do not have the bare section properly exposed, use a wire stripper to strip off the insulation coating to about ½ inch. That will provide a good surface for connecting the respective relay terminals. And always nest the twisted section in wire caps to secure the connections or pigtails. (2)
Step 3: Attach the Horn Wire
At this point, connect the cable of the horn to terminal 86 on the relay socket. Then, connect terminal 30 to terminal 85 on the relay socket with 16-gauge cables.
You must wire the horn relay differently to get continuity between the wire of the horn and the ground (of the car).
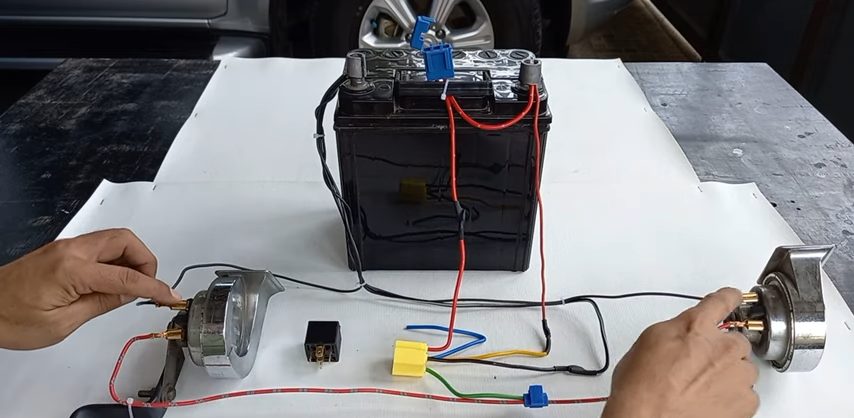
Step 4: Install the Horn and The Relay
After connecting the cables to their respective relay terminals, mount the new horn and the relay under your car’s hood.
I recommend mounting the relay and the horn near the battery inside the car’s hood. That is a double benefit since you won’t need to buy new heavy gauge cables, and the equipment will rest nicely in that position.
Do not just plug in the horn and the relay, using a fuse is highly recommended.
Then, whenever you are installing a fuse, always ensure that the fuse is not inserted until the wiring is complete. So, you should insert your 5-pin relay in its socket and then insert the 5-ampere fuse.
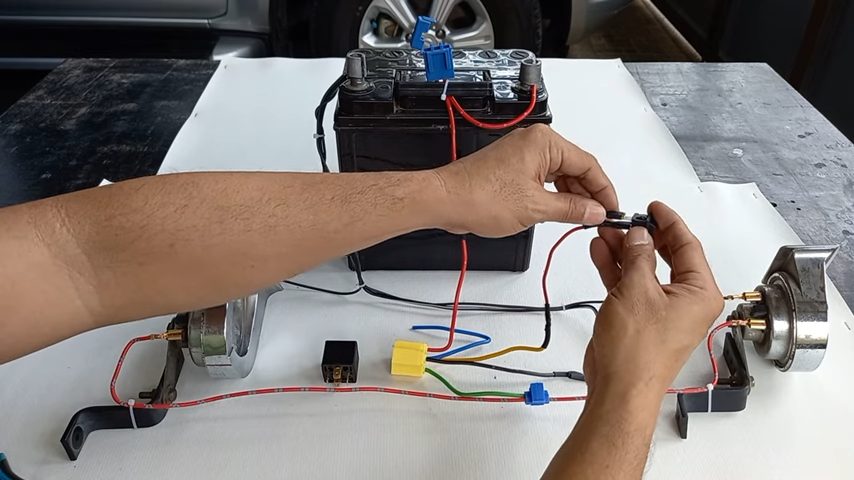
Step 5: Install the Solderless Ring Terminal
Connect one of the inline fuse holder’s cables to the solderless ring terminal. And then attach it to the positive terminal of the car’s battery.
Once done, extend one side of the fuse holder with a 10-gauge wire and a solderless butt connector. And then connect it to terminal 30 with a female spade connector.
Female spade connectors are the best, but you may use any other that’s available to you to do the wiring. Some may prefer using a piece of a 10-gauge wire and ideal solderless connectors to link the horn to terminal 87 on the relay.
If there are two connectors, attach the other connector to a metal spot on your car – use solderless connectors and 10-gauge cables.
If you are uncertain, refer to the single-horn wiring diagram and/or dual horn relay wiring diagram to get a clear picture of the process.
You also need to install a switch to curb the continuous flow of power to the relay’s coil, and the horn will continue to operate throughout. The horn switch should be like the horn switch on the steering wheel.
Note: In the 5-pin relay, pin 85 is the yellow wire. This wire should connect to the original positive wire on the horn. Do not connect it on both sides, only one side (left or right) is enough – that is for dual horn connections.
You can now press the switch and test your horn.
Why Should You Use a Relay to Wire a Horn?
Wiring a horn in your car with a relay is very important as it ensures the proper functioning of the horn relay. The attached cables close the circuit whenever the switch is engaged; the action enables the sound to be released. Evading the horn in this type of wiring is abortive and unwise.
RELATED Horn Relay Diagram
Wrapping Up
You should now be able to comfortably wire a horn in your vehicle using a relay. All the components and procedures have been unveiled in this article, and you should not have any problem.
Take a look at some of our related articles below.
References
(1) supplying electricity – https://www.sciencedirect.com/topics/earth-and-planetary-sciences/electricity-supply
(2) pigtails – https://www.cosmopolitan.com/style-beauty/beauty/g30471416/pigtail-styling-ideas/
Video Reference