9 min read
How to Wire Trailer Lights (Wiring, Diagram, Procedure)
Adding extra lights is a good way to improve visibility if you own a trailer.
Quick Summary: When wiring trailer lights, you must drill and cut out the holes before wiring. Run the wires along the railing only as necessary: the black and white wires in all cases, and the 3rd one according to the requirement (amber and green at the sides for turning, and red at the rear for stopping). Then, connect the same wires by crimping, tuck them inside, and attach the lights.
I will show you the entire procedure from start (drilling) to finish (testing) with step-by-step pictures below.
Method
We will follow these 12 steps to wire your trailer lights (adding extra lights):
- Step 1: Drill the Side Holes
- Step 2: Drill the Rear Holes
- Step 3: Cut along the Perimeter
- Step 4: Fit the Seal
- Step 5: Arrange the Wires
- Step 6: Prepare the Wire Ends
- Step 7: Connect the Main Wire
- Step 8: Tuck the Wires
- Step 9: Fit the Rear Lights
- Step 10: Fit the Side Lights
- Step 11: Connect the Side Lights
- Step 12: Test the Lights
Routing and Wiring
You don’t need to run all five wires along all wiring rails on the trailers. Only route the ones you need, which are usually 3.
Only the black or brown “running” wire that provides power and the ground (white) wire that provides grounding goes across both side rails and the back. Additionally, when wiring lights to a trailer:
- Amber lights go to the vertical parts of the sides to indicate turning.
- Green lights go to the top parts of the sides to indicate turning.
- Red lights go to the rear of the trailer to indicate stopping or braking.
Requirements
Equipment: the lights you’re going to add or replace
Wiring: Measure the length of wire you will need along the trailer’s sides from the power source to where you will install them. You will also need a wire stripper and wire crimper.
If you need to drill a hole: power drill, a drill bit
If you need to cut a hole: a cutter
Attaching New Lights
This procedure is for when you want to install new lights on a trailer that already has them. It is usually done to double the lights to make it easier for other drivers to detect your trailer.
Also, I recommend using new wires when attaching new lights rather than using the existing wiring so that you can keep them separate. However, if the existing wiring is in good condition, use them instead; in this case, you will only need small connector pieces from the existing lights to the new ones.
If while working you notice the existing wiring has cut marks, which is usually due to rodents, or other signs of damage, replace that wiring, too.
Here are the steps to attach new (additional) lights to a trailer:
Step 1: Drill the Side Holes
You may need to drill holes when wiring new lights to the trailer, and there is no space for it.
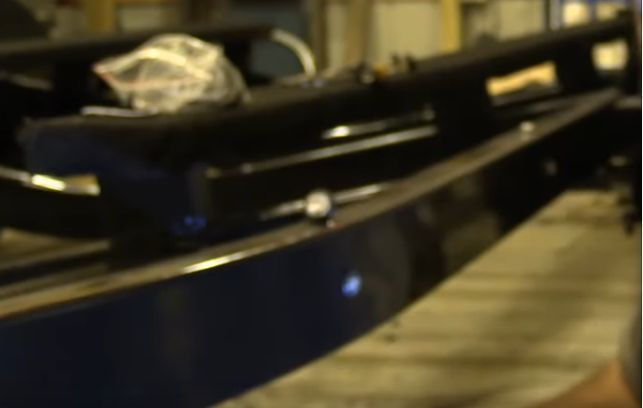
I don’t recommend adhesive backing because it can come off too easily on a trailer. Use a power drill with the right drill bit size for the light fitting to pass through. You must arrange these holes first before wiring. A pair of side holes will look like this – one hole at the top on the horizontal part and one at the side on the vertical part of the side railing.
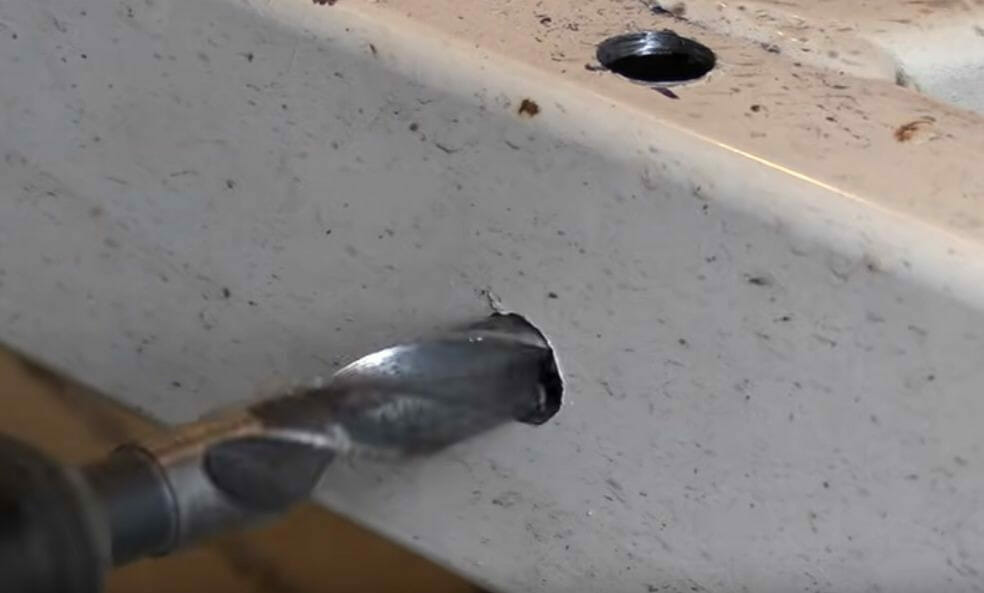
Step 2: Drill the Rear Holes
The hole must be larger when attaching a larger light at the rear.
For example, a standard 2” by 6” light housing may require a hole that measures 2.5” by 6.5”.
One method is to drill 2 2.5” holes, as shown in the picture below, along a length that stretches 6.5”, then use a cutter to cut the oval shape out.
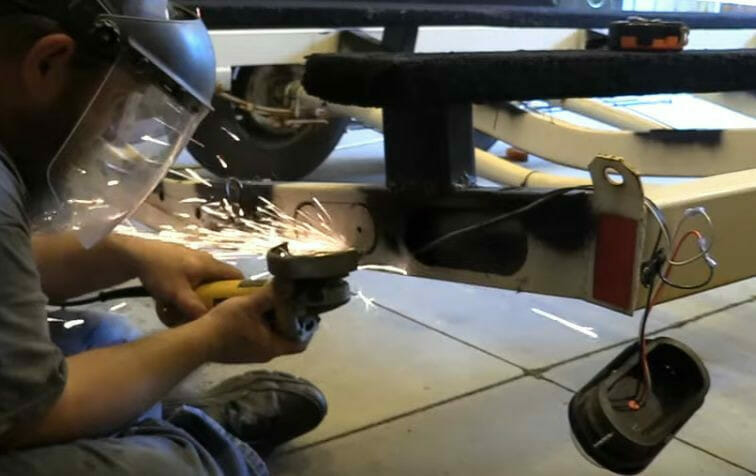
Step 3: Cut along the Perimeter
Now use the cutter to cut out the entire shape.
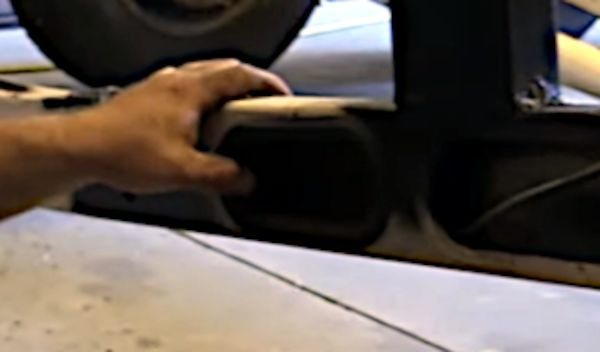
Step 4: Fit the Seal
Fit the light’s rubber seal or “boot” over the hole as shown.
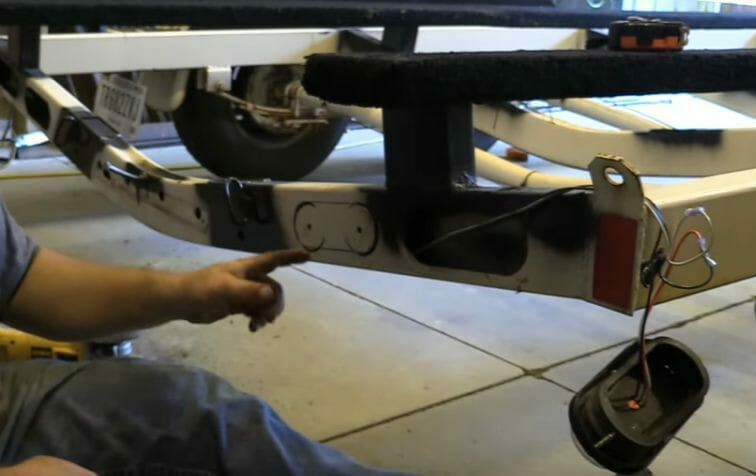
Step 5: Arrange the Wires
Arrange the wires from the power supply to where you want them. Read the ‘Routing section under General Things to Note at the top. New wires were attached alongside the existing ones using electrical tape to bind (not connect) them together.
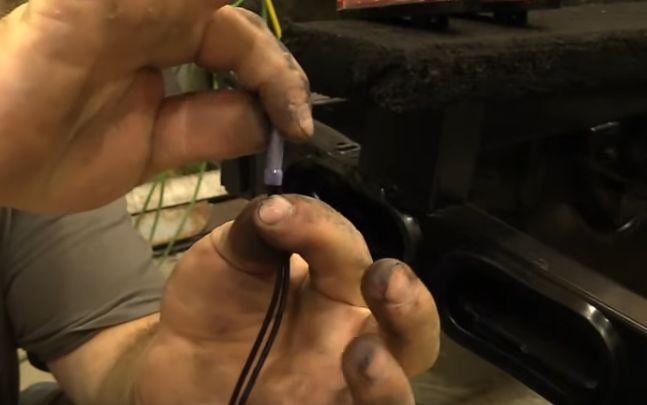
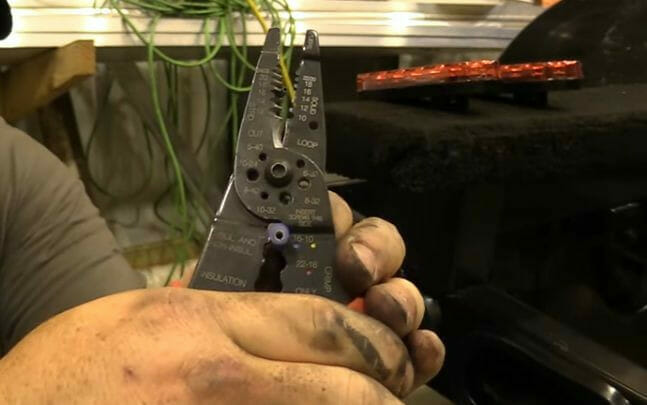
Step 6: Prepare the Wire Ends
Some rear lights come with plugs for the wiring (as shown below), which makes it easier to connect the wires, as you don’t have to connect directly to the lights.
If necessary, prepare the wire ends by cutting to the required length and stripping approximately 1/4” to 3/8” using a wire stripper.
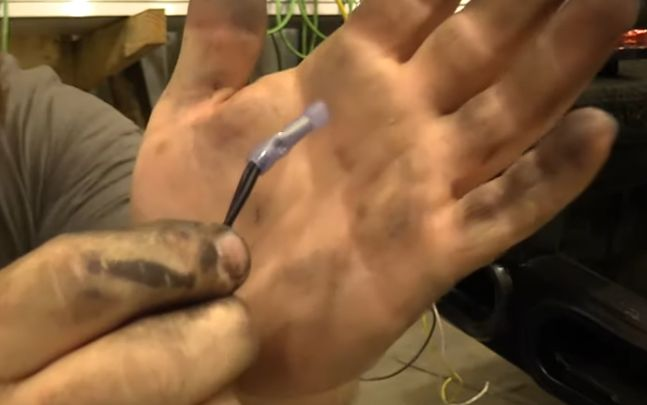
Then, crimp the two similar wire ends from the light firmly: connect the black/brown (running) wires and the white (ground) wires together. Here’s an example of the black wires connected:
Crimp firmly using a crimping tool.
You’ll know you made a good crimp if you see an indent like this:
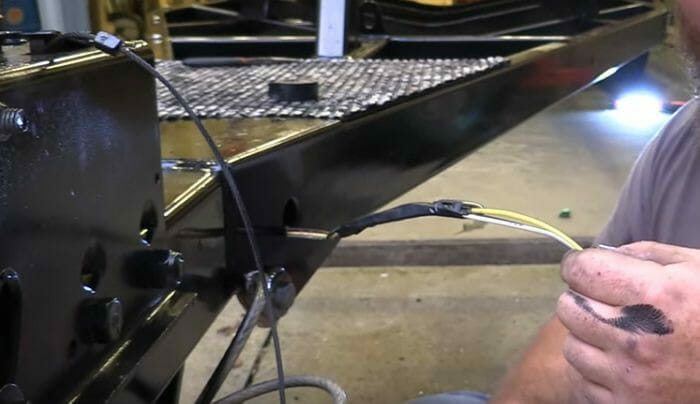
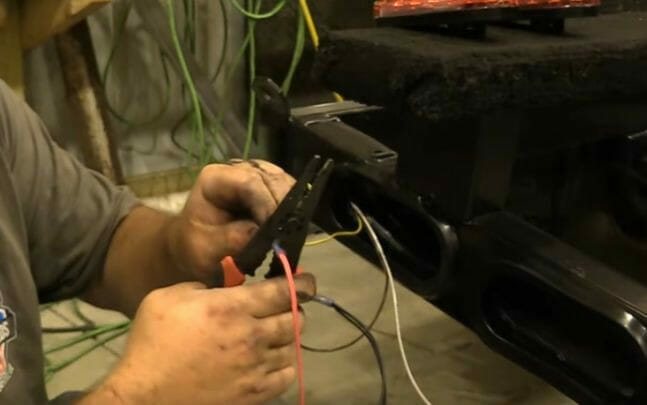
Step 7: Connect the Main Wire
Connect the crimped pairs of wires to the main wires coming from the power supply.
Apply the same procedure for stripping and crimping as in the previous step. Additionally, if the wires are stranded, twist the conductors to keep the strands together.
At the rear, the 3rd wire will be the red one, so the light comes with a red wire. But as a yellow wire was used in this example, it was connected by crimping it to the red wire.
Step 8: Tuck the Wires
Tuck the wires inside the hole after they are all connected.
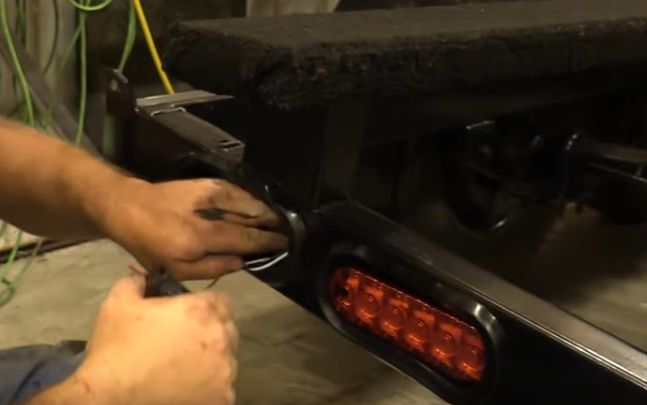
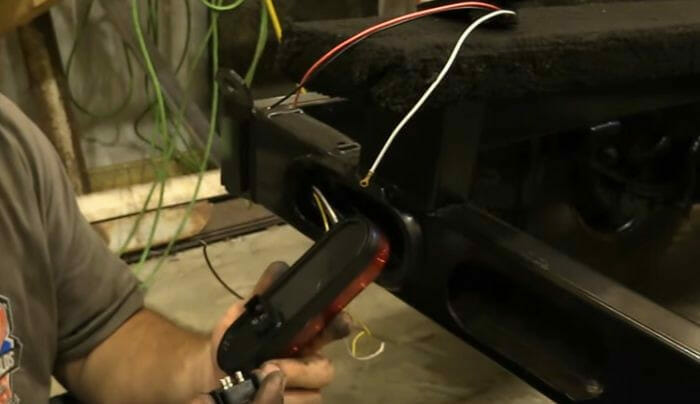
Step 9: Fit the Rear Lights
Fit the light inside its boot after tucking the wires inside.

Repeat the above few steps for the rear light on the other side.
Step 10: Fit the Side Lights
Do the same for the side lights.

Step 11: Connect the Side Lights
Remember to connect the same wires as you did at the rear. Then push them in the holes when done. In this example, the side one is set while the top one remains to be pushed in.
Repeat steps 10 and 11 for all other side lights around the trailer.
Step 12: Test the Lights
You’re ready to test the wiring after connecting the wires to the power source.
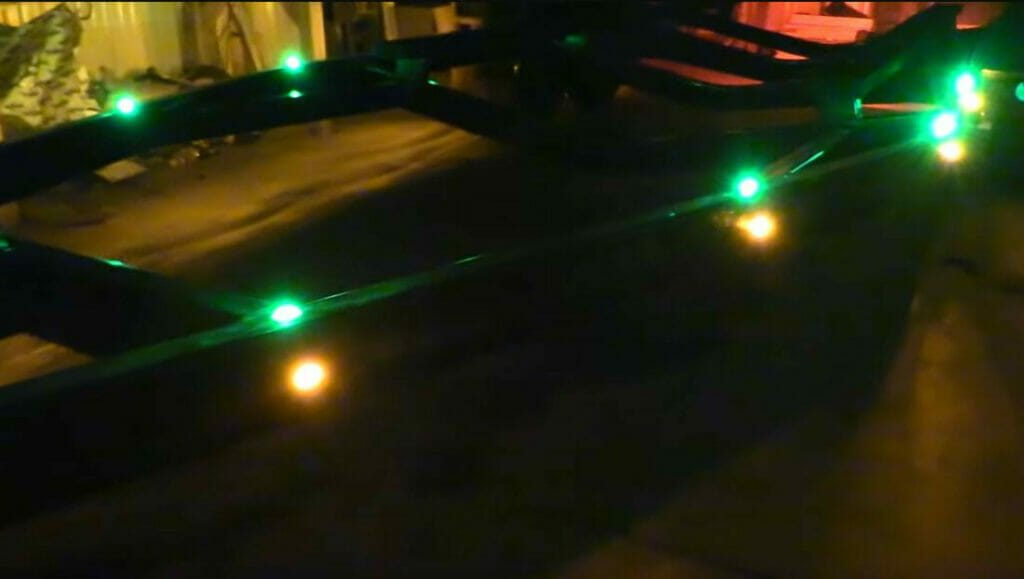
The side lights should look like this:
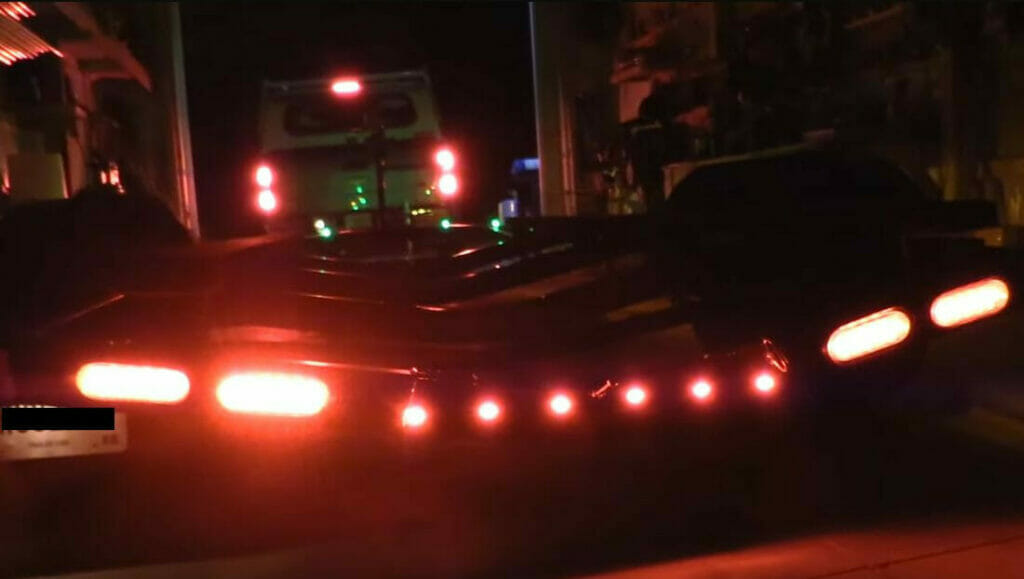
And the rear lights should look like this (number plate covered):
That’s it. Enjoy driving the trailer with improved visibility.
References
Dustin Apple