11 min read
How to Wire a Trailer Battery to Charge (Step-by-Step Guide)
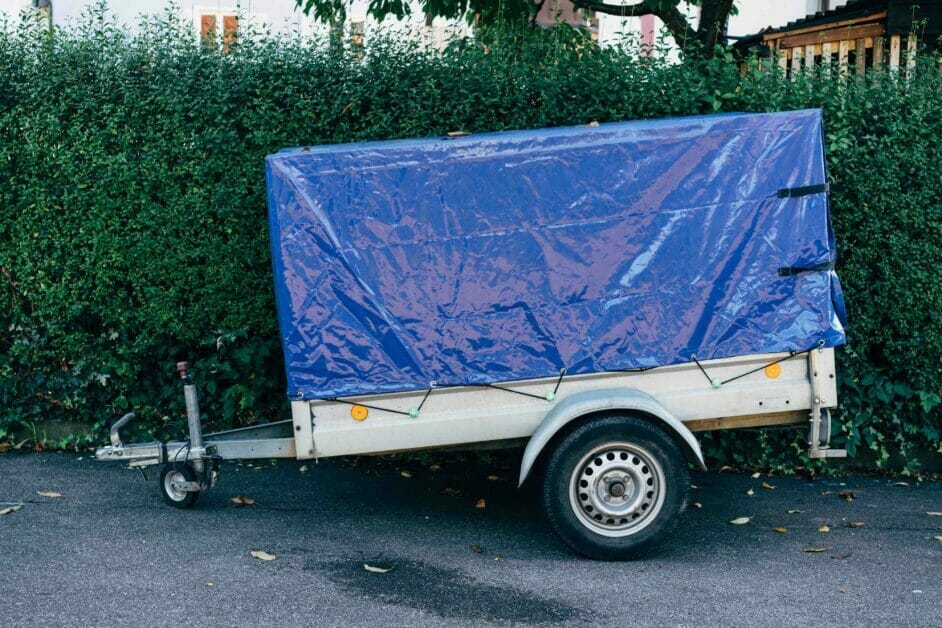
If you own a trailer, you’ll want to know how to wire its battery to keep it charged.
Quick Summary: When wiring a trailer battery to charge from the vehicle, connect the same terminals using a pair of charging leads of the right gauge and length. Connect the trailer battery’s positive terminal to the vehicle battery’s positive terminal with the red lead first, then the two negative terminals with the black one.
You can also charge the trailer’s battery while driving using a DC-to-DC charger, a battery isolation solenoid, a cigarette lighter charger with alligator clips, a winch wiring kit, a 7-way connector, or a solar panel.
Before detailing the wiring processes for most of them (while parked and while driving), I will explain why it’s necessary and its benefits.
Charging a Trailer Battery
A trailer battery doesn’t usually last as long as a regular car battery. That’s because they are often used for longer drives.
What is the Benefit?
Charging your trailer’s battery will ensure it is always charged and ready to use. At the same time, using a battery charger or isolator will ensure the main vehicle’s battery is also charged.
Is Charging while Driving Possible?
Yes, it’s possible to charge a trailer’s battery while driving.
I will cover this under ‘Wiring a Trailer Battery to Charge while Driving’. It involves using a DC-to-DC charger, an isolation solenoid, a cigarette lighter-based battery charger, an inverter, a 7-pin trailer plug, or a solar panel.
Considerations
Battery Size
Generally, you can calculate the battery size using the formula:
P (power in watts) = I (current in amps) x 12V (battery voltage)
For example, if you estimate the total load will draw five amps, get at least a 60W battery. Ideally, it should be a bit higher, so go for around 75W if possible.
Battery Type
Various battery types are available for trailers.
You can use standard lead-acid batteries, nickel-metal-hydride or nickel-cadmium, or longer-lasting lithium-ion ones.
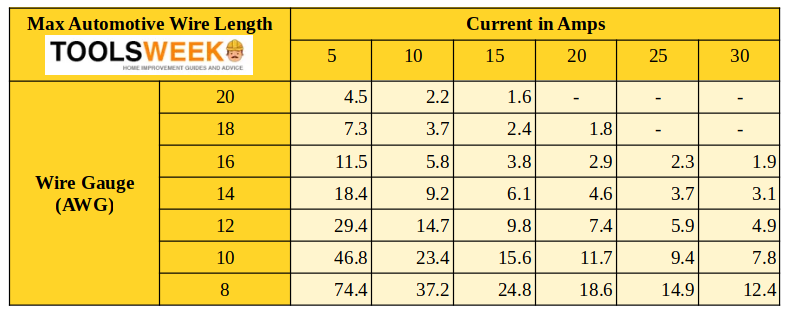
Wire Size
The right or minimum wire size (gauge) you should use depends on the amperage.
The wire must handle the current without overheating, and the length to account for voltage drop, which can be significant for a long trailer.
Use the table below to find the right wire gauge. It gives the maximum wire length in feet for a range of amperage (5-30) and gauge (8-20) values. Note that the higher the gauge, the thicker the wire. The wire gauges recommended here ensure the voltage drop doesn’t exceed 2% at 12V.
Routing the Wire
Route the wires along the trailer’s frame. Avoid sharp edges and moving parts.
Wire Connections
You can choose to either solder the wire connections or use crimp connectors.
Crimp the wires to get the wiring done quickly and easily. It’s usually fine to crimp. But if you prefer a potentially more secure connection and have the time for it, solder the connections. However, although soldering is electrically superior, problems such as cold joints or vulnerability to breaking can arise if done improperly.
If crimping, ensure the crimps are tight enough that you can’t easily pull the wires apart. This also applies to ring terminals crimped on the ends of wires.
Wire Ends
Use a wire stripper to strip the insulation off the ends of the wires.
Whether you sell or crimp the wires to connect them, I recommend stripping about 1/4” to 3/8”. Then, twist the ends together, i.e., the exposed copper strands.
Wiring a Trailer Battery while Parked
When wiring the trailer battery, you will need a jumper cable from the trailer’s battery to the main vehicle’s battery. Then, follow these steps:
Step 1: Identify the Terminals and Wires
You must identify which terminals are positive and negative on both batteries.
The positive terminals are usually marked by a plus (+) sign, and the negative ones with a minus (-) sign. If the terminals have caps over them, the positive terminal will have a red one and the negative terminal a black one.
Also, identify the wires in the connecting cable. Again, red is meant for connecting the positive terminals, and black is for the negative terminals. The red one is a bit larger in some cables, but it might not necessarily be so.
Step 2: Connect the Terminals
The next step is to make the necessary connections to charge the trailer’s battery according to your setup or preference.
Apply only ONE of the alternative possibilities for Step 2.
The general principle when wiring a trailer battery is the same, which is to connect the same terminals.
Step 2a: Connect the Terminals Using a Charging Cable
Connect the same terminals using a charging cable.
Using the charger’s leads, connect the two positive terminals with its red wire and the two negative terminals with the black one.
To clarify, connect the trailer battery’s positive terminal to the vehicle battery’s positive terminal with the red lead first, then the two negative terminals with the black one.
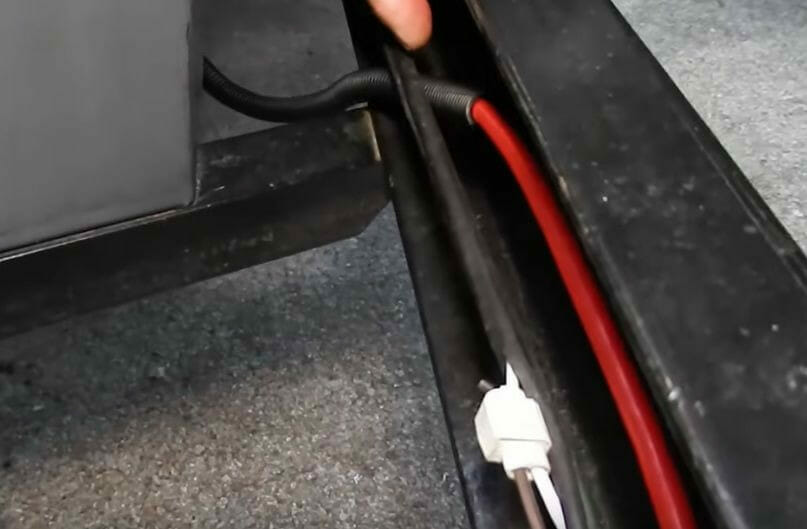
You can also charge the trailer’s battery while driving using a cable with winch connectors, as shown for the positive wire in the picture below.

Step 2b: Connect the Terminals Directly
To connect the terminals directly, loosen the connectors on all four terminals by turning them counterclockwise.
Use a spanner or wrench to loosen them. Then, connect the positive (red) wire to the positive battery terminal at both ends by wrapping the copper strands around them and clamping them down. Tighten the nut or screw (clockwise) and replace the terminal caps.
Repeat the above for the negative (black) wire to connect the two negative terminals.
Using a Battery Isolator
An alternative to the battery charger is to use a battery isolator.
It has the added benefit of being able to charge two batteries simultaneously. The setup is the same as the previous options except that you have three points to connect instead of two for each polarity.
Connect each battery’s positive terminal to the battery isolator’s positive (+) terminal. Then, connect each battery’s negative terminal to the battery isolator’s negative (-) terminal.
Wiring a Trailer Battery to Charge while Driving
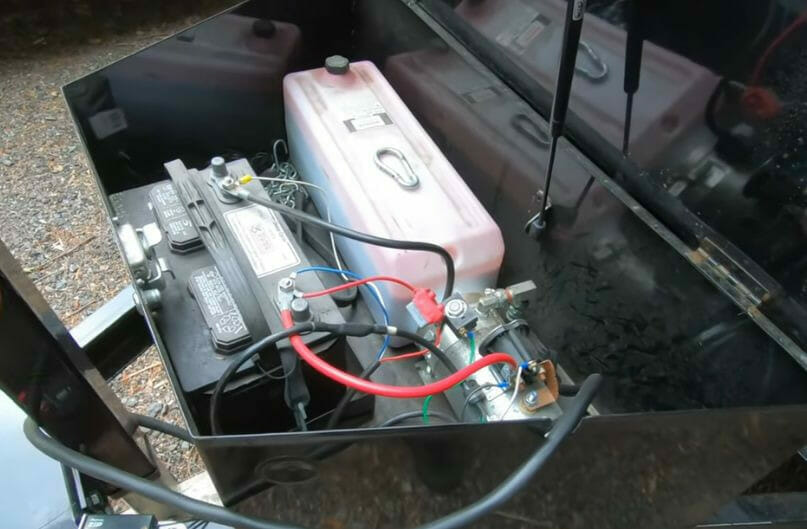
Using a DC-to-DC Battery Charger
A DC-to-DC battery charger connects directly to the main battery.
This makes it more powerful than the provided 7-way connector. Some types can even draw power from the alternator and a solar panel. Here’s an example of a wiring diagram for a DC-to-DC battery charger:
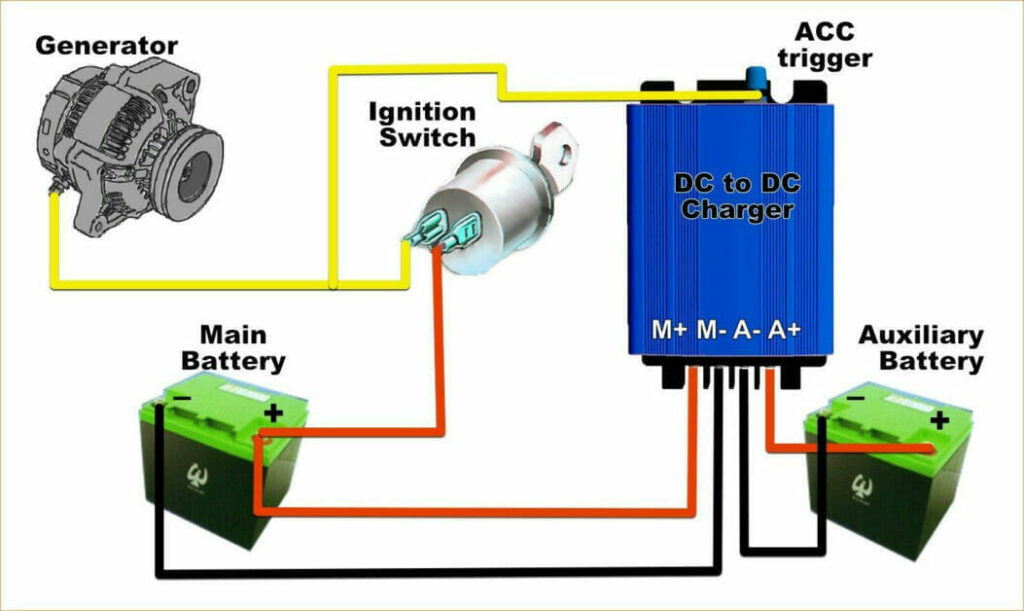
In particular, ensure you:
- Connect the main (source) battery to SBC +/- inputs.
- Connect the trailer (auxiliary) battery to SBC +/- outputs.
I recommend also connecting the ACC trigger to the ignition switch so that the unit powers on automatically when starting the vehicle.
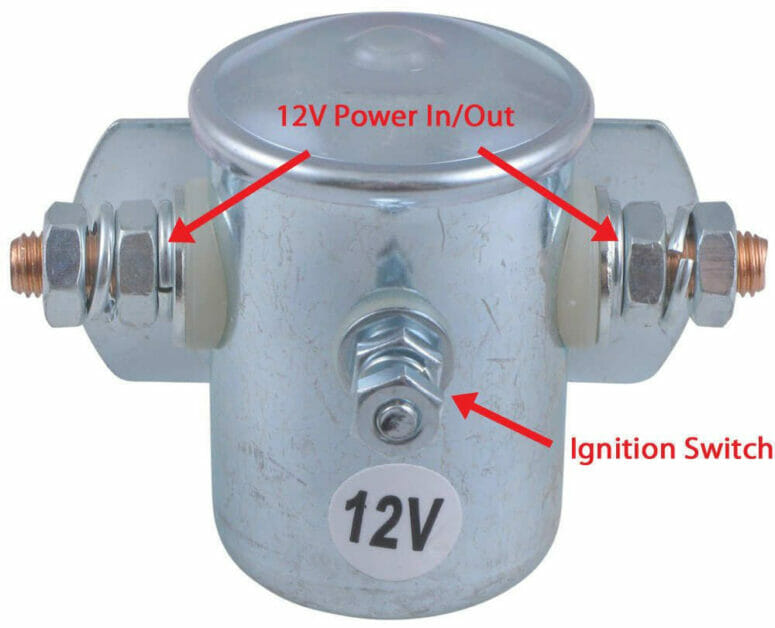
Using a Battery Isolation Solenoid
A battery isolation solenoid only lets the charger operate while the vehicle is running and switches it off when the ignition is turned off.
The function may be built-in to some chargers; otherwise, you can add one externally, as follows:
- Connect the 12V power terminal (Power In) to the vehicle battery’s positive terminal.
- Connect the second power terminal (Power Out) to the trailer’s accessories.
- Connect the ignition switch to the vehicle’s ignition switch.
You can place the battery isolation solenoid in either the trailer or the tow vehicle. Without it, you would have to connect and disconnect the charger manually.
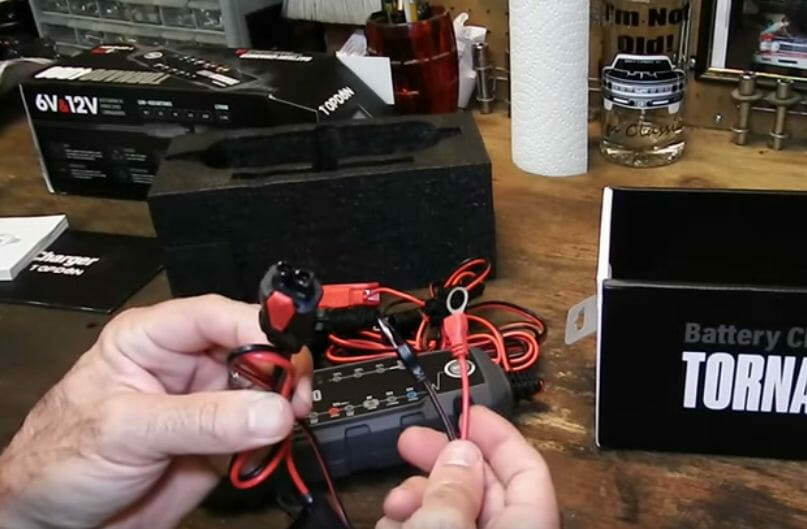
Charging via the Lighter Socket

When wiring a trailer-mounted winch, you usually:
- Connect the red wire from the wired switch to the ignition switch or the vehicle battery’s positive terminal.
- Attach the ground (black) wire to a bolt on the vehicle’s frame after cleaning the contact point with a wire brush.
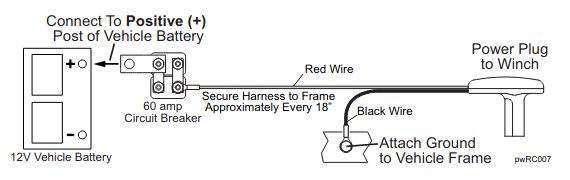
However, consult and follow the wiring diagram that comes with winch kits.
Using a 7-Way Connector
Drivers have had mixed experiences using a 7-way connector, but it’s an option if you only need to trickle charge.
Using a Solar Charger
You can use a solar panel in combination with the above methods to provide a way to charge the trailer battery using solar radiation.
Tips
Charge monitoring – Install a battery monitoring system to monitor the trailer battery’s charge. Don’t let it fall below 50%. A fully charged battery has about 12.6 volts; otherwise, the charge should be at least 12.1 volts.
Inspection – While wiring, inspect both batteries to ensure they are fine. There should be no sign of damage or leakage.
Routing – I recommend you route the charging cable along the trailer’s railing for a more permanent solution. But tie them securely so they don’t come loose. You can use cable ties, electrical tape, or clamps.
Testing – Test the wiring when doing it for the first time to ensure it’s working as it should. It’s necessary to prevent any potential problems caused by incorrect or loose wiring.
Troubleshooting – In case of problems, remember to check the charging circuit’s fuse in the fuse box.
References
Battery isolation solenoid. https://www.etrailer.com/Accessories-and-Parts/Tow-Ready/TR118665.html#exp-productdetails=.videos
DC-to-DC battery wiring diagram. https://www.wenchi-power.com/en/product/DC-to-DC-60A-ISOLATED-CHARGER/WEN60.html
Wiring a winch kit to a trailer. https://productimageserver.com/literature/ownersManual/97992OM.pdf
Video References:
Dan’s Garage NC
Jason the Municipal Mechanic
FSRD