9 min read
What Wires Go to The Starter Solenoid (Simple Guide)
Contents
ToggleYou might be dealing with DIY car repairs or want to know how a starter solenoid works. Either way, understanding where these wires connect is essential.
In most cases, a starter solenoid has three connections and requires three types of wires: the positive wire from the battery, a wire going to the starter, and a thin wire from the ignition switch. But don’t worry. In this article, I’ll walk you through the process and even help you locate the connections if your car has a 4-post starter solenoid.
As you read further, you’ll discover step-by-step instructions on wiring your starter solenoid correctly. Get ready to roll up your sleeves and get your car running like a champ!
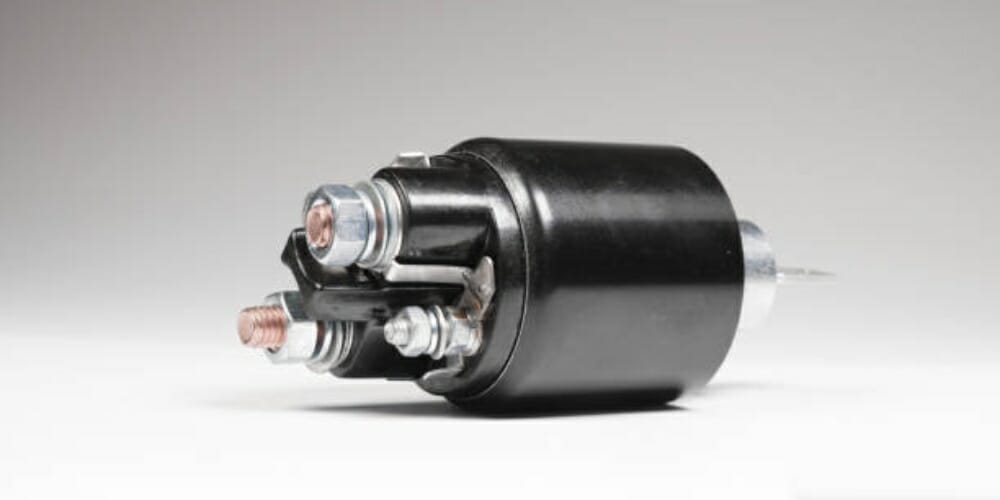
Starter Solenoid Wires
First off, the solenoid plays a crucial role in starting your car. It’s an electromechanical device that connects the battery, ignition switch, and starter motor.
To wire it up, you’ll need to connect several wires:
Battery Wire
The battery wire connects the starter solenoid to the positive battery terminal.
This wire is usually marked with a “B” or “battery” on the solenoid terminal and is responsible for delivering electricity from your battery to the solenoid.
When you turn the key, power flows through the battery wire and energizes the solenoid, allowing your engine to crank.
I recommend using high-quality cables and connectors for this connection to ensure optimal performance.
Ignition Wire
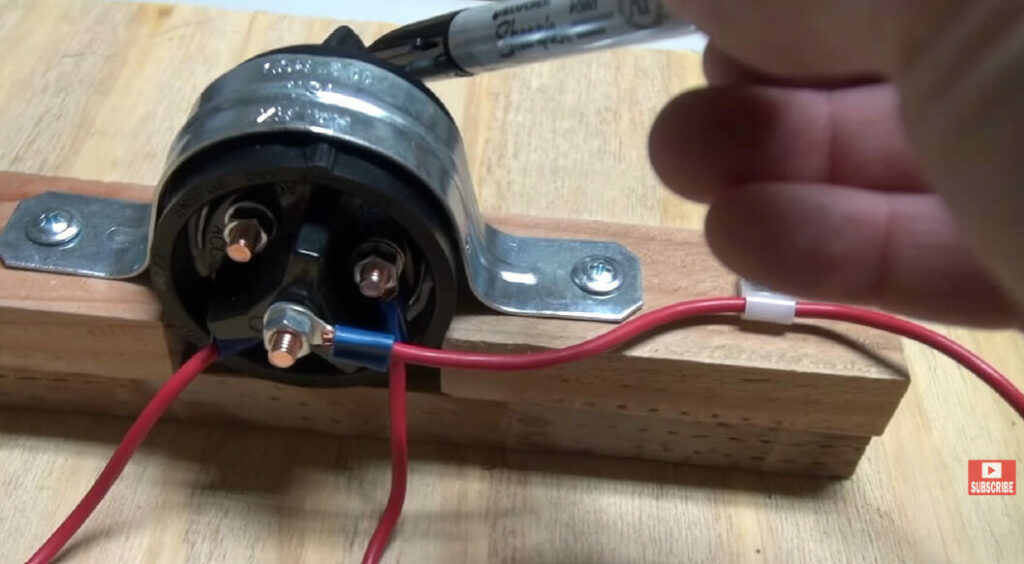
The ignition wire, also known as the starter control wire or the “S” wire, links the starter solenoid to the ignition switch.
This thin wire sends a signal from your ignition to the solenoid, telling it when to engage. It connects to a small terminal, often labeled “S” or “start.”
Ensure the connections are tight and well-insulated – you don’t want electrical issues interfering with your engine’s ignition.
Motor Wire
This wire is connected to the starter motor.
When the solenoid is activated, it connects the battery terminal to this motor wire, which sends a high current from the battery to the starter motor, causing it to run.
Ground Wire
In some cases, you’ll need a ground wire. This is especially true if you have a 4-post starter solenoid. Ground wires complete the circuit and help stabilize the electrical flow.
Attach the ground wire to a clean, metal surface on your vehicle’s frame when installing it. This ensures proper grounding and makes it less likely for electrical issues to crop up in the future.
And there you have it – a quick and straightforward guide to the wires on the starter solenoid.
Identifying the Wires
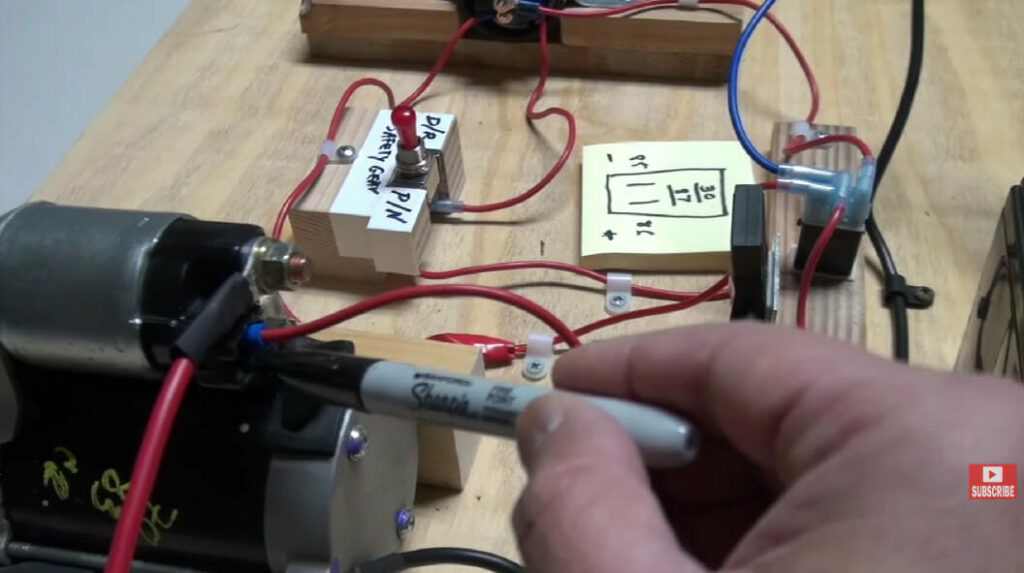
When working on your vehicle, figuring out what wires go to the starter solenoid can be confusing.
I’m here to help you out! Let’s dive into the wiring diagram and learn how to test those wires with a multimeter.
Wiring Diagram
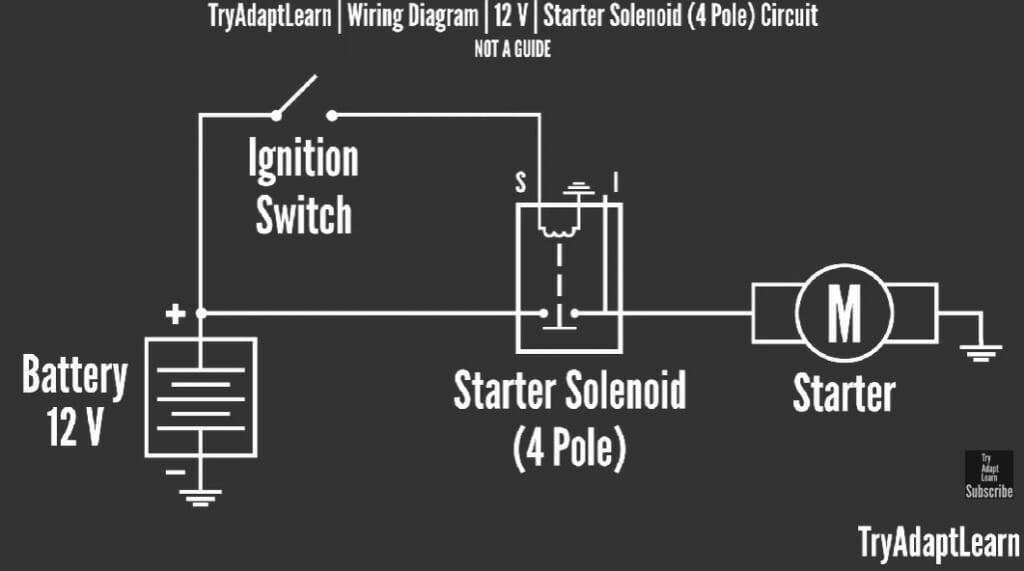
Note: The table above is just an example of a wiring diagram. It may not capture all possible variations in wiring configurations. It’s essential to refer to the appropriate service manual or consult a professional for the specific wiring instructions for your particular vehicle or equipment.
You’ll want to start by looking at the wiring diagram of your vehicle’s specific make and model.
These diagrams can be a lifesaver, as they’ll show the connections for the three main terminals: B (battery), S (start), and M (motor).
We all know red usually means “hot,” right?
- So first, look for the red wire connecting the battery terminal (B) to the solenoid.
- Then, you’ll find another wire going from the solenoid’s starter (S) terminal to the ignition switch.
- And finally, there’s a wire connecting the motor terminal (M) to the actual starter motor.
You might also need a ground wire if you have a 4-post-started solenoid. Easy-peasy!
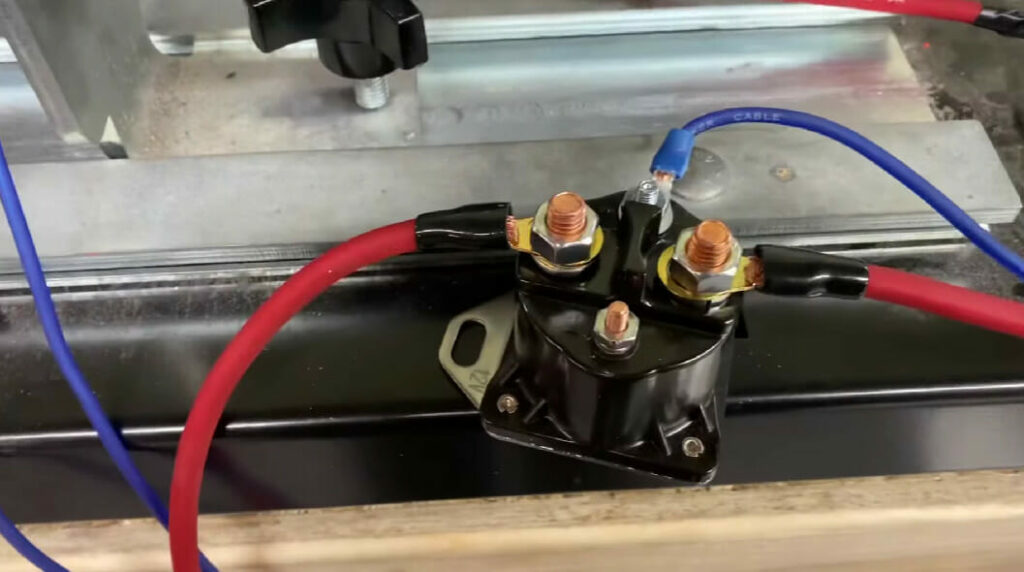
Starter Solenoid Connections
| Connection Point | Wire Type | Purpose |
|---|---|---|
| Battery Terminal | Large Red Wire | It provides power from the battery |
| Ignition Terminal | Small Wire (color varies) | Receives ignition switch signal |
| Motor Terminal | Large Wire (usually black) | Sends power to the starter motor |
| Ground | Black Wire | Connects to the vehicle’s ground |
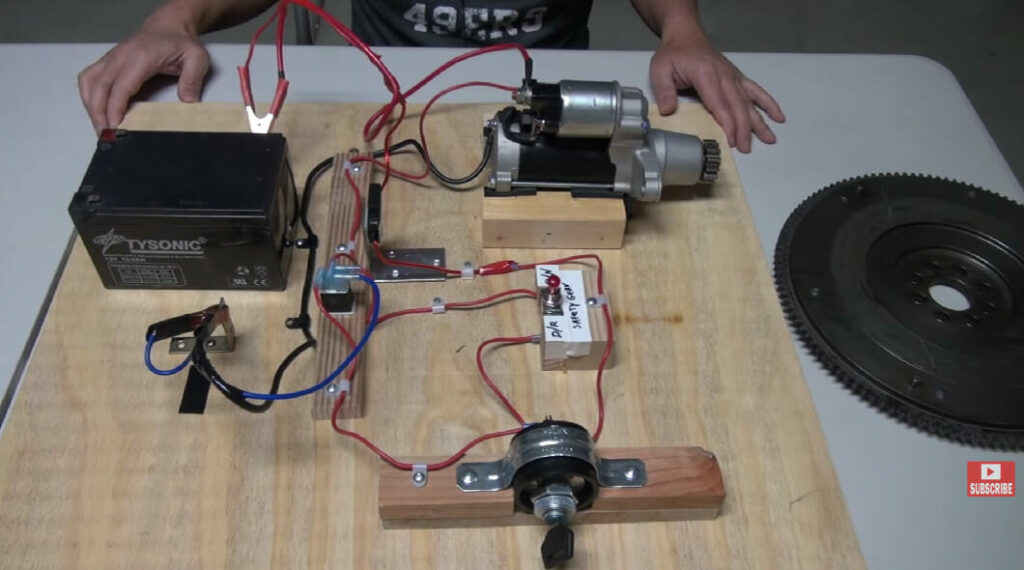
How to Wire a Starter Solenoid
Important: Always disconnect the battery before working on the starter solenoid to avoid any electrical shock or short circuit.
Materials:
- Wrench set
- Wire strippers
- Pliers
- Multimeter (optional)
Steps:
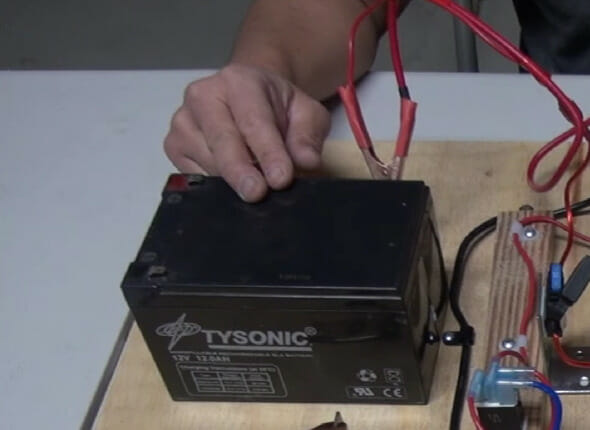
- Disconnect the Battery: Start by disconnecting the battery’s negative terminal to prevent accidents while working with the solenoid.
- Locate the Starter Solenoid: The starter solenoid is usually on the motor. In some vehicles, it may be mounted near the battery or the engine compartment.
- Remove Old Solenoid Wires: Use your wrench set to remove the wires connected to the old solenoid. Remember the positions of each wire. If necessary, take pictures or write down the connections so you can reconnect them similarly.
- Remove the Old Starter Solenoid: Remove the old starter solenoid from the starter or engine compartment. The exact process will vary depending on your car type, but generally, it’s held in place by a couple of bolts.
- Install the New Starter Solenoid: Bolt the new starter solenoid into where the old one was removed.
- Connect the Wires: Now it’s time to reconnect the wires to your new starter solenoid. The exact configuration may vary, but generally:
- The positive (red) cable from the battery goes to the large terminal on one side of the solenoid.
- The cable to the starter motor will connect to the other terminal on the solenoid.
- The small wire (usually in a plastic sheath) goes to the small terminal on the solenoid. This wire comes from the ignition switch.
- Some solenoids might have a ground wire that needs to be connected to the car’s body or the engine block.
- Reconnect the Battery: Once all the wires are securely connected, you can reconnect the negative terminal.
- Test the Starter Solenoid: Test your work by starting the car. If the engine turns over and starts, you’ve successfully wired your starter solenoid.
Remember, if you encounter any issues or if the starter solenoid doesn’t work after installation, it’s important to consult with a professional mechanic.
When to Consult a Professional

Mature client and young mechanic looking under car hood at the engine with lamp.
You know, tackling car repairs can sometimes be a challenge for those who aren’t mechanics.
So, when it comes to wiring the starter solenoid, there might be times when consulting a professional is the better option, and I’m here to tell you about those moments!
First, if you’re unsure about your ability to handle the electrical components of your vehicle, it’s a no-brainer – reach out to a mechanic.
These guys have undergone rigorous training and have experience working with cars, so don’t hesitate to get their expert guidance.
In some instances, you might notice that the wiring connecting to the starter solenoid has visual signs of damage or wear and tear. If that’s the case, it’s worth having a professional look.
They can give you a thorough rundown of the issue and fix it properly to prevent further complications.
Also, if you’ve already tried fixing your starter solenoid, but your car still won’t start, it might be time to call the cavalry!
A mechanic can diagnose the precise issue and get your car back up and running quickly. It’s worth the investment to avoid unnecessary frustration and ensure your car is in the best possible condition.
Lastly, if you’re short on time or not interested in messing around with your car’s electrical system, that’s A-OK! In this case, contacting a professional is definitely the way to go.
They’ll handle all the nitty-gritty details, and you won’t have to worry about a thing.
Consulting a mechanic can save you time and headaches and possibly prevent further issues when working with the starter solenoid on your car. So, don’t be shy; let the pros work their magic!
References
Organizations:
- Society of Automotive Engineers (SAE): https://www.sae.org/
- Automotive Service Excellence (ASE): https://www.ase.com/
Books:
- “Automotive Electrical Handbook” by Jim Horner
- “How to Diagnose and Repair Automotive Electrical Systems” by Tracy Martin
- “Automotive Wiring and Electrical Systems” by Tony Candela
Websites:
- AutoZone Repair: https://www.autozone.com/diy/repair-guides
Video References
DIY Potentials: Projects & Ideas
TryAdaptLearn
Jonathan Patrick
How helpful was this article?
Were Sorry This Was Not Helpful!
Let us improve this post!
Please Tell Us How We Can Improve This Article.