8 min read
How to Wire a Thermostat to a Furnace (8 Steps)
Thermostats and furnaces have several terminals, so wiring them may seem confusing. I will show you how to wire a thermostat to a furnace by connecting all 5 or 6 terminals plus an outdoor condenser. The latter and some terminals might not apply, but once you’re familiar with the wiring, you can wire easier setups, too.
Quick Summary:
- Use an 18-6 cable for wiring.
- Follow the provided wiring diagram and terminal connection table.
- Connect most terminals on the thermostat to the corresponding ones on the furnace.
- Bridge the R and Rc terminals on the thermostat.
- Connect Rc on the thermostat to R on the furnace.
- Connect only the Y and C terminals between the furnace and the outdoor condenser.
Continue reading for more detailed instructions. It will take 8 steps.
Wiring Diagram
Below is a typical wiring diagram for wiring a thermostat to a furnace.
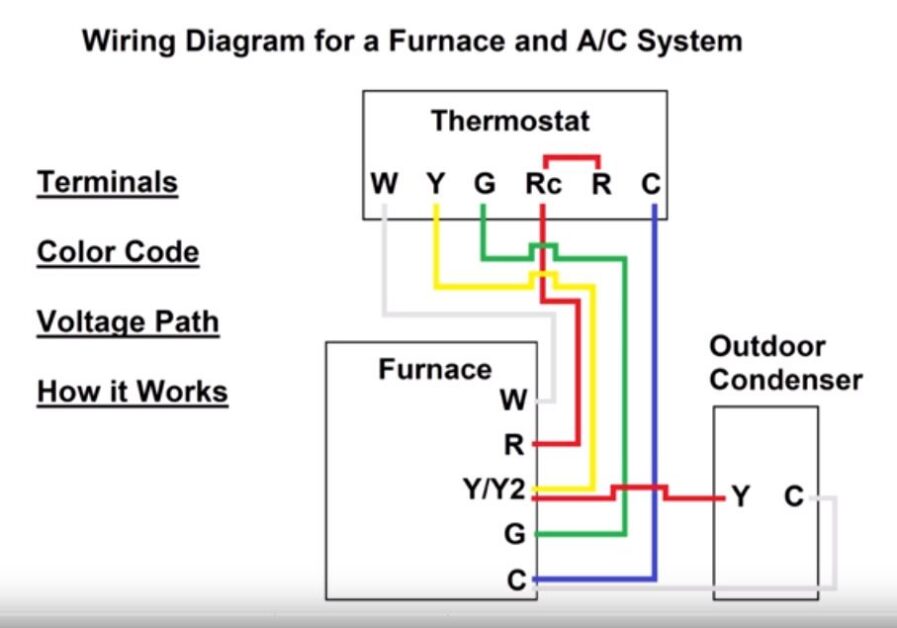
As you can see:
- A typical thermostat has 6 terminals: W, Y, G, Rc, R, and C, all connecting to the furnace except R, which bridges with Rc. The thermostat doesn’t connect directly to the outdoor condenser, only via the furnace.
- A typical furnace has 5 terminals: W, R, Y/Y2, G, and C, which connect to the corresponding terminals on the thermostat. However, note that R connects to Rc on the thermostat (and indirectly to R), and Y/Y2 connects to Y, which also connects to Y on the outdoor condenser. Additionally, C on the furnace and outdoor condenser connect to each other.
- A typical outdoor condenser has 2 terminals, Y and C, which only connect to the corresponding terminals on the furnace. It doesn’t connect directly to the thermostat.
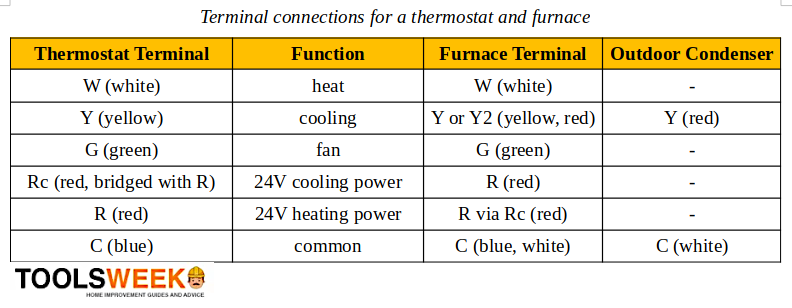
Terminal Connections
Below is a tabular summary of the above information, showing which terminals on each of the three parts connect to each other. Additionally, I’ve added the wire colors and details of each terminal’s function in the second column.
Requirements
Wire Type and Gauge
The wire normally required for a thermostat is 18-6 solid.
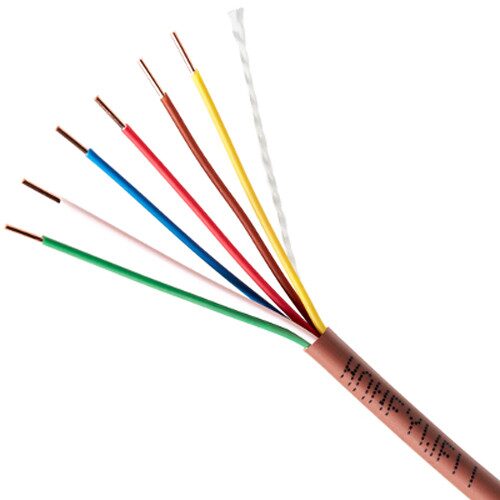
It means a cable specially designed for thermostats (with extra heatproof insulation) containing 6 wires. Some thermostats or furnaces may require an 18-8 wire instead, so check their wiring requirements before purchasing the cable.
Wire Lengths
You can also see from the above wiring diagram that you will need 8 lengths of wire. Their lengths depend on where you install the 3 parts and the distances between them. So, measure the following three distances before cutting the wires:
- The distance between the thermostat and the furnace (for 5 wires)
- The distance between the furnace and the outdoor condenser (for 2 wires)
- The small distance between the R and Rc terminals on the thermostat (for 1 wire)
Allow a little slack in case you need to shorten the wire.
The C Terminal
You only need to wire the C terminal on the thermostat if the power supply connects to it directly.
Otherwise, if the power supply connects directly to the furnace, you don’t need the C connection between the thermostat and the furnace. In that case, the thermostat will be battery-powered. Check the thermostat batteries periodically to ensure they always have sufficient charge.
Tools and Materials
You will need the following tools and materials:
| Tools | Materials |
| Wire cutter Wire stripper Screwdriver | Electrical tape |
Procedure for Wiring a Thermostat to a Furnace
Step 1: Turn the Power Off
Turn the power off to the thermostat and furnace before wiring them.
Step 2: Prepare the Wires
Prepare the wires by cutting them to the required lengths (see Wire Length above) and stripping their ends to connect them to the terminals.
You will need 5 wire lengths between the thermostat and the furnace, 2 between the outdoor condenser, and the small bridge connection inside the thermostat.
Step 3: Remove the Covers
Remove the following from the 3 parts to allow for the wiring work:
- Gently remove the thermostat cover from the wall. It should come off easily, or you may need to remove a screw.
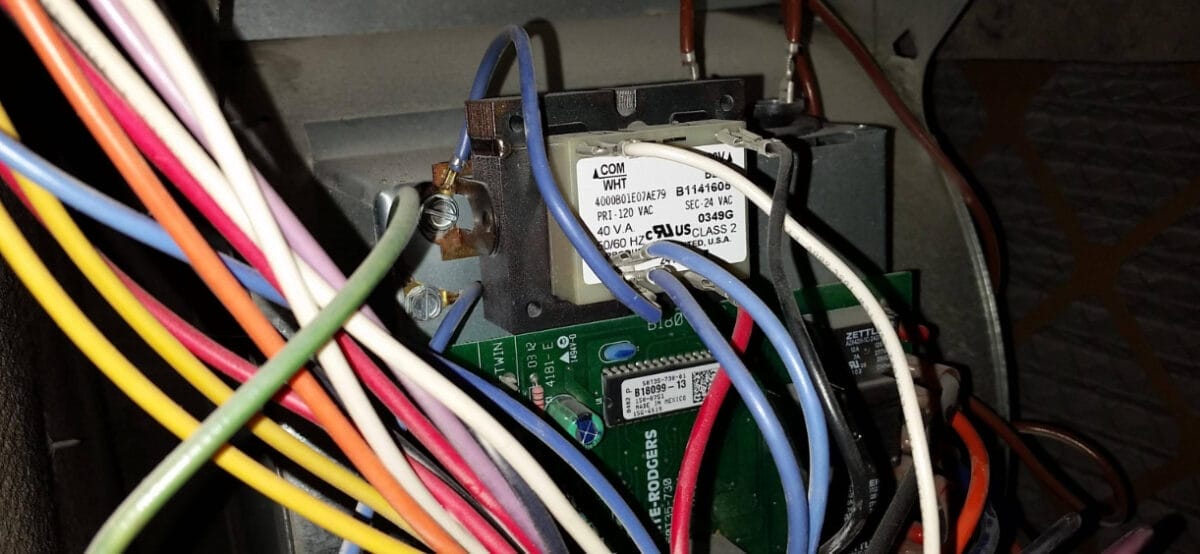
- Remove the access panel on the furnace and locate its control board. You should see a terminal strip to connect the wires.
- Open the outdoor condenser if you have one to get access to where the wiring terminals are located.
Step 4: Wire the Thermostat
Connect the wires to the thermostat according to the wiring diagram:
- Connect the white wire to the W terminal.
- Connect the yellow wire to the Y terminal.
- Connect the green wire to the G terminal.
- Connect the red wire to the RC terminal.
- Connect the blue wire to the C terminal.
- Connect a small red wire to bridge the R and Rc terminals on the thermostat.
The lengths of the first 5 wires above must extend to the furnace.
Step 5: Wire the Furnace
Connect the wires from the thermostat to the furnace according to the wiring diagram:
- Connect the white wire from the W terminal on the thermostat to its W terminal.
- Connect the red wire from the Rc terminal on the thermostat to its R terminal.
- Connect the yellow wire from the Y terminal on the thermostat to its Y/Y2 terminal.
- Connect the green wire from the G terminal on the thermostat to its G terminal.
- Connect the blue wire from the C terminal on the thermostat to its C terminal.
Additionally, connect 2 more wires as follows with lengths that stretch to the outdoor condenser unit:
- Connect a red wire to the Y/Y2 terminal.
- Connect a white wire to the C terminal.
Step 6: Wire the Outdoor Condenser
Connect the wires to the outdoor condenser according to the wiring diagram:
- Connect the red wire from the Y/Y2 terminal on the furnace to its Y terminal.
- Connect the white wire from the C terminal on the furnace to its C terminal.
Step 7: Replace the Covers
Inspect the wiring to ensure they are secure and replace the covers on all 3 system parts.
Step 8: Turn the Power On
Turn the power on to ensure you did the wiring properly and everything worked. Test all the available functions.
FAQ Section
Hey folks! Wiring might seem intimidating, but you got this with the right instructions and a dash of enthusiasm! Let’s answer some burning questions you might have.
Q: Why do I need an 18-6 cable for wiring my thermostat?
A: Great question! An 18-6 cable is specially designed for thermostats with extra heatproof insulation. This means it’s built to withstand the heat, ensuring your setup is safe and long-lasting. It contains 6 wires, giving you everything you need for your typical thermostat-furnace setup.
Q: Can I skip connecting the C terminal on my thermostat?
A: Ah, the ol’ C terminal! If your power supply connects directly to the furnace and not the thermostat, you can skip wiring the C terminal to the thermostat. Remember, if you do this, your thermostat will likely be battery-powered. So, keep an eye on those batteries and make sure they’re always charged up!
Q: How tight should I make the connections on the terminals?
A: Tight enough so they’re secure and won’t easily wiggle out, but not so tight that you risk damaging the terminal or the wire. Think of it like hanging a picture frame – you want it snug on the wall but not about to tear the drywall out!
Q: What if I don’t have an outdoor condenser?
A: No worries! Not all setups will have an outdoor condenser. If that’s the case for you, focus on connecting the thermostat to the furnace using the instructions provided. You can always add an outdoor condenser later if needed. Remember, it’s all about understanding the basic wiring, and then you can tackle any configuration!
Q: I’m feeling overwhelmed. Can I get a professional to do this?
A: Absolutely! Calling in the pros is always a good idea if you’re ever feeling uncomfortable or unsure about a DIY project. They’ll ensure everything’s hooked up right, and you’ll have peace of mind knowing someone did it with experience. Home projects should be fun, not stressful!
References
Website Resources:
- Programmable thermostat. https://www.homedepot.com/p/Honeywell-Home-7-Day-Programmable-Thermostat-with-Digital-Backlit-Display-RTH2510B/203628789
- 18-6 thermostat cable. https://www.bhphotovideo.com/c/product/1372805-REG/honeywell_47140307_18_6_solid_thermostat_cl2.html
- Connecting a furnace. https://www.homedepot.com/b/Heating-Venting-Cooling/N-5yc1vZc4k8
Video References:
AC Service Tech LLC