9 min read
How to Use Diehard Battery Charger
A Diehard battery charger is great for maintaining car batteries, but its many functions and intricacies confuse newcomers.
Below I will cover in detail how to:
- Prepare to Charge the Battery
- Set the Charger’s Configurations and Settings
- Charge the Battery
- Remove the Charger Once the Battery is Fully Charged
Let’s get started!
Steps to Using a Diehard Battery Charger

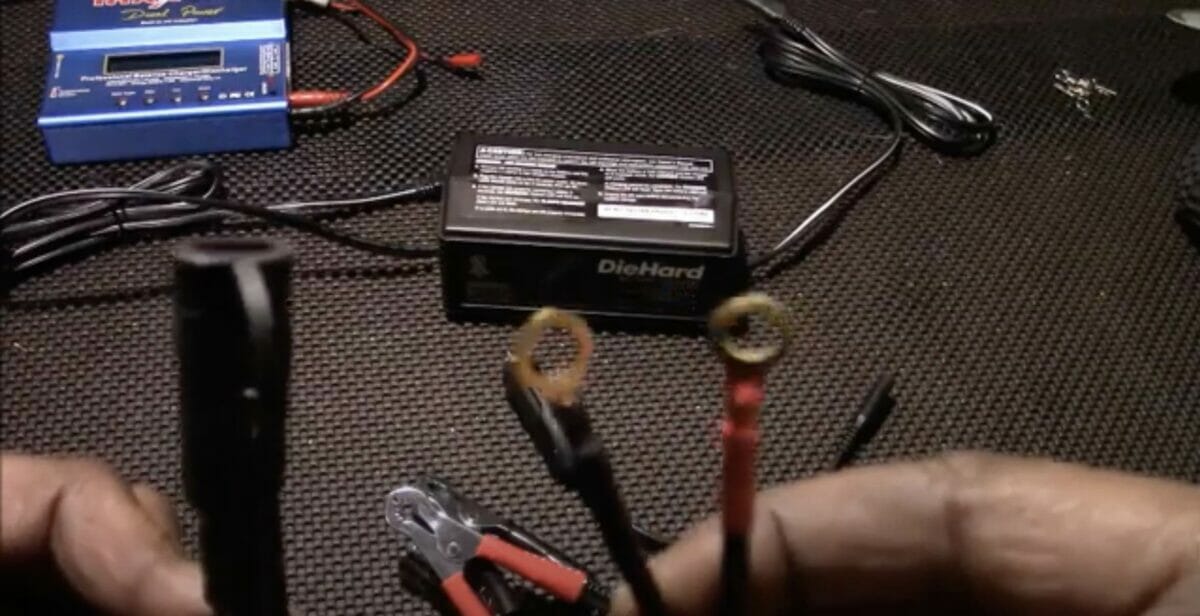
1. Preparations for Charging the Battery
This table provides a detailed, step-by-step guide for preparing to charge a battery.
Following these instructions carefully ensures a safe and efficient charging process.
The steps listed are designed for Diehard battery chargers with 12-volt or 6-volt lead-acid batteries. Whether you’re dealing with a car or marine battery, these instructions will help you prepare your battery for charging.
| Steps | Preparations for Charging the Battery |
|---|---|
| 1 | Use only a Diehard battery charger for a 12-volt or 6-volt lead-acid battery. |
| 2 | Clean the battery terminals. Try to remove as much grime and corrosion as possible. |
| 3 | Check the battery’s manual for specific preparations before charging, such as adding distilled water to the cell units if applicable. |
| 4 | Locate the battery’s recommended rates of charge in the manual. This information is crucial for setting up the Diehard battery charger. |
| 5 | Ensure that the car is in a level area with good ventilation. Secure any hydraulics or rods used to prop up the car or hood. |
| 6 | Determine if the battery needs to be removed from the vehicle. This step is optional for car batteries but necessary for marine ones. |
| 7 | If removing the battery, disconnect the grounded terminal first, then place the battery on a sturdy table or workbench. |
2. Set the Charger’s Configurations
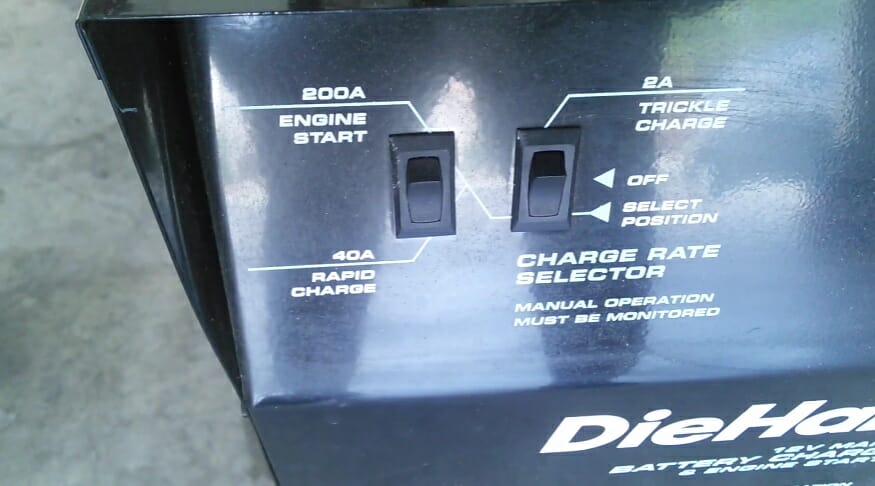
The charger’s controls are located on its front. Depending on the Diehard Charger model, you’ll typically see three switches on your charger.
- Voltage Setting: Used to set the battery voltage to 6 volts or 12 volts.
- Charger Type: Select Manual, Automatic Deep-Cycle, or Automatic Regular charging modes.
- Charge Rate: Select between different charging rates: 2 Amp Charge, 15 Amp Charge, or 125 Amp Engine Start.
Most vehicles run on a 12-volt battery, although you should always check your battery’s parameters before selecting a voltage.
Sometimes, the battery’s manual doesn’t specify what charger type it needs. It’s important to familiarize yourself with the different charger types to care for your battery properly.
- Manual: The charger continuously charges the battery even if it reaches full capacity. You’ll need to monitor the charging process when using the Manual type since it can damage the battery by overcharging.
- Automatic Deep-Cycle: Used for Deep-Cycle batteries. Automatically stops the charging when the batteries reach full capacity. Restarts the charging process when needed.
- Automatic Regular: Standard Mode for charging any batteries except deep-cycle ones. Automatically stops charging when the batteries are full.
You’ll need to initially charge severely depleted batteries on Manual mode before switching to Automatic Regular.
The Automatic Regular mode won’t accurately detect the current charge of severely depleted batteries. It needs an initial charge in the control circuit for the automatic setting to work.
3. Charge the Battery
You can charge car batteries inside the vehicle but only marine batteries outside.
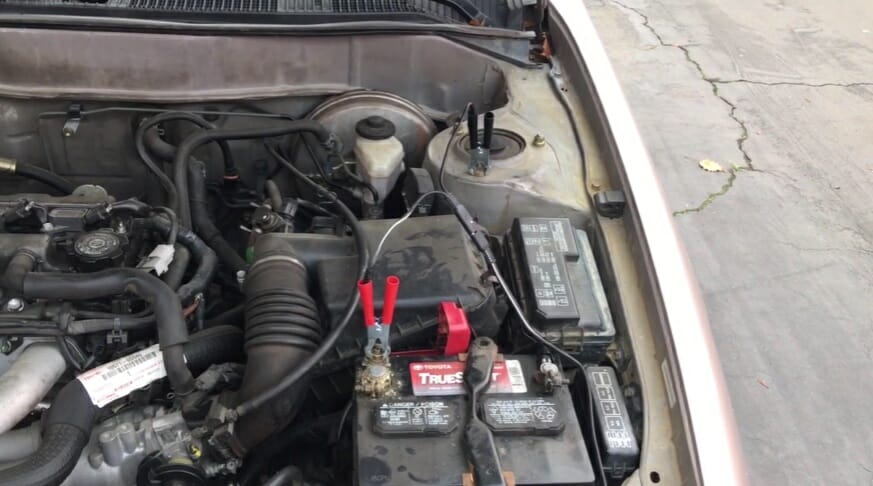
Charging the Battery Inside the Vehicle
Rearrange the power cord and charging leads to keep them clear of other components like the fan blades and belts.
Connect the positive (red-colored) battery charger clamp to the battery’s positive terminal. Connect the negative (black-colored) charger clamp to the grounding terminal, usually the battery’s negative terminal or any unpainted part of the car chassis.
Plug the Diehard battery charger into a grounded 120-volt outlet to begin charging.
If you’re using the Diehard battery charger in Manual mode, use an ammeter to monitor the battery’s charging progress.
Charging the Battery Outside the Vehicle
Remove the battery from the vehicle. Disconnect the grounded terminal first, then all connected accessories and components.
Connect the positive (red-colored) charge clamp to the battery’s positive terminal. Attach a 6-AWG or 4-AWG insulated battery cable to the negative battery terminal. Connect the negative (black-colored) charging clamp to the unconnected end of the insulated battery cable.
Plug the charger into a 120-volt outlet to start charging.
4. Remove the Charger Once Fully Charged
Unplug the Diehard battery charger from the outlet. Remove the negative charger clamp first, then the positive charger clamp. If the battery is removed, put it back in the vehicle. Reconnect any removed wires.
Store the battery charger in a cool, dry location.
Troubleshooting Guide
- Charger Doesn’t Start – Ensure the unit is properly connected to a working outlet if your Diehard battery charger isn’t starting. Check if the outlet’s circuit breaker hasn’t tripped. Also, ensure the charger’s power switch is in the “ON” position. If your charger still doesn’t start, it might be an internal issue that requires professional assistance.
- Battery Isn’t Charging as Expected – If the battery isn’t charging at the expected rate, there could be several causes. Check if you’ve selected the right settings on your charger — the voltage, charger type, and charge rate should match the specifications of your battery. If your settings are correct, but the battery isn’t charging as expected, check the battery terminals. They should be clean and corrosion-free. Dirty or corroded terminals can impede the flow of current. The battery could be too old or damaged if it isn’t charging. Batteries have a finite lifespan and eventually need to be replaced.
- Charger Shows an Error Code or Alarm – If your Diehard charger is showing an error code or sounding an alarm, refer to the user manual for the specific meaning of the code or alarm. The manual will also typically provide troubleshooting steps for each specific issue.
- Charger is Overheating – If it becomes excessively hot during use, switch it off and unplug immediately. Overheating could be caused by a malfunction or by using the charger in a high-temperature environment. Allow the charger to cool before using it again, and consider seeking professional advice.
- Strange Noises – If the charger makes strange noises (buzzing, humming, etc.), it might indicate a hardware issue. Unplug the charger and consult with a professional.
When in doubt, always consult your Diehard battery charger user manual or contact professional service. Attempting to repair a malfunctioning charger could worsen the problem or pose a safety risk.
Charging Time Estimates
- 12-Volt Car BatteryA typical car battery has a capacity of about 48 amp hours (Ah). If you’re using a charger that delivers two amps, it would theoretically take 24 hours to charge a completely drained battery. However, given that most car batteries aren’t entirely drained, you can expect a charging time of 10-12 hours for practical purposes. Using a charger that delivers a higher amperage, like 15 amps, could bring this time down significantly, potentially charging a completely drained battery in just over 3 hours.
- Deep Cycle BatteriesDeep cycle batteries typically have a higher capacity, often around 100 Ah. A 2 amp charger could take up to 50 hours to charge a completely drained deep cycle battery. A 15 amp charger could reduce this time to about 7 hours. Remember that these times are estimates, and actual times may vary depending on the specific battery and discharge level.
- Motorcycle BatteriesMotorcycle batteries are smaller, often having a capacity of around 12 Ah. A 2 amp charger could potentially charge a completely drained motorcycle battery in about 6 hours.
Remember, these are only estimates. Actual charging times can vary based on factors like the age and condition of the battery, the ambient temperature, and the specific design of the battery and charger. Always follow the manufacturer’s recommendations for charging.
Safety Instructions
Using a battery charger has potential hazards that you should always consider before starting.
- Personal Protective Equipment (PPE): Always wear safety gloves and goggles while charging the battery. Batteries can leak or burst, leading to dangerous chemicals in contact with your skin or eyes. Wearing PPE minimizes this risk.
- Ventilation: Charging a battery, especially lead-acid, can produce hydrogen gas. This gas is highly flammable and can cause explosions if it builds up and comes into contact with a spark or flame. Therefore, always charge your battery in a well-ventilated area to disperse any hydrogen gas produced.
- Avoid Flammable Substances: Protect the charger and battery from flammable substances like gasoline or paint thinners. The charger’s heat and the sparking potential could cause these substances to ignite.
- Avoid Water: Never use the charger in rain or wet conditions. Water and electricity are a dangerous combination, and exposure to water can damage your charger and potentially cause an electrical shock. If your charger gets wet, unplug it immediately and allow it to dry completely before using it again.
- Proper Handling of Battery: Never charge a visibly damaged or leaking battery. This could lead to chemical exposure or other hazards.
- Proper Charger Placement: Always place the charger on a flat, stable surface. Avoid placing the charger on the battery or vehicle, as any accidental spills or movement can cause it to fall and potentially result in injury.
References
Sears Parts Direct. https://c.searspartsdirect.com/mmh/lis_pdf/OWNM/L0305319.pdf
Video References
Marlon’s Machines
GORILLA BEAR TECH
Daniel’s Car Talk Channel