11 min read
How to Use a Laser Level for Grading (7-Step Guide)

Hey there, folks! Today, we’re diving into the world of precision and leveling up our game with one of my favorite tools on the construction site – the laser level.
Using a laser level for grading isn’t just about getting things straight; it’s about bringing your A-game to every project, big or small. Here are the steps:
- Step 1: Place your tripod on a level surface and turn on the laser level to allow it to self-level.
- Step 2: Attach a measurement tool to your grade stick to measure the height from the laser beam to the ground.
- Step 3: Use the receiver to detect the laser beam, moving it up or down the grade stick until it finds the beam.
- Step 4: Choose a reference point for your project’s height, adjust the receiver on the grade stick to this height, and mark the spot.
- Step 5: Measure the height of the sub-base at different points with the receiver and grade stick.
- Step 6: Calculate the amount of concrete needed based on the thickness of the sub-base and the marked area.
- Step 7: Finalize your preparations by adjusting your marks or making additional preparations based on your calculations.
So, grab your gear, and let’s prepare to make those lines as level as the horizon on a calm sea day. It’s time to level up, my friends, and I’m here to show you how.
Why You Should Use a Laser Level to Shoot Grade?
Let me share a game-changer with you regarding getting things right on your build or project: laser levels.
I’ve been around the block a few times and seen what works and what doesn’t. And when it comes to shooting grade, laser levels are your best friend, hands down.
I highly recommend using a laser level to shoot grade over any other alternative because of the following advantages:
First, these tools are the real deal in construction and surveying. They’re not just another gadget but the go-to for anyone serious about precision. We’re talking about firing off beams of light, usually in super visible red or green, making it a breeze to see what’s level and what’s not.
Whether hanging pictures at home or mapping out a new build site, these laser levels have covered you. They’re versatile, which means you can use them for just about any grading task you have on your plate.
The beauty of these levels is how they let you work. Pop them on a tripod stand, and you’re good to go. It’s like having an extra pair of hands, allowing you to move and work without being tied down.
But here’s the kicker: the accuracy. We’re talking about precision that doesn’t quit. These laser levels don’t flicker or falter. Once they’re set, they stay true, shooting a straight beam that doesn’t dance around – unless, of course, your tripod’s got issues. But keep that steady, and you’re golden.
So, a laser level is the way to go if you want to step up your game. It’s about making your work sharper, more precise, and easier. Trust me, it’s a move you won’t regret.
How to Use a Laser-Level Device for Grading
Let’s dive into the world of laser leveling, but we’re keeping it simple and straight to the point. Here’s how we get from A to B, ensuring our project’s foundation is as solid as possible.
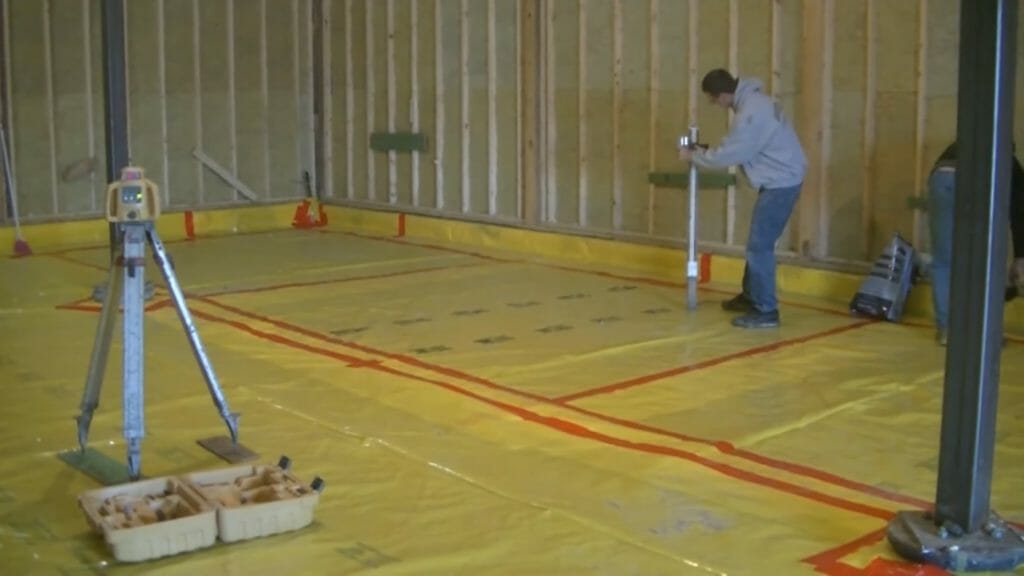
Step 1: Setting Up the Laser Level
- Begin by placing your tripod on a relatively level surface.
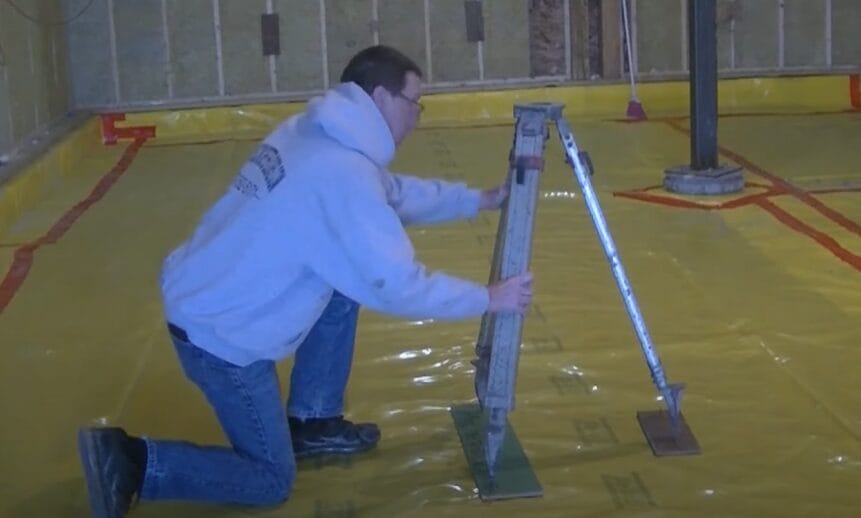
- Turn on the laser level, allowing it to self-level. This step ensures the laser beam it emits is perfectly horizontal or vertical, depending on your requirements.
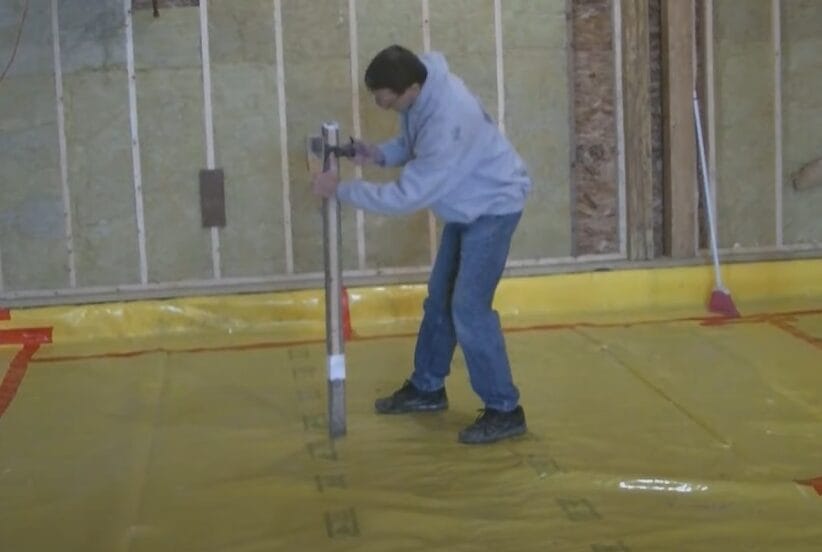
Step 2: Preparing the Grade Stick
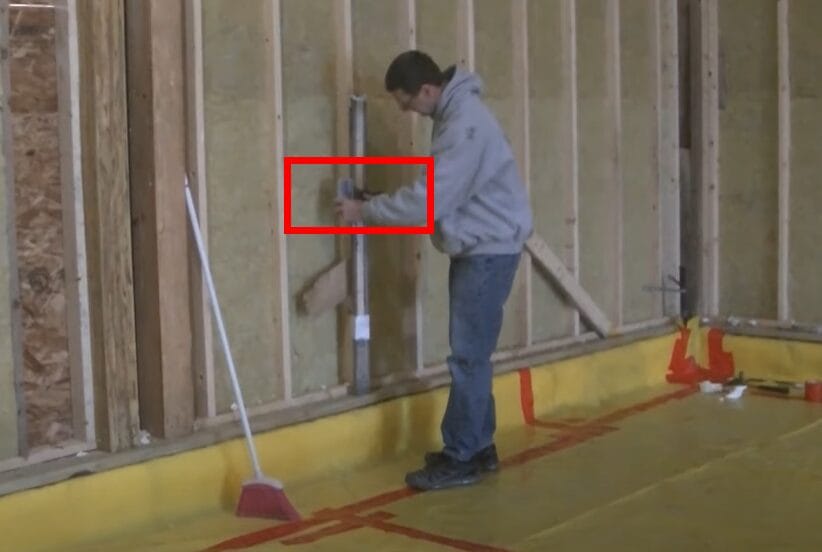
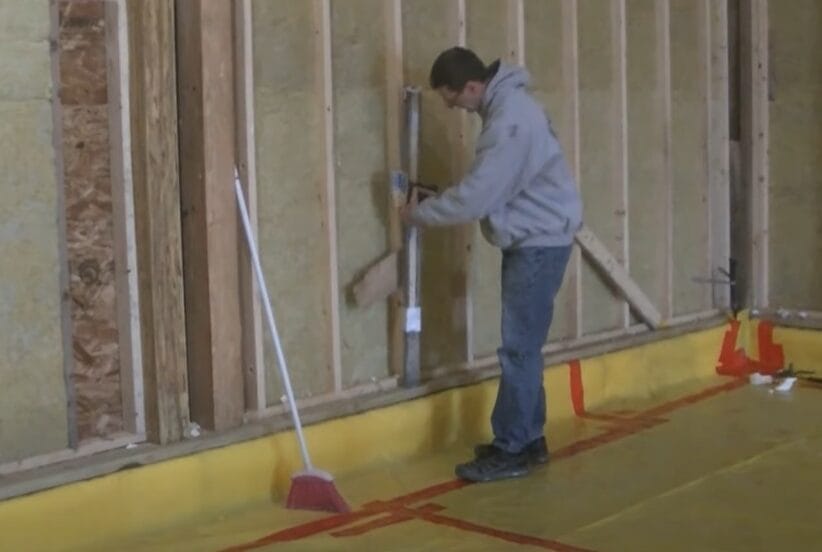
- Attach a measurement tool to your grade stick. This tool will help you measure the height from the laser beam to the ground, which is crucial for establishing a level grade.
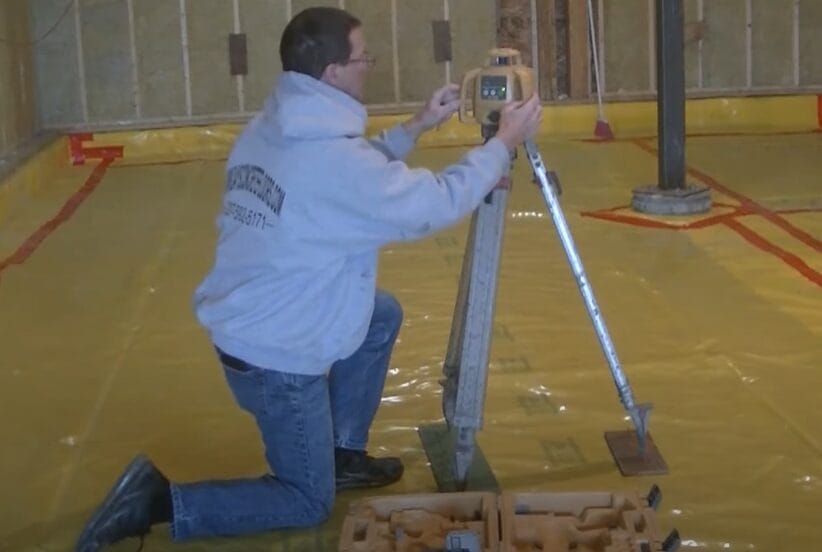
Step 3: Using the Receiver to Locate the Beam
- The receiver helps you detect the laser beam. Move the receiver up or down the grade stick until it indicates that it has found the beam, which means you are at the correct height.
Video | Mike Day Concrete
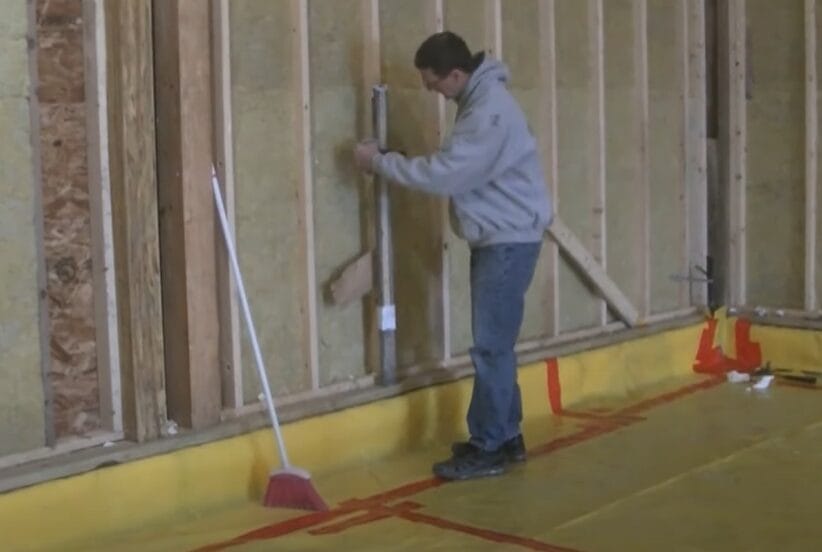
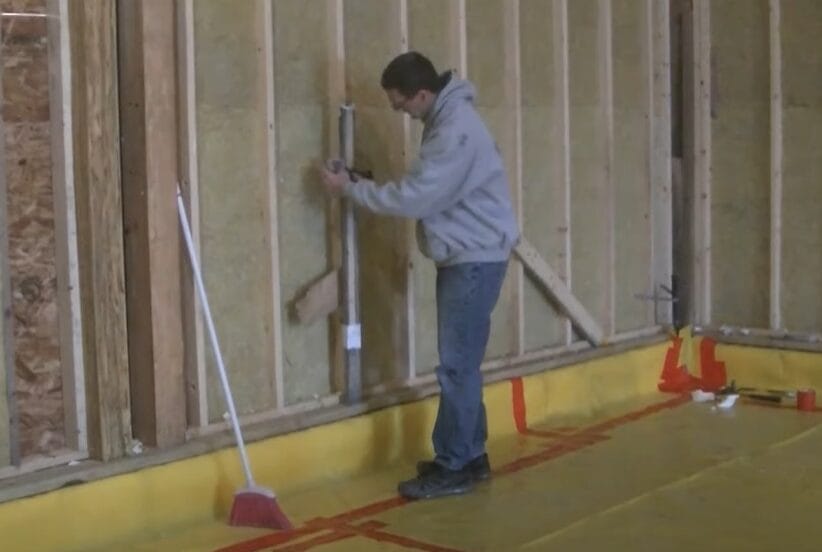
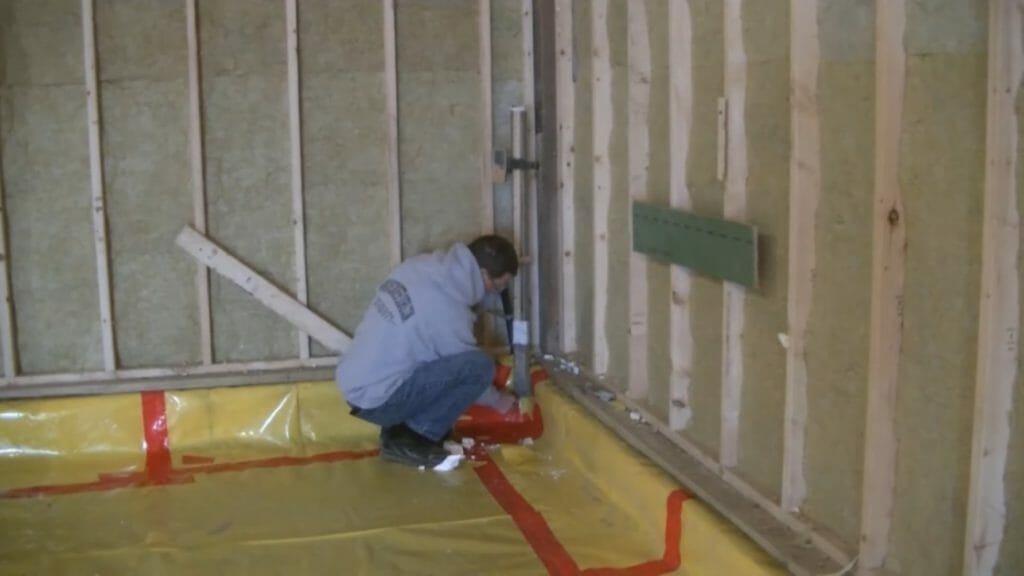
Step 4: Marking the Grade Around the Area
- Choose a reference point for the height of your project. Adjust the receiver on the grade stick to this height and mark the spot.
- Repeat this process in various areas to outline the desired level.
Step 5: Checking the Sub-Base Level
- To ensure the base where you will pour concrete is level, use the receiver and grade stick to measure the height of the sub-base at different points. This step confirms the concrete’s thickness and the base’s uniformity.
Step 6: Calculating the Required Concrete
- Calculate how much concrete you will need based on the thickness of the sub-base and the area you’ve marked. Adjust your calculation if you find variations in the sub-base thickness.
Step 7: Final Preparations Before Pouring Concrete
- Finalize your preparations after marking the entire area and confirming the level and thickness. This may involve adjusting your marks or making additional preparations based on your calculations.
Troubleshooting Tips for Laser Leveling
Even the most seasoned professionals can run into a snag or two regarding laser leveling. It’s all part of the process. But don’t let these hiccups throw you off your game.
I’ve been there, in the trenches, dealing with everything from blinding sunlight to batteries that seemed to give up way too soon. And through it all, I’ve picked up a few tricks that have saved the day more than I can count.
| Common Problem | Solution |
|---|---|
| Interference in Outdoor Settings | I’ve found that bright sunlight can mess with your laser’s visibility. My go-to move is to switch to a laser detector for those sunny days. |
| Ensuring Accuracy Over Long Distances | Long distances can be tricky; the further you go, the more a small error at the start magnifies. Ensure your tripod is stable and your laser level is perfectly calibrated. Sometimes, I use a secondary reference point midway to ensure the beam hasn’t wandered off course. |
| Laser Beam Not Visible | When I first ran into this, I thought my eyes were playing tricks on me. Different lighting conditions can make your laser beam disappear into thin air. If you’re indoors, dimming the lights can make a difference. Outdoors? Those tinted glasses aren’t just a fashion statement; they help you spot the beam. |
| Inaccurate Readings on Sloped Ground | The sloped ground can throw you for a loop. The key is to ensure your laser level is correctly calibrated for the slope. I always take a moment to adjust the device’s settings for the specific slope I’m working with. And remember, check and double-check with a receiver at different points along the slope. |
| Battery Life Issues | Nothing stops working faster than a dead battery. Always have a spare battery on hand, and when possible, use rechargeable batteries that can handle the workload. Keeping them charged the night before is part of my evening ritual now. |
| Tripod Stability Problems | A shaky tripod is the enemy of precision. I’ve had to get creative, using sandbags or weights to stabilize my tripod in less-than-ideal conditions. It’s about ensuring the foundation is rock-solid, no matter where you’re setting up. |
Remember, every project has its hurdles, but with the right approach and a bit of know-how, you’ll be leveling like a pro in no time.
Advanced Techniques and Tips for Mastering Laser Levels
For those ready to push their skills further, here are some advanced techniques and tips for using laser levels in more complex projects:
- Complex Landscaping Projects:
- In landscaping designs, use laser levels to create precise height planes for terraces or steps.
- Ensure water features have a perfect, subtle slope for optimal flow by using the laser level for accurate grading.
- Integrating Laser Leveling Data with Project Planning Software:
- Capture the site’s topography using a laser level connected to data collectors.
- Import this data into planning software like AutoCAD or SketchUp to model proposed changes and identify potential issues early.
- Creative Uses of Elevation:
- Use laser levels to project lines for constructing walls or setting the pitch for roofs, expanding the tool’s utility beyond ground-level tasks.
- The Power of Reflection:
- Position mirrors strategically to reflect the laser beam around corners or over obstacles, maintaining alignment without moving the laser level setup.
Remember, these advanced techniques not only enhance the precision of your work but also bring a new level of creativity and efficiency to your projects. Embrace these tips to elevate your craftsmanship and impress clients with your attention to detail and innovative approach.
Frequently Asked Questions
- Can I Use a Laser Level for Indoor and Outdoor Projects?
- These handy tools are versatile. For outdoor work, ensure your laser level is bright enough to see in daylight or grab a receiver that’ll catch the beam when the sun’s too bright.
- How Do I Know If My Laser Level Is Accurate?
- Give it a quick test run. Shoot a line or a dot against a target, move the level slightly, and see if it holds true. Also, check those manufacturer specs and maybe even look into getting it calibrated if you’re unsure.
- How Often Should I Check the Calibration?
- I like to give my tools a once-over before starting any major project. If you’re using your laser level daily, checking its calibration every few months is a good rule of thumb. Better safe than sorry, right?
- Can Laser Levels Be Used in Direct Sunlight?
- They can, but it’s a bit tricky to see the beam. That’s where a receiver comes into play. It’ll pick up the laser even when the sun’s trying to steal the spotlight.
- What Safety Precautions Should I Take?
- Always, and I mean always, protect your eyes. Don’t stare directly into the laser beam, and if you’re working in bright conditions or with powerful lasers, consider a pair of safety glasses that can filter out the laser light.
- How Do I Extend the Battery Life of My Laser Level?
- Keep it turned off when you’re not using it, and store it away from extreme temperatures. If it uses rechargeable batteries, ensure you’re charging them correctly – not too often, but don’t let them drain completely.
References
Organizations:
- National Association of Home Builders (NAHB). https://www.nahb.org/
- American Society of Civil Engineers (ASCE). https://www.asce.org/
Books:
- “Construction Surveying and Layout: A Step-By-Step Field Engineering Methods Manual” by Wesley G. Crawford. https://www.abebooks.com/9780962412431/Construction-surveying-layout-step-by-step-field-0962412430/plp
- “Site Engineering for Landscape Architects” by Steven Strom, Kurt Nathan, & Jake Woland. https://valsec.barnesandnoble.com/w/site-engineering-for-landscape-architects-steven-strom/1118727935
Website Resources:
- ToolBoxBuzz. https://www.toolboxbuzz.com/
- Pro Tool Reviews. https://www.protoolreviews.com/
- Dewalt. https://www.dewalt.com/
- Bosch. https://www.boschtools.com/us/en/
- Leica Geosystems. https://leica-geosystems.com/
Video References:
Mike Day Concrete