7 min read
How to Tell which Wire is Hot without a Multimeter (4 Methods)
In this article, I’ll guide you to identifying a hot or live wire without using a multimeter.
A multimeter lets you verify the polarity of wires; however, if you don’t have one around, there are other ways to do the same. As a verified electrician, I’ve learned some tips and tricks to pinpoint a live cable without using a multimeter I can teach you. Alternatives can help because a multimeter may be too expensive for your one-off task.
In general, if you don’t have a multimeter, you can use a:
- Voltage detector
- Touch a screwdriver
- Connect a light bulb to the wire
- Use standard color code
I will cover each in more detail below.
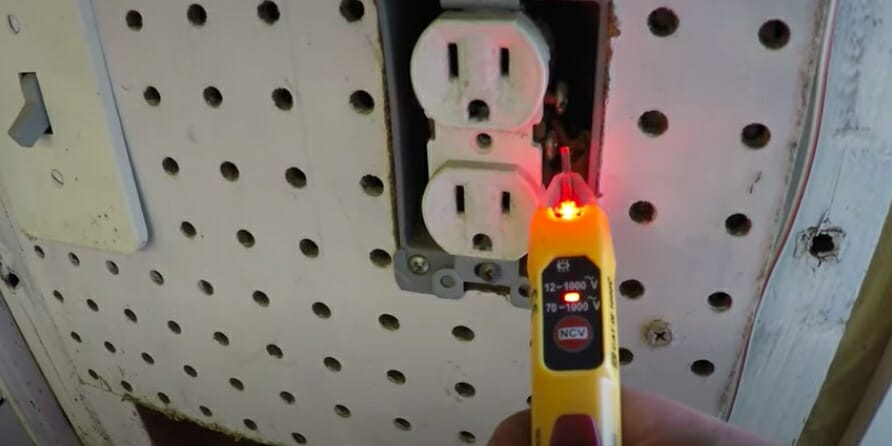
Method 1: Use a Non-Contact Detector
I realize this step may also be unavailable if you don’t have access to any electrician’s tools, in which case I would suggest you move on to the next three.
Follow these simple steps to tell if a wire is hot with a non-contact voltage detector.
Step 1. Hold the non-contact detector near the object or wire your testing.
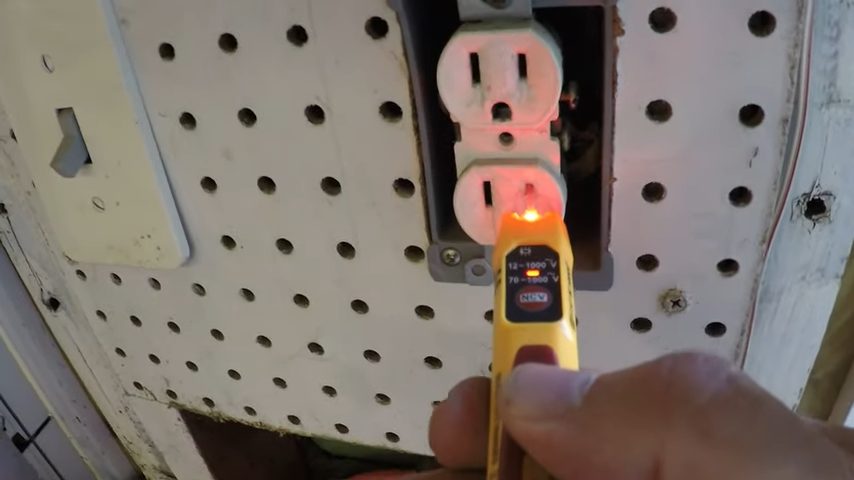
Step 2. A light on the detector will turn on.
Step 3. The non-contact voltage detector will beep if there’s voltage in the object or wire.
Step 4. Testing that the current is flowing through the wire is crucial.
Hints: Don’t hold the voltage detector by the probes, wires, or other tester section while conducting the test. Doing that could impair the tester, making it unsafe to use.
Most detectors work by inducing an alternating magnetic field in the tested object. If the object has voltage, the induced magnetic field will cause an electrical current to flow. The detector’s circuit will then detect the current and beep.
Nevertheless, ensure that the non-contact voltage detector works before you use it. That’s critical because misleading results can cause tremendous damage and accidents.
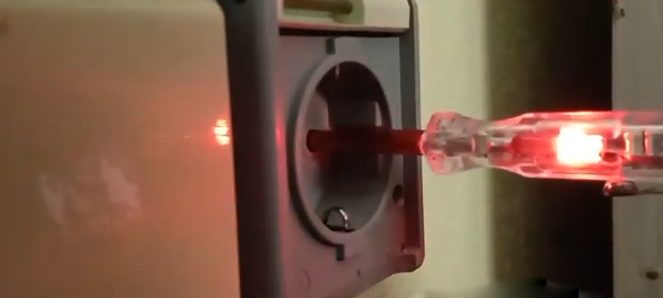
Method 2: Use a Tester Screwdriver
Another way of telling if a wire is hot/live is by using a tester screwdriver.
PROCEDURE
Step 1: Expose the Wires
You can open the cover or remove anything that makes the wires inaccessible.
Maybe you want to check the wires behind a switch; in that case, unscrew the switch cover to access the wires you want to verify the polarity.
Step 2: Locate the Bare Point on The Wire
Since most wires are insulated, you need a perfect and bare spot to touch the tester screwdriver.
If you cannot find a naked portion on the wire to place the tester screwdriver, I recommend stripping the wire. But first, you must turn off the power supply to the fixture you are handling at the breaker panel. Do not strip live wires without adequate expertise. You may be electrocuted.
Proceed as below:
- Get a wire stripper or insulated pliers
- Pull out the wires you want to verify the polarity of
- Nest about half an inch of the wire in the jaws of a wire stripper or pliers and slice off the insulation coating.
- You can now restore the power and carry on with the test.
Step 3: Touch the Tester Screwdriver to The Bare Parts of The Wires

Before the test, ensure your tester screwdriver is sufficiently insulated to avoid accidents.
After that, hold the insulated part and touch the bare or stripped sections on the wires. Ensure the tester screwdriver contacts the wires well.
Concurrently, check the neon lamp on the screwdriver if you touch a hot wire (with the tester screwdriver) neon lamp lights. If the wire is not live (ground or neutral), the neon lamp won’t light.
Note: A malfunctioning tester screwdriver can give misleading results. So, be certain your screwdriver is functional. Otherwise, you may have a short circuit.
RELATED Does Neon Conduct Electricity?
Method 3: Use a Light Bulb as a Tester
First, you need to make this easy-to-use detector. Then, you can use it to verify a hot wire.
How to Make a Light Bulb Detector
Step 1. Note that a bulb must be connected to one end of the wire. So, the bulb should have a neck connected to the wire.
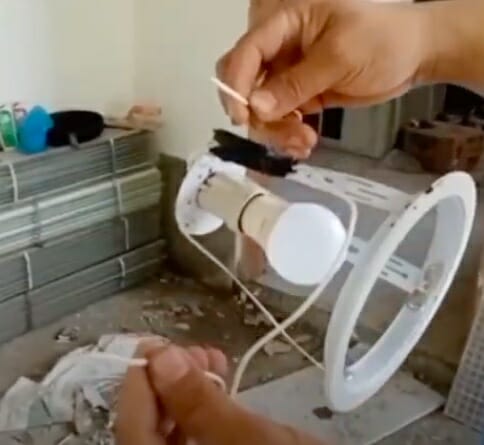
Step 2. Attach the other end of the wire to a plug inserted in a socket.
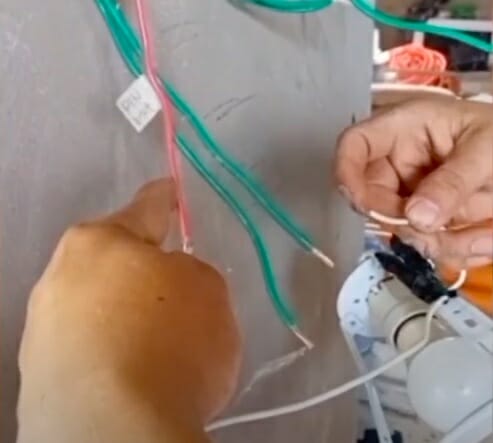
Note: It’s no issue if you connect black, red, or any other wire to the bulb; the tester bulb needs to contact a hot wire and light up – that is how you identify a hot wire.
Using a Light Bulb to Identify a Live Wire
Step 1. Identify ground – green or yellow.
Step 2. Grab a tester and attach one end to the first cable and the other to the ground wire. If the bulb lights up, that’s the hot wire (first cable). If not, it could be a neutral wire.
Step 3. Test the other wire and observe the behavior of the light bulb.
Step 4. Mark the live wire – the one that lit the bulb. That’s your live wire.
Method 4: Using Color Codes
This is arguably the most straightforward way of pinpointing a live or hot cable in an electrical fixture or wire harness; however, not all electrical fixtures have the same wire codes. Additionally, wire codes vary in different countries or regions. Below is a residential color standard for electrical wires.
In most residential lighting fixtures, the wire code is as follows (National Electric Code – United States)
- Black Wires – represent live or hot wires.
- Green or Bare Wires – denote ground wires and connections.
- Yellow Wires – also represent ground connections
- White Wires – represent neutral cables.
This color standard is set by the National Electric Code and maintained by the National Fire Protection Association.
However, due to the variability of color standards in other regions, you cannot entirely rely on color codes to identify a live wire. Also, do not touch the wires anyhow until you know which. That way, you will minimize the possibility of accidents.
References
Website Resources:
- neon lamp. https://www.britannica.com/technology/neon-lamp
- National Electric Code. https://www.techtarget.com/searchdatacenter/definition/National-Electrical-Code-NEC
Video References:
Flannel Guy DIY
by nlman
Bairos Man