
9 min read
How to Seal Hardwood Floors: Easy Tips for a Perfect Finish


Edited by: Louise (Editor In Chief)
Fact/quality checked before release.
Fact/quality checked before release.

Sealing your hardwood floors isn’t just about aesthetics; it’s about protecting your investment and ensuring longevity. Sealing hardwood floors shields them from dirt, dust, and scratches, enhancing their durability and appeal. Imagine walking into a room where the floors gleam with a rich, polished finish that not only looks fantastic but is also built to withstand daily wear and tear.
To get started, you’ll need to gather the right materials and tools, like a quality sealant and a fine sandpaper. Each step in the sealing process, from preparation to application, plays a vital role in achieving that perfect finish. Following the correct methods will not only make the floors look stunning but will also ensure they stay that way for years to come.
Maintaining the beauty of your sealed hardwood floors involves regular care and attention. Keep your floors pristine by sweeping or vacuuming regularly and avoiding excessive water. By dedicating some time to proper maintenance, you’re not just preserving the look of your floors but also protecting the sealant layer that makes them resilient.
Key Takeaways
- Proper sealing enhances the durability and beauty of hardwood floors.
- Gather the right materials and follow careful preparation steps.
- Regular maintenance keeps the floors looking great and extends their lifespan.
Benefits of Sealing Hardwood Floors
Hey there! If you’re thinking about sealing your hardwood floors, you’re in for some serious benefits.
First off, sealing protects your floors from moisture. That means fewer worries about spills, stains, or humidity creeping into the wood and causing damage.
It’s not just about protection. Sealing also enhances the beauty of your hardwood. A good sealant can bring out the natural grain and color, adding an extra touch of elegance to your space.
Let’s talk durability. A well-sealed floor can stand up to everyday wear and tear much better than a non-sealed one. Say goodbye to those pesky scratches and scuffs!
Plus, did you know that sealing makes your floor easier to clean? Dirt and debris are less likely to stick to a sealed surface, making routine cleaning a breeze.
Here’s a quick look at some key benefits:
| Benefit | Impact |
|---|---|
| Protection from moisture | Prevents stains and water damage |
| Enhanced appearance | Highlights natural beauty and grain |
| Increased durability | Resists scratches and wear |
| Easier maintenance | Simplifies cleaning and upkeep |
In a nutshell, sealing your hardwood floors is a smart move that will keep them looking stunning and lasting longer. You’ll appreciate the peace of mind that comes with added protection and the joy of a gorgeous, easy-to-maintain floor.
Materials and Tools Needed

When sealing hardwood floors, you’ll need to choose the right materials and tools to achieve a smooth, durable finish. This section will cover various sealant types and the essential tools for application.
Sealant Types
Selecting the correct sealant is crucial for the longevity of your hardwood floors. Water-based polyurethane sealers are popular for their low VOCs (Volatile Organic Compounds) and quick drying times. They’re eco-friendly but may need reapplication more often.
Oil-based sealers, on the other hand, offer deeper penetration into the wood and result in a rich, warm finish. They take longer to dry but are known for their durability. Trusted brands include Bona Mega, Varathane, and Minwax.
| Sealant Type | Drying Time | Durability |
|---|---|---|
| Water-Based | 2-4 hours | Medium |
| Oil-Based | 24-48 hours | High |
Application Tools
To ensure an even application of the sealant, you’ll need a few essential tools. A high-quality paint roller or brush is vital for applying the sealer smoothly and evenly. For larger areas, consider using a pad applicator for quick and efficient coverage.
Don’t forget a stir stick to mix the sealant thoroughly before application. When applying oil-based sealers, use a rag to work the oil into the wood and a second rag to remove excess.
Prepare your workspace with protective gear such as gloves and a mask to avoid inhaling fumes.
| Tool | Use |
|---|---|
| Paint Roller/Brush | Smooth, even application |
| Pad Applicator | Quick coverage for large areas |
| Stir Stick | Mixing the sealant |
| Rag | Applying and removing excess oil-based |
| Gloves and Mask | Protection during application |
By having the right materials and tools on hand, you’ll be well-prepared to seal your hardwood floors beautifully and effectively.
Preparation Steps
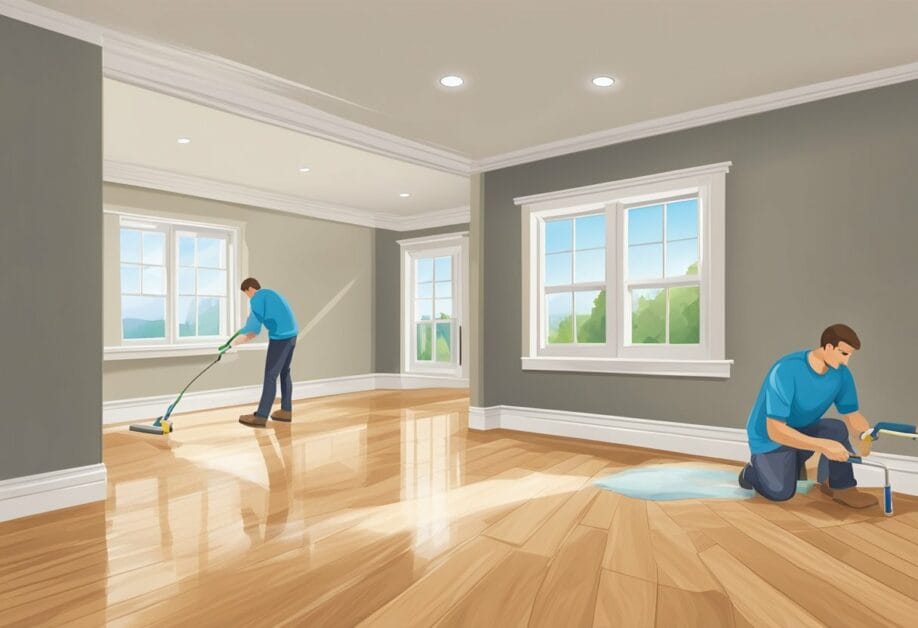
Before sealing hardwood floors, it’s essential to thoroughly clean and sand the surface. Following these steps prepares the floor for effective sealing and ensures a long-lasting finish.
Cleaning the Surface
Start by sweeping the entire floor to remove loose dirt and debris. Use a broom or vacuum with a soft brush attachment to avoid scratching the wood. Follow up with a mop, using warm water and a few drops of mild dish soap. Avoid soaking the floor; instead, use a damp mop to prevent any water damage.
After mopping, dry the floor with a clean cloth. Pay extra attention to corners and edges where dust tends to collect. For stubborn spots, opt for a pH-balanced wood floor cleaner. Let the floor dry completely before moving on to the next step.
Sanding the Floor
Sanding is crucial for creating a smooth surface that allows the sealant to adhere properly. Begin with a coarse-grit sandpaper to remove the top layer of finish and any scratches or stains. Use a drum sander for large areas and an edging sander for corners and edges.
After the initial sanding, switch to a medium-grit sandpaper to even out the surface. Finish with a fine-grit sandpaper for a smooth and polished look. Always sand in the direction of the wood grain to prevent damage.
Tip: Change your sandpaper regularly to maintain effectiveness. Once sanding is complete, vacuum the floor to remove all dust particles.
Tack Cloth Use
After sanding, cleaning the surface with a tack cloth is essential to remove any remaining dust. Tack cloths are impregnated with a sticky substance that picks up fine particles without leaving residue. Gently wipe the entire floor surface with the tack cloth, including corners and edges.
Use a new tack cloth if the first becomes dirty, ensuring that no dust is left behind. This step is critical because even tiny particles of dust can interfere with the sealant, leading to an uneven finish. Make sure the floor feels completely clean to the touch before moving on to sealant application.
In Table 1 below, you’ll find a quick reference for the materials needed:
| Step | Tools/Materials |
|---|---|
| Cleaning | Broom, vacuum, mop, mild dish soap, cloth, pH-balanced cleaner |
| Sanding | Coarse-, medium-, fine-grit sandpaper, drum sander, edging sander, vacuum |
| Tack Cloth Use | Tack cloths |
Sealing the Hardwood Floors
Get ready to protect your beautiful hardwood floors by sealing them effectively. This process ensures that your floors remain durable, shiny, and free from scratches or water damage. Follow these steps for a seamless sealing experience.
Mixing the Sealant
First off, mixing the sealant correctly is crucial. Depending on your choice (water-based or oil-based), the procedure might slightly differ. For water-based sealants, give the container a good shake before opening. Oil-based sealants, on the other hand, usually require stirring with a paint stick until the mixture is even.
Pro Tip: Avoid vigorous shaking with oil-based sealants to prevent air bubbles, which can cause a bumpy finish. Always read the manufacturer’s instructions for specific guidance on mixing times and techniques.
Application Technique
When you’re ready to apply the sealant, start from the corner furthest from the door. This ensures you don’t trap yourself in the room! Pour a line of polyurethane or your chosen sealant and use a rag or a flooring applicator to spread it smoothly.
Tip: Work in small sections to maintain a wet edge and avoid overlap marks. Keep the applicator consistently in contact with the floor to minimize bubbles. After applying the first coat, lightly sand the floor with fine sandpaper like #220 and wipe away any dust using a tack cloth.
Drying Time and Conditions
Patience is key when it comes to drying. Typically, you need to allow 24 to 48 hours for proper curing before moving any furniture back. Make sure the room has good ventilation to help the sealant dry evenly and without strong odors.
Avoid excessive humidity or drastic temperature changes. Monitor conditions and keep traffic to a minimum during the drying period. For the best results, follow up with a second coat after the first one is dry, sanding lightly in between to ensure strong adhesion.
Sealing hardwood floors can be straightforward if you follow each step carefully. Happy sealing!
Post-Sealing Care

Taking care of your newly sealed hardwood floors is crucial for maintaining their beauty and longevity. You’ll need to focus on regular maintenance and the best practices for dealing with spills and ensuring long-term protection.
Regular Maintenance
Regular care for your hardwood floors begins with frequent sweeping or vacuuming to remove dirt and debris. Grit on the floor can act like sandpaper, scratching the surface. Use a vacuum cleaner with a hardwood floor attachment to avoid damaging the sealant layer.
Mopping should be done with a lightly dampened mop and a gentle wood floor cleaner. Excessive water can seep into the wood, causing warping or discoloration, so it’s critical not to soak the floor. Avoid harsh chemicals as they can erode the finish and sealant over time.
Periodic polishing with a product suitable for sealed wood can help maintain a glossy finish and protect the sealant. Always follow the manufacturer’s guidelines to prevent any adverse reactions between the products used and the flooring material.
Dealing With Spills
Accidents happen, and it’s essential to address spills immediately to protect your floors. Wipe up liquids promptly with a dry or slightly damp cloth to prevent them from seeping through the sealant and into the wood.
For sticky spills, use a damp cloth with a mild wood floor cleaner to clean the area thoroughly. Avoid scrubbing too hard, which can damage the finish. If the spill leaves a mark, lightly polish the spot with a suitable product to restore the shine.
When dealing with more significant spills, remember that timing is key. The quicker you act, the less likely moisture will penetrate the wood. Have a clean-up kit handy, including a soft cloth and gentle cleaning solution, to manage these incidents efficiently.
Long-Term Protection
Long-term protection involves not just cleaning but also preventative measures. Place rugs or mats in high-traffic areas and entranceways to reduce the dirt and debris tracked onto your floors. Use felt pads under furniture legs to prevent scratches when moving items.
Be mindful of humidity levels in your home. Wood can expand and contract with changes in moisture, so using a humidifier in the winter and a dehumidifier in the summer can help maintain a stable environment for your floors.
Reapply the sealant as recommended by the product manufacturer. Typically, this should be done every 3-5 years to keep the protective layer intact. Regular inspections for damage or wear can help you address minor issues before they become significant problems.